小黑子—springMVC:第一章 请求处理与响应数据
springMVC入门1.0
- 1、小黑子的springMVC基础
-
- 1.1 SpringMVC概述
- 1.2 SpringMVC快速入门
- 1.3 Controller中直接注入spring中维护的Bean
- 1.4 SpringMVC关键组件浅析
- 2、SpringMVC的请求处理
-
- 2.1 请求映射路径配置
- 2.2 请求数据的接收
-
- 2.2.1 键值对方式接收数据
-
- 2.2.1 - I @RquestParam属性
- 2.2.2 封装JavaBean数据
- 2.2.3 请求参数Postman使用
- 2.2.4 接收JSON格式数据
- 2.2.5 接收Restful风格数据
- 2.2.6 接收上传的文件
- 2.2.6 获取header头信息和cookie信息
- 2.2.7 直接获取Requset和Session域中的数据
- 2.3 Javaweb常用对象获取
- 2.4 请求静态资源
- 2.5 注解驱动< mvc:annotation-driven >标签
- 3、SpringMVC的响应处理
-
- 3.1、传统同步业务数据响应
- 3.2 前后端分离异步业务数据响应
1、小黑子的springMVC基础
1.1 SpringMVC概述
SpringMVC是一个基于Spring开发的MVC轻量级框架,Spring3.0后发布的组件,SpringMVC和Spring可以无缝整合,使用DispatcherServlet作为前端控制器,且内部提供了处理器映射器、处理器适配器、视图解析器等组件,可以简化JavaBean封装,Json转化、文件上传等操作。

1.2 SpringMVC快速入门

在创建Mave项目时要想配置运行tomact,从原型创建具体参考小黑子的第3章tomcat
-
导入spring-mvc坐标
<dependency> <groupId>org.springframeworkgroupId> <artifactId>spring-webmvcartifactId> <version>5.3.7version> dependency> -
配置前端控制器DispatcherServlet
<web-app xmlns="http://xmlns.jcp.org/xml/ns/javaee" xmlns:xsi="http://www.w3.org/2001/XMLSchema-instance" xsi:schemaLocation="http://xmlns.jcp.org/xml/ns/javaee http://xmlns.jcp.org/xml/ns/javaee/web-app_4_0.xsd" version="4.0"> <servlet> <servlet-name>DispatcherServletservlet-name> <servlet-class>org.springframework.web.servlet.DispatcherServletservlet-class> <init-param> <param-name>contextConfigLocationparam-name> <param-value>classpath:spring-mvc.xmlparam-value> init-param> <load-on-startup>2load-on-startup> servlet> <servlet-mapping> <servlet-name>DispatcherServletservlet-name> <url-pattern>/url-pattern> servlet-mapping> web-app> -
编写Controller,配置映射路径,并交给SpringMVC容器管理
package com.itheima.controller;

import org.springframework.stereotype.Controller;
import org.springframework.web.bind.annotation.RequestMapping;

@Controller
public class QuickController {

@RequestMapping("/show")
public void show(){
    System.out.println("show 实现。。。。。");
	}
}

虽然页面报错,但是后台执行了show方法

页面报错500原因:视图指定
@Controller
public class QuickController {

    @RequestMapping("/show")
    public String show(){
        System.out.println("show 实现。。。。。");
        return "/index.jsp";
    }
}
<%@ page contentType="text/html;charset=UTF-8" language="java" %>

<html>
<body>
<h2>Hello SpringMVC!h2>
body>
html>

1.3 Controller中直接注入spring中维护的Bean
- 创建Bean
@Service
public class QuickServiceImpl implements QuickService {
}
package com.itheima.service.impl;

import com.itheima.service.QuickService;
import org.springframework.stereotype.Service;

@Service
public class QuickServiceImpl implements QuickService {
}
- 用spring-xml文件扫描包含该Bean的包
<beans xmlns="http://www.springframework.org/schema/beans"
       xmlns:xsi="http://www.w3.org/2001/XMLSchema-instance"
       xmlns:context="http://www.springframework.org/schema/context"
       xsi:schemaLocation="http://www.springframework.org/schema/beans http://www.springframework.org/schema/beans/spring-beans.xsd
        http://www.springframework.org/schema/context http://www.springframework.org/schema/context/spring-context.xsd">


    <context:component-scan base-package="com.itheima.service"/>

beans>
- 在Web-xml文件中配置ContextLoaderListener
  <context-param>
    <param-name>contextConfigLocationparam-name>
    <param-value>classpath:applicationContext.xmlparam-value>
  context-param>

  <listener>
    <listener-class>org.springframework.web.context.ContextLoaderListenerlistener-class>
  listener>
- 在Controller中访问容器中的Bean
@Controller
public class QuickController {
    //直接注入Service进行使用
    @Autowired
    private QuickService quickService;

    @RequestMapping("/show")
    public String show(){
        System.out.println("show 实现。。。。。"+quickService);
        return "/index.jsp";
    }
}
1.4 SpringMVC关键组件浅析
上面已经完成的快速入门的操作,也在不知不觉中完成的Spring和SpringMVC的整合,我们只需要按照规则去定义Controller和业务方法就可以。但是在这个过程中,肯定是很多核心功能类参与到其中,这些核心功能类,一般称为组件。当请求到达服务器时,是哪个组件接收的请求,是哪个组件帮我们找到的Controller,是哪个组件帮我们调用的方法,又是哪个组件最终解析的视图?/
| 组件 | 描述 | 常用组件 |
|---|---|---|
处理器映射器:HandlerMapping |
匹配映射路径对应的Handler,返回可执行的处理器链对象 | HandlerExecutionChain对象 RequestMappingHandlerMapping |
处理器适配器:HandlerAdapter |
匹配HandlerExecutionChain对应的适配器进行处理器调用,返回视图模型对象 | RequestMappingHandlerAdapter |
视图解析器:ViewResolver |
对视图模型对象进行解析 | InternalResourceViewResolver |

SpringMVC加载组件的策略
SpringMVC的默认组件,SpringMVC在前端控制器DispatcherServlet加载时,就会进行初始化操作,在进行初始化时,就会加载SpringMVC默认指定的一些组件,这些默认组件配置在DispatcherServlet.properties文件中,该文件存在与spring-webmvc-5.3.7.jar包下的 org\springframework\weblservlet\DispatcherServlet.properties
org.springframework.web.servlet.HandlerMapping=org.springframewor.web.servlet.handler.BeanNameUrl HandlerMapping,\
	org.springframework.web.servlet.mvc.method.annotation.RequestMappingHandlerMapping,\
	org.springframework.web.servlet.function.support.RouterFunctionMapping

org.springframework.web.servlet.HandlerAdapter=org.springframework.web.servlet.mvc.HttpReguestHandlerAdapter,\
	org.springframework.web.servlet.mvc.SimpleControllerHaidlerAdapter,\
	org.springframework.web.servlet.mve.method.annotation.RequestMappingHandlerAdapter,
	org.springframework.web.servlet.function.support.HandlerrunctionAdapter

org.springframework.web.servlet.VviewResolver=org.springframework.web.servlet.view.InternalResourceViewResolver
2、SpringMVC的请求处理
2.1 请求映射路径配置
配置映射路径,映射器处理器才能找到Controller的方法资源,目前主流映射路径配置方式就是@RequestMapping
| 相关注解 | 作用 | 使用位置 |
|---|---|---|
| @RequestMapping | 设置控制器方法的访问资源路径,可以接收任何请求 | 方法和类上 |
| @GetMapping | 设置控制器方法的访问资源路径,可以接收GET请求 | 方法和类上 |
| @PostMapping | 设置控制器方法的访问资源路径,可以接收POST请求 | 方法和类上 |
- 当给类加了@RequestMapping,想要访问某个方法就必须要在虚拟地址上加入类的RequestMapping名以及方法的RequestMapping名
@Controller
@RequestMapping("/quick")
public class QuickController {
    //直接注入Service进行使用
    @Autowired
    private QuickService quickService;

//    @RequestMapping(value={"/show","showxxx","showyyy"},method = RequestMethod.GET)
//    @PostMapping("/show")

    //http://localhost:8080/appName/quick/show
    @GetMapping("/show")
    public String show(){
        System.out.println("show 实现。。。。。"+quickService);
        return "/index.jsp";
    }

    @RequestMapping("/show2")
    public String show2(){
        System.out.println("show2 实现。。。。。"+quickService);
        return "/index.jsp";
    }
}
2.2 请求数据的接收
2.2.1 键值对方式接收数据
接收普通请求数据,当客户端提交的数据是普通键值对形式时,直接使用同名形参接收即可
@Controller
public class PqramController {
//采用map
//http://localhost/param4?username=zhangsan&age=12
@RequestMapping("/param4")
public String param4(@RequestParam Map<String,String> map){
map.forEach((k,v)->{
System.out.println(k+"==>"+ v);
});
return "index.jsp";
}
//采用集合
//http://localhost/param2?hobby=swim&hobby=run 路径的接收数据
@GetMapping("/param3")
//直接用集合无注解可能会报错,因为接收到了之后会把数据创建完对象,但是接口是不能创建对象的
//集合用@RequestParam,是告诉springMVC把请求的参数封装进去
public String param3(@RequestParam List<String> hobby){
for (String h : hobby) {
System.out.println(h);
}
return "/index.jsp";
}
//当要接收同名的多个参数值时,就用数组去接收
//http://localhost/param2?hobby=swim&hobby=run 路径的接收数据
@GetMapping("/param2")
public String param2(String[] hobby){
for (String h : hobby) {
System.out.println(h);
}
return "/index.jsp";
}
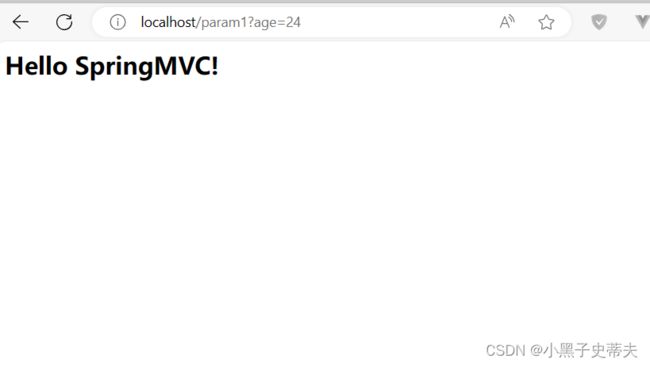
//http://localhost/param1? username=zhangsan&age=24 路径的接收数据
@GetMapping("/param1")
public String param1(@RequestParam("username") String name, int age){
System.out.println(name+"========"+age);
return "/index.jsp";
}
}
2.2.1 - I @RquestParam属性
- @RequestParam可以使获取的数据不创建对象而是直接注入形参,因此使用该注解可以使得参数不一样而注入
- @RequestParam有三个属性
- value:要注入参数的名字
- required:该数据是否必须注入
- true:是
- false:否(默认)
- defaultValue:当数据未提交时的默认值
    //http://localhost/param1?age=24 路径的接收数据
    @GetMapping("/param1")
    public String param1(@RequestParam(value="username",required = true,defaultValue = "magua") String  name, int age){//age的话用int不好,因为如果数据传入没有age就会报错,而用包装类Intage数据没有会返回null
        System.out.println(name+"========"+age);
        return "/index.jsp";
    }

2.2.2 封装JavaBean数据
接收实体JavaBean属性数据,单个JavaBean数据:提交的参数名称只要与Java的属性名一致,就可以进行自动封装
username=zhangsan&age=12&hobbyies=swim&hobbies=run&birthday=2019/1/1&address.ciyu=guangdoor&address.area=room
package com.itheima.pojo;

public class Address {
    private String city;
    public String area;

    public String getCity() {
        return city;
    }

    public void setCity(String city) {
        this.city = city;
    }

    public String getArea() {
        return area;
    }

    public void setArea(String area) {
        this.area = area;
    }
}
package com.itheima.pojo;


import java.util.Arrays;
import java.util.Date;

public class User {
    private String username;
    private Integer age;
    private String[] hobbies;
    private Date birthday;
    private Address address;

    public String getUsername() {
        return username;
    }

    public void setUsername(String username) {
        this.username = username;
    }

    public Integer getAge() {
        return age;
    }

    public void setAge(Integer age) {
        this.age = age;
    }

    public String[] getHobbies() {
        return hobbies;
    }

    public void setHobbies(String[] hobbies) {
        this.hobbies = hobbies;
    }

    public Date getBirthday() {
        return birthday;
    }

    public void setBirthday(Date birthday) {
        this.birthday = birthday;
    }

    public Address getAddress() {
        return address;
    }

    public void setAddress(Address address) {
        this.address = address;
    }

    public User() {
    }

    @Override
    public String toString() {
        return "User{" +
                "username='" + username + '\'' +
                ", age=" + age +
                ", hobbies=" + Arrays.toString(hobbies) +
                ", birthday=" + birthday +
                ", address=" + address +
                '}';
    }
}
    //http://localhost/param5?username=zhangsan&age=12&hobbyies=swim&hobbies=run&birthday=2019/1/1&address.ciyu=guangdoor&address.area=room
    @RequestMapping("/param5")
    public String param5(User user){
        System.out.println(user);
        return "index.jsp";
    }

2.2.3 请求参数Postman使用
Postman使用
开发测试时,可以使用Postman进行测试

@RequestBody:是用于把请求体的这个数据,封装给这个指定的字符串
    @RequestMapping("/param6")
    public String param6(@RequestBody String body ){
        System.out.println(body);
        return "index.jsp";
    }

2.2.4 接收JSON格式数据
- 使用POST请求方式,添加@RequestBody可以使json格式字符串整体打印出来,不会被解析
例如:
@PostMapping("/Param5")
public String Param5(@RequestBody String body) {
    System.out.println(body);
    return "index.jsp";
}
- 使用Json工具 ( jackson )将Json格式的字符串转化为JavaBean进行操作
<dependency>
    <groupId>com.fasterxml.jackson.coregroupId>
    <artifactId>jackson-databindartifactId>
    <version>2.9.0version>
dependency>
@PostMapping ("/show" )
public string show(@RequestBody string body) throws IOException {
	system.out.println(body);
	//获得objectMapper
	ObjectMapper objectMapper = new ObjectMapper();
	//将json格式字符串转化成指定的User
	User user = objectMapper.readValue(body,User.class);
	System.out.println(user);
	return "/index.jsp";
}
- 配置HandlerAdapter可以自动执行转换的工作,指定消息转换器,就不用手动转换json格式字符串了
    <bean class="org.springframework.web.servlet.mvc.method.annotation.RequestMappingHandlerMapping">bean>


    <bean class="org.springframework.web.servlet.mvc.method.annotation.RequestMappingHandlerAdapter">
        <property name="messageConverters">
            <list>
                <bean class="org.springframework.http.converter.json.MappingJackson2HttpMessageConverter">bean>
            list>
        property>
@RequestMapping("/param8")
    public String param8(@RequestBody User user ) throws IOException {
        System.out.println(user);
        return "index.jsp";
    }

2.2.5 接收Restful风格数据
什么是Rest风格?
Rest (Representational State Transfer)表象化状态转变(表述性状态转变),在2000年被提出,基于HTTP、URI
、xml、JSON等标准和协议,支持轻量级、跨平台、跨语言的架构设计。是Web服务的一种新网络应用程序的设计风格和开发方式。
Restful风格的请求,常见的规则有如下三点:
用URI表示某个模块资源,资源名称为名词;
| 模板 | URI资源 |
|---|---|
| 用户模块user | http://localhost/user |
| 商品模块 | product http://localhost/product |
| 账户模块 | account http://localhost/account |
| 日志模块 | log http://localhost/log |
用请求方式表示模块具体业务动作,例如:GET表示查询、POST表示插入、PUT表示更新、DELETE表示删除
| URI资源 | 请求方式 | 参数 | 解释 |
|---|---|---|---|
| http://localhost/user/100 | GET | 存在URL地址中:100 | 查询id=100的User数据 |
| http://localhost/user | POST | 存在请求体中Json: {“username”:“haohao” ,“age”:18} | 插入user数据 |
| http://localhost/user | PUT | 存在请求体中Json : {“id”:100,“username”:“haohao” , “age”:18} | 修改id=100的User数据 |
| http://localhost/user/100 | DELETE | 存在URL地址中:100 | 删除id=100的User数据 |
| http://localhost/product/5 | GET | 存在URL地址中:5 | 查询id=5的Product数据 |
| http://localhost/product | POST | 存在请求体中Json: {“proName”:“小米手机” ,“price”:1299} | 插入Product数据 |
| http://localhost/product | PUT | 存在请求体中Json : {“id”:5,“proName”:“小米手机” ,“price”:1299} | 修改id=5的Product数据 |
| http://localhost/product/5 | DELETE | 存在URL地址中:5 | 删除id=5的Product数据 |
-
用HTTP响应状态码表示结果,国内常用的响应包括三部分:状态码、状态信息、响应数据
{
	"code":200,
	"message":"成功",
	"data":{
	"username":"haohao",
	"age":18
	}
}
{
	"code":300,
	"message":"执行错误",
	"data":"",
}
接收Restful风格数据,Restful请求数据一般会在URL地址上携带,可以使用注解@PathVariable(占位符参数
名称)
http://localhost/user/100
@PostMapping ("/user/{id}")
public string findUserById(@Pathvariable("id") Integer id){
//@Pathvariable注解表示不采用传统格式解析占位符
	system.out.println(id);
	return "/index.jsp";
}
请求URL资源地址包含多个参数情况
http://localhost/user/haohao/18
@PostMapping ("/user/{username}/{age}")
public string findUserById(@Pathvariable("username") String username,@Pathvariable("age") Integer age){
	system.out.println(username+"=="+age);
	return "/index.jsp";
}
2.2.6 接收上传的文件
接收文件上传的数据,文件上传的表单需要一定的要求,如下:
- 表单的提交方式必须是POST
- 表单的enctype属性必须是multipart/form-data
- 文件上传项需要有name属性
<form action="" enctype="multipart/form-data" method="post">
	<input type="file" name="myFile">
form>
http://localhost:8080/SpringMVCDome1/Param6
    @PostMapping("/param10")
    public String Param10(@RequestBody MultipartFile myFile) throws IOException {
        System.out.println(myFile);
        return "/index.jsp";
    }


注意:如果上传文件报错This file isn't in your working directory.Teammates you share this requestwith won't be able to use this file.Tomake collaboration easier you cansetup your working directory insettings.
是因为没有修改postman工作区
- 进入设置file -> settings,上传的文件必须在设置的工作区中


-
服务器端,由于映射器适配器需要文件上传解析器,而该解析器默认未被注册,所以手动注册
<bean id="multipartResolver" class="org.springframework.web.multipart.commons.CommonsMultipartResolver"> <property name="defaultEncoding" value="UTF-8"/> <property name="maxUploadSizePerFile" value="1048576"/> <property name="maxUploadSize" value="3145728"/> <property name="maxInMemorySize" value="1048576"/> bean> -
而CommonsMultipartResolver底层使用的Apache的是Common-fileuplad等工具API进行的文件上传
<dependency>
	<groupId>commons-fileuploadgroupId>
	<artifactId>commons-fileuploadartifactId>
	<version>1.4version>
dependency>
文件上传代码实现
 @PostMapping("/param9")
    public String Param9(@RequestBody MultipartFile myFile) throws IOException {
        System.out.println(myFile);
        //将上传的文件进行保存
        //1、获取当前上传的文件的输入流
        InputStream inputStream = myFile.getInputStream();
        //2、获得上传文件的输出流,被拷贝文件夹的位置
        OutputStream outputStream = new FileOutputStream("E:\\"+myFile.getOriginalFilename());
        //3、执行文件拷贝
        IOUtils.copy(inputStream,outputStream);//(上传的文件,想要被拷贝的文件)
        outputStream.close();
        inputStream.close();
        return "/index.jsp";
    }
复制成功

2.2.6 获取header头信息和cookie信息
-
接收Http请求头数据,接收指定名称的请求头
@GetMapping ("/headers") public String headers(@RequestHeader("Accept-Encoding") String acceptEncoding){ System.out.println( "Accept-Encoding:"+acceptEncoding); return "/index.jsp"; } -
接收所有的请求头信息
@GetMapping ("/headersMap") public String headersMap(@RequestHeader Map<String,string> map){ map.forEach((k, v)->{ System.out.println(k+":"+V); }); return " /index.jsp" ; } -
获得客户端携带的Cookie数据
@GetMapping("/cookies")
public String cookies(@CookieValue(value = "JSESSIONID",defaultValue = "") String jsessionid){
	System.out.println(jsessionid);
	return "/index.jsp" ;
}
2.2.7 直接获取Requset和Session域中的数据
获得转发Request域中数据,在进行资源之间转发时,有时需要将一些参数存储到request域中携带给下一个资源
使用HttpServletRequest前导入包
    <dependency>
      <groupId>javax.servletgroupId>
      <artifactId>javax.servlet-apiartifactId>
      <version>4.0.1version>
    dependency>
    @GetMapping("/request1")
    public String request1(HttpServletRequest request) {
        //存储数据
        request.setAttribute("username","haohao");
        return "/request2";
    }

    @GetMapping("/request2")
    public String request2(@RequestAttribute("username") String username) {
        System.out.println(username);
        return "/index.jsp";
    }


2.3 Javaweb常用对象获取
直接打印参数request和response,可以发现这两个参数是SpringMVC自动传入的
@GetMapping("/Param10")
public String Param10(HttpServletRequest request, HttpServletResponse response) {
    System.out.println(request);
    System.out.println(response);
    return "/index.jsp";
}

2.4 请求静态资源
在Spring-MVC框架下,无法直接访问到web文件下的静态资源
静态资源请求的三种解决方案:
-
第一种方案:在
web.xml去配,可以再次激活Tomcat的DefaultServlet,Servlet的url-pattern的匹配优先级是:精确匹配>目录匹配>扩展名匹配>缺省匹配,所以可以指定某个目录下或某个扩展名的资源使用DefaultServlet进行解析。<servlet-mapping> <servlet-name>defaultservlet-name> <url-pattern>*.htmlurl-pattern> servlet-mapping> <servlet-mapping> <servlet-name>defaultservlet-name> <url-pattern>/img/*url-pattern> servlet-mapping> -
第二种方式,在
spring-mvc.xml中去配置静态资源映射,匹配映射路径的请求到指定的位置去匹配资源<mvc:resources mapping="/img/*" location="/img/" /> <mvc:resources mapping="/css/*" location="/css/" /> <mvc:resources mapping="/js/*" location="/js/" /> <mvc:resources mapping="/html/*" location="/html/" />


- 第三种方式,在spring-mvc.xml中去配置
DefaultServletHttpRequestHandler处理器,静态资源的访问都由该处理器去处理,这也是开发中使用最多的
加了这句话就不用配置路径,比较方便<mvc:default-servlet-handler/>
2.5 注解驱动< mvc:annotation-driven >标签
-
静态资源配置的第二第三种方式我们可以正常访问静态资源,但是Controller又无法访问,报错404

-
第二种方式是通过SpringMVC去解析mvc命名空间下的resources标签完成的静态资源解析,第三种方式通过SpringMVC去解析mvc命名空间下的default-servlet-handler标签完成的静态资源解析,根据自定义命名空间的知识,可以发现不管是以上哪种方式,最终都会注册SimpleUrlHandlerMapping
public BeanDefinition parse(Element elemnt,ParserContext context){ //创建SimpleUrlHandlerMapping类型的BeanDefinition RootBeanDefinition handlerMappingDef = new RootBeanDefinition(SimpleUrlHandlerMapping.class); //注册SimpleUrlHandlerMapping的BeanDefinition context.getRegistry().registerBeanDefinition(beanName,handlerMappingDef); } -
又结合组件浅析知识点,一旦SpringMVC容器中存在HandlerMapping类型的组件时,前端控制器
DispatcherServlet在进行初始化时,就会从容器中获得HandlerMapping,不在加载 dispatcherServlet.properties中默认处理器映射器策略,那也就意味着RequestMappingHandlerMapping不会被加载到了。 -
手动将RequestMappingHandlerMapping也注册到SpringMVC容器中就可以了,这样DispatcherServlet在进行初始化时,就会从容器中同时获得RequestMappingHandlerMapping存储到DispatcherServlet中名为
handlerMappings的List集合中,对@RequestMapping注解进行解析。<bean class="org.springframework.web.servlet.mvc.method.annotation.RequestMappingHandlerMapping"/>

该标签内部会帮我们注册RequestMappingHandlerMapping、注册RequestMappingHandlerAdapter并注入Json消息转换器等,上述配置就可以简化成如下:
<mvc:annotation-driven/>

<mvc:default-servlet-handler/>
PS:
DefaultAnnotationHandlerMapping和AnnotationMethodHandlerAdapter,由于框架的发展,从Spring 3.1.X开始注册组件变为RequestMappingHandlerMapping和RequestMappingHandlerAdapter
3、SpringMVC的响应处理
3.1、传统同步业务数据响应
下面再看一下Spring怎么给客户端响应数据,响应数据主要分为两大部分:
- 传统同步方式:准备好模型数据,在跳转到执行页面进行展示,此方式使用越来越少了,基于历史原因,一些旧项目还在使用;
- 前后端分离异步方式:前端使用Ajax技术+Restful风格与服务端进行Json格式为主的数据交互,目前市场上几乎都是此种方式了。
传统同步业务数据响应
- 请求资源转发
- 请求资源重定向
- 响应模型数据
- 直接回写数据给客户端

-
转发的关键字
forword -
重定向的关键字
redirect@GetMapping("/show") public String show(){ System.out.println("show running...."+quickService); return "redirect:/index.jsp"; } @RequestMapping("/show2") public String show2(){ System.out.println("show2 runnig....."+quickService); return "forward:/index.jsp"; }


通过视图模型的方式进行转发数据:
@Controller
public class ResponseController1 {

    //重定向方式
    @GetMapping("/res1")
   public String res(){
       System.out.println("res running....");
       return "redirect:/index.jsp";
   }

   //转发方式
   @RequestMapping("/res2")
   public String res2(){
       System.out.println("res2 runnig.....");
       return "forward:/index.jsp";
   }

    @RequestMapping("/res3")
    public ModelAndView res3(ModelAndView modelAndView){
        //ModelAndView用于封装模型数据和视图名

        //设置模型数据
        User user = new User();
        user.setUsername("magua");
        user.setAge(19);
        modelAndView.addObject("user",user);//设置名称,传入user类参数
        //设置视图名称,在页面种展示模型数据
        modelAndView.setViewName("/index.jsp");
        return modelAndView;
    }

}

直接回写字符串
需要使用Tomcat8
    //直接回写字符串
    @RequestMapping("/res4")
    @ResponseBody//告诉springMVC返回的字符串不是视图,是以响应体方式响应的数据
    public String res4(){
        return "hello magua!";
    }
3.2 前后端分离异步业务数据响应
其实此处的回写数据,跟上面回写数据给客户端的语法方式一样,只不过有如下一些区别:
- 同步方式回写数据,是将数据响应给浏览器进行页面展示的,而异步方式回写数据一般是回写给Ajax引擎的,即谁访问服务器端,服务器端就将数据响应给谁
- 同步方式回写的数据,一般就是一些无特定格式的字符串,而异步方式回写的数据大多是Json格式字符串
回写普通数据使用@ResponseBody标注方法,直接返回字符串即可,此处不在说明;
回写Json格式的字符串,即将直接拼接Json格式的字符串或使用工具将JavaBean转换成Json格式的字符串回写
@Controller
@ResponseBody
public class ResponseController2 {

    //以后开发都是用这种方式,直接返回实体
    @GetMapping("/ajax/req3")
//    @ResponseBody
    public User res3() throws JsonProcessingException {
        //设置模型数据
        User user = new User();
        user.setUsername("magua");
        user.setAge(20);

        return user;
    }


    //这种方式也是一个弊端
    @GetMapping("/ajax/req2")
//    @ResponseBody
    public String res2() throws JsonProcessingException {
        //设置模型数据
        User user = new User();
        user.setUsername("magua");
        user.setAge(19);
        //json转换工具
        ObjectMapper mapper = new ObjectMapper();
        String jsonStr = mapper.writeValueAsString(user);

        return jsonStr;
    }

    @GetMapping("/ajax/req1")
//    @ResponseBody
    public String res1(){
        return "{\"username\":\"magua\",\"age\":\"18}";
    }
}

使用@RestController 相当于@ResponseBody和@Controller结合