Linux命令总结
目录
关机与重启
(1)shutdown关机
(2)halt关机
(3)sync数据同步
(4)reboot 重启系统
用户切换
(1)su 切换到管理员用户
(2)whoami获取当前系统登陆用户名称
(3)who am i当前系统登录用户详细信息,登录时间,登录ip
(4)exit按照用户登录先后顺序(时间轨迹)依次注销
用户管理
(1)useradd创建用户
(2)passwd给用户设置密码
(3)userdel删除用户
(4)id查询用户信息
(5)chown修改文件所属的用户
(6)groupadd创建用户组
(7)groupdel删除用户组
(8)usermod修改用户所在组
(9)chgrp修改文件所在的组
运行级别
(1)init设置运行级别
(2)systemctl get-default获取默认运行级别
(3)systemctl set-default设置运行级别
帮助指令
(1)man查询该命令的作用
(2)help获得shell内置命令的帮助信息
文件操作
(1)pwd显示当前目录的绝对路径
(2)cd切换目录
(3)mkdir创建目录
(4)rmdir删除目录
(5)touch创建空文件
(6)cp拷贝文件(夹)
(7)rm删除文件
(8)mv剪切(不同目录下操作)或者重命名(同一目录下操作)
(9)ln软连接
查看操作
(1)cat查看文件内容
(2)more分页展示文件内容
(3)less分屏展示文件内容
(4)echo输出内容(字符串,环境变量等)
(5)head用于显示文件开通部分内容,默认情况下时文件前10行的内容
(6)tail用于输出文件尾部的内容 默认情况下是查看文件最后10行的内容
(7)history 查看用户已经执行过的历史指令
(8)ls打印出当前目录的清单
时间指令
(1)date显示当前时间
(2)cal显示当前月份的日历
搜索查找
(1)find从指定目录下递归地遍历各个目录,将所有满足条件的目录显示在控制台。
(2)locate可以定位文件路径,查询速度较快
(3)which查看某个指令在哪个目录下
(4)grep过滤查找
压缩和解压
(1)gzip/gunzip(用于 *.gz文件)
(2)zip/unzip(用于*.zip文件)
(3)tar(用于*.tar.gz文件)
定时任务调度
(1)crontab 设置定时任务
(2)crontab -r 终止任务调度
(3)contab -l :列出当前有哪些任务调度
(4)service crond restart [重启任务调度]
(5)at设置定时任务
磁盘管理
(1)df -h 查询整个磁盘占用情况
(2)du 查询指定目录的磁盘占用情况
(3) ll 统计/dev文件夹下文件的个数
(4)ls -l /dev | grep "^d" | wc -l统计/opt文件夹下目录的个数
(5)tree xxx以树状结构显示目录结构
网络配置
(1)ifconfig查看ip地址
(2)ping测试与目标主机的连通性
进程管理
(1)ps查看系统中哪些正在运行,以及他们的运行的状况
(2)kill通过进程号杀死/终止进程
(3)killall 会杀死当前进程和其子进程
(4)pstree查看进程树
权限管理
(1)chmod +,-,=变更权限
(2)chmod 通过数字变更权限
服务管理指令
(1)systemctl [start | stop | restart | status] 服务启动/停止/重启/重载/查看状态
(2)systemctl restart NetworkManager 重启网络服务
(3)systemctl is-enabled firewalld.service 查看某一服务是否自启动
(4)systemctl enable firewalld.service 设置服务自启动 (服务运行级别 3、5)
(5)systemctl disable firewalld.service 设置服务禁用自启动 (服务运行级别 3、5)
(6)firewall-cmd --permanent --add-port=端口号/协议 打开端口/允许协议
(7)firewall-cmd --permanent --remove-port=端口号/协议 关闭端口/禁用协议
(8)firewall-cmd --query-port=端口/协议 查询端口/协议是否开启
(9)firewall-cmd --list-ports 查询防火墙所有开放的端口/协议配置
(10)firewall-cmd --reload 重载防火墙
动态监控
(1)top显示正在执行的进程
(2)netstat监控网络状态
rpm与yum
(1)rpm -ivh RPM包全路径名称
(2)rpm -qa 查询所有安装的rpm列表
(3)卸载rpm包rpm -e xxx
(4)yum install xxx 下载并安装指定的yum包
关机与重启
(1)shutdown关机
[root@localhost ~]# shutdown -h
Shutdown scheduled for Sun 2023-11-05 17:09:20 CST, use 'shutdown -c' to cancel.
[root@localhost ~]# shutdown -h now#立刻关机[root@localhost ~]# shutdown -h 1#1分钟后关机
Shutdown scheduled for Sun 2023-11-05 17:57:38 CST, use 'shutdown -c' to cancel.
[root@localhost ~]# shutdown -r -now#立即重启(2)halt关机
[root@localhost ~]# halt(3)sync数据同步
同步内存中的数据到硬盘,shutdown,reboot,halt都会自动进行sync操作
[root@localhost ~]# sync
(4)reboot 重启系统
[root@localhost ~]# reboot用户切换
(1)su 切换到管理员用户
[kl@localhost root]$ su#相当于su root
密码:
[root@localhost ~]#
su 用户名#切换用户
[root@localhost ~]# su kl#切换到用户kl
[kl@localhost root]$
低级别到高级别,需要输入密码才能切换,高级别到低级别,不需要密码
(2)whoami获取当前系统登陆用户名称
[root@localhost ~]# whoami #获取当前系统登陆用户名称
root
(3)who am i当前系统登录用户详细信息,登录时间,登录ip
[root@localhost ~]# who am i#当前系统登录用户详细信息,登录时间,登录ip
root     pts/0        2023-11-05 17:13 (192.168.117.1)
(4)exit按照用户登录先后顺序(时间轨迹)依次注销
[kl@localhost root]$ exit
exit
[root@localhost ~]# exit
exit
用户管理
需要管理员权限,root用户下进行创建
(1)useradd创建用户
useradd 用户名 #创建出的用户目录与用户名一致,如果不指定组,会自动创建一个与用户同名的组
[root@localhost ~]# useradd xm
[root@localhost ~]# su xm
[xm@localhost root]$
useradd -d 目录名称 用户名 #创建用户的同时,自定义用户目录的名称
[root@localhost ~]# useradd -d /home/test hd
(2)passwd给用户设置密码
passwd 用户名 #给用户名设置密码
[root@localhost ~]# passwd xm
更改用户 xm 的密码 。
新的 密码:
无效的密码: 密码少于 8 个字符
重新输入新的 密码:
passwd:所有的身份验证令牌已经成功更新。
(3)userdel删除用户
userdel 用户名#只删除用户数据,不删除用户目录
[root@localhost ~]# userdel xq
userdel -r 用户名#删除用户数据以及用户目录
[root@localhost ~]# userdel -r xh
(4)id查询用户信息
id 用户名
[root@localhost /]# id kl
uid=1001(kl) gid=1001(kl) 组=1001(kl)
(5)chown修改文件所属的用户
chown 用户名 文件名
[hd@localhost /]$chown xd hello.cpp #将hello.cpp的所属用户变成xh(6)groupadd创建用户组
用户组:可以将多个用户(具有相同权限)统一管理
groupadd 组名
[root@localhost ~]# groupadd school
useradd -g 组名 用户名#在创建用户时指定其所在组,如果不指定组,会自动创建一个与用户同名的组
[root@localhost ~]# useradd -g school xh
[root@localhost ~]# id xh
uid=1003(xh) gid=1003(school) 组=1003(school)
(7)groupdel删除用户组
groupdel 组名
[root@localhost ~]# groupdel school
(8)usermod修改用户所在组
usermod -g 组名 用户名
[root@localhost ~]# id xh
uid=1003(xh) gid=1003(school) 组=1003(school)
[root@localhost ~]# groupadd home
[root@localhost ~]# usermod -g home xh
[root@localhost ~]# id xh
uid=1003(xh) gid=1004(home) 组=1004(home)
相关配置文件:
/etc/passwd 用户的配置文件,记录用户各种信息
/etc/shadow 口令的配置文件,用户登录时需要口令(密码)
/etc/group 组的配置文件,记录包含linux记录的组的信息
(9)chgrp修改文件所在的组
chgrp 组名 文件名
[hd@localhost /]$#chgrp school hello.cpp#修改hello.cpp所在的组为school运行级别
0:关机
1:单用户(找回用户丢失的密码,可以用单用户模式)
2:多用户状态但没有网络服务
3:多用户状态但是有网络服务,没有图形界面,但是有网络,使用最多,纯命令行 multi-user
4:系统未使用,保留用户
5:图形界面 graphical
6:系统重启
(1)init设置运行级别
[root@localhost ~]# init 3
0,1,2,3,4,5,6
(2)systemctl get-default获取默认运行级别
[root@localhost ~]# systemctl get-default
multi-user.target
(3)systemctl set-default设置运行级别
systemctl set-default 运行级别.target
[root@localhost ~]# systemctl set-default multi-user.target
帮助指令
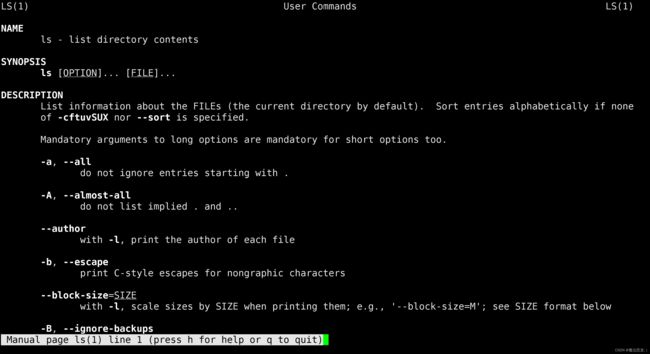
(1)man查询该命令的作用
man 命令名称
[root@localhost ~]# man ls
(2)help获得shell内置命令的帮助信息
help 命令名称
[root@localhost /]# help cd
cd: cd [-L|[-P [-e]] [-@]] [目录]
    改变 shell 工作目录。

    改变当前目录至 DIR 目录。默认的 DIR 目录是 shell 变量 HOME
    的值。

    变量 CDPATH 定义了含有 DIR 的目录的搜索路径,其中不同的目录名称由冒号 (:)分隔。
    一个空的目录名称表示当前目录。如果要切换到的 DIR 由斜杠 (/) 开头,则 CDPATH
    变量不会被使用。

    如果路径找不到,并且 shell 选项 `cdable_vars' 被设定,则参数词被假定为一个
    变量名。如果该变量有值,则它的值被当作 DIR 目录。

    选项:
        -L	强制跟随符号链接: 在处理 `..' 之后解析 DIR 中的符号链接。
        -P	使用物理目录结构而不跟随符号链接: 在处理 `..' 之前解析 DIR 中的符号链接。
        -e	如果使用了 -P 参数,但不能成功确定当前工作目录时,返回非零的返回值。
        -@	在支持拓展属性的系统上,将一个有这些属性的文件当作有文件属性的目录。

    默认情况下跟随符号链接,如同指定 `-L'。
    `..' 使用移除向前相邻目录名成员直到 DIR 开始或一个斜杠的方式处理。

    退出状态:
    如果目录改变,或在使用 -P 选项时 $PWD 修改成功时返回 0,否则非零。
文件操作
(1)pwd显示当前目录的绝对路径
[root@localhost conf]# pwd
/root/mysql/conf
(2)cd切换目录
cd ~ 切换到用户所属的用户目录
[root@localhost jdk]# pwd
/app/jdk
[root@localhost jdk]# cd ~
[root@localhost ~]# pwd
/root
cd / 切换到系统根目录
[root@localhost jdk]# pwd
/app/jdk
[root@localhost jdk]# cd /
[root@localhost /]# pwd
/
cd - 切换到上一条命令所在目录
[root@localhost jdk]# pwd
/app/jdk
[root@localhost jdk]# cd /
[root@localhost /]# pwd
/
[root@localhost /]# cd -
/app/jdk
(3)mkdir创建目录
mkdir 目录名
[root@localhost /]# cd b924
[root@localhost b924]# dir
[root@localhost b924]# mkdir file05
[root@localhost b924]# dir
file05
mkdir -p 一级文件夹/二级文件夹
[root@localhost b924]# cd ..
[root@localhost /]# mkdir -p b924/file06
[root@localhost /]# dir b924/
file05	file06
(4)rmdir删除目录
[root@localhost b924]# dir
file05	file06
[root@localhost b924]# rmdir file06
[root@localhost b924]# dir
file05
(5)touch创建空文件
[root@localhost b924]# dir
file05
[root@localhost b924]# touch hello.txt
[root@localhost b924]# dir
file05	hello.txt
(6)cp拷贝文件(夹)
cp -r 文件夹 目标地址 //递归拷贝
(7)rm删除文件
rm 文件名
[root@localhost b924]# dir
file05	hello.txt
[root@localhost b924]# rm hello.txt
rm:是否删除普通空文件 'hello.txt'?y
[root@localhost b924]# dir
file05
[root@localhost b924]#
rm -f 文件名
不询问删除
[root@localhost b924]# dir
file05	hello.txt
[root@localhost b924]# rm -f hello.txt
[root@localhost b924]# dir
file05
rm -r 文件名
递归删除,一般删除非空的文件夹
[root@localhost ~]# mkdir app
[root@localhost ~]# cd app
[root@localhost app]# touch hello.txt
[root@localhost app]# cd ..
[root@localhost ~]# rm -r app
rm:是否进入目录'app'? y
rm:是否删除普通空文件 'app/hello.txt'?y
rm:是否删除目录 'app'?y
[root@localhost ~]# dir
anaconda-ks.cfg  logs  mysql  nohup.out  __par_compile_fail  projects  store
rm -rf 文件名
不询问递归删除,即删除文件夹
[root@localhost ~]# dir
anaconda-ks.cfg  app  logs  mysql  nohup.out  __par_compile_fail  projects  store
[root@localhost ~]# dir app
hello.txt
[root@localhost ~]# rm -rf app
[root@localhost ~]# dir
anaconda-ks.cfg  logs  mysql  nohup.out  __par_compile_fail  projects  store
(8)mv剪切(不同目录下操作)或者重命名(同一目录下操作)
mv 文件 目录
[root@localhost b924]# dir
file05	hello.cpp
[root@localhost b924]# mv hello.cpp hi.cpp
[root@localhost b924]# dir
file05	hi.cpp
(9)ln软连接
软连接也称为符号链接,类似中windows里面的快捷方式,主要是存放了链接文件的路径。
ln -s 源文件或目录 软连接名称
[root@localhost /]# ln -s /root /home/aw/linkToRoot
[root@localhost /]# cd /home/aw/linkToRoot#实际上此时切换到了root目录
[root@localhost linkToRoot]# ll
总用量 8
-rw-------. 1 root root 1352 9月  24 14:59 anaconda-ks.cfg
drwxr-xr-x  3 root root   26 9月  30 21:24 logs
drwxr-xr-x  5 root root   42 9月  24 16:18 mysql
-rw-------  1 root root  558 10月  1 16:22 nohup.out
-rw-r--r--  1 root root    0 9月  26 22:13 __par_compile_fail
drwxr-xr-x  5 root root   61 9月  27 14:57 projects
lrwxrwxrwx  1 root root    5 11月  5 21:48 root -> /root
drwxr-xr-x  6 root root  100 10月  6 19:27 store
[root@localhost linkToRoot]# cd /root
[root@localhost ~]# ll
总用量 8
-rw-------. 1 root root 1352 9月  24 14:59 anaconda-ks.cfg
drwxr-xr-x  3 root root   26 9月  30 21:24 logs
drwxr-xr-x  5 root root   42 9月  24 16:18 mysql
-rw-------  1 root root  558 10月  1 16:22 nohup.out
-rw-r--r--  1 root root    0 9月  26 22:13 __par_compile_fail
drwxr-xr-x  5 root root   61 9月  27 14:57 projects
lrwxrwxrwx  1 root root    5 11月  5 21:48 root -> /root
drwxr-xr-x  6 root root  100 10月  6 19:27 store
[root@localhost ~]#
删除软连接
rm -f 软连接名称
[root@localhost ~]# rm -f /linkToRoot
查看操作
(1)cat查看文件内容
cat 文件名
[root@localhost b924]# cat hello.cpp
#include
using namespace std;
int main(){
    cout<<"hello world"<
cat -n 文件名
显示行号
[root@localhost b924]# cat -n hello.cpp
     1	#include
     2	using namespace std;
     3	int main(){
     4	    cout<<"hello world"<
cat -n 文件名 | more//分页展示
(2)more分页展示文件内容
more 文件名
[root@localhost /]# more /etc/profile
# /etc/profile

# System wide environment and startup programs, for login setup
# Functions and aliases go in /etc/bashrc

# It's NOT a good idea to change this file unless you know what you
# are doing. It's much better to create a custom.sh shell script in
# /etc/profile.d/ to make custom changes to your environment, as this
# will prevent the need for merging in future updates.

pathmunge () {
    case ":${PATH}:" in
        *:"$1":*)
            ;;
        *)
            if [ "$2" = "after" ] ; then
                PATH=$PATH:$1
            else
                PATH=$1:$PATH
            fi
    esac
}


if [ -x /usr/bin/id ]; then
    if [ -z "$EUID" ]; then
        # ksh workaround
        EUID=`/usr/bin/id -u`
        UID=`/usr/bin/id -ru`
    fi
[root@localhost /]#
| 符号 | 功能 |
| 回车 | 向下翻一行 |
| 空格 | 向下翻页 |
| q | 立刻结束浏览,不再显示文件内容 |
| Ctrl + F | 向下翻一行 |
| Ctrl + B | 返回上一行 |
| :f | 输出当前文件名和行号 |
| = | 输出当前行号 |
(3)less分屏展示文件内容
less 文件名
[root@localhost /]# less /etc/profile

| 符号 | 功能 |
| 空格键 | 向下翻动一页 |
| 上箭头键 | 向上翻动一页 |
| 下箭头键 | 向下翻动一页 |
| /字符串内容 | 搜索字符串 n:向下搜索 N:向上搜索 |
| q | 立刻结束浏览,不再显示文件内容 |
(4)echo输出内容(字符串,环境变量等)
[root@localhost b924]# echo hello
hello
>:输出重定向
[root@localhost /]# cat /home/hi/text.txt
hello123456
[root@localhost /]# echo 'hello'>/home/hi/text.txt#将hello输入到guojing文件夹下的test.txt文件中,之前内容覆盖
[root@localhost /]# cat /home/hi/text.txt
hello
[root@localhost /]# cal > /home/hi/text.txt
[root@localhost /]# cat /home/hi/text.txt
     十一月 2023
日 一 二 三 四 五 六
          1  2  3  4
 5  6  7  8  9 10 11
12 13 14 15 16 17 18
19 20 21 22 23 24 25
26 27 28 29 30
>>:追加
[root@localhost /]# cat /home/hi/text.txt
hello
[root@localhost /]# echo 'hello'>>/home/hi/text.txt#将hello输入到guojing文件夹下的test.txt文件末尾处,之前内容不会被覆盖
[root@localhost /]# cat /home/hi/text.txt
hello
hello
[root@localhost /]# cat /home/hi/text.txt
     十一月 2023
日 一 二 三 四 五 六
          1  2  3  4
 5  6  7  8  9 10 11
12 13 14 15 16 17 18
19 20 21 22 23 24 25
26 27 28 29 30

[root@localhost /]# cal >> /home/hi/text.txt
[root@localhost /]# cat /home/hi/text.txt
     十一月 2023
日 一 二 三 四 五 六
          1  2  3  4
 5  6  7  8  9 10 11
12 13 14 15 16 17 18
19 20 21 22 23 24 25
26 27 28 29 30

     十一月 2023
日 一 二 三 四 五 六
          1  2  3  4
 5  6  7  8  9 10 11
12 13 14 15 16 17 18
19 20 21 22 23 24 25
26 27 28 29 30
(5)head用于显示文件开通部分内容,默认情况下时文件前10行的内容
[root@localhost include]# head jawt.h
/*
 * Copyright (c) 1999, 2013, Oracle and/or its affiliates. All rights reserved.
 * ORACLE PROPRIETARY/CONFIDENTIAL. Use is subject to license terms.
 *
 *
 *
 *
 *
 *
 *
head 文件 -n 5 文件名#显示前五行的内容
[root@localhost include]# head jawt.h -n 5
/*
 * Copyright (c) 1999, 2013, Oracle and/or its affiliates. All rights reserved.
 * ORACLE PROPRIETARY/CONFIDENTIAL. Use is subject to license terms.
 *
 *
(6)tail用于输出文件尾部的内容 默认情况下是查看文件最后10行的内容
[root@localhost include]# dir
classfile_constants.h  jawt.h  jdwpTransport.h	jni.h  jvmticmlr.h  jvmti.h  linux
[root@localhost include]# tail jawt.h

#define JAWT_VERSION_1_3 0x00010003
#define JAWT_VERSION_1_4 0x00010004
#define JAWT_VERSION_1_7 0x00010007

#ifdef __cplusplus
} /* extern "C" */
#endif

#endif /* !_JAVASOFT_JAWT_H_ */
tail -n 5 文件#查看最后五行内容
[root@localhost include]# tail -n 5 jawt.h
#ifdef __cplusplus
} /* extern "C" */
#endif

#endif /* !_JAVASOFT_JAWT_H_ */
tail -f 文件#实时监控文件发生的变化
[root@localhost /]# tail -f /b924/hi.cpp
#include
using namespace std;
int main(){
    cout<<"hello world"<
(7)history 查看用户已经执行过的历史指令
history 10 #查看当前用户的最近10条历史指令
[root@localhost b924]# history 10
  593  touch hello.txt
  594  dir
  595  rm -f hello.txt
  596  dir
  597  touch hello.cpp
  598  vim hello.cpp
  599  cat hello.cpp
  600  echo hello
  601  history
  602  history 10
(8)ls打印出当前目录的清单
[root@localhost /]# ls -lh#可以查看文件大小
总用量 36K
drwxr-xr-x    3 root     root       17 9月  30 19:38 app
drwxr-xr-x    3 root     root       37 11月  5 20:33 b924
lrwxrwxrwx    1 root     root        7 2月  18 2022 bin -> usr/bin
dr-xr-xr-x.   5 root     root     4.0K 2月  18 2022 boot
drwxr-xr-x    2 root     root       32 10月  4 20:39 cig
drwxr-xr-x   20 root     root     3.3K 11月  6 10:39 dev
drwxr-xr-x.  91 root     root     8.0K 11月  6 10:39 etc
drwxr-xr-x    3 root     root       24 9月  25 09:32 git
时间指令
(1)date显示当前时间
[root@localhost /]# date
2023年 11月 05日 星期日 20:44:51 CST
| 符号 | 功能 |
| date +%Y | 显示当前年份 |
| date +%m | 显示当前月份 |
| date +%d | 显示当前是哪一天 |
| date "+%Y-%m-%d %H:%M:%S" | 显示年月日时分秒 |
| date -s 字符串时间 | 设置时间 date -s "2022-8-28 15:48:50" |
(2)cal显示当前月份的日历
[root@localhost /]# cal
     十一月 2023
日 一 二 三 四 五 六
          1  2  3  4
 5  6  7  8  9 10 11
12 13 14 15 16 17 18
19 20 21 22 23 24 25
26 27 28 29 30
cal 2023 #显示整年的日历
[root@localhost /]# cal 2023
                               2023

        一月                   二月                   三月
日 一 二 三 四 五 六   日 一 二 三 四 五 六   日 一 二 三 四 五 六
 1  2  3  4  5  6  7             1  2  3  4             1  2  3  4
 8  9 10 11 12 13 14    5  6  7  8  9 10 11    5  6  7  8  9 10 11
15 16 17 18 19 20 21   12 13 14 15 16 17 18   12 13 14 15 16 17 18
22 23 24 25 26 27 28   19 20 21 22 23 24 25   19 20 21 22 23 24 25
29 30 31               26 27 28               26 27 28 29 30 31

        四月                   五月                   六月
日 一 二 三 四 五 六   日 一 二 三 四 五 六   日 一 二 三 四 五 六
                   1       1  2  3  4  5  6                1  2  3
 2  3  4  5  6  7  8    7  8  9 10 11 12 13    4  5  6  7  8  9 10
 9 10 11 12 13 14 15   14 15 16 17 18 19 20   11 12 13 14 15 16 17
16 17 18 19 20 21 22   21 22 23 24 25 26 27   18 19 20 21 22 23 24
23 24 25 26 27 28 29   28 29 30 31            25 26 27 28 29 30
30
        七月                   八月                   九月
日 一 二 三 四 五 六   日 一 二 三 四 五 六   日 一 二 三 四 五 六
                   1          1  2  3  4  5                   1  2
 2  3  4  5  6  7  8    6  7  8  9 10 11 12    3  4  5  6  7  8  9
 9 10 11 12 13 14 15   13 14 15 16 17 18 19   10 11 12 13 14 15 16
16 17 18 19 20 21 22   20 21 22 23 24 25 26   17 18 19 20 21 22 23
23 24 25 26 27 28 29   27 28 29 30 31         24 25 26 27 28 29 30
30 31
        十月                  十一月                 十二月
日 一 二 三 四 五 六   日 一 二 三 四 五 六   日 一 二 三 四 五 六
 1  2  3  4  5  6  7             1  2  3  4                   1  2
 8  9 10 11 12 13 14    5  6  7  8  9 10 11    3  4  5  6  7  8  9
15 16 17 18 19 20 21   12 13 14 15 16 17 18   10 11 12 13 14 15 16
22 23 24 25 26 27 28   19 20 21 22 23 24 25   17 18 19 20 21 22 23
29 30 31               26 27 28 29 30         24 25 26 27 28 29 30
                                              31
搜索查找
(1)find从指定目录下递归地遍历各个目录,将所有满足条件的目录显示在控制台。
find 搜索范围 选项
| 选项 | 功能 |
| -name | 按照文件的名称查找文件 |
| -size | 按照指定的大小查找文件 |
| -user | 查找指定用户所属的文件 |
-name
[root@localhost /]# dir b924
file05	hello.cpp
[root@localhost /]# find /b924 -name 'hello.cpp'
/b924/file05/hello.cpp
/b924/hello.cpp
-size
| 符号 | 功能 |
| +n | 大于 |
| -n | 小于 |
| n | 等于 |
单位有k,M,G
[root@localhost /]# find / -size +200M#查找整个Linux系统大于200M的文件
/proc/kcore
find: ‘/proc/1047/task/1047/fd/6’: No such file or directory
find: ‘/proc/1047/task/1047/fdinfo/6’: No such file or directory
find: ‘/proc/1047/fd/5’: No such file or directory
find: ‘/proc/1047/fdinfo/5’: No such file or directory
/root/store/commitlog/00000000000000000000
/root/store/index/20231006192353152
/usr/lib/locale/locale-archive
/usr/local/rocketmq/store1/commitlog/00000000000000000000
-user
[root@localhost /]# find /opt -user 'root'#查找opt目录下,查询root用户创建的文件
/opt
/opt/containerd
/opt/containerd/bin
/opt/containerd/lib
(2)locate可以定位文件路径,查询速度较快
由于locate指令基于数据库进行查询,所以第一次查询运行前,必须使用updatedb指令创建locate数据库。
[root@localhost /]# updatedb
[root@localhost /]# locate hello.cpp
/b924/hello.cpp
/b924/file05/hello.cpp
(3)which查看某个指令在哪个目录下
[root@localhost /]# which cd
/usr/bin/cd
(4)grep过滤查找
"|"表示前一个指令的处理结果输出传递给后面的指令处理,一般将 | 和 grep一起结合起来使用。
grep [选项] 查找内容 源文件
| 选项 | 功能 |
|---|---|
| -n | 显示行号 |
| -i | 忽略自动大小写 |
[root@localhost b924]# cat -n hello.cpp
     1	#include
     2	using namespace std;
     3	int main(){
     4	    cout<<"hello world"<
压缩和解压
(1)gzip/gunzip(用于 *.gz文件)
gzip 压缩文件
gunzip 解压缩文件
[root@localhost b924]# dir
file05	hello.cpp
[root@localhost b924]# gzip hello.cpp
[root@localhost b924]# dir
file05	hello.cpp.gz
[root@localhost b924]# gunzip hello.cpp.gz
[root@localhost b924]# dir
file05	hello.cpp
(2)zip/unzip(用于*.zip文件)
zip 压缩文件
unzip 解压缩文件
选项:-r 递归压缩,即压缩目录
选项:-d 指定解压后文件存放方目录
[root@localhost b924]# dir
file05	hello.cpp
[root@localhost b924]# zip -r myFile.zip file05/ #将file05目录及其下面的所有文件进行压缩,压缩成myFile.zip
  adding: file05/ (stored 0%)
  adding: file05/hello.cpp (stored 0%)
[root@localhost b924]# dir
file05	hello.cpp  myFile.zip
[root@localhost b924]# unzip -d /app myFile.zip #将zip文件解压到/app目录下面
Archive:  myFile.zip
   creating: /app/file05/
 extracting: /app/file05/hello.cpp
[root@localhost b924]# dir /app
file05	jdk
(3)tar(用于*.tar.gz文件)
tar 将文件打包为*.tar.gz
| 选项 | 功能 |
|---|---|
| -c | 产生tar打包文件 |
| -v | 显示详细信息 |
| -f | 指定压缩后的文件名 |
| -z | 打包同时压缩 |
| -x | 解压tar包文件 |
[root@localhost b924]# dir
file05	hello.cpp
[root@localhost b924]# tar -zcvf MyFile.tar.gz file05#将file05目录压缩成MyFile.tar.gz
file05/
file05/hello.cpp
[root@localhost b924]# dir
file05	hello.cpp  MyFile.tar.gz
[root@localhost b924]# dir
hello.cpp  MyFile.tar.gz
[root@localhost b924]# tar -zxvf MyFile.tar.gz#将MyFile.tar.gz解压到当前目录
file05/
file05/hello.cpp
[root@localhost b924]# dir
file05	hello.cpp  MyFile.tar.gz
[root@localhost b924]# dir /app
jdk
[root@localhost b924]# tar -zxvf MyFile.tar.gz -C /app#将MyFile.tar.gz文件解压到/app目录下
file05/
file05/hello.cpp
[root@localhost b924]# dir /app
file05	jdk
定时任务调度
(1)crontab 设置定时任务
| 参数 | 功能 |
| -e | 编辑定时任务 |
| -l | 查询定时任务 |
| -r | 删除当前用户的所有定时任务 |
[root@localhost ~]# crontab -e
*/1 * * * * ls -l /etc/ >> /tmp/etc.txt# #将etc目录下面的文件列表查询出来,追加到/tmp/etc.txt文件中,并每分钟执行1次
占位符说明
| 项目 | 含义 | 范围 |
|---|---|---|
| 第一个 “*” | 一个小时当中的第几分钟 | 0-59 |
| 第二个 “*” | 一天当中的第几个小时 | 0-23 |
| 第三个 “*” | 一个月当中的第几天 | 1-31 |
| 第四个 “*” | 一年当中的第几个月 | 1-12 |
| 第五个 “*” | 一周当中的星期几 | 0-7(0和7都代表星期日) |
特殊符号说明
| 特殊符号 | 含义 |
|---|---|
| * | 代表任何时间,比如第一个“*”就代表1小时中每分钟都执行1次的意思。 |
| , | 代表不连续的时间,比如“0,8,12,16 * * *”就代表1天中的8点过0分,12点过0分,16点过0分都会执行1次。 |
| - | 代表连续的时间范围,比如“0,5 * * 1-6”就代表星期1到星期6的凌晨5点过0分都会执行。 |
| */n | 代表每隔多久执行1次。比如“*/10 * * * *” 就代表每隔10分钟就执行1次命令。 |
特殊时间执行案例
| 时间 | 含义 |
|---|---|
| 45 22 * * * | 每天在22时45分执行任务 |
| 0 17 * * 1 | 每周一的17点过0分执行任务 |
| 0 5 1,15 * * | 每月的1号和15号的凌晨5点钟执行任务 |
| 40 4 * * 1-5 | 每周1-到周5的凌晨4:40分执行任务 |
| */10 4 * * * | 每天的凌晨4点。每隔10分钟就执行1次任务 |
*/1 * * * * date >> /tmp/mydate.txt #每隔1分钟,将当前的日期信息追加到/tmp/mydate.txt文件中[root@localhost ~]# crontab -e
0 2 * * * mysqldump -u root -p root testdb > /home/db.bak#每天凌晨2点,将mysql数据库testdb,备份到文件中
#备份数据库的指令为 mysqldump -u root -p密码 数据库名称 > /home/文件名称(2)crontab -r 终止任务调度
[root@localhost ~]# crontab -r
(3)contab -l :列出当前有哪些任务调度
(4)service crond restart [重启任务调度]
(5)at设置定时任务
-
at命令是一次性定时执行任务计划,at的守护线程atd以后台的模式运行,检查作业队列来运行。
-
默认情况下,atd守护线程每60秒检查作业队列,有作业时会检查作业运行时间,如果时间与当前时间匹配,则运行此作业。
-
at命令是一次性定制的计划任务,执行完一个任务后就不再执行此任务了。
-
在使用at命令的时候,一定要保证atd进程的启动,可以用相关指令来查看
ps -ef | grep atd
-
at时间定义:
| 格式 | 含义 | 举例 |
|---|---|---|
| HH:MM | 当天 HH:MM 执行,若当天时间已过,则在明天 HH:MM 执行 | 当天 4:00 (若超时则为明天 4:00): 4:00 |
| 英文粗略时间单次 | midnight(午夜,00:00)、noon(中午,12:00)、teatime(下午茶时间,16:00) tomorrow(明天) | midnight、noon、teatime |
| 英文月名A 日期B [年份C] | C年A月B日执行 | 在 2018 年 1 月 15 日执行: January 15 2018 |
| 日期时间戳形式 | 绝对计时法 时间+日期 时间:HH:MM 日期:MMDDYY或MM/DD/YY或MM.DD.YY |
在 2018 年 1 月 15 日执行: 011518或01/15/18或01.15.18 |
| now + 数量 单位 | 相对计时法 以 minutes、hours、days 或 weeks 为单位 | 5 天后的此时此刻执行: now + 5 days |
常用选项:
| 选项 | 功能 |
| -m | 当前任务执行后,向用户发送邮件 |
| -l | (=atq指令)list:列出当前用户的at任务队列 |
| -d | (=atrm指令)delete:删除at任务 |
| -v | 显示任务的将被执行时间 |
| -c | 输出任务内容(任务指令) |
| -V | 显示版本信息 |
| -f <文件> | 从指定的文件读入,而不是从标准读入 |
| -t <时间参数> | 以时间参数的形式提交要提交的任务,时间参数MMDDhhmm(月日时分) |
语法格式:
at [选项][时间]
at > 命令(输入两次 Ctrl + D)//第一行:at 指令输入结束后,回车到下一行输入指令 //第二行:开头的 at> 无需输入,是系统自动添加的 //命令输入结束后:Ctrl + D 结束命令的输入,要输入两次
磁盘管理
(1)df -h 查询整个磁盘占用情况
[root@localhost ~]# df -h
文件系统             容量  已用  可用 已用% 挂载点
devtmpfs             946M     0  946M    0% /dev
tmpfs                963M     0  963M    0% /dev/shm
tmpfs                963M  8.7M  954M    1% /run
tmpfs                963M     0  963M    0% /sys/fs/cgroup
/dev/mapper/ao-root   27G  8.6G   19G   32% /
/dev/nvme0n1p1      1014M  155M  860M   16% /boot
tmpfs                193M     0  193M    0% /run/user/0
(2)du 查询指定目录的磁盘占用情况
| 参数 | 功能 |
| -s | 指定目录大小汇总 |
| -h | 带计量单位 |
| -a | 含文件 |
| --max-depth=1 | 子目录深度 |
| -c | 列出明细的同时,增加汇总值 |
[root@localhost /]# du -h /opt
0	/opt/containerd/bin
0	/opt/containerd/lib
0	/opt/containerd
0	/opt
[root@localhost /]# du -h --max-depth=1 /opt
0	/opt/containerd
0	/opt
(3) ll 统计/dev文件夹下文件的个数
[root@localhost /]# ll /dev
总用量 0
crw------- 1 root root     10, 175 11月  7 16:01 agpgart
drwxr-xr-x 2 root root          80 11月  7 16:01 ao
crw-r--r-- 1 root root     10, 235 11月  7 16:01 autofs
drwxr-xr-x 2 root root         160 11月  7 16:01 block
drwxr-xr-x 2 root root          60 11月  7 16:01 bsg
crw------- 1 root root     10, 234 11月  7 16:01 btrfs-control
drwxr-xr-x 3 root root          60 11月  7 16:01 bus
lrwxrwxrwx 1 root root           3 11月  7 16:01 cdrom -> sr0
R 代表递归 统计/opt文件下的文件的个数,包括子文件夹下的
[root@localhost /]# ls -lR /home | grep "^-" | wc -l#R代表递归 统计/home文件下的文件的个数,包括子文件夹下的
4
(4)ls -l /dev | grep "^d" | wc -l统计/opt文件夹下目录的个数
[root@localhost /]# ls -l /dev | grep "^d" | wc -l
18
ls -lR /opt | grep "^d" | wc -l 统计/opt文件夹下的目录的个数,包括子文件夹下的
[root@localhost /]# ls -lR /home | grep "^d" | wc -l#统计/home文件夹下的目录的个数,包括子文件夹下的
12
(5)tree xxx以树状结构显示目录结构
[root@localhost /]# tree /home
/home
├── aw
│   └── linkToRoot -> /root
├── hi
│   ├── myprofile
│   ├── myProfile
│   ├── test.txt
│   └── text.txt
├── kl
├── mydocker
├── rocketmq
│   └── broker
│       ├── conf
│       ├── logs
│       └── store
├── test
├── xm
└── xq

13 directories, 4 files
网络配置
(1)ifconfig查看ip地址
[root@localhost ~]# ifconfig
ens160: flags=4163  mtu 1500
        inet 192.168.117.131  netmask 255.255.255.0  broadcast 192.168.117.255
        inet6 fe80::20c:29ff:fee8:9caf  prefixlen 64  scopeid 0x20
        ether 00:0c:29:e8:9c:af  txqueuelen 1000  (Ethernet)
        RX packets 1428  bytes 112703 (110.0 KiB)
        RX errors 0  dropped 0  overruns 0  frame 0
        TX packets 818  bytes 194304 (189.7 KiB)
        TX errors 0  dropped 0 overruns 0  carrier 0  collisions 0

lo: flags=73  mtu 65536
        inet 127.0.0.1  netmask 255.0.0.0
        inet6 ::1  prefixlen 128  scopeid 0x10
        loop  txqueuelen 1000  (Local Loopback)
        RX packets 0  bytes 0 (0.0 B)
        RX errors 0  dropped 0  overruns 0  frame 0
        TX packets 0  bytes 0 (0.0 B)
        TX errors 0  dropped 0 overruns 0  carrier 0  collisions 0
(2)ping测试与目标主机的连通性
[root@localhost ~]# ping www.baidu.com
PING www.a.shifen.com (39.156.66.18) 56(84) bytes of data.
64 bytes from 39.156.66.18 (39.156.66.18): icmp_seq=1 ttl=128 time=32.4 ms
64 bytes from 39.156.66.18 (39.156.66.18): icmp_seq=2 ttl=128 time=90.3 ms
64 bytes from 39.156.66.18 (39.156.66.18): icmp_seq=3 ttl=128 time=88.8 ms
64 bytes from 39.156.66.18 (39.156.66.18): icmp_seq=4 ttl=128 time=83.5 ms
64 bytes from 39.156.66.18 (39.156.66.18): icmp_seq=5 ttl=128 time=133 ms
进程管理
(1)ps查看系统中哪些正在运行,以及他们的运行的状况
[root@localhost b924]# ps
    PID TTY          TIME CMD
    983 pts/0    00:00:00 bash
   2140 pts/0    00:00:00 ps
| 字段 | 说明 |
|---|---|
| PID | 进程识别号 |
| TTV | 终端机号 |
| TIME | 此进程所消耗cpu时间 |
| CMD | 正在执行命令或进程名 |
| 参数 | |
| -a | 显示终端所用的进程信息 |
| -u | 以用户的格式显示进程的信息 |
| -x | 显示后台程序运行的参数 |
| -e | 显示所有进程 |
| -f | 全格式显示 |
[root@localhost b924]# ps -aux | more
USER         PID %CPU %MEM    VSZ   RSS TTY      STAT START   TIME COMMAND
root           1  0.1  0.6 172684 12800 ?        Ss   10:39   0:04 /usr/lib/systemd/systemd --switched-root --syste
m --deserialize 17
root           2  0.0  0.0      0     0 ?        S    10:39   0:00 [kthreadd]
root           3  0.0  0.0      0     0 ?        I<   10:39   0:00 [rcu_gp]
root           4  0.0  0.0      0     0 ?        I<   10:39   0:00 [rcu_par_gp]
root           6  0.0  0.0      0     0 ?        I<   10:39   0:00 [kworker/0:0H-xfs-log/dm-0]
root           7  0.0  0.0      0     0 ?        I    10:39   0:00 [kworker/u256:0-flush-252:0]
root           8  0.0  0.0      0     0 ?        I<   10:39   0:00 [mm_percpu_wq]
root           9  0.0  0.0      0     0 ?        S    10:39   0:00 [ksoftirqd/0]
root          10  0.0  0.0      0     0 ?        R    10:39   0:01 [rcu_sched]
| 参数 | |
| USER | 进程所属的用户名称 |
| PID | 进程号 |
| %CPU | 进程占用CPU的百分比 |
| %MEM | 进程占用物理内存的百分比 |
| VSZ | 进程占用虚拟内存的大小(KB) |
| RSS | 进程占用物理内存的大小(KB) |
| STAT | 进程状态,S-代表睡眠 R-正在运行 D-短期等待 Z-僵死进程 T-被停止的线程 |
| START | :进程启动的时间 |
| TIME | 进程使用CPU的时间 |
| COMMAND | 进程启动所需要的命令和参数 |
ps -ef#以全格式查看进程信息
[root@localhost /]# ps -ef | more
UID          PID    PPID  C STIME TTY          TIME CMD
root           1       0  0 10:39 ?        00:00:04 /usr/lib/systemd/systemd --switched-root --system --deserialize
 17
root           2       0  0 10:39 ?        00:00:00 [kthreadd]
root           3       2  0 10:39 ?        00:00:00 [rcu_gp]
root           4       2  0 10:39 ?        00:00:00 [rcu_par_gp]
root           6       2  0 10:39 ?        00:00:00 [kworker/0:0H-xfs-log/dm-0]
root           8       2  0 10:39 ?        00:00:00 [mm_percpu_wq]
root           9       2  0 10:39 ?        00:00:00 [ksoftirqd/0]
root          10       2  0 10:39 ?        00:00:01 [rcu_sched]
查看指定进程信息:
[root@localhost /]# ps -ef | grep sshd#查看指定进程信息
root         794       1  0 10:39 ?        00:00:00 /usr/sbin/sshd -D [email protected],[email protected],aes256-ctr,aes256-cbc,[email protected],aes128-ctr,aes128-cbc [email protected],[email protected],[email protected],[email protected],hmac-sha2-256,hmac-sha1,[email protected],hmac-sha2-512 -oGSSAPIKexAlgorithms=gss-curve25519-sha256-,gss-nistp256-sha256-,gss-group14-sha256-,gss-group16-sha512-,gss-gex-sha1-,gss-group14-sha1- -oKexAlgorithms=curve25519-sha256,[email protected],ecdh-sha2-nistp256,ecdh-sha2-nistp384,ecdh-sha2-nistp521,diffie-hellman-group-exchange-sha256,diffie-hellman-group14-sha256,diffie-hellman-group16-sha512,diffie-hellman-group18-sha512,diffie-hellman-group-exchange-sha1,diffie-hellman-group14-sha1 -oHostKeyAlgorithms=ecdsa-sha2-nistp256,[email protected],ecdsa-sha2-nistp384,[email protected],ecdsa-sha2-nistp521,[email protected],ssh-ed25519,[email protected],rsa-sha2-256,[email protected],rsa-sha2-512,[email protected],ssh-rsa,[email protected] -oPubkeyAcceptedKeyTypes=ecdsa-sha2-nistp256,[email protected],ecdsa-sha2-nistp384,[email protected],ecdsa-sha2-nistp521,[email protected],ssh-ed25519,[email protected],rsa-sha2-256,[email protected],rsa-sha2-512,[email protected],ssh-rsa,[email protected] -oCASignatureAlgorithms=ecdsa-sha2-nistp256,ecdsa-sha2-nistp384,ecdsa-sha2-nistp521,ssh-ed25519,rsa-sha2-256,rsa-sha2-512,ssh-rsa
root         980     794  0 10:40 ?        00:00:00 sshd: root [priv]
root         982     980  0 10:40 ?        00:00:00 sshd: root@pts/0
(2)kill通过进程号杀死/终止进程
kill 选项 进程号
-9 表示强迫进程立即停止
(3)killall 会杀死当前进程和其子进程
(4)pstree查看进程树
可以更加直观的来查看进程信息
pstree[选项]
| 参数 | 功能 |
| -p | 显示进程的PID |
| -u | 显示进程的所属用户 |
[root@localhost /]# pstree
systemd─┬─NetworkManager───2*[{NetworkManager}]
        ├─atd
        ├─chronyd
        ├─containerd───9*[{containerd}]
        ├─containerd-shim─┬─portainer───5*[{portainer}]
        │                 └─10*[{containerd-shim}]
        ├─containerd-shim─┬─redis-server───4*[{redis-server}]
        │                 └─10*[{containerd-shim}]
        ├─containerd-shim─┬─sh───java───31*[{java}]
        │                 └─10*[{containerd-shim}]
[root@localhost /]# pstree -u#以树状的形式展示进程的用户信息
systemd─┬─NetworkManager───2*[{NetworkManager}]
        ├─atd
        ├─chronyd(chrony)
        ├─containerd───9*[{containerd}]
        ├─containerd-shim─┬─portainer───5*[{portainer}]
        │                 └─10*[{containerd-shim}]
        ├─containerd-shim─┬─redis-server(systemd-coredump)───4*[{redis-server}]
        │                 └─10*[{containerd-shim}]
        ├─containerd-shim─┬─sh───java───39*[{java}]
        │                 └─10*[{containerd-shim}]
权限管理
[root@localhost ~]# ll
总用量 8
-rw-------. 1 root root 1352 9月  24 14:59 anaconda-ks.cfg
drwxr-xr-x  3 root root   26 9月  30 21:24 logs
drwxr-xr-x  5 root root   42 9月  24 16:18 mysql
-rw-------  1 root root  558 10月  1 16:22 nohup.out
-rw-r--r--  1 root root    0 9月  26 22:13 __par_compile_fail
drwxr-xr-x  5 root root   61 9月  27 14:57 projects
lrwxrwxrwx  1 root root    5 11月  5 21:48 root -> /root
drwxr-xr-x  6 root root  100 10月  6 19:27 store

第0位确定文件类型(l,d,c,b,-)
| 符号 | 含义 |
| l | 软连接,相当于windows的快捷方式 |
| d | 目录,相当于windows的文件夹 |
| c | 设备文件中串行接口设备,鼠标,键盘 |
| b | 设备文件中可供存储的接口设备,比如说硬盘 |
| - | 文件 |
第1-3位确定所有者(该文件的所有者)拥有该文件的权限 --User
第4-6位确定所属组(同用户组的)又有该文件的权限 --Group
第7-9位确定组外其他用户拥有改文件的权限 --Other
rwx作用到文件
| r | 可读 read 可以读取,查看 |
| w | 代表可写 write 可以修改,但是不代表可以删除改文件,删除一个文件的前提条件是对该文件所在的目录有写权限,才能删除文件 |
| x | 代表可执行 execute 可被执行 |
rwx作用到目录
| r | 可读 可以读取 ls查看目录的内容 |
| w | 代表可写 对目录内进行创建+删除+重命名该目录 |
| x | 代表可执行 可以进入该目录 |
可以修改文件或者目录的权限
(1)chmod +,-,=变更权限
u:所有者,g:所属组,o,其他人,a:所有人(u,g,o的总和)
[root@localhost b924]# chmod u=rwx,g=rx,o=rx hello.cpp#给hello.cpp所有者读写执行的权限,给所在组执行读执行的权限,给其他组读执行的权限
[root@localhost b924]# ll
总用量 4
drwxr-xr-x 2 root root 23 11月  6 10:45 file05
-rwxr-xr-x 1 root root 99 11月  5 20:33 hello.cpp
[root@localhost b924]# chmod u-x,g+w hello.cpp #给hello.cpp文件的所有者去除执行的权限,增加组写的权限
[root@localhost b924]# ll
总用量 4
drwxr-xr-x 2 root root 23 11月  6 10:45 file05
-rw-rwxr-x 1 root root 99 11月  5 20:33 hello.cpp
[root@localhost b924]# chmod a+x hello.cpp#给hello.cpp文件的所有用户添加读的权限
[root@localhost b924]# ll
总用量 4
drwxr-xr-x 2 root root 23 11月  6 10:45 file05
-rwxrwxr-x 1 root root 99 11月  5 20:33 hello.cpp
(2)chmod 通过数字变更权限
r=4,w=2,x=1
rwx=4+2+1=7
[root@localhost b924]# chmod 137 hello.cpp #等价于chmod u=x,g=wx,o=rwx hello.cpp
[root@localhost b924]# ll
总用量 4
drwxr-xr-x 2 root root 23 11月  6 10:45 file05
---x-wxrwx 1 root root 99 11月  5 20:33 hello.cpp
服务管理指令
(1)systemctl [start | stop | restart | status] 服务启动/停止/重启/重载/查看状态
systemctl 指令管理的服务在/usr/lib/systemd/system中查看。
服务名查看所有服务的自启动状态
[root@localhost ~]# systemctl list-unit-files | grep firewall
firewalld.service                          disabled
[root@localhost ~]# systemctl status firewalld.service#查看防火墙状态
● firewalld.service - firewalld - dynamic firewall daemon
   Loaded: loaded (/usr/lib/systemd/system/firewalld.service; disabled; vendor preset: enabled)
   Active: inactive (dead)
     Docs: man:firewalld(1)
[root@localhost ~]# systemctl stop firewalld.service#停止防火墙状态
[root@localhost ~]# systemctl restart firewalld.service#重启防火墙
服务的状态如下:
| 状态 | 含义 |
| masked | 此服务禁止自启动 |
| static | 该服务无法自启动,只能作为其他文件的依赖 |
| enabled | 已配置为自启动 |
| disabled | 未配置为自启动 |
(2)systemctl restart NetworkManager 重启网络服务
[root@localhost ~]# systemctl restart NetworkManager
(3)systemctl is-enabled firewalld.service 查看某一服务是否自启动
[root@localhost ~]# systemctl is-enabled firewalld.service
disabled
(4)systemctl enable firewalld.service 设置服务自启动 (服务运行级别 3、5)
[root@localhost ~]# systemctl enable firewalld.service
Created symlink /etc/systemd/system/dbus-org.fedoraproject.FirewallD1.service → /usr/lib/systemd/system/firewalld.service.
Created symlink /etc/systemd/system/multi-user.target.wants/firewalld.service → /usr/lib/systemd/system/firewalld.service.
(5)systemctl disable firewalld.service 设置服务禁用自启动 (服务运行级别 3、5)
[root@localhost ~]# systemctl disable firewalld.service
Removed /etc/systemd/system/multi-user.target.wants/firewalld.service.
Removed /etc/systemd/system/dbus-org.fedoraproject.FirewallD1.service.
firewall
防火墙的核心功能:打开或关闭对应端口。关闭端口,则外部的数据请求不能通过对应的端口,与服务器上的程序进行通信 在真正的生产环境,为保证安全,需要启动防火墙并配置打开和关闭的端口。
(6)firewall-cmd --permanent --add-port=端口号/协议 打开端口/允许协议
(7)firewall-cmd --permanent --remove-port=端口号/协议 关闭端口/禁用协议
(8)firewall-cmd --query-port=端口/协议 查询端口/协议是否开启
(9)firewall-cmd --list-ports 查询防火墙所有开放的端口/协议配置
(10)firewall-cmd --reload 重载防火墙
[root@localhost ~]# firewall-cmd --query-port=3306/tcp  # 查询防火墙是否开启3306端口
no
[root@localhost ~]# firewall-cmd --list-ports  # 查看防火墙开放的端口有哪些
6379/tcp 8280/tcp 9876/tcp 10911/tcp
[root@localhost ~]# firewall-cmd --permanent --add-port=3306/tcp  # 开放防火墙对3306端口的访问权限
success
[root@localhost ~]# firewall-cmd --reload  # 重载防火墙
success
[root@localhost ~]# firewall-cmd --list-ports
3306/tcp 6379/tcp 8280/tcp 9876/tcp 10911/tcp
动态监控
(1)top显示正在执行的进程
top与ps最大的不同之处在于top在执行一段时间可以更新正在运行的进程。
top [选项]
| 选项 | 功能 |
|---|---|
| -d秒数 | 指定top命令每隔几秒刷新,默认3秒 |
| -i | 使用top不显示任何闲置或者僵死的进程 |
| -p | 通过指定监控ID来仅仅监控某个进程的状态 |
[root@localhost /]# top
top - 16:48:47 up 29 min,  2 users,  load average: 0.00, 0.00, 0.00
Tasks: 130 total,   1 running, 129 sleeping,   0 stopped,   0 zombie
%Cpu(s):  0.0 us,  0.0 sy,  0.0 ni,100.0 id,  0.0 wa,  0.0 hi,  0.0 si,  0.0 st
MiB Mem :   1925.2 total,   1566.2 free,    190.6 used,    168.4 buff/cache
MiB Swap:   2056.0 total,   2056.0 free,      0.0 used.   1581.7 avail Mem

    PID USER      PR  NI    VIRT    RES    SHR S  %CPU  %MEM     TIME+ COMMAND
      1 root      20   0  172480  12564   8140 S   0.0   0.6   0:03.62 systemd
      2 root      20   0       0      0      0 S   0.0   0.0   0:00.01 kthreadd
      3 root       0 -20       0      0      0 I   0.0   0.0   0:00.00 rcu_gp
      4 root       0 -20       0      0      0 I   0.0   0.0   0:00.00 rcu_par_gp
      6 root       0 -20       0      0      0 I   0.0   0.0   0:00.00 kworker/0:0H-xfs-log/dm-0
      8 root       0 -20       0      0      0 I   0.0   0.0   0:00.00 mm_percpu_wq
      9 root      20   0       0      0      0 S   0.0   0.0   0:00.08 ksoftirqd/0
     10 root      20   0       0      0      0 I   0.0   0.0   0:00.38 rcu_sched
输入top命令之后,可以按下面的字符来进行对应的交互操作
| 操作 | 功能 |
|---|---|
| P | 以CPU使用率来排序,默认就是此项 |
| M | 以内存使用来排序 |
| N | 以PID排序 |
| q | 退出top |
(2)netstat监控网络状态
netstat [选项]
| 选项 | 功能 |
| -an | 按照一定的属性排列输出 |
| -p | 显示哪个进程在调用 |
[root@localhost /]# netstat -anp | more
Active Internet connections (servers and established)
Proto Recv-Q Send-Q Local Address           Foreign Address         State       PID/Program name
tcp        0      0 0.0.0.0:22              0.0.0.0:*               LISTEN      821/sshd
tcp        0      0 127.0.0.1:6010          0.0.0.0:*               LISTEN      1015/sshd: root@pts
tcp        0     36 192.168.117.131:22      192.168.117.1:57178     ESTABLISHED 1013/sshd: root [pr
tcp6       0      0 :::22                   :::*                    LISTEN      821/sshd
tcp6       0      0 ::1:6010                :::*                    LISTEN      1015/sshd: root@pts
udp        0      0 192.168.117.131:68      192.168.117.254:67      ESTABLISHED 813/NetworkManager
udp        0      0 127.0.0.1:323           0.0.0.0:*                           815/chronyd
udp6       0      0 ::1:323                 :::*                                815/chronyd
raw6       0      0 :::58                   :::*                    7           813/NetworkManager
Active UNIX domain sockets (servers and established)
Proto RefCnt Flags       Type       State         I-Node   PID/Program name     Path
unix  2      [ ACC ]     SEQPACKET  LISTENING     21250    1/systemd            /run/udev/control
unix  2      [ ACC ]     STREAM     LISTENING     21254    1/systemd            /run/lvm/lvmpolld.socket
unix  2      [ ACC ]     STREAM     LISTENING     24072    796/mcelog           /var/run/mcelog-client
unix  3      [ ]         DGRAM                    13595    1/systemd            /run/systemd/notify
unix  2      [ ]         DGRAM                    13597    1/systemd            /run/systemd/cgroups-agent
unix  2      [ ACC ]     STREAM     LISTENING     13608    1/systemd            /run/systemd/journal/stdout
unix  6      [ ]         DGRAM                    13612    1/systemd            /run/systemd/journal/socket
unix  2      [ ACC ]     STREAM     LISTENING     23622    1/systemd            /var/run/.heim_org.h5l.kcm-socket
rpm与yum
rpm是互联网下载包和打包和安装工具,他包含在某些linux分版中,他具有生产.rpm扩展名的文件,RPM是redhat package manage(软件包管理工具的缩写)
(1)rpm -ivh RPM包全路径名称
| 参数 | 功能 |
| i | install 安装 |
| v | verbose 提示 |
| h | hash 进度条 |
(2)rpm -qa 查询所有安装的rpm列表
[root@localhost ~]# rpm -qa | more
rpm-plugin-systemd-inhibit-4.14.3-26.0.1.an8.x86_64
perl-srpm-macros-1-25.el8.noarch
audit-libs-3.0.7-4.0.1.an8.x86_64
perl-Mozilla-CA-20160104-7.module+an8.7.0+10932+615184cb.noarch
os-prober-1.74-9.0.1.an8.x86_64
isl-0.16.1-6.0.1.an8.x86_64
libxml2-2.9.7-17.0.2.an8.x86_64
pkgconf-m4-1.4.2-1.el8.noarch
perl-HTTP-Tiny-0.074-1.0.1.an8.noarch
查询当前系统中是否安装了指定的软件
[root@localhost ~]# rpm -qa | grep firefox#查看是否安装了火狐
firefox-115.4.0-1.0.1.an8.x86_64
查询软件安装的详细信息
[root@localhost ~]# rpm -qi firefox#查询firefox安装的详细信息
Name        : firefox
Version     : 115.4.0
Release     : 1.0.1.an8
Architecture: x86_64
Install Date: 2023年11月06日 星期一 13时21分37秒
Group       : Unspecified
Size        : 297322953
License     : MPLv1.1 or GPLv2+ or LGPLv2+
Signature   : RSA/SHA256, 2023年11月02日 星期四 15时58分59秒, Key ID 619140084873f7c5
Source RPM  : firefox-115.4.0-1.0.1.an8.src.rpm
Build Date  : 2023年11月04日 星期六 21时55分12秒
Build Host  : iZ2ze8vdmdyl66lfybi1hzZ
Relocations : (not relocatable)
Packager    : OpenAnolis Community
Vendor      : OpenAnolis Community
URL         : https://www.mozilla.org/firefox/
Summary     : Mozilla Firefox Web browser
Description :
Mozilla Firefox is an open-source web browser, designed for standards
compliance, performance and portability.
(3)卸载rpm包rpm -e xxx
[root@localhost ~]# rpm -e firefox #删除firefox
如果其它的软件包依赖于要删除的软件包,卸载时则会产生错误。此时如果我们想强制删除,可以添加另外的参数--nodeps
[root@localhost ~]# rpm -e --nodeps firefox #删除firefox
Yum是一个Shell前端软件包管理器,基于RPM包管理,能够从指定的服务器自动下载RPM包并安装,并且可以自动处理依赖性关系,并且一次安装所有的依赖软件包。
(4)yum install xxx 下载并安装指定的yum包
[root@localhost ~]# yum install firefox.x86_64#安装火狐浏览器
