高级运维学习(十六)Prometheus 监控
Prometheus概述
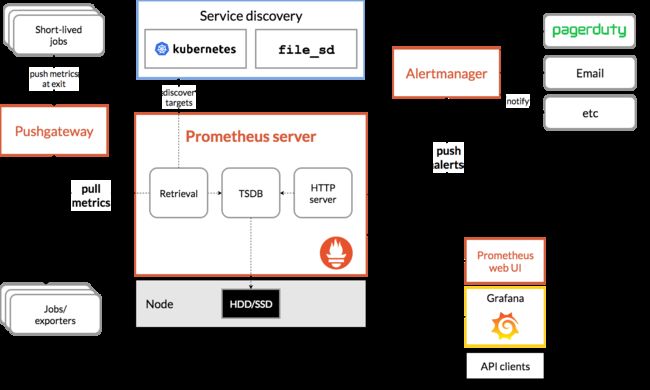
- Prometheus是一个开源系统监控和警报工具包,最初由 SoundCloud构建。
- 也是一款监控软件,也是一个时序数据库。Prometheus 将其指标收集并存储为时间序列数据,即指标信息与记录时的时间戳以及称为标签的可选键值对一起存储。
- 主要用在容器监控方面,也可以用于常规的主机监控。
- 使用google公司开发的go语言编写。
- Prometheus是一个框架,可以与其他组件完美结合。
部署Prometheus服务器
环境说明:
- Prometheus:192.168.88.5
- web1:192.168.88.100
配置时间
# 1. 查看时区
[root@prometheus ~]# timedatectl
               Local time: Sun 2023-01-01 11:15:11 CST
           Universal time: Sun 2023-01-01 03:15:11 UTC
                 RTC time: Sun 2023-01-01 03:15:11
                Time zone: Asia/Shanghai (CST, +0800)
System clock synchronized: no
              NTP service: inactive
          RTC in local TZ: no

# 2. 如果时区不正确,则改为正确的时区
[root@prometheus ~]# timedatectl set-timezone Asia/Shanghai

# 3. 查看时间
[root@prometheus ~]# date

# 4. 如果时间不正确,则改为正确的时间
[root@prometheus ~]# date -s "年月日 时:分:秒"
安装Prometheus服务器
- 拷贝Prometheus相关软件包到服务器
- 解压即部署
[root@prometheus ~]# cd prometheus_soft/
[root@prometheus prometheus_soft]# tar xf prometheus-2.37.5.linux-amd64.tar.gz
[root@prometheus prometheus_soft]# mv prometheus-2.37.5.linux-amd64 /usr/local/prometheus-
配置文件
- 配置文件中包含三个配置块:
global、rule_files和scrape_configs。 global块控制 Prometheus 服务器的全局配置。我们有两个选择。第一个,scrape_interval控制 Prometheus 抓取目标的频率。您可以为单个目标覆盖它。在这种情况下,全局设置是每 15 秒抓取一次。该evaluation_interval选项控制 Prometheus 评估规则的频率。Prometheus 使用规则来创建新的时间序列并生成警报。rule_files块指定我们希望 Prometheus 服务器加载的任何规则的位置。现在我们还没有规则。- 最后一个块,
scrape_configs控制 Prometheus 监控的资源。由于 Prometheus 还将有关自身的数据公开为 HTTP 端点,因此它可以抓取和监控自身的健康状况。在默认配置中,有一个名为 的作业prometheus,用于抓取 Prometheus 服务器公开的时间序列数据。该作业包含一个单一的、静态配置的目标,即localhost的9090端口。Prometheus期望度量在/metrics路径上的目标上可用,所以这个默认作业是通过 URL 抓取的:http://localhost:9090/metrics。
- 配置文件中包含三个配置块:
-
编写服务启动文件并启动服务
[root@prometheus ~]# vim /usr/lib/systemd/system/prometheus.service
[Unit]
Description=Prometheus Monitoring System
After=network.target

[Service]
ExecStart=/usr/local/prometheus/prometheus \
  --config.file=/usr/local/prometheus/prometheus.yml \
  --storage.tsdb.path=/usr/local/prometheus/data/

[Install]
WantedBy=multi-user.target

# 启动服务
[root@prometheus prometheus_soft]# systemctl daemon-reload
[root@prometheus prometheus_soft]# systemctl enable prometheus.service --now
[root@prometheus prometheus_soft]# ss -tlnp | grep :9090
LISTEN 0 128 *:9090 *:* users:(("prometheus",pid=4396,fd=7)) - 访问web页面:
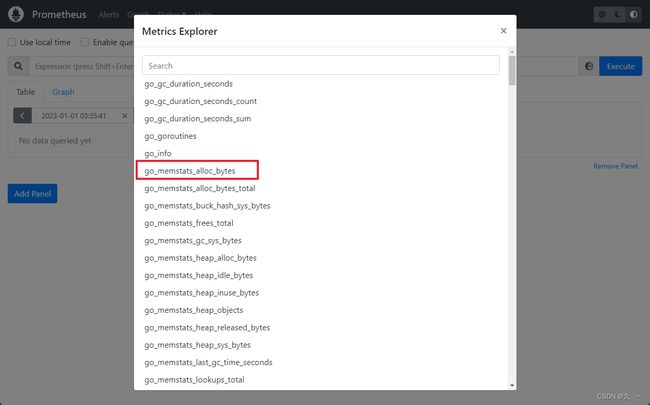
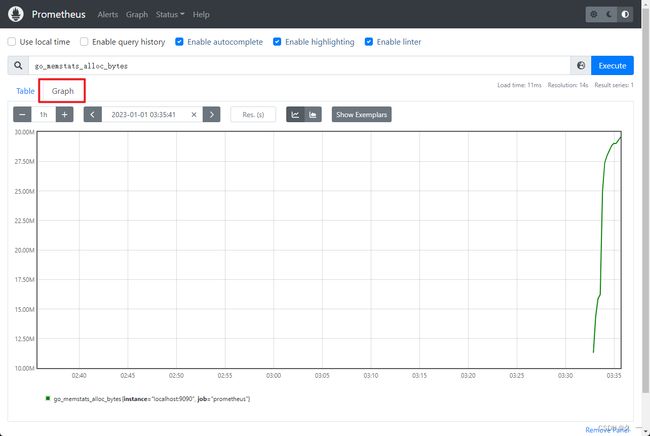
- 查看监控自身的数据,如分配置给Prometheus运行的内存数量
添加被监控端
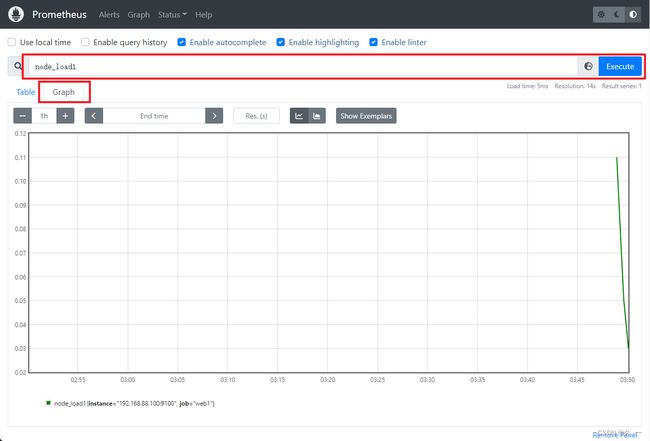
-
监控方式:
- 拉取:pull。监控端联系被监控端,采集数据
- 推送:push。被监控端主动把数据发给监控端。在prometheus中,push的方式需要额外的组件pushgateway
-
被监控端根据自身运行的服务,可以运行不同的exporter(被监控端安装的、可以与Prometheus通信,实现数据传递的软件)
-
exporter列表:Exporters and integrations | Prometheus
部署通用的监控exporter
- node-exporter用于监控硬件和系统的常用指标
- exporter运行于被监控端,以服务的形式存在。每个exporter所使用的端口号都不一样。
- 在web1[192.168.88.100]上部署node exporter
# 1. 拷贝node_exporter到web1
[root@prometheus ~]# scp prometheus_soft/node_exporter-1.5.0.linux-amd64.tar.gz 192.168.88.100:/root/

# 2. 解压即部署
[root@web1 ~]# tar xf node_exporter-1.5.0.linux-amd64.tar.gz
[root@web1 ~]# mv node_exporter-1.5.0.linux-amd64 /usr/local/node_exporter

# 3. 创建服务文件,并启动服务
[root@web1 ~]# vim /usr/lib/systemd/system/node_exporter.service
[Unit]
Description=node_exporter
After=network.target

[Service]
Type=simple
ExecStart=/usr/local/node_exporter/node_exporter

[Install]
WantedBy=multi-user.target

[root@web1 ~]# systemctl daemon-reload
[root@web1 ~]# systemctl enable node_exporter.service --now
[root@web1 ~]# ss -tlnp | grep :9100
LISTEN 0 128 *:9100 *:* users:(("node_exporter",pid=7371,fd=3)) - 在Prometheus服务器上添加监控节点
# 1. 修改配置文件,追加以下内容。特别注意缩进
[root@prometheus ~]# vim /usr/local/prometheus/prometheus.yml
...略...
  - job_name: "web1"
    static_configs:
      - targets: ["192.168.88.100:9100"]

# 2. 重启服务
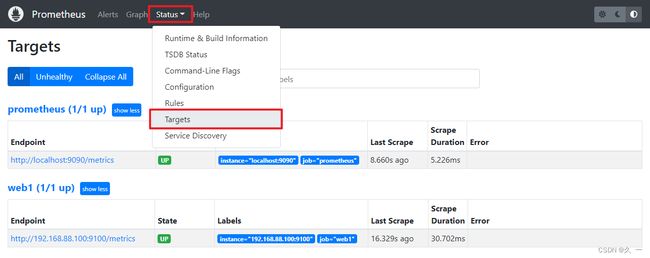
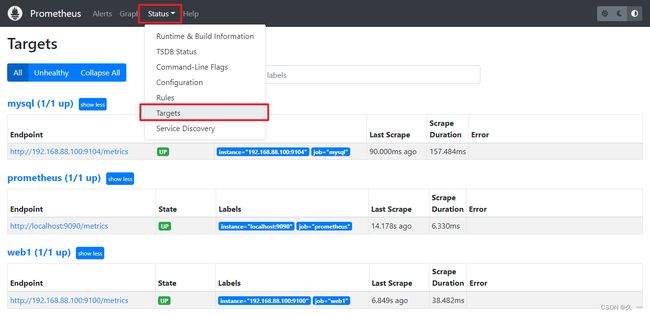
[root@prometheus ~]# systemctl restart prometheus.service - 查看添加结果
Grafana
概述
- Grafana是一款开源的、跨平台的、基于web的可视化工具
- 展示方式:客户端图表、面板插件
- 数据源可以来自于各种源,如prometheus
部署Grafana
- 装包、启服务
[root@prometheus ~]# yum install -y prometheus_soft/grafana-enterprise-9.3.2-1.x86_64.rpm
[root@prometheus ~]# systemctl enable grafana-server.service --now- 初始化。访问http://192.168.88.5:3000。初始用户名和密码都是admin。第一次登陆时,要求改密码,本例中密码改为tedu.cn。如果登陆报错,请更换其他浏览器。
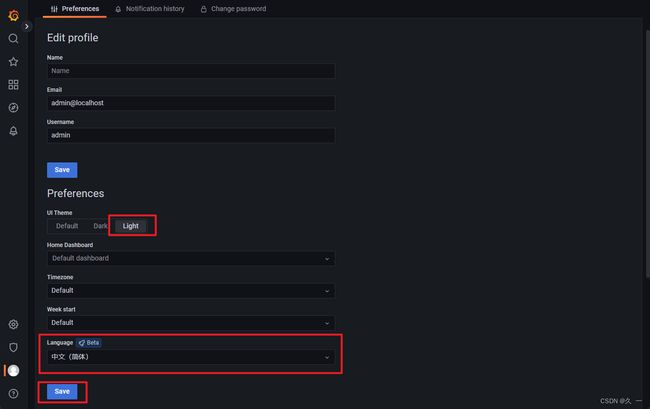
- 修改主题
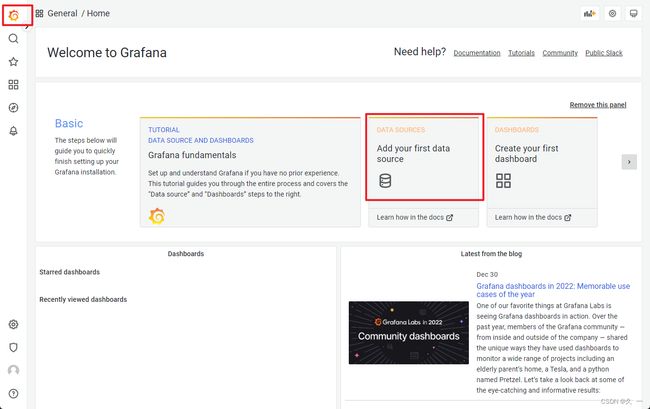
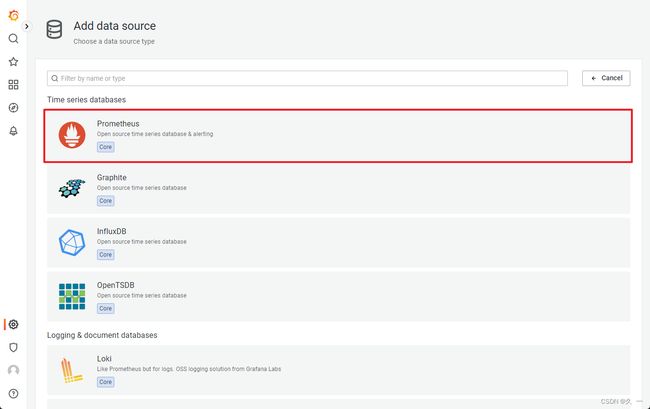
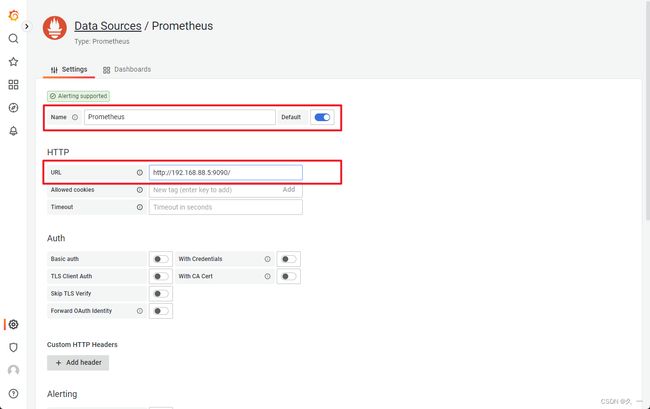
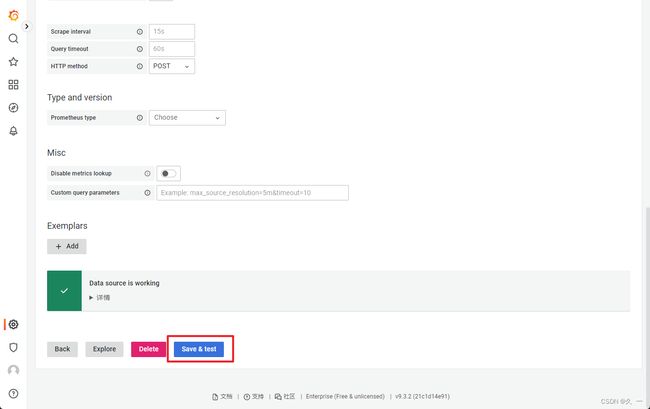
- 对接Prometheus
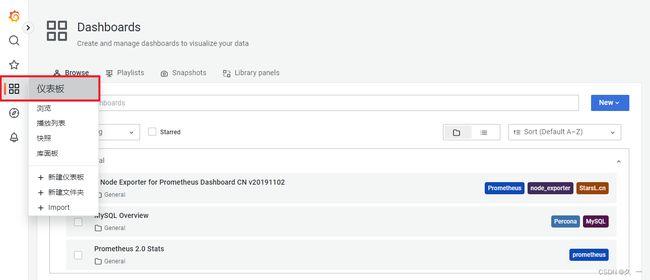
添加仪表盘
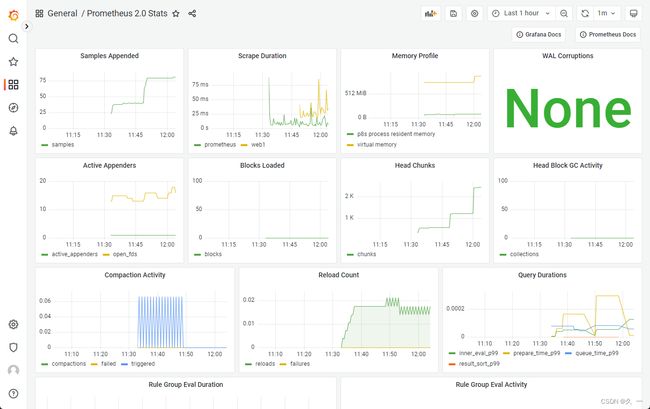
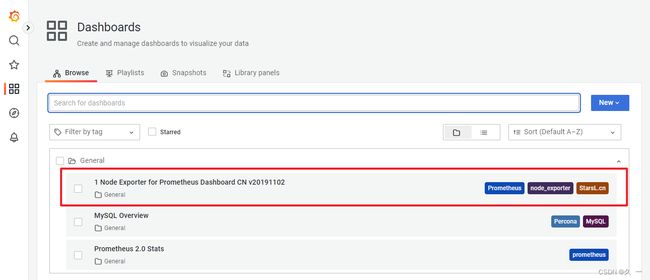
查看仪表盘
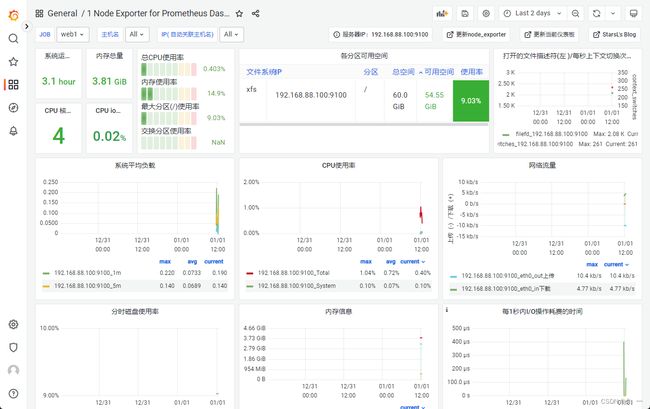
展示node1的监控信息
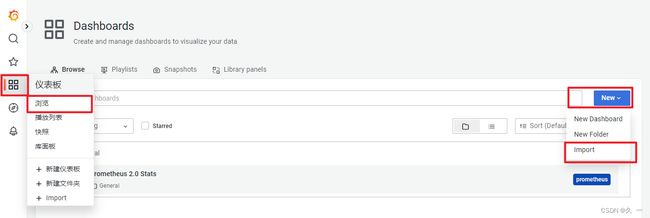
- grafana模板下载:Dashboards | Grafana Labs
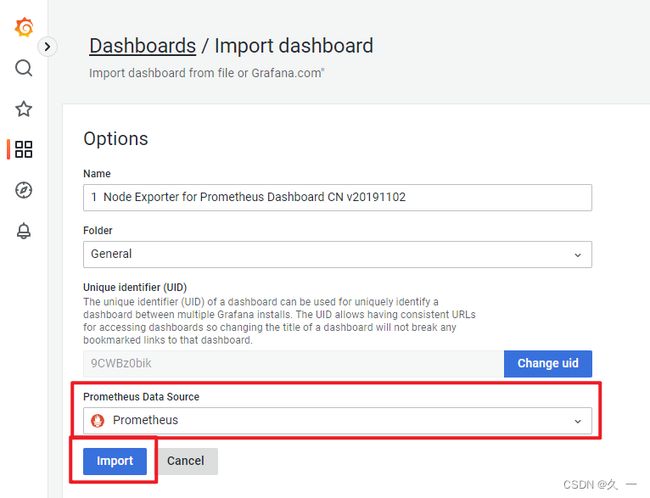
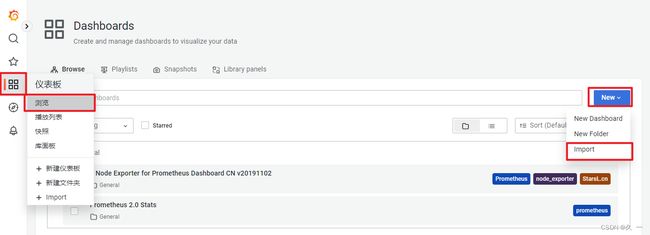
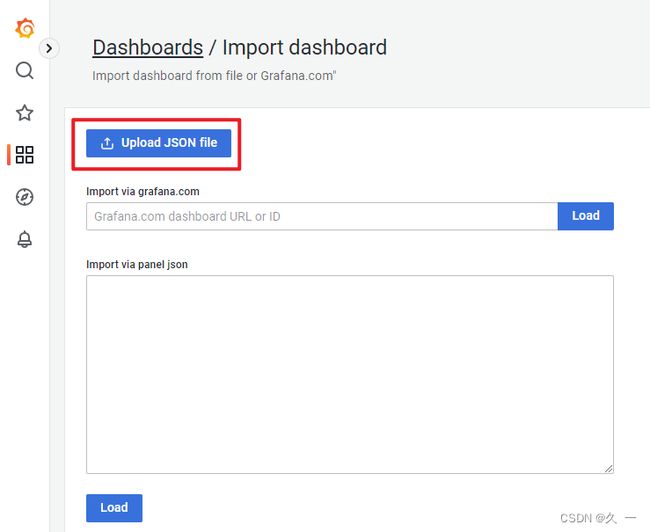
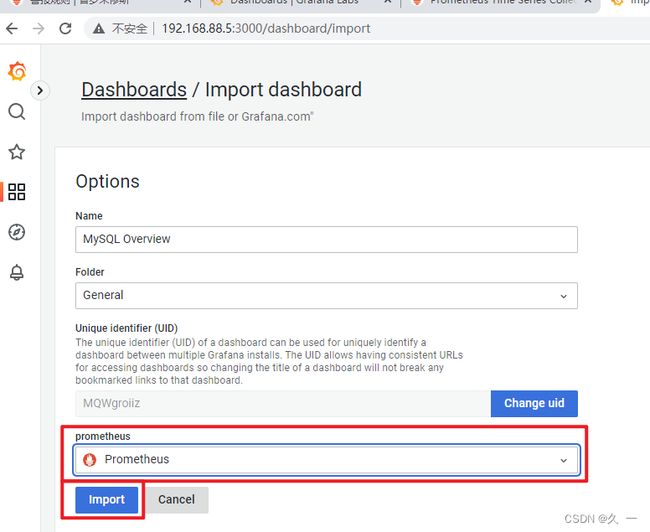
- 导入主机监控模板。
监控MySQL数据库
配置MySQL
[root@web1 ~]# yum install -y mysql-server
[root@web1 ~]# systemctl enable mysqld --now
[root@web1 ~]# mysql
mysql> create user dbuser1@localhost identified by '123456';
mysql> grant all privileges on *.* to dbuser1@localhost;
mysql> quit
配置mysql exporter
配置mysql exporter
# 1. 安装
[root@prometheus ~]# scp prometheus_soft/mysqld_exporter-0.14.0.linux-amd64.tar.gz 192.168.88.100:/root/
[root@web1 ~]# tar xf mysqld_exporter-0.14.0.linux-amd64.tar.gz
[root@web1 ~]# mv mysqld_exporter-0.14.0.linux-amd64 /usr/local/mysqld_exporter

# 2. 编写用于连接mysql服务的配置文件
[root@web1 ~]# vim /usr/local/mysqld_exporter/.my.cnf
[client]
host=127.0.0.1
port=3306
user=dbuser1
password=123456

# 3. 创建service文件
[root@web1 ~]# vim /usr/lib/systemd/system/mysqld_exporter.service
[Unit]
Description=mysqld_exporter
After=network.target

[Service]
ExecStart=/usr/local/mysqld_exporter/mysqld_exporter \
--config.my-cnf=/usr/local/mysqld_exporter/.my.cnf

[Install]
WantedBy=multi-user.target

[root@web1 ~]# systemctl daemon-reload
[root@web1 ~]# systemctl enable mysqld_exporter.service --now
配置prometheus监控mysql
- 修改配置文件,启动服务
# 1. 在配置文件中追加内容
[root@prometheus ~]# vim /usr/local/prometheus/prometheus.yml
...略...
  - job_name: "mysql"
    static_configs:
      - targets: ["192.168.88.100:9104"]

# 2. 重启服务
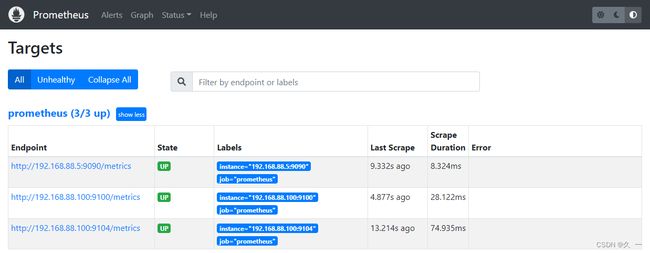
[root@prometheus ~]# systemctl restart prometheus.service - 查看状态
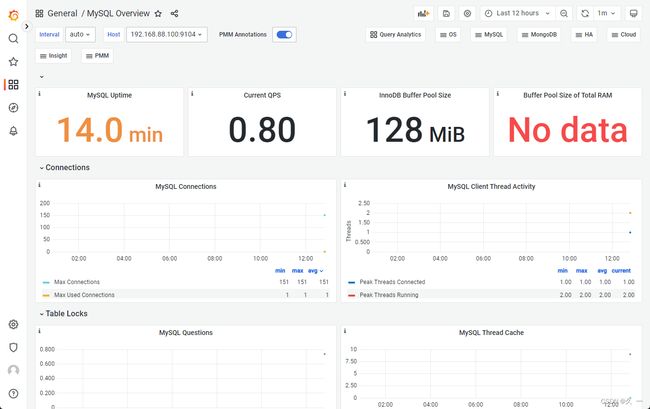
- 在Grafana中展示数据
自动发现机制
概述
- 自动发现是指Prometheus自动对节点进行监控,不需要手动一个一个去添加,和Zabbix的自动发现、自动注册一个道理
- Prometheus有多种自动发现发现,比如
file_sd_configs基于文件自动发现、基于K8S自动发现、基于openstack自动发现、基于consul自动发现等。
基于文件自动发现
file_sd_configs实现文件级别的自动发现- 使用文件自动发现功能后,Prometheus会定期检查配置文件是否有更新
- 如果有更新的话就将新加入的节点接入监控,服务端无需重启服务
修改Prometheus使用自动发现
- 修改Prometheus
# 1. 备份现有配置文件
[root@prometheus ~]# cp /usr/local/prometheus/prometheus.yml ~

# 2. 修改配置文件,删除静态配置,添加自动发现配置
[root@prometheus ~]# vim /usr/local/prometheus/prometheus.yml
# 将scrape_configs及以下内容修改为:
 21 scrape_configs:
 22   - job_name: "prometheus"
 23     file_sd_configs:
 24       - refresh_interval: 120s
 25         files:
 26           - /usr/local/prometheus/sd_config/*.yml

 # 3. 重启服务
[root@prometheus ~]# systemctl restart prometheus.service - web中将没有任何监控项目
- 创建自动发现规则文件
[root@prometheus ~]# mkdir /usr/local/prometheus/sd_config
[root@prometheus ~]# vim /usr/local/prometheus/sd_config/discovery.yml
- targets:
    - 192.168.88.5:9090
    - 192.168.88.100:9100
- 192.168.88.100:9104- 大概2分钟之后,刷新target web页面
配置web2接受Prometheus监控
- 将web1的node exporter拷贝到web2
[root@web1 ~]# scp -r /usr/local/node_exporter 192.168.88.200:/usr/local/
[root@web1 ~]# scp /usr/lib/systemd/system/node_exporter.service 192.168.88.200:/usr/lib/systemd/system/- 启服务
[root@web2 ~]# systemctl daemon-reload
[root@web2 ~]# systemctl enable node_exporter.service --now- 修改自动发现文件
[root@prometheus ~]# vim /usr/local/prometheus/sd_config/discovery.yml
- targets:
    - 192.168.88.5:9090
    - 192.168.88.100:9100
    - 192.168.88.100:9104
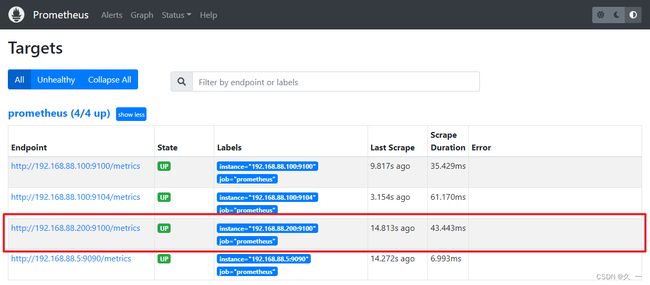
- 192.168.88.200:9100- 大概2分钟之后,刷新target web页面
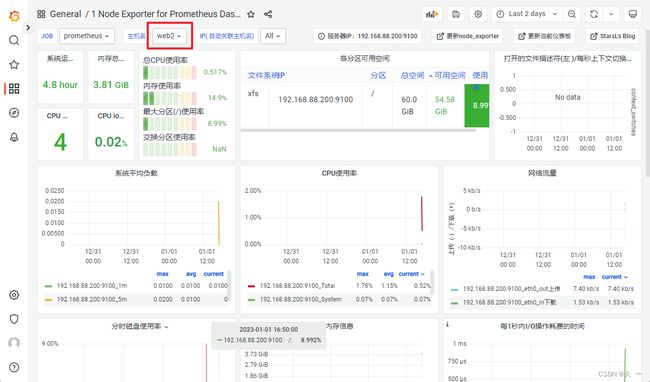
- 在Grafana上查看结果
Alertmanager
概述
- Prometheus服务器中的告警规则向Alertmanager发送告警。然后,Alertmanager管理这些告警,包括静默、抑制、分组以及通过电子邮件、即时消息系统和聊天平台等方法发出通知。
-
设置告警和通知的主要步骤是:
- 设置和配置Alertmanager
- 配置Prometheus与Alertmanager对接
- 在普罗米修斯中创建告警规则
-
在Prometheus中一条告警规则主要由以下几部分组成:
- 告警名称:用户需要为告警规则命名
- 告警规则:告警规则实际上主要由PromQL进行定义,其实际意义是当表达式(PromQL)查询结果持续多长时间(During)后出发告警
Alertmanager特性
- Alertmanager处理客户端应用程序(如Prometheus服务器)发送的警报。它负责重复数据删除、分组,并将其路由到正确的接收方集成
- 分组:分组将性质相似的警报分类到单个通知中。这在较大的停机期间特别有用,此时许多系统同时发生故障,数百到数千个警报可能同时发出。
- 抑制:抑制是当某一告警发出后,可以停止重复发送由此告警引发的其它告警的机制。
- 静默提供了一个简单的机制可以快速根据标签对告警进行静默处理。如果接收到的告警符合静默的配置, Alertmanager则不会发送告警通知。静默设置需要在Alertmanager的Web页面上进行设置。
部署Alertmanager
部署
- 解压即部署
# 1. 解压
[root@prometheus ~]# cd prometheus_soft/
[root@prometheus prometheus_soft]# tar xf alertmanager-0.25.0.linux-amd64.tar.gz
[root@prometheus prometheus_soft]# mv alertmanager-0.25.0.linux-amd64 /usr/local/alertmanager

# 2. 编写服务文件并启动
[root@prometheus prometheus_soft]# vim /usr/lib/systemd/system/alertmanager.service
[Unit]
Description=alertmanager System

[Service]
ExecStart=/usr/local/alertmanager/alertmanager \
--config.file=/usr/local/alertmanager/alertmanager.yml

[Install]
WantedBy=multi-user.target

[root@prometheus ~]# systemctl daemon-reload
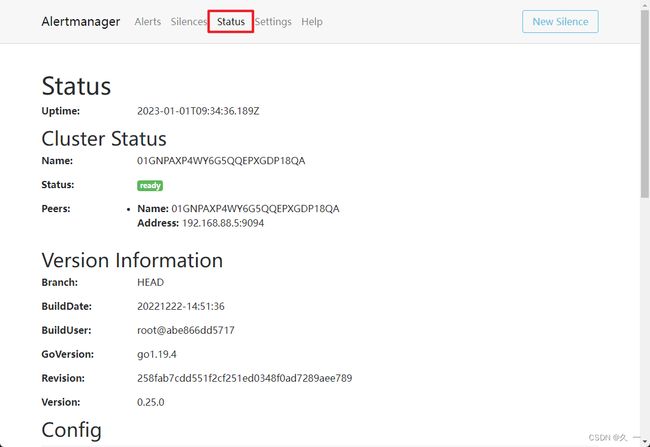
[root@prometheus ~]# systemctl enable alertmanager.service --now- 访问http://192.168.88.5:9093可以访问web配置页面
配置文件
-
Alertmanager的配置主要包含两个部分:路由(route)以及接收器(receivers)。所有的告警信息都会从配置中的顶级路由(route)进入路由树,根据路由规则将告警信息发送给相应的接收器。
-
在Alertmanager中可以定义一组接收器,比如可以按照角色(比如系统运维,数据库管理员)来划分多个接收器。接收器可以关联邮件,Slack以及其它方式接收告警信息。
-
目前配置文件中只设置了一个顶级路由route并且定义的接收器为default-receiver。因此,所有的告警都会发送给default-receiver。
-
因此在Alertmanager配置中一般会包含以下几个主要部分:
- 全局配置(global):用于定义一些全局的公共参数,如全局的SMTP配置
- 模板(templates):用于定义告警通知时的模板,如HTML模板,邮件模板等
- 告警路由(route):根据标签匹配,确定当前告警应该如何处理
- 接收器(receivers):接收器是一个抽象的概念,它可以是一个邮箱也可以是微信,Slack或者Webhook 等,接收器一般配合告警路由使用
- 抑制规则(inhibit_rules):合理设置抑制规则可以减少垃圾告警的产生
Prometheus与Alertmanager对接
- 编辑Prometheus配置文件,修改alerting配置
[root@prometheus ~]# vim /usr/local/prometheus/prometheus.yml
...略...
  8 alerting:
  9   alertmanagers:
 10     - static_configs:
 11         - targets:
 12           - localhost:9093
 ...略...
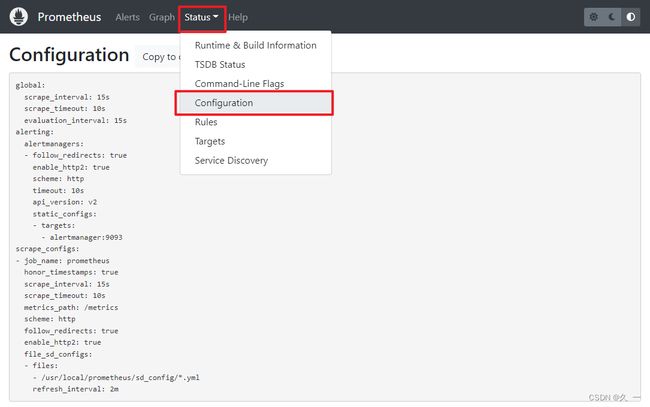
[root@prometheus ~]# systemctl restart prometheus.service - 访问:http://192.168.88.5:9090/config,查看配置是否生效
配置Alertmanager通过邮件发送告警
# 1. 备份配置文件
[root@prometheus ~]# cp /usr/local/alertmanager/alertmanager.yml ~

# 2. 修改配置文件
[root@prometheus ~]# vim /usr/local/alertmanager/alertmanager.yml
global:
  smtp_from: '[email protected]'      # 发件人地址
  smtp_smarthost: 'localhost:25'   # 邮件服务器地址
  smtp_require_tls: false       # 是否使用TLS安全连接
route:
  group_by: ['alertname']
  group_wait: 30s
  group_interval: 5m
  repeat_interval: 1h
  receiver: 'default-receiver'  # 接收器
receivers:
  - name: 'default-receiver'    # 配置接收器为邮件
    email_configs:
      - to: '[email protected]'
inhibit_rules:
  - source_match:
      severity: 'critical'
    target_match:
      severity: 'warning'
    equal: ['alertname', 'dev', 'instance']

# 3. 定义告警规则
[root@prometheus ~]# mkdir /usr/local/prometheus/rules
[root@prometheus ~]# vim /usr/local/prometheus/rules/hoststats-alert.rules
groups:
- name: example
  rules:

  - alert: InstanceDown
    expr: up == 0
    for: 5m
    labels:
      severity: warn
    annotations:
      summary: "Instance {{ $labels.instance }} down"
      description: "{{ $labels.instance }} of job {{ $labels.job }} has been down for more than 5 minutes."

  - alert: hostMemUsageAlert
    expr: (node_memory_MemTotal - node_memory_MemAvailable)/node_memory_MemTotal > 0.85
    for: 1m
    labels:
      severity: warn
    annotations:
      summary: "Instance {{ $labels.instance }} MEM usgae high"

# 4. 在Prometheus中声明规则文件位置
[root@prometheus ~]# vim /usr/local/prometheus/prometheus.yml
...略...
 15 rule_files:
 16   - /usr/local/prometheus/rules/*.rules
...略...

# 5. 重启服务
[root@prometheus ~]# systemctl restart alertmanager.service
[root@prometheus ~]# systemctl restart prometheus.service

# 6. 安装并启动邮件服务
[root@prometheus ~]# yum install -y postfix mailx
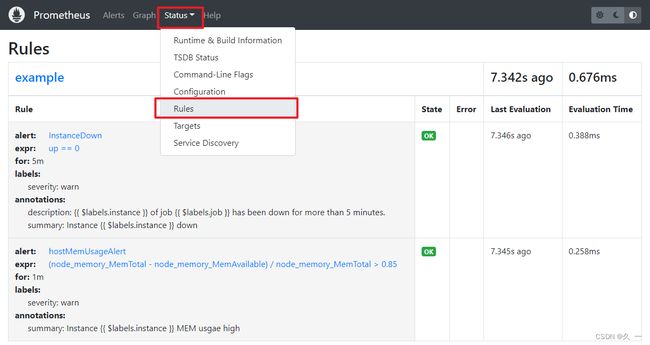
[root@prometheus ~]# systemctl enable postfix --now- 查看加载的规则文件
- 测试告警
# 1. 将web1关机
[root@web1 ~]# shutdown -h now

# 2. 查看邮件
[root@prometheus ~]# mail
>N 1 [email protected] Sun Jan 1 18:59 227/10404 "[FIRING:1] InstanceDown (192.168.88.200:9100 prometheus warn)"将告警邮件内容从【】这一行到【
