rsync gitlab svn
文章目录
- rsync
-
- 1. 简介
- 2. 特性
- 3. rsync命令
- 4.常用选项
- 5.rsync+inotify
- gitlab
-
- gitlab介绍
- gitlab部署
- gitlab管理
-
- 用户
- 组
- 权限
- 项目
- svn
-
- 简介
- 主要功能
- 安装SVN
rsync
1. 简介
rsync是linux系统下的数据镜像备份工具。使用快速增量备份工具Remote Sync可以远程同步,支持本地复制,或者与其他SSH、rsync主机同步。
2. 特性
rsync支持很多特性:
- 可以镜像保存整个目录树和文件系统
- 可以很容易做到保持原来文件的权限、时间、软硬链接等等
- 无须特殊权限即可安装
- 快速:第一次同步时rsync会复制全部内容,但在下一次只传输修改过的文件。rsync在传输
- 数据的过程中可以实行压缩及解压缩操作,因此可以使用更少的带宽
- 安全:可以使用scp、ssh等方式来传输文件,当然也可以通过直接的socket连接
- 支持匿名传输,以方便进行网站镜像
3. rsync命令
本地使用
rsync [OPTION]… SRC DEST
[root@localhost opt]# ls
123
[root@localhost opt]# rsync -a 123 12
[root@localhost opt]# ll
总用量 0
-rw-r--r--. 1 root root 0 10月 11 04:05 12
-rw-r--r--. 1 root root 0 10月 11 04:05 123
通过远程shell使用推送文件
rsync [OPTION]… SRC [USER@]HOST:DEST
[root@localhost opt]# rsync -avz 123 [email protected]:/opt/123
The authenticity of host '192.168.101.110 (192.168.101.110)' can't be established.
ECDSA key fingerprint is SHA256:XNANn9WATgDlDr83K5XheE3dU+UweJ+VzFL6f/5PO78.
Are you sure you want to continue connecting (yes/no/[fingerprint])? yes
Warning: Permanently added '192.168.101.110' (ECDSA) to the list of known hosts.
[email protected]'s password:
sending incremental file list
123

sent 81 bytes  received 35 bytes  17.85 bytes/sec
total size is 0  speedup is 0.0
去对端查看
[root@localhost ~]# ls /opt/
123
通过远程shell使用拉取文件
[root@localhost opt]# ls
12  123
[root@localhost opt]# rsync -avz [email protected]:/etc/yum.repos.d .
[email protected]'s password:
receiving incremental file list
yum.repos.d/
yum.repos.d/CentOS-Stream-AppStream.repo
yum.repos.d/CentOS-Stream-BaseOS.repo
yum.repos.d/CentOS-Stream-Debuginfo.repo
yum.repos.d/CentOS-Stream-Extras.repo
yum.repos.d/CentOS-Stream-HighAvailability.repo
yum.repos.d/CentOS-Stream-Media.repo
yum.repos.d/CentOS-Stream-PowerTools.repo
yum.repos.d/CentOS-Stream-RealTime.repo

sent 180 bytes  received 3,494 bytes  1,469.60 bytes/sec
total size is 5,263  speedup is 1.43
[root@localhost opt]# ls
12  123  yum.repos.d
4.常用选项
-a, --archive //归档
-v, --verbose //啰嗦模式
-q, --quiet //静默模式
-r, --recursive //递归
-p, --perms //保持原有的权限属性
-z, --compress //在传输时压缩,节省带宽,加快传输速度
–delete //在源服务器上做的删除操作也会在目标服务器上同步
5.rsync+inotify
rsync与传统的cp、tar备份方式相比,rsync具有安全性高、备份迅速、支持增量备份等优点,通过rsync可以解决对实时性要求不高的数据备份需求,例如定期的备份文件服务器数据到远端服务器,对本地磁盘定期做数据镜像等。
随着应用系统规模的不断扩大,对数据的安全性和可靠性也提出的更好的要求,rsync在高端业务系统中也逐渐暴露出了很多不足,首先,rsync同步数据时,需要扫描所有文件后进行比对,进行差量传输。如果文件数量达到了百万甚至千万量级,扫描所有文件将是非常耗时的。而且正在发生变化的往往是其中很少的一部分,这是非常低效的方式。其次,rsync不能实时的去监测、同步数据,虽然它可以通过linux守护进程的方式进行触发同步,但是两次触发动作一定会有时间差,这样就导致了服务端和客户端数据可能出现不一致,无法在应用故障时完全的恢复数据。基于以上原因,rsync+inotify组合出现了!
Inotify是一种强大的、细粒度的、异步的文件系统事件监控机制,linux内核从2.6.13起,加入了Inotify支持,通过Inotify可以监控文件系统中添加、删除,修改、移动等各种细微事件,利用这个内核接口,第三方软件就可以监控文件系统下文件的各种变化情况,而inotify-tools就是这样的一个第三方软件。
在前面有讲到,rsync可以实现触发式的文件同步,但是通过crontab守护进程方式进行触发,同步的数据和实际数据会有差异,而inotify可以监控文件系统的各种变化,当文件有任何变动时,就触发rsync同步,这样刚好解决了同步数据的实时性问题。
环境说明:
| 服务器类型 | IP地址 | 应用 |
|---|---|---|
| 源服务器 | 192.168.101.110 | rsync inotify-tools 脚本 |
| 目标服务器 | 192.168.101.200 | rsync |
需求:
- 把源服务器上/etc目录实时同步到目标服务器的/tmp/下
在目标服务器上做以下操作:
## 关闭防火墙
[root@localhost opt]# systemctl disable firewalld.service
Removed /etc/systemd/system/multi-user.target.wants/firewalld.service.
Removed /etc/systemd/system/dbus-org.fedoraproject.FirewallD1.service.
[root@localhost opt]# systemctl stop firewalld.service
[root@localhost opt]# setenforce 0
## 安装rsync
[root@localhost opt]# yum -y install rsync rsync-daemon
## 设置rsync配置文件
[root@localhost ~]# vim /etc/rsync.conf
log file = /var/log/rsyncd.log    # 日志文件位置,启动rsync后自动产生这个文件,无需提前创建
pidfile = /var/run/rsyncd.pid     # pid文件的存放位置
lock file = /var/run/rsync.lock   # 支持max connections参数的锁文件
secrets file = /etc/rsync.pass    # 用户认证配置文件,里面保存用户名称和密码,必须手动创建这个文件

[etc_from_client]     # 自定义同步名称
path = /tmp/          # rsync服务端数据存放路径,客户端的数据将同步至此目录
comment = sync etc from client
uid = root        # 设置rsync运行权限为root
gid = root        # 设置rsync运行权限为root
port = 873        # 默认端口
ignore errors     # 表示出现错误忽略错误
use chroot = no       # 默认为true,修改为no,增加对目录文件软连接的备份
read only = no    # 设置rsync服务端为读写权限
list = no     # 不显示rsync服务端资源列表
max connections = 200     # 最大连接数
timeout = 600     # 设置超时时间
auth users = admin        # 执行数据同步的用户名,可以设置多个,用英文状态下逗号隔开
## 创建用户认证文件
[root@localhost ~]# vim /etc/rsync.pass
admin:123456
## 设置文件权限
[root@localhost ~]# chmod 600 /etc/rsync*
## 启动rsync服务并设置开机自启动
[root@localhost ~]# systemctl enable --now rsyncd
Created symlink /etc/systemd/system/multi-user.target.wants/rsyncd.service → /usr/lib/systemd/system/rsyncd.service.
在源服务器上做以下操作:
##关闭防火墙
```[root@localhost ~]# systemctl disable firewalld.service
Removed /etc/systemd/system/multi-user.target.wants/firewalld.service.
Removed /etc/systemd/system/dbus-org.fedoraproject.FirewallD1.service.
[root@localhost ~]# systemctl stop firewalld.service
[root@localhost ~]# setenforce 0
##安装epel源
[root@localhost ~]# yum -y install epel-release
##安装服务
[root@localhost ~]# yum -y install inotify-tools
##创建认证密码文件
[root@localhost ~]# cat /etc/rsync.pass
123456
##设置文件权限,只设置文件所有者具有读取、写入权限即可
[root@localhost ~]# chmod 600 /etc/rsync.pass
##在源服务器上创建测试目录,然后在源服务器运行以下命令
[root@localhost ~]# mkdir -p etc/test
[root@localhost ~]#  rsync -avH --port 873 --progress --delete /root/etc/ [email protected]::etc_from_client --password-file=/etc/rsync.pass
sending incremental file list
deleting systemd-private-76ee40b268504de4bfbb8accbad9afe3-rtkit-daemon.service-38Oo7g/tmp/
deleting systemd-private-76ee40b268504de4bfbb8accbad9afe3-rtkit-daemon.service-38Oo7g/
deleting systemd-private-76ee40b268504de4bfbb8accbad9afe3-colord.service-qRWtqo/tmp/
deleting systemd-private-76ee40b268504de4bfbb8accbad9afe3-colord.service-qRWtqo/
deleting systemd-private-76ee40b268504de4bfbb8accbad9afe3-chronyd.service-HquHA7/tmp/
deleting systemd-private-76ee40b268504de4bfbb8accbad9afe3-chronyd.service-HquHA7/
deleting systemd-private-76ee40b268504de4bfbb8accbad9afe3-ModemManager.service-sNi99G/tmp/
deleting systemd-private-76ee40b268504de4bfbb8accbad9afe3-ModemManager.service-sNi99G/
deleting .esd-0/socket
deleting .esd-0/
deleting .X11-unix/X1024
deleting .X11-unix/X0
deleting .X11-unix/
deleting .ICE-unix/6278
deleting .ICE-unix/5929
deleting .ICE-unix/
./
test/

sent 77 bytes  received 796 bytes  1,746.00 bytes/sec
total size is 0  speedup is 0.00
##运行完成后,在目标服务器上查看,在/tmp目录下有test目录,说明数据同步成功
[root@localhost ~]# ls /tmp/
test

##写同步脚本
[root@localhost ~]# mkdir /script
[root@localhost ~]# cd /script/
[root@localhost script]# touch inotify.sh
[root@localhost script]# chmod +x inotify.sh
[root@localhost script]# vim inotify.sh
host=192.168.101.200      # 目标服务器的ip(备份服务器)
src=/etc        # 在源服务器上所要监控的备份目录(此处可以自定义,但是要保证存在)
des=etc_from_client     # 自定义的模块名,需要与目标服务器上定义的同步名称一致
password=/etc/rsync.pass        # 执行数据同步的密码文件
user=admin          # 执行数据同步的用户名
inotifywait=/usr/bin/inotifywait

$inotifywait -mrq --timefmt '%Y%m%d %H:%M' --format '%T %w%f%e' -e modify,delete,create,attrib $src \
| while read files;do
    rsync -avzP --delete  --timeout=100 --password-file=${password} $src $user@$host::$des
    echo "${files} was rsynced" >>/tmp/rsync.log 2>&1
done
##启动脚本
[root@localhost ~]# nohup bash /scripts/inotify.sh &
[1] 86871
[root@localhost ~]# nohup: ignoring input and appending output to ‘nohup.out’

[root@localhost ~]# ps -ef|grep inotify
root      86871   2143  0 14:52 pts/0    00:00:00 bash /scripts/inotify.sh
root      86872  86871  0 14:52 pts/0    00:00:00 /usr/bin/inotifywait -mrq --timefmt %Y%m%d %H:%M --format %T %w%f%e -e modify,delete,create,attrib /etc
root      86873  86871  0 14:52 pts/0    00:00:00 bash /scripts/inotify.sh
root      86875   2143  0 14:52 pts/0    00:00:00 grep --color=auto inotify
##在源服务器上生成一个新文件
[root@localhost ~]# touch /etc/234
[root@localhost ~]# echo 'hello' > /etc/234
##查看inotify生成的日志
[root@localhost ~]# tail /tmp/rsync.log
20211011 07:39 /etc/234CREATE was rsynced
20211011 07:39 /etc/234ATTRIB was rsynced
20211011 07:39 /etc/234MODIFY was rsynced
设置脚本开机自动启动:
[root@localhost ~]# chmod +x /etc/rc.d/rc.local
[root@localhost ~]# ll /etc/rc.d/rc.local
-rwxr-xr-x. 1 root root 474 12月  1 2020 /etc/rc.d/rc.local
[root@localhost ~]# echo 'nohup /bin/bash /scripts/inotify.sh' >> /etc/rc.d/rc.local
[root@localhost ~]# tail /etc/rc.d/rc.local
#
# In contrast to previous versions due to parallel execution during boot
# this script will NOT be run after all other services.
#
# Please note that you must run 'chmod +x /etc/rc.d/rc.local' to ensure
# that this script will be executed during boot.

touch /var/lock/subsys/local

nohup /bin/bash /scripts/inotify.sh
gitlab
gitlab介绍
版本控制是指对软件开发过程中各种程序代码、配置文件及说明文档等文件变更的管理,是软件配置管理的核心思想之一。
版本控制最主要的功能就是追踪文件的变更。它将什么时候、什么人更改了文件的什么内容等信息忠实地了记录下来。每一次文件的改变,文件的版本号都将增加。除了记录版本变更外,版本控制的另一个重要功能是并行开发。软件开发往往是多人协同作业,版本控制可以有效地解决版本的同步以及不同开发者之间的开发通信问题,提高协同开发的效率。并行开发中最常见的不同版本软件的错误(Bug)修正问题也可以通过版本控制中分支与合并的方法有效地解决。
具体来说,在每一项开发任务中,都需要首先设定开发基线,确定各个配置项的开发初始版本,在开发过程中,开发人员基于开发基线的版本,开发出所需的目标版本。当发生需求变更时,通过对变更的评估,确定变更的影响范围,对被影响的配置项的版本进行修改,根据变更的性质使配置项的版本树继续延伸或产生新的分支,形成新的目标版本,而对于不受变更影响的配置项则不应发产生变动。同时,应能够将变更所产生的对版本的影响进行记录和跟踪。必要时还可以回退到以前的版本。例如当开发需求或需求变更被取消时,就需要有能力将版本回退到开发基线版本。在曾经出现过的季度升级包拆包和重新组包的过程中,其实就是将部分配置项的版本回退到开发基线,将对应不同需求的不同分支重新组合归并,形成新的升级包版本。
版本控制是软件配置管理的核心功能。所有置于配置库中的元素都应自动予以版本的标识,并保证版本命名的唯一性。版本在生成过程中,自动依照设定的使用模型自动分支、演进。除了系统自动记录的版本信息以外,为了配合软件开发流程的各个阶段。还需要定义、收集一些元数据来记录版本的辅助信息和规范开发流程,并为今后对软件过程的度量做好准备。当然如果选用的工具支持,这些辅助数据将能直接统计出过程数据,从而方便软件过程改进活动的进行。对于配置库中的各个基线控制项,应该根据其基线的位置和状态来设置相应的访问权限。一般来说,对于基线版本之前的各个版本都应处于被锁定的状态,如需要对它们进行变更,则应按照变更控制的流程来进行操作。
常用的版本控制工具:
- gitlab
- subversion
gitlab部署
##安装依赖包
[root@localhost ~]# yum -y install epel-release
[root@localhost ~]# yum -y install curl openssh-server openssh-clients postfix cronie policycoreutils-python-utils git
##设置postfix开机自启并启动
[root@localhost ~]# systemctl enable --now postfix.service
Created symlink /etc/systemd/system/multi-user.target.wants/postfix.service → /usr/lib/systemd/system/postfix.service.
[root@localhost ~]# ls /usr/src/
gitlab-ce-14.3.2-ce.0.el8.x86_64.rpm
##安装gitlab
[root@localhost ~]# rpm -ivh /usr/src/gitlab-ce-14.3.2-ce.0.el8.x86_64.rpm
警告:/usr/src/gitlab-ce-14.3.2-ce.0.el8.x86_64.rpm: 头V4 RSA/SHA256 Signature, 密钥 ID f27eab47: NOKEY
Verifying... ################################# [100%]
准备中... ################################# [100%]
正在升级/安装...
1:gitlab-ce-14.3.2-ce.0.el8 ################################# [100%]
It looks like GitLab has not been configured yet; skipping the upgrade script.
*. *.
*** ***
***** *****
.****** *******
******** ********
,,,,,,,,,***********,,,,,,,,,
,,,,,,,,,,,*********,,,,,,,,,,,
.,,,,,,,,,,,*******,,,,,,,,,,,,
,,,,,,,,,*****,,,,,,,,,.
,,,,,,,****,,,,,,
.,,,***,,,,
,*,.
_______ __ __ __
/ ____(_) /_/ / ____ _/ /_
/ / __/ / __/ / / __ `/ __ \
/ /_/ / / /_/ /___/ /_/ / /_/ /
\____/_/\__/_____/\__,_/_.___/
Thank you for installing GitLab!
GitLab was unable to detect a valid hostname for your instance.
Please configure a URL for your GitLab instance by setting `external_url`
configuration in /etc/gitlab/gitlab.rb file.
Then, you can start your GitLab instance by running the following command:
sudo gitlab-ctl reconfigure
For a comprehensive list of configuration options please see the Omnibus GitLab readme
https://gitlab.com/gitlab-org/omnibus-gitlab/blob/master/README.md
Help us improve the installation experience, let us know how we did with a 1 minute survey:
https://gitlab.fra1.qualtrics.com/jfe/form/SV_6kVqZANThUQ1bZb?installation=omnibus&release=14-3
##修改配置文件
[root@localhost ~]# vim /etc/gitlab/gitlab.rb
...... //此处为省略内容
external_url 'http://192.168.101.200' //将此处设为gitlab的服务器ip地址亦或域名
...... //此处为省略内容
##重载配置文件并重启gitlab
[root@localhost ~]# gitlab-ctl reconfigure
[root@localhost ~]# gitlab-ctl restart
ok: run: alertmanager: (pid 139025) 1s
ok: run: gitaly: (pid 139066) 0s
ok: run: gitlab-exporter: (pid 139084) 0s
ok: run: gitlab-workhorse: (pid 139089) 1s
ok: run: grafana: (pid 139175) 0s
ok: run: logrotate: (pid 139189) 1s
ok: run: nginx: (pid 139196) 0s
ok: run: node-exporter: (pid 139230) 1s
ok: run: postgres-exporter: (pid 139240) 0s
ok: run: postgresql: (pid 139280) 0s
ok: run: prometheus: (pid 139317) 1s
ok: run: puma: (pid 139394) 0s
ok: run: redis: (pid 139400) 1s
ok: run: redis-exporter: (pid 139406) 0s
ok: run: sidekiq: (pid 139595) 0s
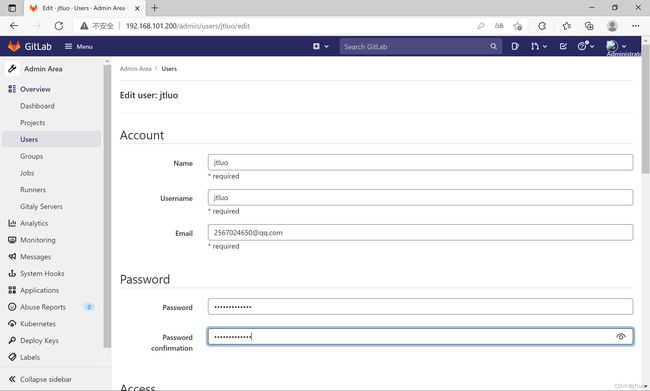
##破解管理员密码
[root@localhost ~]# gitlab-rails console -e production
--------------------------------------------------------------------------------
Ruby: ruby 2.7.4p191 (2021-07-07 revision a21a3b7d23) [x86_64-linux]
GitLab: 14.3.2 (92acfb1b8a9) FOSS
GitLab Shell: 13.21.1
PostgreSQL: 12.7
--------------------------------------------------------------------------------
Loading production environment (Rails 6.1.3.2)
irb(main):001:0> user = User.where(id: 1).first
=> #
irb(main):002:0> user.password = '123456'
=> "123456"
irb(main):003:0> user.password_confirmation = '123456'
=> "123456"
irb(main):004:0> user.save!
Enqueued ActionMailer::MailDeliveryJob (Job ID: 317f5655-bfaa-485d-a0b3-4e1f6bcd582c) to Sidekiq(mailers) with arguments: "DeviseMailer", "password_change", "deliver_now", {:args=>[#>]}
=> true
irb(main):012:0> exit
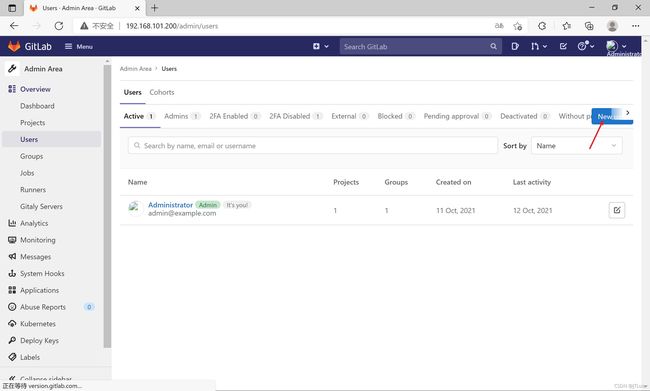
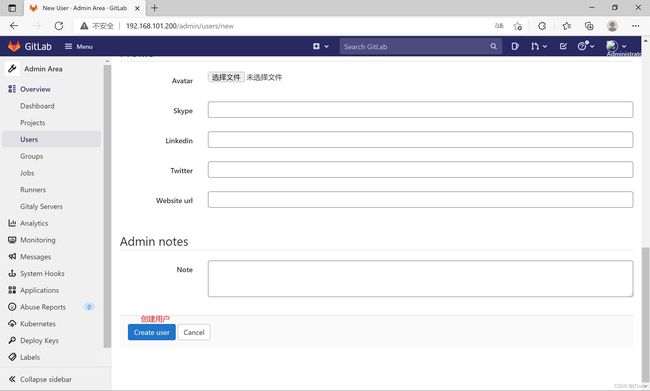
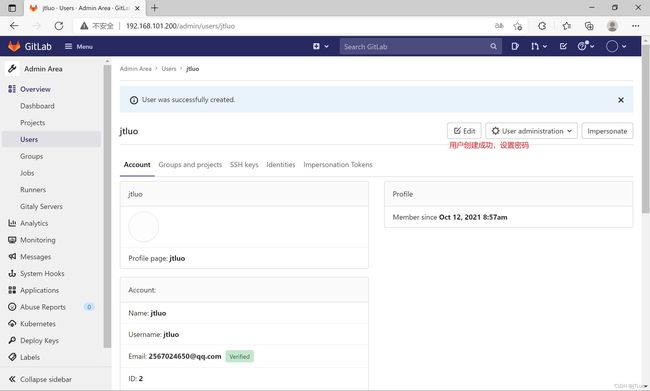
gitlab管理

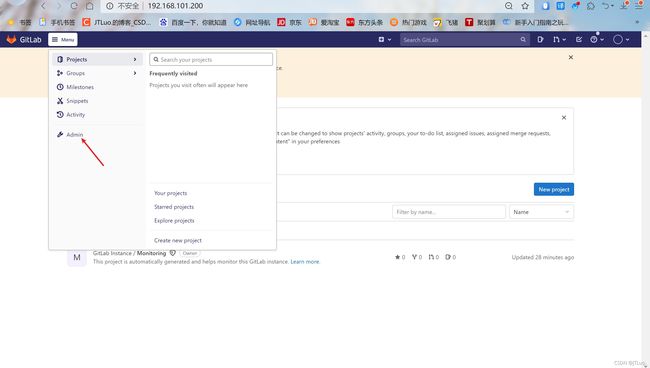

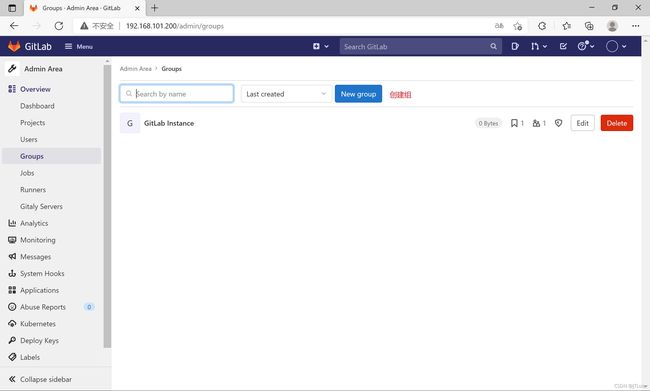
用户


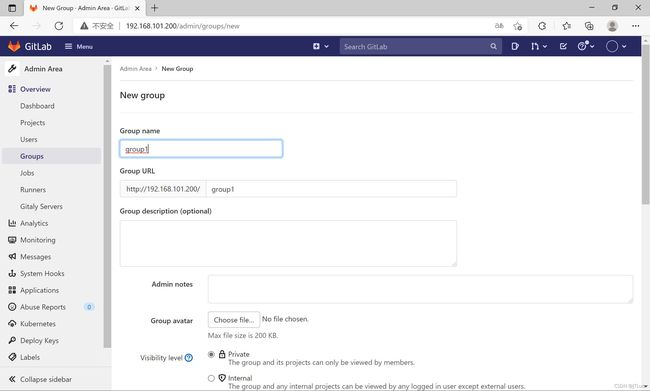
组
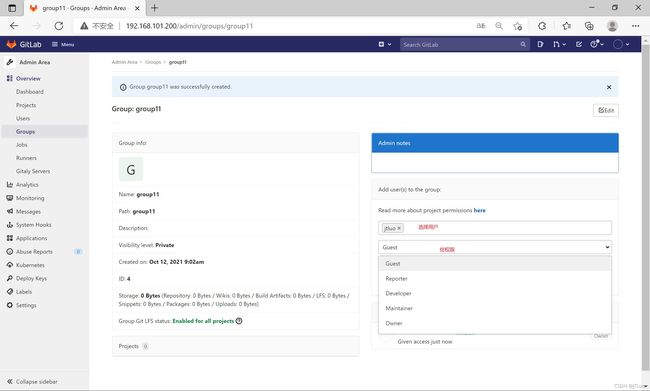
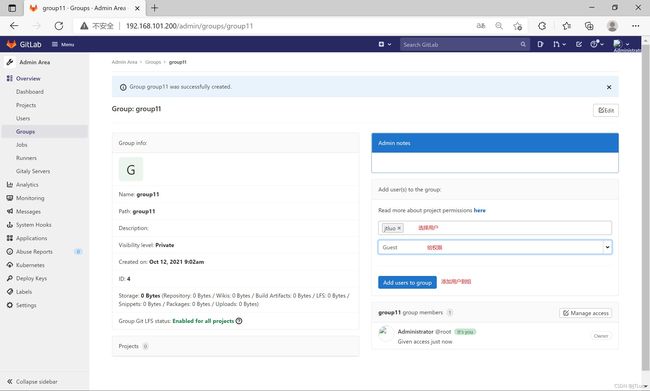
权限
成员权限:
Guest:可以创建issue、发表评论,不能读写版本库
Reporter:可以克隆代码,不能提交,QA、PM可以赋予这个权限
Developer:可以克隆代码、开发、提交、push,RD可以赋予这个权限
Master:可以创建项目、添加tag、保护分支、添加项目成员、编辑项目,核心RD负责人可以赋予这个权限
Owner:可以设置项目访问权限 - Visibility Level、删除项目、迁移项目、管理组成员,开发组leader可以赋予这个权限
项目权限:
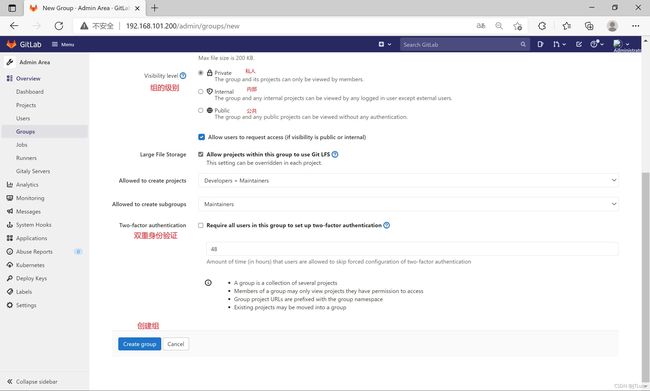
Gitlab中的组和项目有三种访问权限:Private、Internal、Public
Private:只有组成员才能看到
Internal:只要登录的用户就能看到
Public:所有人都能看到
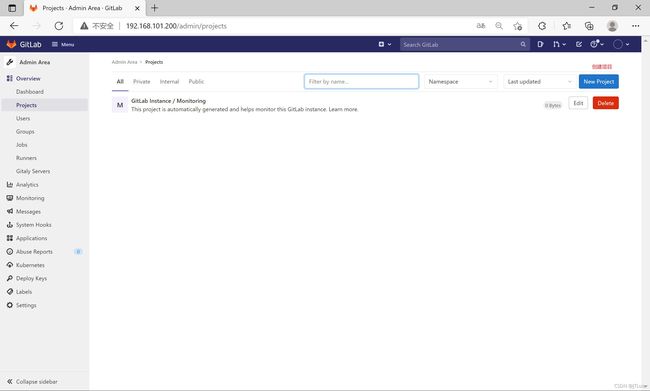
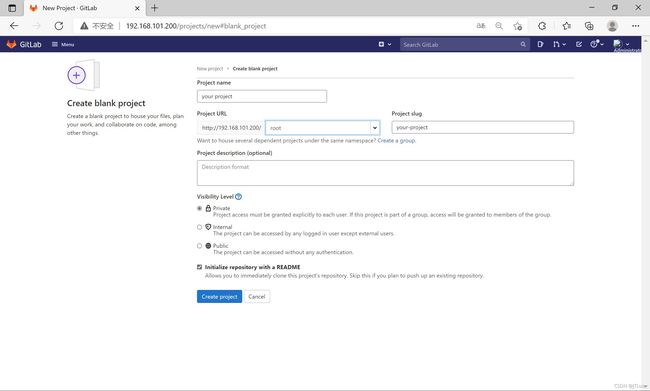
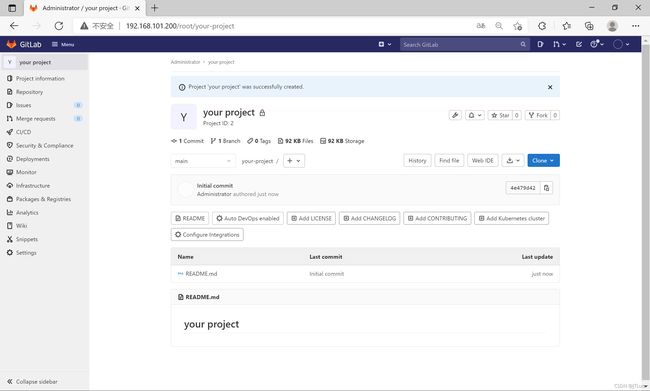
项目

[root@gitlab ~]# git config --global user.name "Administrator"
[root@gitlab ~]# git config --global user.email "[email protected]"

[root@localhost opt]# git clone http://192.168.101.200/root/you-project.git
正克隆到 'you-project'...
Username for 'http://192.168.101.200': root
Password for 'http://[email protected]':
warning: 您似乎克隆了一个空仓库。
[root@localhost opt]# ls
you-project
[root@localhost opt]# cd you-project/
[root@localhost you-project]# git switch -c main
切换到一个新分支 'main'
[root@localhost you-project]# touch README.md
[root@localhost you-project]# git add README.md
[root@localhost you-project]# git commit -m "add README"
[main(根提交) ca2ec56] add README
 1 file changed, 0 insertions(+), 0 deletions(-)
 create mode 100644 README.md
[root@localhost you-project]# git push -u origin main
Username for 'http://192.168.101.200': root
Password for 'http://[email protected]':
枚举对象: 3, 完成.
对象计数中: 100% (3/3), 完成.
写入对象中: 100% (3/3), 216 字节 | 216.00 KiB/s, 完成.
总共 3(差异 0),复用 0(差异 0),包复用 0
To http://192.168.240.40/root/you-project.git
 * [new branch]      main -> main
分支 'main' 设置为跟踪来自 'origin' 的远程分支 'main'。
svn
简介
SVN是Subversion的简称,是一个开放源代码的版本控制系统,相较于RCS、CVS,它采用了分支管理系统,它的设计目标就是取代CVS。互联网上很多版本控制服务已从CVS迁移到Subversion。说得简单一点SVN就是用于多个人共同开发同一个项目,共用资源的目的。
主要功能
1)目录版本控制
CVS 只能跟踪单个文件的历史, 不过 Subversion 实作了一个 “虚拟” 的版本控管文件系统, 能够依时间跟踪整个目录的变动。 目录和文件都能进行版本控制。
(2)真实的版本历史
自从CVS限制了文件的版本记录,CVS并不支持那些可能发生在文件上,但会影响所在目录内容的操作,如同复制和重命名。除此之外,在CVS里你不能用拥有同样名字但是没有继承老版本历史或者根本没有关系的文件替换一个已经纳入系统的文件。在Subversion中,你可以增加(add)、删除(delete)、复制(copy)和重命名(rename),无论是文件还是目录。所有的新加的文件都从一个新的、干净的版本开始。
(3)自动提交
一个提交动作,不是全部更新到了档案库中,就是不完全更新。这允许开发人员以逻辑区间建立并提交变动,以防止当部分提交成功时出现的问题。
(4)纳入版本控管的元数据
每一个文件与目录都附有一組属性关键字并和属性值相关联。你可以创建, 并儲存任何你想要的Key/Value对。 属性是随着时间来作版本控管的,就像文件內容一样。
(5)选择不同的网络层
Subversion 有抽象的档案库存取概念, 可以让人很容易地实作新的网络机制。 Subversion 可以作为一个扩展模块嵌入到Apache HTTP 服务器中。这个为Subversion提供了非常先进的稳定性和协同工作能力,除此之外还提供了许多重要功能: 举例来说, 有身份认证, 授权, 在线压缩, 以及文件库浏览等等。还有一个轻量级的独立Subversion服务器, 使用的是自定义的通信协议, 可以很容易地通过 ssh 以 tunnel 方式使用。
(6)一致的数据处理方式
Subversion 使用二进制差异算法来异表示文件的差异, 它对文字(人类可理解的)与二进制文件(人类无法理解的) 两类的文件都一视同仁。 这两类的文件都同样地以压缩形式储存在档案库中, 而且文件差异是以两个方向在网络上传输的。
(7)有效的分支(branch)与标签(tag)
在分支与标签上的消耗并不必一定要与项目大小成正比。 Subversion 建立分支与标签的方法, 就只是复制该项目, 使用的方法就类似于硬连接(hard-link)。 所以这些操作只会花费很小, 而且是固定的时间。
(8)Hackability
Subversion没有任何的历史包袱; 它主要是一群共用的 C 程序库, 具有定义完善的API。这使得 Subversion 便于维护, 并且可被其它应用程序与程序语言使用。
安装SVN
##安装
[root@localhost ~]# yum install -y subversion

##创建版本库
[root@localhost ~]# mkdir -p /data/svnroot/myproject

##版本库初始化
[root@localhost ~]# svnadmin create /data/svnroot/myproject
[root@localhost ~]# ll /data/svnroot/myproject/
总用量 8
drwxr-xr-x. 2 root root  76 10月 11 09:04 conf
drwxr-sr-x. 6 root root 233 10月 11 09:04 db
-r--r--r--. 1 root root   2 10月 11 09:04 format
drwxr-xr-x. 2 root root 231 10月 11 09:04 hooks
drwxr-xr-x. 2 root root  41 10月 11 09:04 locks
-rw-r--r--. 1 root root 246 10月 11 09:04 README.txt


配置用户及权限:
[root@yt-01 conf]# vim authz
[groups]
admins = yuntai,user1
# admin:组名
# yuntai,user1:两个用户
[/]                    // [/]:指定目录,“/”代表仓库的根目录,即/data/svnroot/myproject/
@admins = rw   //指定admins组所对应的权限
* = r                 //指定其他所有用户对应的权限
[myproject:/]
# myproject:项目名称,该方法适合SVN有多个项目(或有多个子项目)时使用
user1 = rw

配置用户密码:
[root@yt-01 conf]# vim passwd
[users]
yuntai = 123456
user1 = 123456
#为了提高安全性,真是环境要设置复杂密码

配置仓库文件:
[root@yt-01 conf]# vim svnserve.conf
[general]
anon-access = none
#指定匿名用户权限

auth-access = write
#指定认证用户权限

password-db = passwd
#指定用户密码文件

authz-db = authz
#指定用户权限文件

realm = /data/svnroot/myproject
#指定对用的仓库文件(绝对路径)

##进入配置文件目录
[root@localhost ~]# cd /data/svnroot/myproject/conf/
[root@localhost conf]# ls
authz  hooks-env.tmpl  passwd  svnserve.conf
#authz:控制权限 	#passwd:密码文件 	#svnserve.conf:仓库配置文件

##启动
[root@localhost ~]# svnserve -d -r /data/svnroot/
[root@localhost conf]# ps aux |grep svn
root      187610  0.0  0.0  92708   852 ?        Ss   09:11   0:00 svnserve -d -r /data/svnroot/
root      187877  0.0  0.0  12320   976 pts/0    S+   09:11   0:00 grep --color=auto svn
[root@localhost ~]# netstat -lntp |grep svn
tcp        0      0 0.0.0.0:3690            0.0.0.0:*               LISTEN      2309/svnserve
##安装
[root@localhost ~]#  yum install -y subversion

##创建测试目录
[root@localhost ~]# mkdir -p /home/svntest/
[root@localhost ~]# cd /home/svntest/
[root@localhost svntest]#  svn checkout svn://192.168.240.70/myproject --username=yuntai
svn: E170013: Unable to connect to a repository at URL 'svn://192.168.240.70/myproject'
svn: E220003: 认证配置无效