一文学懂ansible
目录
- 1. 文件模块
-
- 1.1 fetch
- 1.2 copy
- 1.3 file
- 1.4 blockinfile
- 1.5 lineinfile
- 1.6 find
- 1.7 replace
- 2. 命令模块
-
- 2.1 command
- 2.2 shell
- 2.3 script
- 3. 系统类模块
-
- 3.1 cron
- 3.2 service
- 3.3 user
- 3.4 group
- 4. 包管理模块
-
- 4.1 yum_repository
- 4.2 yum
- 5. playbook
-
- 5.1 handlers
- 5.2 tags
- 5.3 变量
-
- 5.3.1 setup模块
- 5.3.2 debug模块
- 5.3.3 注册变量
- 5.3.4 在终端提示输入信息并写入变量
- 5.3.5 执行剧本时传入变量
- 5.3.6 在清单文件中配置变量
- 5.3.7 内置变量hostvars
- 5.3.8 内置变量inventory_hostname
- 5.3.9 内置变量inventory_hostname_short
- 5.3.10 内置变量play_hosts
- 5.3.11 内置变量groups
- 5.3.12 内置变量group_names
- 5.3.13 内置变量inventory_dir
- 5.3.14 include_vars
- 6. 循环
-
- 6.1 with_items、with_list、with_flattened、with_together
- 6.2 with_cartesian、with_nested
- 6.3 with_indexed_items
- 6.4 with_sequence
- 6.5 with_random_choice
- 6.6 with_dict、with_subelements
- 6.7 wiht_file、with_fileglob
- 6.8 loop
- 7. 条件判断
-
- 7.1 when
- 7.2 tests
-
- 7.2.1 is exists 和 not is exists
- 7.2.2 判断变量(defined、undefined、none)
- 7.2.3 判断执行结果
- 7.2.4 判断路径
- 7.2.5 判读奇偶,整除
- 7.2.6 version
- 7.2.7 subset、superset
- 7.2.8 string
- 7.2.9 number
- 7.3 block
- 7.3 fail
- 7.4 failed_when
- 7.5 changed_when
- 8. 过滤器(filters)
-
- 8.1 字符串过滤器
- 8.2 数值过滤器
- 8.3 列表过滤器
- 8.4 变量未定义时相关操作的过滤器
- 8.5 json_query
- 8.6 quote
- 8.8 其它过滤器
- 9. lookup插件
- 10. include
- 11. include_tasks
- 12. jinja2模板
-
- 12.1 template
- 13. 角色
-
- 13.1 tasks
- 13.2 defaults
- 13.3 vars
- 13.4 templates
- 13.5 handlers
- 14. ansible-vault
-
- 14.1 encrypt (对文件加密)
- 14.2 decrypt (对文件解密)
- 14.3 加密时多文件进行标记
- 14.4 create
- 14.5 edit
- 14.6 view
- 14.7 rekey
- 14.8 encrypt_string
本文演示使用版本是 2.7
学习链接来自朱双印大神,以下链接直达:
https://www.zsythink.net/archives/tag/ansible/
1. 文件模块
1.1 fetch
从远程主机拷贝文件到本地
ansible-doc -s fetch 或者 ansible-doc fetch可以查看该模块的相关参数以及用法
ansible-doc -s fetch
- name: Fetch files from remote nodes
  fetch:
      dest:                  # (required) A directory to save the file into. For example, if the `dest' directory is `/backup' a `src' file named
                               `/etc/profile' on host `host.example.com', would be saved into
                               `/backup/host.example.com/etc/profile'. The host name is based on the inventory name.
      fail_on_missing:       # When set to `yes', the task will fail if the remote file cannot be read for any reason. Prior to Ansible 2.5, setting this
                               would only fail if the source file was missing. The default was changed to `yes' in Ansible
                               2.5.
      flat:                  # Allows you to override the default behavior of appending hostname/path/to/file to the destination. If `dest' ends with '/', it
                               will use the basename of the source file, similar to the copy module. This can be useful if
                               working with a single host, or if retrieving files that are uniquely named per host. If using
                               multiple hosts with the same filename, the file will be overwritten for each host.
      src:                   # (required) The file on the remote system to fetch. This `must' be a file, not a directory. Recursive fetching may be supported
                               in a later release.
      validate_checksum:     # Verify that the source and destination checksums match after the files are fetched.
示例
//从远程主机拷贝 hosts 文件到当前主机的当前路径
[root@master ~]# ansible A -m fetch -a "src=/etc/hosts dest=./"
node1 | CHANGED => {
    "changed": true,
    "checksum": "7335999eb54c15c67566186bdfc46f64e0d5a1aa",
    "dest": "/root/node1/etc/hosts",
    "md5sum": "54fb6627dbaa37721048e4549db3224d",
    "remote_checksum": "7335999eb54c15c67566186bdfc46f64e0d5a1aa",
    "remote_md5sum": null
}
1.2 copy
将本地的文件拷贝到远程主机
ansible-doc -s copy
- name: Copy files to remote locations
  copy:
      attributes:            # The attributes the resulting file or directory should have. To get supported flags look at the man page for `chattr' on the
                               target system. This string should contain the attributes in the same order as the one displayed
                               by `lsattr'. The `=' operator is assumed as default, otherwise `+' or `-' operators need to be
                               included in the string.
      backup:                # Create a backup file including the timestamp information so you can get the original file back if you somehow clobbered it
                               incorrectly.
      checksum:              # SHA1 checksum of the file being transferred. Used to validate that the copy of the file was successful. If this is not
                               provided, ansible will use the local calculated checksum of the src file.
      content:               # When used instead of `src', sets the contents of a file directly to the specified value. Works only when `dest' is a file.
                               Creates the file if it does not exist. For advanced formatting or if `content' contains a
                               variable, use the [template] module.
      decrypt:               # This option controls the autodecryption of source files using vault.
      dest:                  # (required) Remote absolute path where the file should be copied to. If `src' is a directory, this must be a directory too. If
                               `dest' is a non-existent path and if either `dest' ends with "/" or `src' is a directory,
                               `dest' is created. If `dest' is a relative path, the starting directory is determined by the
                               remote host. If `src' and `dest' are files, the parent directory of `dest' is not created and
                               the task fails if it does not already exist.
      directory_mode:        # When doing a recursive copy set the mode for the directories. If this is not set we will use the system defaults. The mode is
                               only set on directories which are newly created, and will not affect those that already
                               existed.
      follow:                # This flag indicates that filesystem links in the destination, if they exist, should be followed.
      force:                 # Influence whether the remote file must always be replaced. If `yes', the remote file will be replaced when contents are
                               different than the source. If `no', the file will only be transferred if the destination does
                               not exist. Alias `thirsty' has been deprecated and will be removed in 2.13.
      group:                 # Name of the group that should own the file/directory, as would be fed to `chown'.
      local_follow:          # This flag indicates that filesystem links in the source tree, if they exist, should be followed.
      mode:                  # The permissions of the destination file or directory. For those used to `/usr/bin/chmod' remember that modes are actually
                               octal numbers. You must either add a leading zero so that Ansible's YAML parser knows it is an
                               octal number (like `0644' or `01777')or quote it (like `'644'' or `'1777'') so Ansible receives
                               a string and can do its own conversion from string into number. Giving Ansible a number without
                               following one of these rules will end up with a decimal number which will have unexpected
                               results. As of Ansible 1.8, the mode may be specified as a symbolic mode (for example, `u+rwx'
                               or `u=rw,g=r,o=r'). As of Ansible 2.3, the mode may also be the special string `preserve'.
                               `preserve' means that the file will be given the same permissions as the source file.
      owner:                 # Name of the user that should own the file/directory, as would be fed to `chown'.
      remote_src:            # Influence whether `src' needs to be transferred or already is present remotely. If `no', it will search for `src' at
                               originating/master machine. If `yes' it will go to the remote/target machine for the `src'.
                               `remote_src' supports recursive copying as of version 2.8. `remote_src' only works with
                               `mode=preserve' as of version 2.6.
      selevel:               # The level part of the SELinux file context. This is the MLS/MCS attribute, sometimes known as the `range'. When set to
                              `_default', it will use the `level' portion of the policy if available.
      serole:                # The role part of the SELinux file context. When set to `_default', it will use the `role' portion of the policy if available.
      setype:                # The type part of the SELinux file context. When set to `_default', it will use the `type' portion of the policy if available.
      seuser:                # The user part of the SELinux file context. By default it uses the `system' policy, where applicable. When set to `_default',
                               it will use the `user' portion of the policy if available.
      src:                   # Local path to a file to copy to the remote server. This can be absolute or relative. If path is a directory, it is copied
                               recursively. In this case, if path ends with "/", only inside contents of that directory are
                               copied to destination. Otherwise, if it does not end with "/", the directory itself with all
                               contents is copied. This behavior is similar to the `rsync' command line tool.
      unsafe_writes:         # Influence when to use atomic operation to prevent data corruption or inconsistent reads from the target file. By default this
                               module uses atomic operations to prevent data corruption or inconsistent reads from the target
                               files, but sometimes systems are configured or just broken in ways that prevent this. One
                               example is docker mounted files, which cannot be updated atomically from inside the container
                               and can only be written in an unsafe manner. This option allows Ansible to fall back to unsafe
                               methods of updating files when atomic operations fail (however, it doesn't force Ansible to
                               perform unsafe writes). IMPORTANT! Unsafe writes are subject to race conditions and can lead to
                               data corruption.
      validate:              # The validation command to run before copying into place. The path to the file to validate is passed in via '%s' which must be
                               present as in the examples below. The command is passed securely so shell features like
                               expansion and pipes will not work.
示例
//将本地文件拷贝到远程主机,如果已经存在会覆盖
[root@master ~]# ansible A -m copy -a "src=kube-apiserver.yaml dest=~"
node1 | CHANGED => {
    "ansible_facts": {
        "discovered_interpreter_python": "/usr/bin/python"
    },
    "changed": true,
    "checksum": "60338206f477413b094d6985cdd5ab2f1e3f44b8",
    "dest": "/root/kube-apiserver.yaml",
    "gid": 0,
    "group": "root",
    "md5sum": "256fba0189c16669eea2988928b5c99a",
    "mode": "0644",
    "owner": "root",
    "secontext": "system_u:object_r:admin_home_t:s0",
    "size": 557,
    "src": "/root/.ansible/tmp/ansible-tmp-1662740120.83-2529-139599052542459/source",
    "state": "file",
    "uid": 0
}


//在远程主机生成一个新文件叫 test.txt 并插入两行内容
[root@master ~]# ansible A -m copy -a 'content="hello world\npython\n" dest=~/test.txt'
node1 | CHANGED => {
    "ansible_facts": {
        "discovered_interpreter_python": "/usr/bin/python"
    },
    "changed": true,
    "checksum": "e5e71edd29c5860c789c8053b4be33f74c7164c6",
    "dest": "/root/test.txt",
    "gid": 0,
    "group": "root",
    "md5sum": "fe16512a8ff0747c579623853a388006",
    "mode": "0644",
    "owner": "root",
    "secontext": "system_u:object_r:admin_home_t:s0",
    "size": 19,
    "src": "/root/.ansible/tmp/ansible-tmp-1662742261.15-2570-223952060184790/source",
    "state": "file",
    "uid": 0
}


//将本地文件复制到远程主机,如果存在相同文件,且内容不同则不执行拷贝,远程主机中文件不会改变
[root@master ~]# ansible A -m copy -a "src=kube-apiserver.yaml dest=~ force=no"
node1 | SUCCESS => {
    "changed": false,
    "dest": "/root",
    "src": "/root/kube-apiserver.yaml"
}


//将本地文件拷贝到远程主机,指定文件的属主和属组,前提是属主和属组必须存在
[root@master ~]# ansible A -m copy -a "src=testfile dest=/opt owner=psp group=psp"
node1 | CHANGED => {
    "ansible_facts": {
        "discovered_interpreter_python": "/usr/bin/python"
    },
    "changed": true,
    "checksum": "da39a3ee5e6b4b0d3255bfef95601890afd80709",
    "dest": "/opt/testfile",
    "gid": 1000,
    "group": "psp",
    "md5sum": "d41d8cd98f00b204e9800998ecf8427e",
    "mode": "0644",
    "owner": "psp",
    "secontext": "system_u:object_r:usr_t:s0",
    "size": 0,
    "src": "/root/.ansible/tmp/ansible-tmp-1662742695.23-2661-265193321730874/source",
    "state": "file",
    "uid": 1000
}


//将本地文件拷贝到远程主机,指定文件的权限
[root@master ~]# ansible A -m copy -a "src=testfile dest=/opt owner=psp mode=777"
node1 | CHANGED => {
    "ansible_facts": {
        "discovered_interpreter_python": "/usr/bin/python"
    },
    "changed": true,
    "checksum": "da39a3ee5e6b4b0d3255bfef95601890afd80709",
    "dest": "/opt/testfile",
    "gid": 0,
    "group": "root",
    "md5sum": "d41d8cd98f00b204e9800998ecf8427e",
    "mode": "0777",
    "owner": "psp",
    "secontext": "system_u:object_r:usr_t:s0",
    "size": 0,
    "src": "/root/.ansible/tmp/ansible-tmp-1662742863.29-2712-133210533825699/source",
    "state": "file",
    "uid": 1000
}
1.3 file
file模块可以帮助我们完成一些对文件的基本操作,比如,创建文件或目录、删除文件或目录、修改文件权限等
- name: Manage files and file properties
  file:
      access_time:           # This parameter indicates the time the file's access time should be set to. Should be `preserve' when no modification is
                               required, `YYYYMMDDHHMM.SS' when using default time format, or `now'. Default is `None' meaning
                               that `preserve' is the default for `state=[file,directory,link,hard]' and `now' is default for
                               `state=touch'.
      access_time_format:    # When used with `access_time', indicates the time format that must be used. Based on default Python format (see time.strftime
                               doc).
      attributes:            # The attributes the resulting file or directory should have. To get supported flags look at the man page for `chattr' on the
                               target system. This string should contain the attributes in the same order as the one displayed
                               by `lsattr'. The `=' operator is assumed as default, otherwise `+' or `-' operators need to be
                               included in the string.
      follow:                # This flag indicates that filesystem links, if they exist, should be followed. Previous to Ansible 2.5, this was `no' by
                               default.
      force:                 # Force the creation of the symlinks in two cases: the source file does not exist (but will appear later); the destination
                               exists and is a file (so, we need to unlink the `path' file and create symlink to the `src'
                               file in place of it).
      group:                 # Name of the group that should own the file/directory, as would be fed to `chown'.
      mode:                  # The permissions the resulting file or directory should have. For those used to `/usr/bin/chmod' remember that modes are
                               actually octal numbers. You must either add a leading zero so that Ansible's YAML parser knows
                               it is an octal number (like `0644' or `01777') or quote it (like `'644'' or `'1777'') so
                               Ansible receives a string and can do its own conversion from string into number. Giving Ansible
                               a number without following one of these rules will end up with a decimal number which will have
                               unexpected results. As of Ansible 1.8, the mode may be specified as a symbolic mode (for
                               example, `u+rwx' or `u=rw,g=r,o=r').
      modification_time:     # This parameter indicates the time the file's modification time should be set to. Should be `preserve' when no modification is
                               required, `YYYYMMDDHHMM.SS' when using default time format, or `now'. Default is None meaning
                               that `preserve' is the default for `state=[file,directory,link,hard]' and `now' is default for
                               `state=touch'.
      modification_time_format:   # When used with `modification_time', indicates the time format that must be used. Based on default Python format (see
                               time.strftime doc).
      owner:                 # Name of the user that should own the file/directory, as would be fed to `chown'.
      path:                  # (required) Path to the file being managed.
      recurse:               # Recursively set the specified file attributes on directory contents. This applies only when `state' is set to `directory'.
      selevel:               # The level part of the SELinux file context. This is the MLS/MCS attribute, sometimes known as the `range'. When set to
                               `_default', it will use the `level' portion of the policy if available.
      serole:                # The role part of the SELinux file context. When set to `_default', it will use the `role' portion of the policy if available.
      setype:                # The type part of the SELinux file context. When set to `_default', it will use the `type' portion of the policy if available.
      seuser:                # The user part of the SELinux file context. By default it uses the `system' policy, where applicable. When set to `_default',
                               it will use the `user' portion of the policy if available.
      src:                   # Path of the file to link to. This applies only to `state=link' and `state=hard'. For `state=link', this will also accept a
                               non-existing path. Relative paths are relative to the file being created (`path') which is how
      state:                 # If `absent', directories will be recursively deleted, and files or symlinks will be unlinked. In the case of a directory, if
                               `diff' is declared, you will see the files and folders deleted listed under `path_contents'.
                               Note that `absent' will not cause `file' to fail if the `path' does not exist as the state did
                               not change. If `directory', all intermediate subdirectories will be created if they do not
                               exist. Since Ansible 1.7 they will be created with the supplied permissions. If `file', without
                               any other options this works mostly as a 'stat' and will return the current state of `path'.
                               Even with other options (i.e `mode'), the file will be modified but will NOT be created if it
                               does not exist; see the `touch' value or the [copy] or [template] module if you want that
                               behavior. If `hard', the hard link will be created or changed. If `link', the symbolic link
                               will be created or changed. If `touch' (new in 1.4), an empty file will be created if the
                               `path' does not exist, while an existing file or directory will receive updated file access and
                               modification times (similar to the way `touch' works from the command line).
      unsafe_writes:         # Influence when to use atomic operation to prevent data corruption or inconsistent reads from the target file. By default this
                               module uses atomic operations to prevent data corruption or inconsistent reads from the target
                               files, but sometimes systems are configured or just broken in ways that prevent this. One
                               example is docker mounted files, which cannot be updated atomically from inside the container
                               and can only be written in an unsafe manner. This option allows Ansible to fall back to unsafe
                               methods of updating files when atomic operations fail (however, it doesn't force Ansible to
                               perform unsafe writes). IMPORTANT! Unsafe writes are subject to race conditions and can lead to
                               data corruption.
示例
//在node1这台主机上创建文件,如果文件存在,就更新文件的时间戳,文件内容不会被覆盖
[root@master ~]# ansible minion29 -m file -a "path=/opt/test.txt state=touch"
node1 | CHANGED => {
    "ansible_facts": {
        "discovered_interpreter_python": "/usr/bin/python"
    },
    "changed": true,
    "dest": "/opt/test.txt",
    "gid": 0,
    "group": "root",
    "mode": "0644",
    "owner": "root",
    "secontext": "unconfined_u:object_r:usr_t:s0",
    "size": 12,
    "state": "file",
    "uid": 0
}


//在node1主机给test.txt创建软连接,test.txt必须已存在
[root@master ~]# ansible minion29 -m file -a "path=/opt/linkfile state=link src=/opt/test.txt"
node1 | CHANGED => {
    "ansible_facts": {
        "discovered_interpreter_python": "/usr/bin/python"
    },
    "changed": true,
    "dest": "/opt/linkfile",
    "gid": 0,
    "group": "root",
    "mode": "0777",
    "owner": "root",
    "secontext": "unconfined_u:object_r:usr_t:s0",
    "size": 13,
    "src": "/opt/test.txt",
    "state": "link",
    "uid": 0
}


//在node1主机给test.txt创建硬连接,test.txt必须已存在
[root@master ~]# ansible minion29 -m file -a "path=/opt/hardfile state=hard src=/opt/test.txt"
node1 | CHANGED => {
    "ansible_facts": {
        "discovered_interpreter_python": "/usr/bin/python"
    },
    "changed": true,
    "dest": "/opt/hardfile",
    "gid": 0,
    "group": "root",
    "mode": "0644",
    "owner": "root",
    "secontext": "unconfined_u:object_r:usr_t:s0",
    "size": 12,
    "src": "/opt/test.txt",
    "state": "hard",
    "uid": 0
}


//删除远程主机上的目录或者文件
[root@master ~]# ansible minion29 -m file -a "path=/opt/123.txt state=absent"
node1 | CHANGED => {
    "ansible_facts": {
        "discovered_interpreter_python": "/usr/bin/python"
    },
    "changed": true,
    "path": "/opt/123.txt",
    "state": "absent"
}

//在远程主机上创建文件并修改属主和属组,用户和组必须已经存在
[root@master ~]# ansible minion29 -m file -a "path=/opt/abc state=touch owner=psp group=psp"
node1 | CHANGED => {
    "ansible_facts": {
        "discovered_interpreter_python": "/usr/bin/python"
    },
    "changed": true,
    "dest": "/opt/abc",
    "gid": 1000,
    "group": "psp",
    "mode": "0644",
    "owner": "psp",
    "secontext": "unconfined_u:object_r:usr_t:s0",
    "size": 0,
    "state": "file",
    "uid": 1000
}
//加上 recurse=yes 参数可以递归改变属主属组
[root@master ~]# ansible minion29 -m file -a "path=/opt/test state=directory owner=psp group=psp recurse=yes"
node1 | CHANGED => {
    "ansible_facts": {
        "discovered_interpreter_python": "/usr/bin/python"
    },
    "changed": true,
    "gid": 1000,
    "group": "psp",
    "mode": "0755",
    "owner": "psp",
    "path": "/opt/test",
    "secontext": "unconfined_u:object_r:usr_t:s0",
    "size": 6,
    "state": "directory",
    "uid": 1000
}


//在远程主机创建文件或者目录,并指定权限,或者修改远程主机文件和目录的权限
[root@master ~]# ansible minion29 -m file -a "path=/opt/test state=directory mode=0777"
node1 | CHANGED => {
    "ansible_facts": {
        "discovered_interpreter_python": "/usr/bin/python"
    },
    "changed": true,
    "gid": 1000,
    "group": "psp",
    "mode": "0777",
    "owner": "psp",
    "path": "/opt/test",
    "secontext": "unconfined_u:object_r:usr_t:s0",
    "size": 6,
    "state": "directory",
    "uid": 1000
}
[root@master ~]# ansible minion29 -m file -a "path=/opt/abc  mode=0777"
node1 | CHANGED => {
    "ansible_facts": {
        "discovered_interpreter_python": "/usr/bin/python"
    },
    "changed": true,
    "gid": 1000,
    "group": "psp",
    "mode": "0777",
    "owner": "psp",
    "path": "/opt/abc",
    "secontext": "unconfined_u:object_r:usr_t:s0",
    "size": 0,
    "state": "file",
    "uid": 1000
}
1.4 blockinfile
blockinfile模块可以帮助我们在指定的文件中插入”一段文本”,这段文本是被标记过的,换句话说就是,我们在这段文本上做了记号,以便在以后的操作中可以通过”标记”找到这段文本,然后修改或者删除它
- name: Insert/update/remove a text block surrounded by marker lines
  blockinfile:
      attributes:            # The attributes the resulting file or directory should have. To get supported flags look at the man page for `chattr' on the
                               target system. This string should contain the attributes in the same order as the one displayed
                               by `lsattr'. The `=' operator is assumed as default, otherwise `+' or `-' operators need to be
                               included in the string.
      backup:                # Create a backup file including the timestamp information so you can get the original file back if you somehow clobbered it
                               incorrectly.
      block:                 # The text to insert inside the marker lines. If it is missing or an empty string, the block will be removed as if `state' were
                               specified to `absent'.
      create:                # Create a new file if it does not exist.
      group:                 # Name of the group that should own the file/directory, as would be fed to `chown'.
      insertafter:           # If specified, the block will be inserted after the last match of specified regular expression. A special value is available;
                               `EOF' for inserting the block at the end of the file. If specified regular expression has no
                               matches, `EOF' will be used instead.
      insertbefore:          # If specified, the block will be inserted before the last match of specified regular expression. A special value is available;
                               `BOF' for inserting the block at the beginning of the file. If specified regular expression has
                               no matches, the block will be inserted at the end of the file.
      marker:                # The marker line template. `{mark}' will be replaced with the values `in marker_begin' (default="BEGIN") and `marker_end'
                               (default="END"). Using a custom marker without the `{mark}' variable may result in the block
                               being repeatedly inserted on subsequent playbook runs.
      marker_begin:          # This will be inserted at `{mark}' in the opening ansible block marker.
      marker_end:            # This will be inserted at `{mark}' in the closing ansible block marker.
      mode:                  # The permissions the resulting file or directory should have. For those used to `/usr/bin/chmod' remember that modes are
                               actually octal numbers. You must either add a leading zero so that Ansible's YAML parser knows
                               it is an octal number (like `0644' or `01777') or quote it (like `'644'' or `'1777'') so
                               Ansible receives a string and can do its own conversion from string into number. Giving Ansible
                               a number without following one of these rules will end up with a decimal number which will have
                               unexpected results. As of Ansible 1.8, the mode may be specified as a symbolic mode (for
                               example, `u+rwx' or `u=rw,g=r,o=r').
      owner:                 # Name of the user that should own the file/directory, as would be fed to `chown'.
      path:                  # (required) The file to modify. Before Ansible 2.3 this option was only usable as `dest', `destfile' and `name'.
      selevel:               # The level part of the SELinux file context. This is the MLS/MCS attribute, sometimes known as the `range'. When set to
                               `_default', it will use the `level' portion of the policy if available.
      serole:                # The role part of the SELinux file context. When set to `_default', it will use the `role' portion of the policy if available.
      setype:                # The type part of the SELinux file context. When set to `_default', it will use the `type' portion of the policy if available.
      seuser:                # The user part of the SELinux file context. By default it uses the `system' policy, where applicable. When set to `_default',
                               it will use the `user' portion of the policy if available.
      state:                 # Whether the block should be there or not.
      unsafe_writes:         # Influence when to use atomic operation to prevent data corruption or inconsistent reads from the target file. By default this
                               module uses atomic operations to prevent data corruption or inconsistent reads from the target
                               files, but sometimes systems are configured or just broken in ways that prevent this. One
                               example is docker mounted files, which cannot be updated atomically from inside the container
                               and can only be written in an unsafe manner. This option allows Ansible to fall back to unsafe
                               methods of updating files when atomic operations fail (however, it doesn't force Ansible to
                               perform unsafe writes). IMPORTANT! Unsafe writes are subject to race conditions and can lead to
                               data corruption.
      validate:              # The validation command to run before copying into place. The path to the file to validate is passed in via '%s' which must be
                               present as in the examples below. The command is passed securely so shell features like
                               expansion and pipes will not work.
示例
//在远程主机某文件中插入如下日容
[root@master ~]# ansible minion29 -m blockinfile -a 'path=/opt/rc.local block="systemctl start nginx"'
node1 | SUCCESS => {
    "ansible_facts": {
        "discovered_interpreter_python": "/usr/bin/python"
    },
    "changed": false,
    "msg": ""
}
[root@node1 opt]# cat rc.local
#!/bin/bash
# THIS FILE IS ADDED FOR COMPATIBILITY PURPOSES
#
# It is highly advisable to create own systemd services or udev rules
# to run scripts during boot instead of using this file.
#
# In contrast to previous versions due to parallel execution during boot
# this script will NOT be run after all other services.
#
# Please note that you must run 'chmod +x /etc/rc.d/rc.local' to ensure
# that this script will be executed during boot.

touch /var/lock/subsys/local

#以下三行是执行以上命令之后生成的
# BEGIN ANSIBLE MANAGED BLOCK
systemctl start nginx
# END ANSIBLE MANAGED BLOCK
1.5 lineinfile
lineinfile模块,确保”某一行文本”存在于指定的文件中,或者确保从文件中删除指定的”文本”(即确保指定的文本不存在于文件中),还可以根据正则表达式,替换”某一行文本”。
示例
# node1上有如下文件
[root@node1 ~]# cat /opt/file.1
hello world

# 确保指定的”一行文本”存在于文件中,如果指定的文本本来就存在于文件中,则不做任何操作,
# 如果不存在,默认在文件的末尾插入这行文本
[root@master ~]# ansible node1 -m lineinfile -a 'path=/opt/file.1 line="hello job"'
node1 | CHANGED => {
    "ansible_facts": {
        "discovered_interpreter_python": "/usr/bin/python"
    },
    "backup": "",
    "changed": true,
    "msg": "line added"
}
[root@node1 ~]# cat /opt/file.1
hello world
hello job


# 如下命令表示根据正则表达式替换”某一行”,如果不止一行能够匹配正则,
# 那么只有最后一个匹配正则的行才会被替换,被匹配行会被替换成line参数指定的内容,
# 但是如果指定的表达式没有匹配到任何一行,那么line中的内容会被添加到文件的最后一行。
[root@master ~]# ansible test1 -m lineinfile -a 'path=/opt/file.1 regexp="^hello" line="test text"'
node1 | CHANGED => {
    "ansible_facts": {
        "discovered_interpreter_python": "/usr/bin/python"
    },
    "backup": "",
    "changed": true,
    "msg": "line replaced"
}
[root@node1 ~]# cat /opt/file.1
hello world
test text


# 如下命令表示根据正则表达式替换”某一行”,如果不止一行能够匹配正则,
# 那么只有最后一个匹配正则的行才会被替换,被匹配行会被替换成line参数指定的内容,
# 但是如果指定的表达式没有匹配到任何一行,那么则不对文件进行任何操作。
[root@master ~]# ansible test1 -m lineinfile -a 'path=/opt/file.1 regexp="^line" line="test text" backrefs=yes '
node1 | SUCCESS => {
    "ansible_facts": {
        "discovered_interpreter_python": "/usr/bin/python"
    },
    "backup": "",
    "changed": false,
    "msg": ""
}


# 根据line参数的内容删除行,如果文件中有多行都与line参数的内容相同,
# 那么这些相同的行都会被删除。
[root@master ~]# ansible test1 -m lineinfile -a 'path=/opt/file.1 line="test" state=absent'
node1 | CHANGED => {
    "ansible_facts": {
        "discovered_interpreter_python": "/usr/bin/python"
    },
    "backup": "",
    "changed": true,
    "found": 2,
    "msg": "2 line(s) removed"


# 根据正则表达式删除对应行,如果有多行都满足正则表达式,
# 那么所有匹配的行都会被删除
[root@master ~]# ansible test1 -m lineinfile -a 'path=/opt/file.1 regexp="^test" state=absent'
node1 | CHANGED => {
    "ansible_facts": {
        "discovered_interpreter_python": "/usr/bin/python"
    },
    "backup": "",
    "changed": true,
    "found": 1,
    "msg": "1 line(s) removed"
}
1.6 find
find模块可以帮助我们在远程主机中查找符合条件的文件,就像find命令一样。
在目标主机的/opt目录中查找文件内容中包含hello字符串的文件,隐藏文件会被忽略,不会进行递归查找。
[root@master ~]# ansible test1 -m find -a 'paths=/opt/ contains=".*hao.*"'
node1 | SUCCESS => {
    "ansible_facts": {
        "discovered_interpreter_python": "/usr/bin/python"
    },
    "changed": false,
    "examined": 7,
    "files": [
        {
            "atime": 1675541750.0372677,
            "ctime": 1675541748.3192677,
            "dev": 64768,
            "gid": 0,
            "gr_name": "root",
            "inode": 16786471,
            "isblk": false,
            "ischr": false,
            "isdir": false,
            "isfifo": false,
            "isgid": false,
            "islnk": false,
            "isreg": true,
            "issock": false,
            "isuid": false,
            "mode": "0644",
            "mtime": 1675541748.3192677,
            "nlink": 1,
            "path": "/opt/file.2",
            "pw_name": "root",
            "rgrp": true,
            "roth": true,
            "rusr": true,
            "size": 24,
            "uid": 0,
            "wgrp": false,
            "woth": false,
            "wusr": true,
            "xgrp": false,
            "xoth": false,
            "xusr": false
        }
    ],
    "matched": 1,
    "msg": ""
}
在目标主机的/opt目录中查找文件内容中包含hello字符串的文件,隐藏文件会被忽略,会进行递归查找。
[root@master ~]# ansible test1 -m find -a 'paths=/opt/ contains=".*hello.*" recurse=yes'
node1 | SUCCESS => {
    "ansible_facts": {
        "discovered_interpreter_python": "/usr/bin/python"
    },
    "changed": false,
    "examined": 16,
    "files": [
        {
            "atime": 1675541665.8002715,
            "ctime": 1675463616.4938169,
            "dev": 64768,
            "gid": 0,
            "gr_name": "root",
            "inode": 16786737,
            "isblk": false,
            "ischr": false,
            "isdir": false,
            "isfifo": false,
            "isgid": false,
            "islnk": false,
            "isreg": true,
            "issock": false,
            "isuid": false,
            "mode": "0644",
            "mtime": 1675463616.4908168,
            "nlink": 1,
            "path": "/opt/file.1",
            "pw_name": "root",
            "rgrp": true,
            "roth": true,
            "rusr": true,
            "size": 12,
            "uid": 0,
            "wgrp": false,
            "woth": false,
            "wusr": true,
            "xgrp": false,
            "xoth": false,
            "xusr": false
        },
        {
            "atime": 1675541750.0372677,
            "ctime": 1675541748.3192677,
            "dev": 64768,
            "gid": 0,
            "gr_name": "root",
            "inode": 16786471,
            "isblk": false,
            "ischr": false,
            "isdir": false,
            "isfifo": false,
            "isgid": false,
            "islnk": false,
            "isreg": true,
            "issock": false,
            "isuid": false,
            "mode": "0644",
            "mtime": 1675541748.3192677,
            "nlink": 1,
            "path": "/opt/file.2",
            "pw_name": "root",
            "rgrp": true,
            "roth": true,
            "rusr": true,
            "size": 24,
            "uid": 0,
            "wgrp": false,
            "woth": false,
            "wusr": true,
            "xgrp": false,
            "xoth": false,
            "xusr": false
        },
        {
            "atime": 1675541829.0852642,
            "ctime": 1675541824.1442645,
            "dev": 64768,
            "gid": 0,
            "gr_name": "root",
            "inode": 51202253,
            "isblk": false,
            "ischr": false,
            "isdir": false,
            "isfifo": false,
            "isgid": false,
            "islnk": false,
            "isreg": true,
            "issock": false,
            "isuid": false,
            "mode": "0644",
            "mtime": 1675541824.1442645,
            "nlink": 1,
            "path": "/opt/ansible_test/file.1",
            "pw_name": "root",
            "rgrp": true,
            "roth": true,
            "rusr": true,
            "size": 12,
            "uid": 0,
            "wgrp": false,
            "woth": false,
            "wusr": true,
            "xgrp": false,
            "xoth": false,
            "xusr": false
        }
    ],
    "matched": 3,
    "msg": ""
}

在test1主机的/opt目录中查找以file开头的文件,包括隐藏文件,但是不包括目录或其他文件类型,不会进行递归查找,因为这里需要使用正则表达式,所以需要加上use_regex=yes。
[root@master ~]# ansible test1 -m find -a 'paths=/opt/ patterns="^file" hidden=yes use_regex=yes'
在test1主机的/opt目录中查找以file开头的文件,包括隐藏文件,包括所有文件类型,但是不进行递归查找
[root@master ~]# ansible test1 -m find -a 'paths=/opt/ patterns="^file" hidden=yes use_regex=yes file_type=any'
在test1主机的/opt目录中查找2天以内的文件,不包括隐藏文件、目录、软连接等类型的文件,不进行递归查找
[root@master ~]# ansible test1 -m find -a 'paths=/opt/ age=-2d'
在test1主机的/opt目录中查找小于5m的文件,不包括隐藏文件、目录、软连接等类型的文件,进行递归查找
[root@master ~]# ansible test1 -m find -a 'paths=/opt/ size=-5m recurse=yes'
在test1主机的/opt目录中查找atime在2天以前的文件,不包括隐藏文件、目录、软连接等类型的文件,不进行递归查找
[root@master ~]# ansible test1 -m find -a 'paths=/opt/ age=2d age_stamp=atime'
返回查找到的文件的sha1校验码
[root@master ~]# ansible test1 -m find -a 'paths=/opt/ age=-2d get_checksum=yes'
1.7 replace
replace模块可以根据我们指定的正则表达式替换文件中的字符串,文件中所有被正则匹配到的字符串都会被替换。
将test1主机中/opt/file.2文件中的 hello 替换成 ni hao,替换之前,备份file.2这个文件
[root@master ~]# ansible test1 -m replace -a 'path=/opt/file.2 regexp="hello" replace="ni hao" backup=yes'
2. 命令模块
2.1 command
command模块可以帮助我们在远程主机上执行命令,在不指定 -m 的时候,ansible默认执行的就是command模块
注意:使用command模块在远程主机中执行命令时,不会经过远程主机的shell处理,在使用command模块时,如果需要执行的命令中含有重定向、管道符等操作时,这些符号也会失效,比如”<“, “>”, “|”, “;” 和 “&” 这些符号,如果你需要这些功能,可以参考后面介绍的shell模块,还有一点需要注意,如果远程节点是windows操作系统,则需要使用win_command模块。
在远程主机执行 ls 命令
[root@master ~]# ansible test1 -a "ls"
[root@master ~]# ansible test1 -m command -a "ls"
在执行某个命令之前,先进入某个目录中
[root@master ~]# ansible test1 -m command -a "chdir=/tmp ls"
当指定的文件存在时,则不执行指定的命令
[root@master ~]# ansible test1 -m command -a "creates=/root/case.sh sh case.sh"
node1 | SUCCESS | rc=0 >>
skipped, since /root/case.sh exists
当指定的文件存在时,则执行指定的命令
[root@master ~]# ansible test1 -m command -a "removes=/root/case.sh sh case.sh"
node1 | CHANGED | rc=0 >>
hello world
2.2 shell
shell模块可以帮助我们在远程主机上执行命令,与command模块不同的是,shell模块在远程主机中执行命令时,会经过远程主机上的/bin/sh程序处理。
使用shell模块可以在远程服务器上执行命令,它支持管道与重定向等符号。
[root@master ~]# ansible test1 -m shell -a 'chdir=/opt echo "good evering" > file.3'
2.3 script
script模块可以帮助我们在远程主机上执行ansible主机上的脚本,也就是说,脚本一直存在于ansible主机本地,不需要手动拷贝到远程主机后再执行。
在目标主机执行 ansible 主控端的脚本,执行在之前先进入到某个目录
[root@master ~]# ansible test1 -m script -a 'chdir=/opt ~/test1.sh'
当指定的文件不存在时,则不执行对应的脚本
[root@master ~]# ansible test1 -m script -a 'removes=/opt/file.8 ~/test1.sh'
3. 系统类模块
3.1 cron
cron模块可以帮助我们管理远程主机中的计划任务,功能相当于crontab命令。
在test1主机上创建计划任务,任务名称为test crontab(任务名称会在crontab注释内容中,如果不知道任务名称默认为注释的内容为#Ansible: None),每天17:13执行指定任务。
[root@master ~]# ansible test1 -m cron -a 'name="test crontab" minute=13 hour=17 job="echo helo wrold > /tmp/test.txt"'
在test1主机上创建计划任务,任务名称为”crontab day test”,任务每3天执行一次,于执行当天的1点1分开始执行,任务内容为输出test字符
[root@master ~]# ansible test1 -m cron -a " name='crontab day test' minute=1 hour=1 day=*/3 job='echo test' "
在test1主机上创建计划任务,任务名称为”test special time”,任务将在重启时执行,任务内容为输出test字符
ansible test70 -m cron -a " name='test special time' special_time=reboot job='echo test' "
在”test special time”已经存在的情况下,执行如下命令,原计划任务会被修改,因为启用了backup,所以任务在修改前会被备份。
ansible test1 -m cron -a " name='test special time' special_time=hourly job='echo test' backup=yes "
任务”test special time”已经存在于test70主机中,如果我们想要删除这个计划任务,可以执行如下命令,删除任务的同时可以进行备份。
ansible test70 -m cron -a " name='test special time' state=absent backup=yes "
默认操作root用户的计划任务,如果想要操作远程主机中其他用户的计划任务,可以指定要操作的用户。
ansible test1 -m cron -a "user=tsc name='test special time' special_time=hourly job='echo test'"
之前已经创建了名称为test crontab的计划任务,如果我们想要暂时注释这个计划任务,可以使用如下命令,但是需要注意,在注释任务时,所有设定需要 跟原设定保持一致,否则计划任务的设置将会发生改变,示例如下
比如,我们想要将crontab day test这个任务注释掉,则需要使用如下命令,注意,最好与backup参数同时使用
ansible test1 -m cron -a " name='crontab day test' minute=1 hour=1 day=*/3 job='echo test' disabled=yes backup=yes"
3.2 service
service模块可以帮助我们管理远程主机上的服务,比如,启动或停止远程主机中的nginx服务。
注意:假如你想要管理远程主机中的某个服务,那么这个服务必须能被 BSD init, OpenRC, SysV, Solaris SMF, systemd, upstart 中的任意一种所管理,否则无法使用service模块。
将test1主机中的nginx启动,并设置开机自启
[root@master ~]# ansible test1 -m service -a 'name="nginx" state=started enabled=yes'
3.3 user
user模块可以帮助我们管理远程主机上的用户,比如创建用户、修改用户、删除用户、为用户创建密钥对等操作。
在test1主机上创建名为zsy的用户,如果用户已经存在,则不进行任何操作。
ansible test1 -m user -a 'name=zsy'
在test1主机上删除名为zsy的用户,但是不会删除zsy用户的家目录
ansible test1 -m user -a 'name=zsy state=absent'
在test1主机上删除名为zsy的用户,同时会删除zsy用户的家目录等信息
ansible test70 -m user -a 'name=abc state=absent remove=yes'
指定test70主机上的zsy用户的主组为zsythink,zsythink组需要提前存在,当不使用group设置主组时,默认主组与用户名相同。
ansible test70 -m user -a "name=zsy group=zsythink"
指定test70主机上的zsy用户的附加组为zsythink,zsythink组需要提前存在,当不使用groups设置附属组时,默认附加组与用户名相同,注意,为了保险起见,在不知道用户原来的附加组设定的情况下,最好将append参数设置为yes,我们也可以一次性设置多个附加组,附加组之间用逗号隔开,比如groups=zsy,zsythink,root 示例命令如下
ansible test70 -m user -a "name=zsy groups=zsythink append=yes"
指定test70主机上的zsy用户使用/bin/csh作为默认shell
ansible test70 -m user -a "name=zsy shell=/bin/csh"
指定test70主机上的zsy用户的uid为2002
ansible test70 -m user -a "name=zsy uid=2002"
指定test70主机上的zsy用户的过期时间为2018年12月31日,使用”date -d 2018-12-31 +%s”命令可以获取到对应日期的unix时间戳
ansible test70 -m user -a 'name=zsy expires=1546185600'
指定test70主机上的zsy用户的注释信息
ansible test70 -m user -a 'name=zsy comment="www.zsythink.net"'
将test70主机上的zsy用户的密码设置为666666
首先生成666666的加密字符串
[root@test71 ~]# python;
Python 2.7.5 (default, Aug  4 2017, 00:39:18)
[GCC 4.8.5 20150623 (Red Hat 4.8.5-16)] on linux2
Type "help", "copyright", "credits" or "license" for more information.
>>> import crypt; crypt.crypt('666666')
'$6$ygRbo7Fj.mMU2KY0$OEqihCCn5UfOsvMyzPNPBgx3bzAtwrOFyFvacgUmA374XOAEtUCrdjbW5Ip.Zqo491o3kD5I.HaC9nLhh6x741'
使用生成的密码字符串设置用户密码
ansible test70 -m user -a ' name=zsy password="$6$ygRbo7Fj.mMU2KY0$OEqihCCn5UfOsvMyzPNPBgx3bzAtwrOFyFvacgUmA374XOAEtUCrdjbW5Ip.Zqo491o3kD5I.HaC9nLhh6x741" '
如下命令表示设置test70主机上的zsy用户的密码,但是如果用户当前的加密字符串与命令中设置的加密字符串不一致,则不进行密码更新的操作。
ansible test70 -m user -a 'name=zsy password="$6$a.ofrhIWn4gJGbi0$i6Xhr.F/YyhMe2UCodydwyF952bP4DOf0qYcGE8aK.EsgOR/GKU0Oy9Ov6oIH3RIJ9BnhvoVR9ozflmUJgxhL0" update_password=on_create'
为test70上的zsy用户生成ssh密钥对,默认在用户家目录的./ssh目录中生成名为id_rsa的私钥和名为id_rsa.pub的公钥,如果已经存在同名密钥,并不会覆盖原来的密钥,即不做任何操作。
ansible test70 -m user -a 'name=zsy generate_ssh_key=yes'
为test70上的zsy用户生成ssh密钥对,密钥对生成在/opt目录下,私钥名为id_rsa_zsy,公钥名为id_rsa_zsy.pub
ansible test70 -m user -a 'name=zsy generate_ssh_key=yes ssh_key_file=/opt/id_rsa_zsy'
为test70上的zsy用户生成ssh密钥对,同时指定公钥中的注释信息为”www.zsythink.net”,此参数只能在创建密钥时使用才会生效,并不能操作同名的老密钥
ansible test70 -m user -a 'name=zsy generate_ssh_key=yes ssh_key_comment="www.zsythink.net"'
为test70上的zsy用户生成ssh密钥对,同时指定私钥的密码为123456,此参数只能在创建密钥时使用才会生效,并不能操作同名的老密钥
ansible test70 -m user -a 'name=zsy generate_ssh_key=yes ssh_key_passphrase="123456"'
为test70上的zsy用户生成ssh密钥对,同时指定密钥对的类型为dsa,当不显式指定密钥类型时,默认类型为rsa,此参数只能在创建密钥时使用才会生效,并不能操作同名的老密钥
ansible test70 -m user -a 'name=zsy generate_ssh_key=yes ssh_key_type=dsa'
3.4 group
group模块可以帮助我们管理远程主机上的用户组。
确保test70主机中存在名为zsythink的组
ansible test70 -m group -a ' name=zsythink'
删除test70主机中存在名为zsythink的组,删除成功的前提是不能有用户把被删除的组当成主组。
ansible test70 -m group -a ' name=zsythink state=absent'
确保test70主机中存在名为zsythink的组,并且确定zsythink组的组id为1008
ansible test70 -m group -a 'name=zsythink gid=1008'
4. 包管理模块
4.1 yum_repository
yum_repository模块可以帮助我们管理远程主机上的yum仓库。
使用如下命令在test1主机上设置ID为 aliyun_epel 的yum源,仓库配置文件路径为/etc/yum.repos.d/aliyun_epel.repo,不起用,并指定个公钥
ansible test1 -m yum_repository -a 'name=aliyun_epel description="aliyun epel" baseurl=https://mirrors.aliyun.com/epel/$releasever\Server/$basearch/ file=aliyun_epel enabled=no gpgcheck=yes gpgcakey=file:///etc/pki/rpm-gpg/RPM-GPG-KEY-EPEL-7
删除/etc/yum.repos.d/alibaba.repo配置文件中的aliEpel源
ansible test70 -m yum_repository -a 'file=alibaba name=aliEpel state=absent'
4.2 yum
yum模块可以帮助我们在远程主机上通过yum源管理软件包。
确保test70主机上通过yum源安装了nginx(对应yum源未开启gpg验证,所以需要设置disable_gpg_check=yes),如下三条命令的效果相同
ansible test70 -m yum -a 'name=nginx disable_gpg_check=yes'
ansible test70 -m yum -a 'name=nginx state=present disable_gpg_check=yes'
ansible test70 -m yum -a 'name=nginx state=installed disable_gpg_check=yes'
确保test70主机上安装了yum源中最新版本的nginx
ansible test70 -m yum -a 'name=nginx state=latest disable_gpg_check=yes'
确保test70主机上通过yum源安装的nginx被卸载了
ansible test70 -m yum -a 'name=nginx state=absent'
ansible test70 -m yum -a 'name=nginx state=removed'
在test70主机上安装telnet时不确定local源是否启用,使用enablerepo=local确保临时启用local源
ansible test70 -m yum -a 'name=telnet disable_gpg_check=yes enablerepo=local'
在test70主机上安装telnet时,确定多个源中都有telnet,但是不想从local源中安装,所以在安装时临时禁用local源
ansible test70 -m yum -a 'name=telnet disable_gpg_check=yes disablerepo=local'
5. playbook
playbook简单的示例
- hosts: test2   #指定要执行的远程主机
  remote_user: root   #远程主机使用的用户
  tasks:     #要执行的任务
  - name: make testfile #任务名
    file:   #所使用的模块,模块下面指定需要使用的参数,相当于命令行的 -a
      path: /testdir/testfile.txt
      state: touch
      mode: 0700
检查palybook是否有语法错误
ansible-playbook --syntax-check test.yml
模拟执行,并不是真的执行
ansible-playbook --check test.yml
5.1 handlers
handlers也是一种任务,handlers中的任务会被tasks中的任务进行”调用”,但是,被”调用”并不意味着一定会执行,只有当tasks中的任务”真正执行”以后(真正的进行实际操作,造成了实际的改变),handlers中被调用的任务才会执行,如果tasks中的任务并没有做出任何实际的操作,那么handlers中的任务即使被’调用’,也并不会执行。
通过在handlers中设置notify参数来调用handlers
如下示例:
---
- hosts: test2
  remote_user: root
  tasks:
  - name: make testfile1
    file: path=/testdir/testfile1
          state=directory
    notify: ht2
  - name: make testfile2
    file: path=/testdir/testfile2
          state=directory
    notify: ht1

  handlers:
  - name: ht1
    file: path=/testdir/ht1
          state=touch
  - name: ht2
    file: path=/testdir/ht2
          state=touch
...
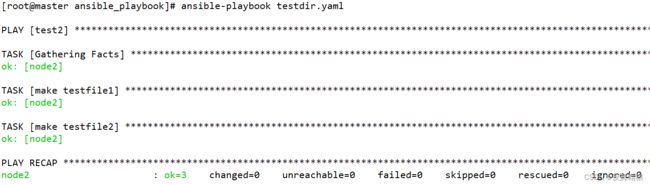
第一次执行
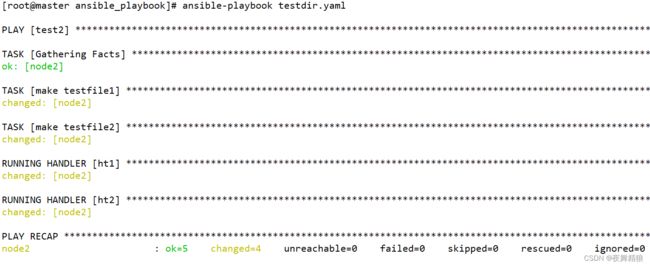
第二次执行
从上图可以看出,handler执行的顺序与handler在playbook中定义的顺序是相同的,与”handler被notify”的顺序无关。
默认情况下,所有task执行完毕后,才会执行各个handler,并不是执行完某个task后,立即执行对应的handler,如果你想要在执行完某些task以后立即执行对应的handler,则需要使用meta模块,示例如下:
---
- hosts: test2
  remote_user: root
  tasks:
  - name: task1
    file: path=/testdir/testfile
          state=touch
    notify: handler1
  - name: task2
    file: path=/testdir/testfile2
          state=touch
    notify: handler2

  - meta: flush_handlers

  - name: task3
    file: path=/testdir/testfile3
          state=touch
    notify: handler3

  handlers:
  - name: handler1
    file: path=/testdir/ht1
          state=touch
  - name: handler2
    file: path=/testdir/ht2
          state=touch
  - name: handler3
    file: path=/testdir/ht3
          state=touch

正如上图所示,meta任务之前的任务task1与task2在进行了实际操作以后,立即运行了对应的handler1与handler2,然后才运行了task3,在所有task都运行完毕后,又逐个将剩余的handler根据情况进行调用。
如果想要每个task在实际操作后都立马执行对应handlers,则可以在每个任务之后都添加一个meta任务,并将其值设置为flush_handlers 所以,我们可以依靠meta任务,让handler的使用变得更加灵活。
一次性notify多个handler
第一种写法
---
- hosts: test2
  remote_user: root
  tasks:
  - name: task1
    file: path=/testdir/testfile
          state=touch
    notify: handler group1

  handlers:
  - name: handler1
    listen: handler group1   # 在每个handler加上listen参数
    file: path=/testdir/ht1
          state=touch
  - name: handler2
    listen: handler group1
    file: path=/testdir/ht2
          state=touch
...

第二种写法
---
- hosts: test2
  remote_user: root
  tasks:
  - name: task1
    file: path=/testdir/testfile
          state=touch
    notify:           #使用列表的形式调用
      - handler1
      - handler2

  handlers:
  - name: handler1
    file: path=/testdir/ht1
          state=touch
  - name: handler2
    file: path=/testdir/ht2
          state=touch
...
5.2 tags
对任务进行打标签,可以在执行ansible-playbook的时候,指定tags参数来指定需要执行的任务
如下示例:
---
- hosts: test2
  remote_user: root
  tasks:
  - name: task1
    file: path=/testdir/testfile1
          state=touch
    tags: task1
  - name: task2
    file: path=/testdir/testfile2
          state=touch
    tags: task2
  - name: task3
    file: path=/testdir/testfile3
          state=touch
    tags: task3
...
执行如下:

指定某些任务不执行,其它的执行

一个任务指定多个标签以及在play中也可以指定标签,如下所示:
一个任务指定多个标签
---
- hosts: test2
  remote_user: root
  tasks:
  - name: task1
    file: path=/testdir/testfile1
          state=touch
    tags: touchfile,task1
  - name: task2
    file: path=/testdir/testfile2
          state=touch
    tags: touchfile,task2
  - name: task3
    file: path=/testdir/testfile3
          state=touch
    tags: touchfile,task3
...

在play中指定标签,当指定play中的标签时,play下面的任务都会被执行
---
- hosts: test2
  remote_user: root
  tags: touchfile
  tasks:
  - name: task1
    file: path=/testdir/testfile1
          state=touch
    tags: task1
  - name: task2
    file: path=/testdir/testfile2
          state=touch
    tags: task2
  - name: task3
    file: path=/testdir/testfile3
          state=touch
    tags: task3
...
查看剧本中有哪些标签

5个特殊的标签
- always
- never(2.5版本中新加入的特殊tag)
- tagged
- untagged
- all
always
当我们把任务的tags的值指定为always时,那么这个任务就总是会被执行,除非你使用’–skip-tags’选项明确指定不执行对应的任务
---
- hosts: test2
  remote_user: root
  tasks:
  - name: task1
    file: path=/testdir/testfile1
          state=touch
    tags: task1
  - name: task2
    file: path=/testdir/testfile2
          state=touch
    tags: task2
  - name: task3
    file: path=/testdir/testfile3
          state=touch
    tags: task3,always
...
执行如下:
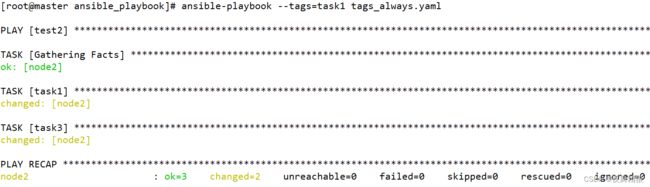
使用如下命令就可以跳过有always标签的任务
ansible-playbook --skip-tags=always tags_always.yaml
never
与always相反,总是不会被执行
---
- hosts: test2
  remote_user: root
  tasks:
  - name: task1
    file: path=/testdir/testfile1
          state=touch
    tags: task1
  - name: task2
    file: path=/testdir/testfile2
          state=touch
    tags: task2
  - name: task3
    file: path=/testdir/testfile3
          state=touch
    tags: task3,never
...
执行如下

tagged
有标签的任务才会被执行,没有标签的不会被执行
示例如下:
---
- hosts: test2
  remote_user: root
  tasks:
  - name: task1
    file: path=/testdir/testfile1
          state=touch
    tags: task1
  - name: task2
    file: path=/testdir/testfile2
          state=touch
    tags: task2
  - name: task3
    file: path=/testdir/testfile3
          state=touch
...
执行如下

如下命令表示,跳过有标签的任务,即使有always标签也会被跳过
ansible-playbook --skip-tags=tagged tags_always.yaml
如下命令表示,只执行没有标签的任务
ansible-playbook --tags=untagged tags_always.yaml
如下命令表示,跳过没有标签的任务
ansible-playbook --skip-tags=untagged tags_always.yaml
all标签就是执行所有任务,不用指定,当不指定tags参数时,默认就是执行所有任务。
5.3 变量
使用 vars 来定义变量,
---
- hosts: test2
  remote_user: root
  vars:
    ver: version
  tasks:
  - name: make testfile1
    file: path=/testdir/{{ ver }}
          state=touch
...
执行如下

定义多个变量
vars:
  var1: backup
  var2: version
以属性的方式定义变量,示例如下:
---
- hosts: test2
  remote_user: root
  vars:
    tomcat:
      conf8081: /testdir/8081.conf
      conf8082: /testdir/8082.conf
  tasks:
  - name: make 8081.conf
    file:
      path: "{{ tomcat.conf8081 }}"    # 变量在开头就被引用需要使用引号
      state: touch
  - name: make 8082.conf
    file:
      path: "{{ tomcat.conf8082 }}"
      state: touch

...
执行如下:
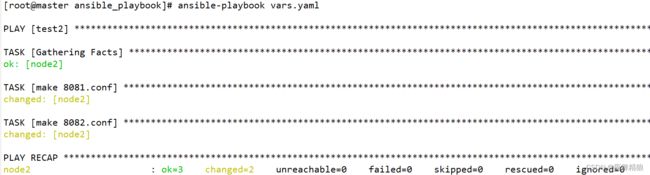
将变量定义到某一个具体的文件中,然后在剧本中引用。
[root@master ansible_playbook]# cat tomcat_var.yaml
---
tomcat:
  conf8081: /testdir/8081.conf
  conf8082: /testdir/8082.conf
...
在剧本周总引用,使用vars_files引用,指定变量文件的绝对路径
---
- hosts: test2
  remote_user: root
  vars_files:
  - /root/ansible_playbook/tomcat_var.yaml
  tasks:
  - name: make 8081.conf
    file:
      path: "{{ tomcat.conf8081 }}"
      state: touch
  - name: make 8082.conf
    file:
      path: "{{ tomcat.conf8082 }}"
      state: touch

...
5.3.1 setup模块
当我们运行一个playbook时,默认都会运行一个名为”[Gathering Facts]”的任务,前文中已经大致的介绍过这个默认的任务,ansible通过”[Gathering Facts]”这个默认任务收集远程主机的相关信息(例如远程主机的IP地址,主机名,系统版本,硬件配置等信息),其实,这些被收集到的远程主机信息会保存在对应的变量中,当我们想要使用这些信息时,我们可以获取对应的变量,从而使用这些信息。
如果想要查看”[Gathering Facts]”任务收集的信息内容,我们可以借助一个模块:setup模块
ansible test1 -m setup
通过filter参数进行过滤
# 查看远程主机的系统版本
[root@master ansible_playbook]# ansible test1 -m setup -a 'filter=ansible_distribution'
node1 | SUCCESS => {
    "ansible_facts": {
        "ansible_distribution": "CentOS",
        "discovered_interpreter_python": "/usr/bin/python"
    },
    "changed": false
}
怕参数太长,可使用通配符
# 查看远程主机网卡信息
ansible test1 -m setup -a 'filter=ansible_ens*'
在远程主机自定义信息
默认去查找 /etc/ansible/facts.d 目录,在此目录下以”.fact”为后缀的文件,且这些文件的内容格式必须为INI或者json格式,两种格式不能写在一个文件。
INI书写格式
[ansible_var]
mes1=hello world
mes2=Good evening

json书写格式
{
   "testmsg":{
       "msg1":"This is the first custom test message",
       "msg2":"This is the second custom test message"
   }
}
通过参数 filter=ansible_local 来过滤
[root@master ~]# ansible test1 -m setup -a 'filter=ansible_local'
node1 | SUCCESS => {
    "ansible_facts": {
        "ansible_local": {
            "ansible": {
                "ansible_var": {
                    "mes1": "hello world",
                    "mes2": "Good evening"
                }
            },
            "ansible1": {
                "testmsg": {
                    "msg1": "This is the first custom test message",
                    "msg2": "This is the second custom test message"
                }
            }
        },
        "discovered_interpreter_python": "/usr/bin/python"
    },
    "changed": false
}
查找其它目录下以 .fact 结尾的文件,则需要指定 fact_path 参数来确定文件的目录
[root@master ~]# ansible test2 -m setup -a 'filter=ansible_local fact_path=/testdir'
node2 | SUCCESS => {
    "ansible_facts": {
        "ansible_local": {
            "test": {
                "nginx": {
                    "conf": "/etc/nginx/nginx.conf",
                    "logs": "/etc/nginx/access.log"
                }
            }
        },
        "discovered_interpreter_python": "/usr/bin/python"
    },
    "changed": false
}
5.3.2 debug模块
debug模块的作用就是帮助我们进行调试的,debug模块可以帮助我们把信息输出到ansible控制台上,以便我们能够定位问题。
使用msg参数输出自定义的信息
---
- hosts: test2
  remote_user: root
  tasks:
  - name: make testfile1
    file: path=/testdir/testfile1
          state=directory
  - name: debug msg
    debug:
      msg: This is debug info,mkdir /testdir/testfile1
...
执行如下:

输出变量中的值,var 和 msg 参数不能同时使用
---
- hosts: test2
  remote_user: root
  vars:
    nginx: /usr/local/nginx
  tasks:
  - name: make testfile1
    file: path=/testdir/testfile1
          state=directory
  - name: debug msg
    debug:
      var: nginx
...
执行如下:

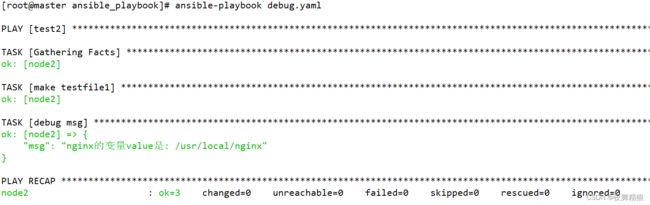
使用 msg 引用变量的值
---
- hosts: test2
  remote_user: root
  vars:
    nginx: /usr/local/nginx
  tasks:
  - name: make testfile1
    file: path=/testdir/testfile1
          state=directory
  - name: debug msg
    debug:
      msg: "nginx的变量value是: {{ nginx }}"
...
执行如下
引用 [Gathering Facts] 任务中变量的值
---
- hosts: test2
  remote_user: root
  vars:
    nginx: /usr/local/nginx
  tasks:
  - name: make testfile1
    file: path=/testdir/testfile1
          state=directory
  - name: debug msg
    debug:
      msg: "test2的内存情况: {{ ansible_memory_mb }}"
...
执行如下:

只要其中一部分信息:
---
- hosts: test2
  remote_user: root
  vars:
    nginx: /usr/local/nginx
  tasks:
  - name: make testfile1
    file: path=/testdir/testfile1
          state=directory
  - name: debug msg
    debug:
      msg: "test2的内存情况: {{ ansible_memory_mb.real }}"
...
执行如下:

5.3.3 注册变量
ansible的模块在运行之后,其实都会返回一些”返回值”,只是默认情况下,这些”返回值”并不会显示而已,我们可以把这些返回值写入到某个变量中,这样我们就能够通过引用对应的变量从而获取到这些返回值了,这种将模块的返回值写入到变量中的方法被称为”注册变量”。
---
- hosts: test2
  remote_user: root
  tasks:
  - name: make shell
    shell: "echo make shell > /testdir/testshell"
    register: var_shell   # 将shell模块执行后的返回值写入到 var_shell 变量中
  - name: shell module return values
    debug:
      var: var_shell
...
执行如下

5.3.4 在终端提示输入信息并写入变量
交互式的输入内容存入到变量中,如下所示:
---
- hosts: test2
  remote_user: root
  vars_prompt:
  - name: my_name
    prompt: "你的名字是?"
  - name: my_age
    prompt: "你的年龄是?"
  tasks:
  - name: echo vars
    debug:
      msg: "你的名字是{{ my_name }},你的年龄是{{ my_age }}!"
...
执行如下:

默认输入的信息不会在终端上显示,比较适合密码,私密的东西输入。若想要显示输入的内容,加上 private 参数即可。
---
- hosts: test2
  remote_user: root
  vars_prompt:
  - name: my_name
    prompt: "你的名字是?"
    private: no   # 加入此参数即可
  - name: my_age
    prompt: "你的年龄是?"
    private: no
    default: 20  # 此参数是设置默认值
  tasks:
  - name: echo vars
    debug:
      msg: "你的名字是{{ my_name }},你的年龄是{{ my_age }}!"
...
执行如下:

通过此方法在远程主机创建用户
---
- hosts: test1
  remote_user: root
  vars_prompt:
    - name: "hash_string"
      prompt: "Enter something"
      private: no
      encrypt: "sha512_crypt"   # user模块的明文密码需要经过哈希运算,使用encrypt进行哈希运算再传给对应的变量
      confirm: yes   # 此参数表示需要再次输入进行确认
  tasks:
   - name: Output the string after hash
     debug:
      msg: "{{hash_string}}"
以上文件执行要求主机按照 passlib 库。
5.3.5 执行剧本时传入变量
---
- hosts: test2
  remote_user: root
  tasks:
  - name: input var the comman line
    debug:
      var: input_var
...
执行如下:
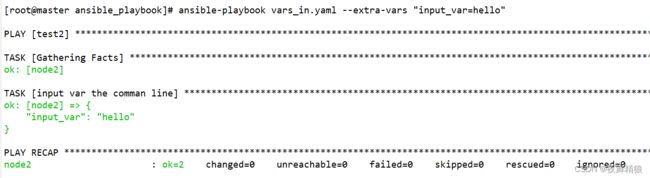
执行的时候使用 --extra-vars 参数,简写就是 -e,可以一次指定多个变量,用空格隔开
ansible-playbook vars_in.yaml --e "input_var1=hello input_var2=hello2"
命令行传入的变量优先级高于yaml文件中定义的变量。如果在 yaml 文件中定义了变量,在命令行也指定了相同变量,以命令行定义的为准。
5.3.6 在清单文件中配置变量
[root@master ~]# vim /etc/ansible/hosts
[test1]
node1 ansible_host=192.168.40.129 test29="192.168.40.129"

[root@master ~]# ansible test1 -m shell -a "echo {{ test29 }}"
node1 | CHANGED | rc=0 >>
192.168.40.129
主机变量生效范围仅限于对应的主机,其它主机不能引用
配置有层级的变量
[root@master ~]# vim /root/ansible_playbook/hosts
all:
 hosts:
   test1:
     ansible_host: 192.168.40.129
     ansible_port: 22
     testhostvar: test1_host_var
     testhostvar1: test1_host_var1
     testhostvar3:
       thv31: 3.1
       thv32: 3.2

[root@master ~]# ansible test1 -i /root/ansible_playbook/hosts -m shell -a "echo {{ testhostvar3.thv31 }}"
test1 | CHANGED | rc=0 >>
3.1
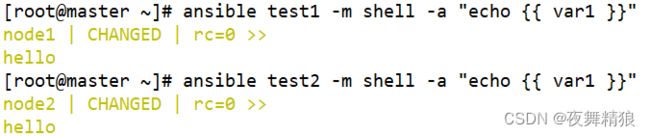
主机组变量
INI方式
[server]
node1 ansible_host=192.168.40.129
node2 ansible_host=192.168.40.130

[server:vars]
var1=hello
var2=wrold

yaml方式
all:
 children:
   server:
     hosts:
       node1:
         ansible_host: 192.168.40.129
         ansible_port: 22
       node2:
         ansible_host: 192.168.40.130
         ansible_port: 22
     vars:
       test_group_var1: 'group var test1'
       test_group_var2: 'group var test2'
该主机组中的主机都能引用定义在该主机组中的变量
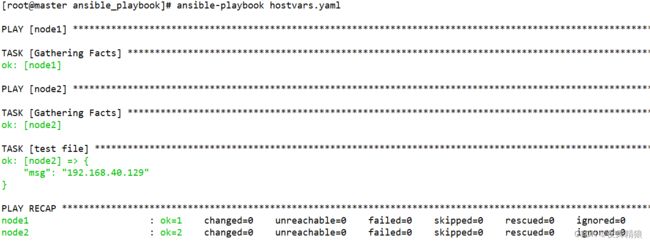
5.3.7 内置变量hostvars
hostvars可以帮助我们在操作当前主机时获取到其他主机中的信息。
---
- hosts: node1
  remote_user: root

- hosts: node2
  remote_user: root
  tasks:
  - name: test file
    debug:
      msg: '{{ hostvars.node1.ansible_ens32.ipv4.address }}'
...
如上示例,在操作node2主机的时候获取node1主机的facts信息,第一个play没有执行任务,目的是收集node1主机facts信息,使得第二个play获取。
执行如下:
除了facts信息,我们还能够利用hostvars内置变量从别的主机中获取到其他类型的一些变量信息,比如,其他主机的注册变量、主机变量、组变量等信息,我们先来看一个获取其他主机的注册变量的小示例,如下:
---
- hosts: node2
  remote_user: root
  gather_facts: no    #此选项表示该play不收集facts信息
  tasks:
  - shell: "echo register_var_in_play1"
    register: shellreturn

- hosts: node1
  remote_user: root
  gather_facts: no
  tasks:
  - debug:
      msg: "{{hostvars.node2.shellreturn.stdout}}"
...
执行如下: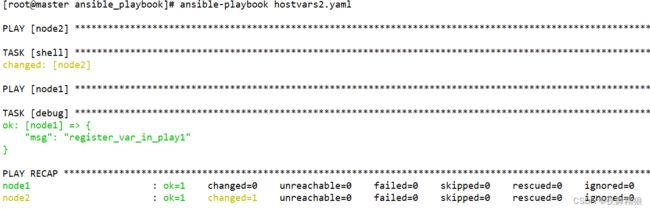
注册变量、清单中的主机变量、主机组变量不用事先收集也可以被 hostvars 跨主机引用。
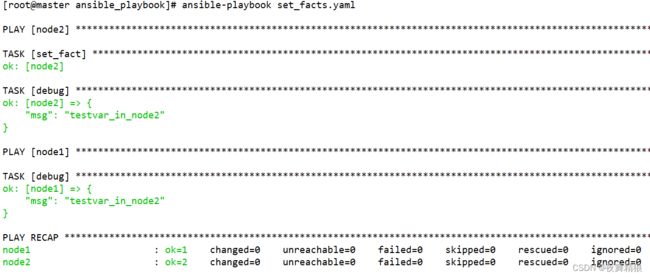
通过 set_facts 参数在play中设置变量,供下一个play使用,示例如下:
---
- hosts: node2
  remote_user: root
  gather_facts: no
  tasks:
  - set_fact:
      testvar: "testvar_in_node2"
  - debug:
      msg: "{{testvar}}"

- hosts: node1
  remote_user: root
  gather_facts: no
  tasks:
  - debug:
      msg: "{{hostvars.node2.testvar}}"
...
执行如下:
5.3.8 内置变量inventory_hostname
通过inventory_hostname变量可以获取到被操作的当前主机的主机名称,这里所说的主机名称并不是linux系统的主机名,而是对应主机在清单中配置的名称,假设我的清单配置如下
[server]
node1 ansible_host=192.168.40.129
node2 ansible_host=192.168.40.130
192.168.40.131
[root@master ansible_playbook]# ansible server -m debug -a "msg={{ inventory_hostname }}"
node1 | SUCCESS => {
    "msg": "node1"
}
192.168.40.131 | SUCCESS => {
    "msg": "192.168.40.131"
}
node2 | SUCCESS => {
    "msg": "node2"
}
从返回信息可以看出,如果使用IP配置主机,inventory_hostname的值就是IP,如果使用别名,inventory_hostname的值就是别名。
5.3.9 内置变量inventory_hostname_short
[root@master ansible_playbook]# ansible server -m debug -a "msg={{ inventory_hostname_short }}"
node1 | SUCCESS => {
    "msg": "node1"
}
node2 | SUCCESS => {
    "msg": "node2"
}
192.168.40.131 | SUCCESS => {
    "msg": "192"
}
无论是IP还是别名,如果清单的主机名称中包含”.”,inventory_hostname_short都会取得主机名中第一个”.”之前的字符作为主机的简短名称。
5.3.10 内置变量play_hosts
内置变量play_hosts可以获取到当前play所操作的所有主机的主机名列表,示例playbook如下:
---
- hosts: node2,node1
  remote_user: root
  tasks:
  - name: test file
    debug:
      msg: '{{ play_hosts }}'
...
执行如下:

inventory_hostname和play_hosts都是返回主机名,只不过,inventory_hostname只返回当前被操作的主机的主机名,而play_hosts则返回当前play中所有被操作主机的主机名列表。
5.3.11 内置变量groups
[root@master ansible_playbook]# ansible node1 -m debug -a "msg={{ groups }}"
node1 | SUCCESS => {
    "msg": {
        "all": [
            "node1",
            "node2",
            "192.168.40.131"
        ],
        "server": [
            "node1",
            "node2",
            "192.168.40.131"
        ],
        "ungrouped": []
    }
}
[root@master ansible_playbook]# ansible node1 -m debug -a "msg={{ groups.server }}"
node1 | SUCCESS => {
    "msg": [
        "node1",
        "node2",
        "192.168.40.131"
    ]
}
5.3.12 内置变量group_names
远程主机属于那个组,执行结果就是该组的名字,我们操作未分组的主机时,group_names的值为”ungrouped”。
[root@master ansible_playbook]# ansible node1 -m debug -a "msg={{ group_names }}"
node1 | SUCCESS => {
    "msg": [
        "server"
    ]
}
5.3.13 内置变量inventory_dir
通过inventory_dir变量获取到ansible主机中清单文件的存放路径
[root@master ansible_playbook]# ansible node1 -m debug -a "msg={{ inventory_dir }}"
node1 | SUCCESS => {
    "msg": "/etc/ansible"
}
5.3.14 include_vars
在执行剧本的过程中,随时的引入变量文件,以便动态的获取到最新的变量文件内容,加载最新的变量文件,引入到后续任务中
如下实例,如果不用 include_vars 关键字去引用,则会报错。
---
- hosts: master
  remote_user: root
  gather_facts: no
  vars_files:
  - /testdir/ansible/testfile
  tasks:
  - debug:
      msg: "{{testvar1}},{{testvar2}}"
  - lineinfile:
      path: "/testdir/ansible/testfile"
      line: "testvar3: ccc"
  - debug:
      msg: "{{testvar1}},{{testvar2}},{{testvar3}}"
使用 include_vars 来动态加载即可
---
- hosts: master
  remote_user: root
  gather_facts: no
  vars_files:
  - /testdir/ansible/testfile
  tasks:
  - debug:
      msg: "{{testvar3}}"
  - lineinfile:
      path: "/testdir/ansible/testfile"
      line: "testvar4: ddd"
  - include_vars: "/testdir/ansible/testfile"
  - debug:
      msg: "{{testvar4}}"
将一个变量文件中的值全部赋值给另外一个变量
---
- hosts: node1
  remote_user: root
  gather_facts: no
  tasks:
  - include_vars:
      file: /root/ansible_playbook/tomcat_var.yaml
      name: trans_var
  - debug:
      msg: "{{trans_var}}"

如上图所示,tomcat_var.yaml 文件的变量被都赋予了叫 trans_var 的变量。
includ_vars 不仅能够加载指定变量文件中的变量,还能加载某个目录下的所有变量文件。如下所示:
  - include_vars:
      dir: /testdir/ansible/test/
      name: trans_var
  - debug:
      msg: "{{trans_var}}"
第一:指定目录中的所有文件的文件后缀必须是 ‘.yaml’ 、’.yml’ 、’.json’中的一种,默认只有这三种后缀是合法后缀,如果目录中存在非合法后缀的文件,执行playbook时则会报错。
第二:如果此目录中的子目录中包含变量文件,子目录中的变量文件也会被递归的加载,而且子目录中的文件也必须遵守上述第一条规则。
第三:dir参数与file参数不能同时使用。
第一点与第二点都是默认设置,可以通过其他选项修改,方法如下
当使用dir参数时,指定目录中的所有文件必须以 ‘.yaml’ 、’.yml’ 、’.json’ 作为文件的后缀,如果想要手动指定合法的文件后缀名,则可以使用extensions参数指定哪些后缀是合法的文件后缀,extensions参数的值需要是一个列表,示例如下:
  tasks:
  - include_vars:
      dir: /testdir/ansible/test/
      extensions: [yaml,yml,json,varfile]
      name: trans_var
  - debug:
      msg: "{{trans_var}}"
当使用dir参数时,默认情况下会递归的加载指定目录及其子目录中的所有变量文件,如果想要控制递归的深度,则可以借助depth参数,示例如下:
  tasks:
  - include_vars:
      dir: /testdir/ansible/test/
      depth: 1
      name: trans_var
  - debug:
      msg: "{{trans_var}}"
上例表示,加载”/testdir/ansible/test/”目录中的变量文件,但是其子目录中的变量文件将不会被加载,depth的值为1表示递归深度为1,默认值为0,表示递归到最底层的子目录。
在使用dir参数时,我们还可以借助正则表达式,匹配那些我们想要加载的变量文件,比如,我们只想加载指定目录中以”var_”开头的变量文件,则可以使用如下方法
  tasks:
  - include_vars:
      dir: /testdir/ansible/test/
      files_matching: "^var_.*"
      name: trans_var
  - debug:
      msg: "{{trans_var}}"
其实,不仅能够使用正则去匹配需要加载的变量文件名,还可以明确指定,哪些变量文件不能被加载,使用’ignore_files’参数可以明确指定需要忽略的变量文件名称,’ignore_files’参数的值是需要是一个列表,示例如下
  tasks:
  - include_vars:
      dir: /testdir/ansible/test/
      ignore_files: ["^var_.*",varintest.yaml]
      name: trans_var
  - debug:
      msg: "{{trans_var}}"
上例表示,加载 /testdir/ansible/test/目录中的变量文件,但是所有以”var_”开头的变量文件和varintest.yaml变量文件将不会被加载, ‘files_matching’参数和’ignore_files’参数能够同时使用,当它们同时出现时,会先找出正则匹配到的文件,然后从中排除那些需要忽略的文件。
在2.4版本以后的ansible中,当执行了include_vars模块以后,include_vars模块会将载入的变量文件列表写入到自己的返回值中,这个返回值的关键字为’ansible_included_var_files’,所以,如果我们想要知道本次任务引入了哪些变量文件,则可以使用如下方法
  tasks:
  - include_vars:
      dir: /testdir/ansible/test/
    register: return_val
  - debug:
      msg: "{{return_val.ansible_included_var_files}}"
6. 循环
6.1 with_items、with_list、with_flattened、with_together
通过关键字 with_item 接收返回信息,”with_items”关键字会把返回的列表信息自动处理,将每一条信息单独放在一个名为”item”的变量中,获取变量 item 的值,即可循环获取列表中的每一条信息
---
- hosts: node1
  remote_user: root
  gather_facts: no
  tasks:
  - debug:
      msg: "{{ item }}"
    with_items:
    - 1
    - 2
    - 3
...
执行如下

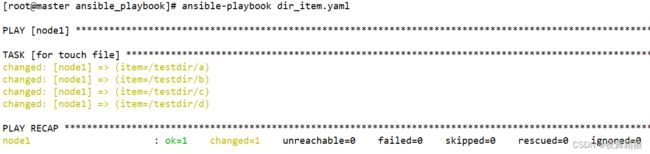
批量创建文件
---
- hosts: node1
  remote_user: root
  gather_facts: no
  vars:
    dirs:
    - "/testdir/a"
    - "/testdir/b"
    - "/testdir/c"
    - "/testdir/d"
  tasks:
  - name: for touch file
    file:
      path: "{{ item }}"
      state: touch
    with_items: "{{ dirs }}"
...
执行如下:
遍历注册变量register的每一条信息
---
- hosts: node1
  gather_facts: no
  tasks:
  - name: test shell
    shell: "{{ item }}"
    with_items: "ls /testdir"
    register: returnvalue
  - debug:
      msg: "{{ item.stdout }}"
    with_items: "{{ returnvalue.results }}"
...
执行如下:

当使用了循环以后,每次shell模块执行后的返回值都会放入一个名为”results”的序列中,其实,”results”也是一个返回值,当模块中使用了循环时,模块每次执行的返回值都会追加存放到”results”这个返回值中,所以,我们可以通过”results”关键字获取到每次模块执行后的返回值。
with_list
with_list处理嵌套列表,每个嵌套在大列表中的小列表都被当做一个整体存放在item变量中,最终被debug作为一个小整体输出了,而不会像with_items一样将小列表”展开拉平”后一并将小列表中的元素循环输出。
示例如下:
---
- hosts: node1
  remote_user: root
  gather_facts: no
  tasks:
  - name: test with_list
    debug:
      msg: "{{ item }}"
    with_list:      # 将with_list替换成with_items执行效果如图2所示,换成with_flattened如图3所示,换成with_together如图4所示
    - [ 1, 2, 3 ]
    - [ a, b ]
图1:with_list

图2:with_itesm

图2:with_flattened ,与with_items完全一样

图4:with_together,会将小列表的值分别对应合并,数量不同,则显示另外一个值为 null

6.2 with_cartesian、with_nested
”with_cartesian”关键字的作用就是将每个小列表中的元素按照”笛卡尔的方式”组合后,循环的处理每个组合,with_nested的作用与前者完全相同
通过该关键字创建三个目录 ,每个目录下面都有相同的子目录
示例如下:
---
- hosts: node2
  remote_user: root
  gather_facts: no
  tasks:
  - name: mkdir test directory
    file:
      state: directory
      path: /testdir/{{ item.0 }}/{{ item.1 }}
    with_cartesian:
    - [a,b,c]
    - [test1,test2]
...
执行如下:
6.3 with_indexed_items
”with_indexed_items”的作用就是在循环处理列表时为列表中的每一项添加”数字索引”,”索引”从0开始
示例如下:
---
- hosts: node2
  remote_user: root
  gather_facts: no
  tasks:
  - name: mkdir test directory
    debug:
      msg: "{{ item }}"
    with_cartesian:
    - [a,b]
    - [test1,test2]
...
执行如下:

如上图,在使用 with_indexed_items 关键字时,它也像 with_items 和 with_flattened 一样,会将大列表扯开,然后加上编号存到 item 中,但是它和后面两者还是有区别,加入大列表中再嵌套列表,效果则不同,示例如下。
---
- hosts: node2
  remote_user: root
  gather_facts: no
  tasks:
  - name: mkdir test directory
    debug:
      msg: "{{ item }}"
    with_indexed_items:
    - [a,b]
    - [test1,test2,[test4,test5]]
...
执行如下:

如上图所示,嵌套的列表则没有被扯开,而是作为一个整体使用了一个编号
6.4 with_sequence
with_sequence 关键字就是 Linux 中的命令 seq,输出一段有序列的整数,可以设置步长,在循环中通过遍历每个数来达到我们想要的目的
示例如下:
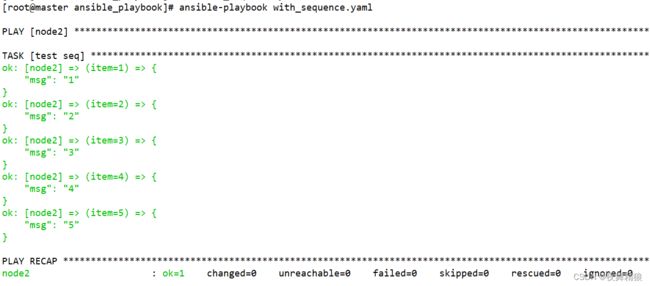
输出从1到5的整数,步长为1。两种写法,效果都一样
写法一
---
- hosts: node2
  remote_user: root
  gather_facts: no
  tasks:
  - name: test seq
    debug:
      msg: "{{ item }}"
    with_sequence:
      start=1
      stride=1
      end=5
...


写法二,这种写法只适用于步长是1
---
- hosts: node2
  remote_user: root
  gather_facts: no
  tasks:
  - name: test seq
    debug:
      msg: "{{ item }}"
    with_sequence:
      count=5
...
当我们不指定stride的值时,stride的值默认为1,但是,当end的值小于start的值时,则必须指定stride的值,而且stride的值必须是负数,示例如下:
---
- hosts: node2
  remote_user: root
  gather_facts: no
  tasks:
  - name: test seq
    debug:
      msg: "{{ item }}"
    with_sequence:
      start=6
      end=2
      stride=-2
...

“with_sequence”还有一个小功能,就是”格式化”输出数据的功能,”格式化数据”的方法与C语言的printf函数的使用方法类似,示例如下:
---
- hosts: node2
  remote_user: root
  gather_facts: no
  tasks:
  - name: test seq
    debug:
      msg: "{{ item }}"
    with_sequence:
      start=6
      end=2
      stride=-2
      format="number is %0.2f"   # 将输出的整数保留两位小数使之成为浮点数
...

6.5 with_random_choice
从给定的列表中随机取出一个
以下示例每次执行都是随机从定义的列表中取出的
---
- hosts: node2
  remote_user: root
  gather_facts: no
  tasks:
  - name: test random
    debug:
      msg: "{{ item }}"
    with_random_choice: [1,2,10,5,90,hello,boo]
...
6.6 with_dict、with_subelements
with_dict 关键字会将一个字典中的键存入 item 的 key 关键字中,值放入 value 关键字中。
示例如下:
---
- hosts: node1
  remote_user: root
  gather_facts: no
  vars:
    users:
      user1: lxr
      user2: bob
  tasks:
  - name: test with_dict
    debug:
      msg: "{{ item }}"
    with_dict: "{{ users }}"
...

”with_subelements”可以处理复合结构的字典数据,在处理这个字典的同时,需要指定一个子元素,这个子元素的值必须是一个列表,之后,”with_subelements”会将子元素的列表中的每一项作为一个整体,将其他子元素作为一个整体,然后将两个整体组合成item。
示例如下:
---
- hosts: node1
  remote_user: root
  gather_facts: no
  vars:
    users:
    - user1: lxr
      phone: 213-74983-43
      girlfirend:
      - Marry
      - Alis
    - user2: Bob
      phone: 898-795-353
      girlfirend:
      - Rose
      - Karry
  tasks:
  - name: test with_subelements
    debug:
      msg: "{{ item }}"
    with_subelements:
    - "{{ users }}"
    - girlfirend
...

6.7 wiht_file、with_fileglob
获取ansible主控端主机某个文件的内容,与剧本中定义的远程主机无关
示例如下:
---
- hosts: node1
  remote_user: root
  gather_facts: no
  tasks:
  - name: test with_file
    debug:
      msg: "{{ item }}"
    with_file:
    - /root/ansible_playbook/with_indexed_items.yaml
...

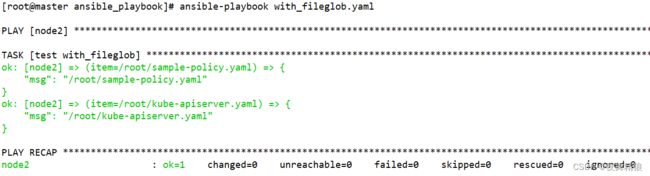
with_fileglob 匹配 ansible主控端某个目录下的文件,不能匹配目录,支持正则,通配符,只适用于主控端。
示例如下:
---
- hosts: node2
  remote_user: root
  gather_facts: no
  tasks:
  - name: test with_fileglob
    debug:
      msg: "{{ item }}"
    with_fileglob:
    - /root/*.yaml
...
6.8 loop
在2.5版本之前的ansible中,大多数人习惯使用”with_X”风格的关键字操作循环,从2.6版本开始,官方开始推荐使用”loop”关键字代替”with_X”风格的关键字
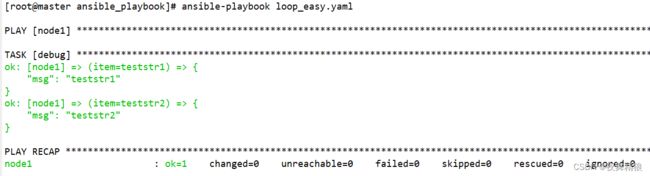
简单循环
---
- hosts: node1
  remote_user: root
  gather_facts: no
  tasks:
  - debug:
      msg: "{{ item }}"
    loop:
    - teststr1
    - teststr2
复杂循环
在2.6版本之后,官方开始推荐使用”loop加filter”的方式来替代”loop加lookup”的方式实现循环
---
- hosts: node1
  remote_user: root
  gather_facts: no
  vars:
    users:
      alice: female
      bob: male
  tasks:
  - debug:
      msg: "{{item.key}} is {{item.value}}"
    loop: "{{ users | dict2items }}"
...
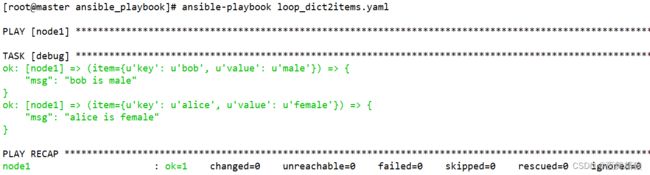
字典数据经过”dict2items”处理后,与字典数据经过”with_dict”处理后的格式完全相同
我所使用的版本是2.9,更多循环的使用案例请参考如下官方文档:
ansible-2.9版本循环官方文档链接
7. 条件判断
7.1 when
在 ansible 中,条件判断使用 when 关键字。使用when关键字为任务指定条件,条件成立,则执行任务,条件不成立,则不执行任务
示例如下:
---
- hosts: server
  remote_user: root
  tasks:
  - name: test when
    file:
      state: directory
      path: /testwhen
    when: ansible_distribution == "CentOS"
...
以上示例表示当操作系统为 “CentOS” 时,则创建目录 /testwhen
在使用条件判断时,可以使用以下运算符
比较运算符:
| 运算符 | 说明 |
|---|---|
| == | 比较两个对象是否相等,相等为真 |
| != | 比较两个对象是否不等,不等为真 |
| > | 比较两个值的大小,如果左边的值大于右边的值,则为真 |
| < | 比较两个值的大小,如果左边的值小于右边的值,则为真 |
| >= | 比较两个值的大小,如果左边的值大于右边的值或左右相等,则为真 |
| <= | 比较两个值的大小,如果左边的值小于右边的值或左右相等,则为真 |
逻辑运算符:
| 运算符 | 说明 |
|---|---|
| and | 逻辑与,当左边与右边同时为真,则返回真 |
| or | 逻辑或,当左边与右边有任意一个为真,则返回真 |
| not | 取反,对一个操作体取反 |
| () | 组合,将一组操作体包装在一起,形成一个较大的操作体 |
逻辑与 and 也可以通过列表的方式,示例如下
---
- hosts: node1
  remote_user: root
  tasks:
  - debug:
      msg: "System release is centos7"
    when:
    - ansible_distribution == "CentOS"
    - ansible_distribution_major_version == "7"
...
ansible默认的机制是当playbook中的某个task执行后,如果task报错,playbook会在报错task的位置上停止,报错task之后的task则不会执行。如果想要执行报错,继续执行后面的task,则可以通过 ”ignore_errors” 关键字实现,示例如下:
---
- hosts: node1
  remote_user: root
  tasks:
  - name: task1
    shell: "ls /testabc"
    register: returnmsg
    ignore_errors: true
  - name: task2
    debug:
      msg: "Command execution successful"
    when: returnmsg.rc == 0
  - name: task3
    debug:
      msg: "Command execution failed"
    when: returnmsg.rc != 0
...
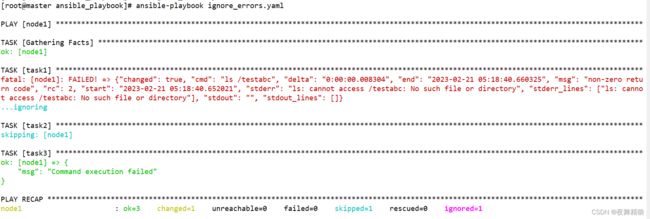
如上图所示,node1 中没有 testabc,所以 task1 执行不成功,但是因为加了 ignore_errors 参数,所以后续的任务会继续执行。
7.2 tests
7.2.1 is exists 和 not is exists
is exists,当判断的内容存在时,则为真。
示例如下:
---
- hosts: node1
  remote_user: root
  gather_facts: no
  vars:
    testpath: /testdir
  tasks:
  - debug:
      msg: "file exist"
    when: testpath is exists
...
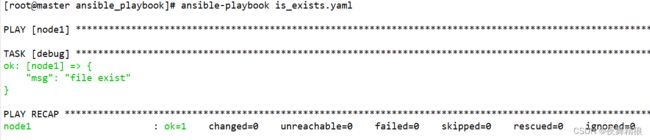
当主控端有 /testdir 路径时,则为真,则会执行 debug 模块,注意,这里的判断仅适用于 ansible 主机,与被控端无关。
== is not exists,当判断的内容不存在时,则为真。==
示例如下:
---
- hosts: node1
  remote_user: root
  gather_facts: no
  vars:
    testpath: /testdir21
  tasks:
  - debug:
      msg: "file not exist"
    when: testpath is not exists   # 或者 not testpath is exists 也是一样的
...
7.2.2 判断变量(defined、undefined、none)
defined :判断变量是否已经定义,已经定义则返回真
undefind :判断变量是否已经定义,未定义则返回真
none :判断变量值是否为空,如果变量已经定义,但是变量值为空,则返回真
示例如下:
---
- hosts: node1
  remote_user: root
  gather_facts: no
  vars:
    var1: "hello_world"
    var2:
  tasks:
  - name: test defined
    debug:
      msg: "var is defined"
    when: var1 is defined
  - name: test undefined
    debug:
      msg: "var is defined"
    when: var3 is undefined
  - name: test none
    debug:
      msg: "var2 is none"
    when: var2 is none
...

7.2.3 判断执行结果
success 或 succeeded:通过任务的返回信息判断任务的执行状态,任务执行成功则返回真
failure 或 failed:通过任务的返回信息判断任务的执行状态,任务执行失败则返回真
change 或 changed:通过任务的返回信息判断任务的执行状态,任务执行状态为changed则返回真
skip 或 skipped:通过任务的返回信息判断任务的执行状态,当任务没有满足条件,而被跳过执行时,则返回真
---
- hosts: node1
  remote_user: root
  gather_facts: no
  vars:
    doshell: "yes"
  tasks:
  - shell: "cat /testdir/abc"
    register: returnmsg
    ignore_errors: true
    when: doshell == "yes"
  - debug:
      msg: "success"
    when: returnmsg is success
  - debug:
      msg: "failed"
    when: returnmsg is failure
  - debug:
      msg: "changed"
    when: returnmsg is change
  - debug:
      msg: "skip"
    when: returnmsg is skip
...
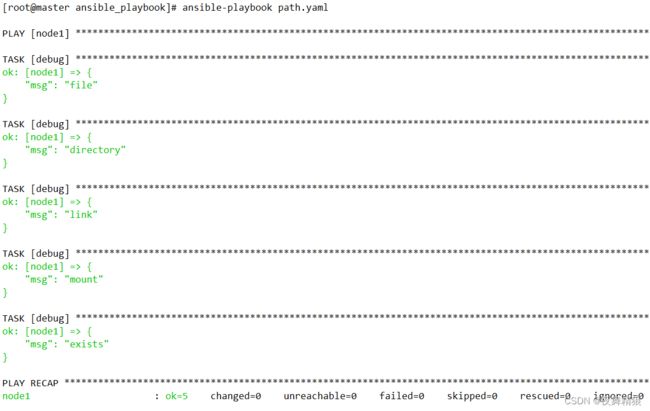
7.2.4 判断路径
注:如下tests的判断均针对于ansible主机中的路径,与目标主机无关
file : 判断路径是否是一个文件,如果路径是一个文件则返回真
directory :判断路径是否是一个目录,如果路径是一个目录则返回真
link :判断路径是否是一个软链接,如果路径是一个软链接则返回真
mount:判断路径是否是一个挂载点,如果路径是一个挂载点则返回真
exists:判断路径是否存在,如果路径存在则返回真
---
- hosts: node1
  remote_user: root
  gather_facts: no
  vars:
    testpath1: "/testdir/a.txt"
    testpath2: "/testdir/testab"
    testpath3: "/testdir/testlink"
    testpath4: "/boot"
  tasks:
  - debug:
      msg: "file"
    when: testpath1 is file
  - debug:
      msg: "directory"
    when: testpath2 is directory
  - debug:
      msg: "link"
    when: testpath3 is link
  - debug:
      msg: "mount"
    when: testpath4 is mount
  - debug:
      msg: "exists"
    when: testpath1 is exists
...
7.2.5 判读奇偶,整除
even :判断数值是否是偶数,是偶数则返回真
odd :判断数值是否是奇数,是奇数则返回真
divisibleby(num) :判断是否可以整除指定的数值(num),如果除以指定的值以后余数为0,则返回真
---
- hosts: node1
  remote_user: root
  gather_facts: no
  vars:
    num1: 4
    num2: 7
    num3: 64
  tasks:
  - debug:
      msg: "An even number"
    when: num1 is even
  - debug:
      msg: "An odd number"
    when: num2 is odd
  - debug:
      msg: "Can be divided exactly by"
    when: num3 is divisibleby(8)

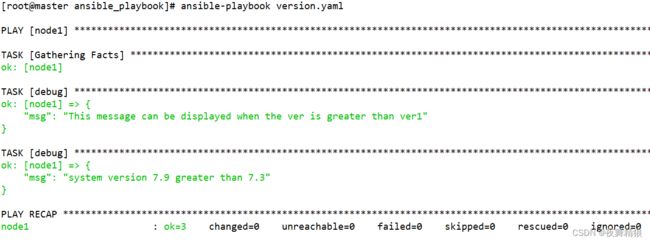
7.2.6 version
version:可以用于对比两个版本号的大小,或者与指定的版本号进行对比,使用语法为 version(‘版本号’, ‘比较操作符’)
比较操作符的语法如下:
大于:>, gt
大于等于:>=, ge
小于:<, lt
小于等于:<=, le
等于: ==, =, eq
不等于:!=, <>, ne
示例:
---
- hosts: node1
  remote_user: root
  vars:
    ver: 7.4.1708
    ver1: 7.4.1707
  tasks:
  - debug:
      msg: "This message can be displayed when the ver is greater than ver1"
    when: ver is version(ver1,">")
  - debug:
      msg: "system version {{ansible_distribution_version}} greater than 7.3"
    when: ansible_distribution_version is version("7.3","gt")
7.2.7 subset、superset
subset:判断一个list是不是另一个list的子集,是另一个list的子集时返回真
superset : 判断一个list是不是另一个list的父集,是另一个list的父集时返回真
---
- hosts: node1
  remote_user: root
  gather_facts: no
  vars:
    a:
    - 2
    - 5
    b: [1,2,3,4,5]
  tasks:
  - debug:
      msg: "A is a subset of B"
    when: a is subset(b)
  - debug:
      msg: "B is the parent set of A"
    when: b is superset(a)
7.2.8 string
判断对象是否是一个字符串,是字符串则返回真
---
- hosts: node1
  remote_user: root
  gather_facts: no
  vars:
    testvar1: 1
    testvar2: "1"
    testvar3: a
  tasks:
  - debug:
      msg: "This variable is a string"
    when: testvar1 is string
  - debug:
      msg: "This variable is a string"
    when: testvar2 is string
  - debug:
      msg: "This variable is a string"
    when: testvar3 is string

testvar1不是字符,所以不满足条件,跳过。
7.2.9 number
判断对象是否是一个数字,是数字则返回真
---
- hosts: node1
  remote_user: root
  gather_facts: no
  vars:
    testvar1: 1
    testvar2: "1"
    testvar3: 00.20
  tasks:
  - debug:
      msg: "This variable is number"
    when: testvar1 is number
  - debug:
      msg: "This variable is a number"
    when: testvar2 is number
  - debug:
      msg: "This variable is a number"
    when: testvar3 is number
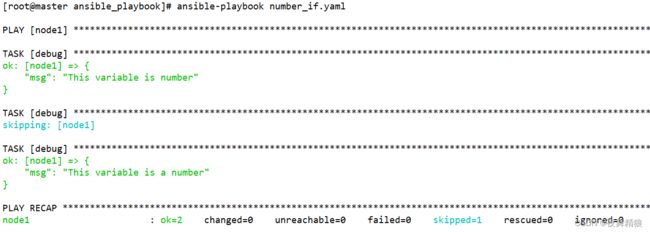
testvar2不是数字,所以不满足条件,跳过。
7.3 block
when条件判断,当条件成立时,执行多个任务
示例如下:
---
- hosts: node1
  remote_user: root
  gather_facts: no
  tasks:
  - block:
      - debug:
          msg: "task1 in block1"
      - debug:
          msg: "task2 in block1"
    when: 2 > 1
...
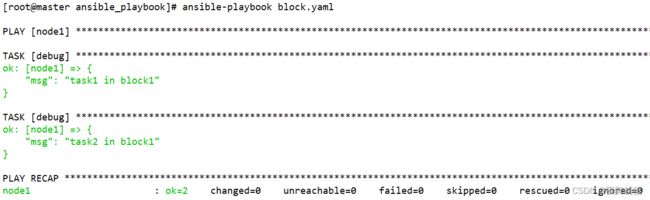
block还具有错误处理功能,当某个任务失败时,继续执行下一个任务,成功则不执行
示例如下:
---
- hosts: node1
  remote_user: root
  tasks:
  - block:
      - command: 'ls /abcd'
    rescue:   # 通过此关键字来决定当前面的任务执行失败后,你后面要执行什么任务
      - debug:
          msg: 'I caught an error'
...

关键字 always ,无论block中的任务执行成功还是失败,always中的任务都会被执行
示例如下:
---
- hosts: node1
  remote_user: root
  gather_facts: no
  tasks:
  - name: Attempt and graceful roll back demo
    block:
    - debug:
        msg: 'I execute normally'
    - name: i force a failure
      command: /bin/false
    - debug:
        msg: 'I never execute, due to the above task failing, :-('
    rescue:
    - debug:
        msg: 'I caught an error'
    - name: i force a failure in middle of recovery! >:-)
      command: /bin/false
    - debug:
        msg: 'I also never execute :-('
    always:
    - debug:
        msg: "This always executes"
...

如上图所示,block 中有多个任务,首先执行 debug 模块任务,肯定会成功,接着command模块任务肯定会执行失败,因此下一个 debug 模块不会执行,任务失败后直接执行 rescue 关键字下的任务,再接着 rescue 下的任务 command 也会执行失败,无论成功与否,都会最终执行 always 关键字下面的任务。
7.3 fail
调用fail模块时,playbook会马上终止任务,可以和when一起使用,当条件成立时,立刻终止当前任务
示例如下:
---
- hosts: node1
  remote_user: root
  tasks:
  - shell: "echo 'This is a string for testing--error'"
    register: return_value
  - fail:
      msg: "task fail,please check!!!"   # fail的msg关键字用来自定义fail模块的默认输出
    when: "'error' in return_value.stdout"
  - debug:
      msg: "I never execute,Because the playbook has stopped"
...

从上图可以看出,最后一个 debug 染污并没有被执行,因为在此之前已经终止任务。
’in’关键字的用法与python中’in’的用法相同,可以使用’in’关键字判断一个字符串是否存在于另一个字符串中,也可以用于判断一个特定的值是否存在于列表中,由于shell标准输出的信息中的确包含error字符串,所以fail模块对应的条件成立,最终调用fail模块,playbook终止运行。不过需要注意的是,当使用”in”或者”not in”进行条件判断时,整个条件需要用引号引起,并且,需要判断的字符串也需要使用引号引起。
7.4 failed_when
failed_when 关键字对应的条件成立时,将对应任务的执行状态设置为失败,并不是真的任务执行失败了,只是关键字对应的条件成立了
示例如下:
---
- hosts: node1
  remote_user: root
  gather_facts: no
  tasks:
  - debug:
      msg: "I execute normally"
  - shell: "echo 'This is a string for testing error'"
    register: return_value
    failed_when: ' "error" in return_value.stdout'
  - debug:
      msg: "I never execute,Because the playbook has stopped"
...
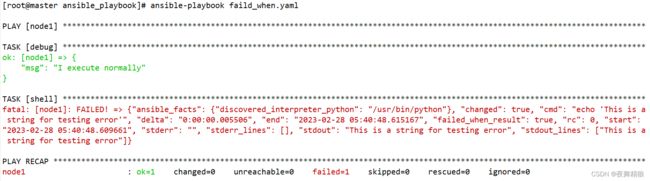
7.5 changed_when
‘changed_when’关键字的作用是在条件成立时,将对应任务的执行状态设置为changed,当将’changed_when’直接设置为false时,对应任务的状态将不会被设置为’changed’,如果任务原本的执行状态为’changed’,最终则会被设置为’ok
示例如下:
---
- hosts: node1
  remote_user: root
  tasks:
  - debug:
      msg: "test message"
    changed_when: 2 > 1
...


---
- hosts: node1
  remote_user: root
  gather_facts: no
  tasks:
  - command: "ls /tmp"
    changed_when: false
...


8. 过滤器(filters)
将数据通过管道符传递给对应的过滤器,过滤器会将数据处理成我们想要的结果
8.1 字符串过滤器
---
- hosts: node1
  remote_user: root
  vars:
    testvar: "abc123ABC 666"
    testvar1: "  abc  "
    testvar2: '123456789'
    testvar3: "1a2b,@#$%^&"
  tasks:
  - debug:
      #将字符串转换成纯大写
      msg: "{{ testvar | upper }}"
  - debug:
      #将字符串转换成纯小写
      msg: "{{ testvar | lower }}"
  - debug:
      #将字符串变成首字母大写,之后所有字母纯小写
      msg: "{{ testvar | capitalize }}"
  - debug:
      #将字符串反转
      msg: "{{ testvar | reverse }}"
  - debug:
      #返回字符串的第一个字符
      msg: "{{ testvar | first }}"
  - debug:
      #返回字符串的最后一个字符
      msg: "{{ testvar | last }}"
  - debug:
      #将字符串开头和结尾的空格去除
      msg: "{{ testvar1 | trim }}"
  - debug:
      #将字符串放在中间,并且设置字符串的长度为30,字符串两边用空格补齐30位长
      msg: "{{ testvar1 | center(width=30) }}"
  - debug:
      #返回字符串长度,length与count等效,可以写为count
      msg: "{{ testvar2 | length }}"
  - debug:
      #将字符串转换成列表,每个字符作为一个元素
      msg: "{{ testvar3 | list }}"
  - debug:
      #将字符串转换成列表,每个字符作为一个元素,并且随机打乱顺序
      #shuffle的字面意思为洗牌
      msg: "{{ testvar3 | shuffle }}"
  - debug:
      #将字符串转换成列表,每个字符作为一个元素,并且随机打乱顺序
      #在随机打乱顺序时,将ansible_date_time.epoch的值设置为随机种子
      #也可以使用其他值作为随机种子,ansible_date_time.epoch是facts信息
      msg: "{{ testvar3 | shuffle(seed=(ansible_date_time.epoch)) }}"
...
8.2 数值过滤器
---
- hosts: node1
  remote_user: root
  vars:
    testvar: -1
  tasks:
  - debug:
      #将对应的值转换成int类型
      #ansible中,字符串和整形不能直接计算,比如{{ 8+'8' }}会报错
      #所以,我们可以把一个值为数字的字符串转换成整形后再做计算
      msg: "{{ 8+('8' | int) }}"
  - debug:
      #将对应的值转换成int类型,如果无法转换,默认返回0
      #使用int(default=6)或者int(6)时,如果无法转换则返回指定值6
      msg: "{{ 'a' | int(default=6) }}"
  - debug:
      #将对应的值转换成浮点型,如果无法转换,默认返回'0.0'
      msg: "{{ '8' | float }}"
  - debug:
      #当对应的值无法被转换成浮点型时,则返回指定值’8.8‘
      msg: "{{ 'a' | float(8.88) }}"
  - debug:
      #获取对应数值的绝对值
      msg: "{{ testvar | abs }}"
  - debug:
      #四舍五入
      msg: "{{ 12.5 | round }}"
  - debug:
      #取小数点后五位
      msg: "{{ 3.1415926 | round(5) }}"
  - debug:
      #从0到100中随机返回一个随机数
      msg: "{{ 100 | random }}"
  - debug:
      #从5到10中随机返回一个随机数
      msg: "{{ 10 | random(start=5) }}"
  - debug:
      #从5到15中随机返回一个随机数,步长为3
      #步长为3的意思是返回的随机数只有可能是5、8、11、14中的一个
      msg: "{{ 15 | random(start=5,step=3) }}"
  - debug:
      #从0到15中随机返回一个随机数,这个随机数是5的倍数
      msg: "{{ 15 | random(step=5) }}"
  - debug:
      #从0到15中随机返回一个随机数,并将ansible_date_time.epoch的值设置为随机种子
      #也可以使用其他值作为随机种子,ansible_date_time.epoch是facts信息
      #seed参数从ansible2.3版本开始可用
      msg: "{{ 15 | random(seed=(ansible_date_time.epoch)) }}"
...
8.3 列表过滤器
---
- hosts: node1
  remote_user: root
  vars:
    testvar7: [22,18,5,33,27,30]
    testvar8: [1,[7,2,[15,9]],3,5]
    testvar9: [1,'b',5]
    testvar10: [1,'A','b',['QQ','wechat'],'CdEf']
    testvar11: ['abc',1,3,'a',3,'1','abc']
    testvar12: ['abc',2,'a','b','a']
  tasks:
  - debug:
      #返回列表长度,length与count等效,可以写为count
      msg: "{{ testvar7 | length }}"
  - debug:
      #返回列表中的第一个值
      msg: "{{ testvar7 | first }}"
  - debug:
      #返回列表中的最后一个值
      msg: "{{ testvar7 | last }}"
  - debug:
      #返回列表中最小的值
      msg: "{{ testvar7 | min }}"
  - debug:
      #返回列表中最大的值
      msg: "{{ testvar7 | max }}"
  - debug:
      #将列表升序排序输出
      msg: "{{ testvar7 | sort }}"
  - debug:
      #将列表降序排序输出
      msg: "{{ testvar7 | sort(reverse=true) }}"
  - debug:
      #返回纯数字非嵌套列表中所有数字的和
      msg: "{{ testvar7 | sum }}"
  - debug:
      #如果列表中包含列表,那么使用flatten可以'拉平'嵌套的列表
      #2.5版本中可用,执行如下示例后查看效果
      msg: "{{ testvar8 | flatten }}"
  - debug:
      #如果列表中嵌套了列表,那么将第1层的嵌套列表‘拉平’
      #2.5版本中可用,执行如下示例后查看效果
      msg: "{{ testvar8 | flatten(levels=1) }}"
  - debug:
      #过滤器都是可以自由结合使用的,就好像linux命令中的管道符一样
      #如下,取出嵌套列表中的最大值
      msg: "{{ testvar8 | flatten | max }}"
  - debug:
      #将列表中的元素合并成一个字符串
      msg: "{{ testvar9 | join }}"
  - debug:
      #将列表中的元素合并成一个字符串,每个元素之间用指定的字符隔开
      msg: "{{ testvar9 | join(' , ') }}"
  - debug:
      #从列表中随机返回一个元素
      #对列表使用random过滤器时,不能使用start和step参数
      msg: "{{ testvar9 | random }}"
  - debug:
      #从列表中随机返回一个元素,并将ansible_date_time.epoch的值设置为随机种子
      #seed参数从ansible2.3版本开始可用
      msg: "{{ testvar9 | random(seed=(ansible_date_time.epoch)) }}"
  - debug:
      #随机打乱顺序列表中元素的顺序
      #shuffle的字面意思为洗牌
      msg: "{{ testvar9 | shuffle }}"
  - debug:
      #随机打乱顺序列表中元素的顺序
      #在随机打乱顺序时,将ansible_date_time.epoch的值设置为随机种子
      #seed参数从ansible2.3版本开始可用
      msg: "{{ testvar9 | shuffle(seed=(ansible_date_time.epoch)) }}"
  - debug:
      #将列表中的每个元素变成纯大写
      msg: "{{ testvar10 | upper }}"
  - debug:
      #将列表中的每个元素变成纯小写
      msg: "{{ testvar10 | lower }}"
  - debug:
      #去掉列表中重复的元素,重复的元素只留下一个
      msg: "{{ testvar11 | unique }}"
  - debug:
      #将两个列表合并,重复的元素只留下一个
      #也就是求两个列表的并集
      msg: "{{ testvar11 | union(testvar12) }}"
  - debug:
      #取出两个列表的交集,重复的元素只留下一个
      msg: "{{ testvar11 | intersect(testvar12) }}"
  - debug:
      #取出存在于testvar11列表中,但是不存在于testvar12列表中的元素
      #去重后重复的元素只留下一个
      #换句话说就是:两个列表的交集在列表1中的补集
      msg: "{{ testvar11 | difference(testvar12) }}"
  - debug:
      #取出两个列表中各自独有的元素,重复的元素只留下一个
      #即去除两个列表的交集,剩余的元素
      msg: "{{ testvar11 | symmetric_difference(testvar12) }}"
...
8.4 变量未定义时相关操作的过滤器
---
- hosts: node1
  remote_user: root
  gather_facts: no
  vars:
    testvar6: ''
  tasks:
  - debug:
      #如果变量没有定义,则临时返回一个指定的默认值
      #注:如果定义了变量,变量值为空字符串,则会输出空字符
      #default过滤器的别名是d
      msg: "{{ testvar5 | default('hello world') }}"
  - debug:
      #如果变量的值是一个空字符串或者变量没有定义,则临时返回一个指定的默认值
      msg: "{{ testvar6 | default('hello world',boolean=true) }}"
  - debug:
      #如果对应的变量未定义,则报出“Mandatory variable not defined.”错误,而不是报出默认错误
      msg: "{{ testvar5 | mandatory }}"
...
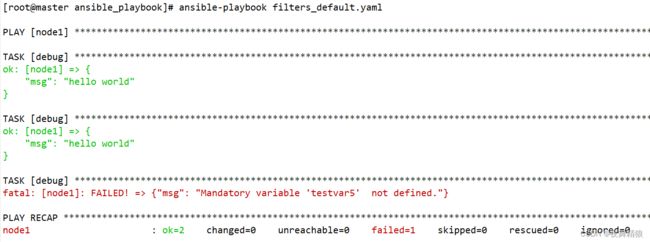
8.5 json_query
json_query 过滤器允许您查询复杂的 JSON 结构并使用循环结构对其进行迭代。
如下示例:
在主控端有如下 json 文件,
{
  "ports": [
    {
      "name": "app1",
      "port": 8080
    },
    {
      "name": "app2",
      "port": 8081
    }
  ]
}


上面的json格式的文件如果转换从成yaml格式如下:
ports:
- name: app1
  port: 8080
- name: app2
  port: 8082
通过json_query过滤器获取到上述json中的所有ports的name,则可以使用如下方法:
---
- hosts: node1
  remote_user: root
  gather_facts: no
  tasks:
  - include_vars:
      file: "/root/ansible_playbook/tomcat_var.yaml"
      name: tomcat_var
  - debug:
      msg: "{{ tomcat_var | json_query('ports[*].name') }}"
...

使用 json_query 过滤器获取如下文件中所有的 hobby
---
test:
  users:
  - name: tom
    age: 18
    hobby:
    - Skateboard
    - VideoGame
  - name: jerry
    age: 20
    hobby:
    - Music
---
- hosts: node1
  remote_user: root
  gather_facts: no
  tasks:
  - include_vars:
      file: "/root/ansible_playbook/vars/user.yaml"
      name: testvar
  - debug:
      msg: "{{ testvar | json_query('test.users[*].hobby[*]') }}"

指定条件,只获取 tom 的爱好
---
- hosts: node1
  remote_user: root
  gather_facts: no
  tasks:
  - include_vars:
      file: "/root/ansible_playbook/vars/user.yaml"
      name: testvar
  - debug:
      msg: "{{ testvar | json_query('test.users[?name == `tom`].hobby[*]') }}"

获取所有用户的姓名和年龄
---
- hosts: node1
  remote_user: root
  gather_facts: no
  tasks:
  - include_vars:
      file: "/root/ansible_playbook/vars/user.yaml"
      name: testvar
  - debug:
     msg: "{{ testvar | json_query('test.users[*].{ name:name,age:age }') }}"
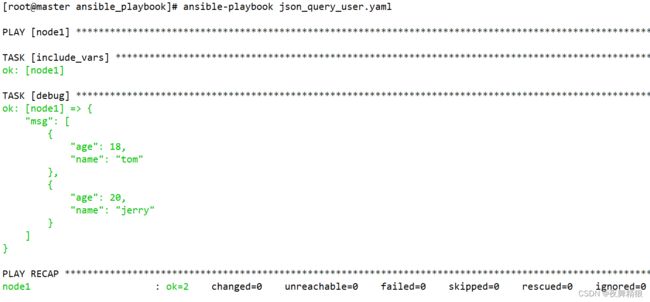
8.6 quote
在调用shell模块时,如果引用某些变量时需要添加引号,则可以使用quote过滤器代替引号
示例如下:
- hosts: node1
  remote_user: root
  vars:
    ver: version
  tasks:
  - name: test quote
    shell: "echo {{ ver | quote }} > /testdir/test_quote.file"
...

使用引号则是如下写法:
    shell: "echo '{{ver}}' > /testdir/test_quote.file"
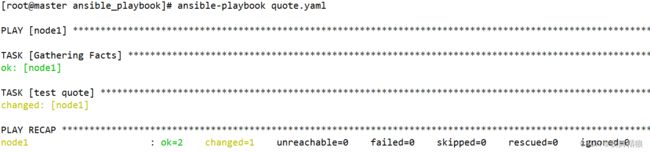
8.8 其它过滤器
---
- hosts: node1
  remote_user: root
  gather_facts: no
  tasks:
  ######################################################################
  #在调用shell模块时,如果引用某些变量时需要添加引号,则可以使用quote过滤器代替引号
  #示例如下,先看示例,后面会有注解
  - shell: "echo {{teststr | quote}} > /testdir/testfile"
    vars:
      teststr: "a\nb\nc"
  #上例中shell模块的写法与如下写法完全等效
  #shell: "echo '{{teststr}}' > /testdir/testfile"
  #没错,如你所见,quote过滤器能够代替引号
  #上例中,如果不对{{teststr}}添加引号,则会报错,因为teststr变量中包含"\n"转义符
  ######################################################################
  #ternary过滤器可以实现三元运算的效果 示例如下
  #如下示例表示如果name变量的值是John,那么对应的值则为Mr,否则则为Ms
  #简便的实现类似if else对变量赋值的效果
  - debug:
      msg: "{{ (name == 'John') | ternary('Mr','Ms') }}"
    vars:
      name: "John"
  ######################################################################
  #basename过滤器可以获取到一个路径字符串中的文件名
  - debug:
      msg: "{{teststr | basename}}"
    vars:
      teststr: "/testdir/ansible/testfile"
  ######################################################################
  #获取到一个windows路径字符串中的文件名,2.0版本以后的ansible可用
  - debug:
      msg: "{{teststr | win_basename}}"
    vars:
      teststr: 'D:\study\zsythink'
  ######################################################################
  #dirname过滤器可以获取到一个路径字符串中的路径名
  - debug:
      msg: "{{teststr | dirname}}"
    vars:
      teststr: "/testdir/ansible/testfile"
  ######################################################################
  #获取到一个windows路径字符串中的文件名,2.0版本以后的ansible可用
  - debug:
      msg: "{{teststr | win_dirname}}"
    vars:
      teststr: 'D:\study\zsythink'
  ######################################################################
  #将一个windows路径字符串中的盘符和路径分开,2.0版本以后的ansible可用
  - debug:
      msg: "{{teststr | win_splitdrive}}"
    vars:
      teststr: 'D:\study\zsythink'
  #可以配合之前总结的过滤器一起使用,比如只获取到盘符,示例如下
  #msg: "{{teststr | win_splitdrive | first}}"
  #可以配合之前总结的过滤器一起使用,比如只获取到路径,示例如下
  #msg: "{{teststr | win_splitdrive | last}}"
  ######################################################################
  #realpath过滤器可以获取软链接文件所指向的真正文件
  - debug:
      msg: "{{ path | realpath }}"
    vars:
      path: "/testdir/ansible/testsoft"
  ######################################################################
  #relpath过滤器可以获取到path对于“指定路径”来说的“相对路径”
  - debug:
      msg: "{{ path | relpath('/testdir/testdir') }}"
    vars:
      path: "/testdir/ansible"
  ######################################################################
  #splitext过滤器可以将带有文件名后缀的路径从“.后缀”部分分开
  - debug:
      msg: "{{ path | splitext }}"
    vars:
      path: "/etc/nginx/conf.d/test.conf"
  #可以配置之前总结的过滤器,获取到文件后缀
  #msg: "{{ path | splitext | last}}"
  #可以配置之前总结的过滤器,获取到文件前缀名
  #msg: "{{ path | splitext | first | basename}}"
  ######################################################################
  #to_uuid过滤器能够为对应的字符串生成uuid
  - debug:
      msg: "{{ teststr | to_uuid }}"
    vars:
      teststr: "This is a test statement"
  ######################################################################
  #bool过滤器可以根据字符串的内容返回bool值true或者false
  #字符串的内容为yes、1、True、true则返回布尔值true,字符串内容为其他内容则返回false
  - debug:
      msg: "{{ teststr | bool }}"
    vars:
      teststr: "1"
  #当和用户交互时,有可能需要用户从两个选项中选择一个,比如是否继续,
  #这时,将用户输入的字符串通过bool过滤器处理后得出布尔值,从而进行判断,比如如下用法
  #- debug:
  #    msg: "output when bool is true"
  #  when: some_string_user_input | bool
  ######################################################################
  #map过滤器可以从列表中获取到每个元素所共有的某个属性的值,并将这些值组成一个列表
  #当列表中嵌套了列表,不能越级获取属性的值,也就是说只能获取直接子元素的共有属性值。
  - vars:
      users:
      - name: tom
        age: 18
        hobby:
        - Skateboard
        - VideoGame
      - name: jerry
        age: 20
        hobby:
        - Music
    debug:
      msg: "{{ users | map(attribute='name') | list }}"
  #也可以组成一个字符串,用指定的字符隔开,比如分号
  #msg: "{{ users | map(attribute='name') | join(';') }}"
  ######################################################################
  #与python中的用法相同,两个日期类型相减能够算出两个日期间的时间差
  #下例中,我们使用to_datatime过滤器将字符串类型转换成了日期了类型,并且算出了时间差
  - debug:
      msg: '{{ ("2016-08-14 20:00:12"| to_datetime) - ("2012-12-25 19:00:00" | to_datetime) }}'
  #默认情况下,to_datatime转换的字符串的格式必须是“%Y-%m-%d %H:%M:%S”
  #如果对应的字符串不是这种格式,则需要在to_datetime中指定与字符串相同的时间格式,才能正确的转换为时间类型
  - debug:
      msg: '{{ ("20160814"| to_datetime("%Y%m%d")) - ("2012-12-25 19:00:00" | to_datetime) }}'
  #如下方法可以获取到两个日期之间一共相差多少秒
  - debug:
      msg: '{{ ( ("20160814"| to_datetime("%Y%m%d")) - ("20121225" | to_datetime("%Y%m%d")) ).total_seconds() }}'
  #如下方法可以获取到两个日期“时间位”相差多少秒,注意:日期位不会纳入对比计算范围
  #也就是说,下例中的2016-08-14和2012-12-25不会纳入计算范围
  #只是计算20:00:12与08:30:00相差多少秒
  #如果想要算出连带日期的秒数差则使用total_seconds()
  - debug:
      msg: '{{ ( ("2016-08-14 20:00:12"| to_datetime) - ("2012-12-25 08:30:00" | to_datetime) ).seconds }}'
  #如下方法可以获取到两个日期“日期位”相差多少天,注意:时间位不会纳入对比计算范围
  - debug:
      msg: '{{ ( ("2016-08-14 20:00:12"| to_datetime) - ("2012-12-25 08:30:00" | to_datetime) ).days }}'
  ######################################################################
  #使用base64编码方式对字符串进行编码
  - debug:
      msg: "{{ 'hello' | b64encode }}"
  #使用base64编码方式对字符串进行解码
  - debug:
      msg: "{{ 'aGVsbG8=' | b64decode }}"
  #######################################################################
  #使用sha1算法对字符串进行哈希
  - debug:
      msg: "{{ '123456' | hash('sha1') }}"
  #使用md5算法对字符串进行哈希
  - debug:
      msg: "{{ '123456' | hash('md5') }}"
  #获取到字符串的校验和,与md5哈希值一致
  - debug:
      msg: "{{ '123456' | checksum }}"
  #使用blowfish算法对字符串进行哈希,注:部分系统支持
  - debug:
      msg: "{{ '123456' | hash('blowfish') }}"
  #使用sha256算法对字符串进行哈希,哈希过程中会生成随机"盐",以便无法直接对比出原值
  - debug:
      msg: "{{ '123456' | password_hash('sha256') }}"
  #使用sha256算法对字符串进行哈希,并使用指定的字符串作为"盐"
  - debug:
      msg: "{{ '123456' | password_hash('sha256','mysalt') }}"
  #使用sha512算法对字符串进行哈希,哈希过程中会生成随机"盐",以便无法直接对比出原值
  - debug:
      msg: "{{ '123123' | password_hash('sha512') }}"
  #使用sha512算法对字符串进行哈希,并使用指定的字符串作为"盐"
  - debug:
      msg: "{{ '123123' | password_hash('sha512','ebzL.U5cjaHe55KK') }}"
  #如下方法可以幂等的为每个主机的密码生成对应哈希串
  #有了之前总结的过滤器用法作为基础,你一定已经看懂了
  - debug:
      msg: "{{ '123123' | password_hash('sha512', 65534|random(seed=inventory_hostname)|string) }}"
9. lookup插件
lookup类型的插件的主要作用是访问外部的数据源,比如,获取到外部数据并赋值给某个变量,以便之后使用这些数据,lookup插件的操作都是在ansible主机中进行的,与目标主机没有关系
语法:lookup(‘插件名’,被处理数据或参数)
查看有哪些lookup插件可以使用,可以使用如下命令进行查看
ansible-doc -t lookup -l
单独查看某个插件的使用方法,比如dict插件的使用方法,则可以使用如下命令
ansible-doc -t lookup 插件名
演示官方的一个示例如下:
使用 dict 插件
[root@master vars]# ansible-doc -t lookup dict
> DICT    (/usr/lib/python2.7/site-packages/ansible/plugins/lookup/dict.py)

        Takes dictionaries as input and returns a list with each item in the list being a dictionary with 'key'
        and 'value' as keys to the previous dictionary's structure.

  * This module is maintained by The Ansible Community
OPTIONS (= is mandatory):

= _terms
        A list of dictionaries


        METADATA:
          status:
          - preview
          supported_by: community


EXAMPLES:

vars:
  users:
    alice:
      name: Alice Appleworth
      telephone: 123-456-7890
    bob:
      name: Bob Bananarama
      telephone: 987-654-3210
tasks:
  # with predefined vars
  - name: Print phone records
    debug:
      msg: "User {{ item.key }} is {{ item.value.name }} ({{ item.value.telephone }})"
    loop: "{{ lookup('dict', users) }}"
  # with inline dictionary
  - name: show dictionary
    debug:
      msg: "{{item.key}}: {{item.value}}"
    with_dict: {a: 1, b: 2, c: 3}
  # Items from loop can be used in when: statements
  - name: set_fact when alice in key
    set_fact:
      alice_exists: true
    loop: "{{ lookup('dict', users) }}"
    when: "'alice' in item.key"

RETURN VALUES:

  _list:
    description:
      - list of composed dictonaries with key and value
    type: list
---
- hosts: node1
  remote_user: root
  gather_facts: no
  vars:
    users:
      alice:
        name: Alice Appleworth
        telephone: 123-456-7890
      bob:
        name: Bob Bananarama
        telephone: 987-654-3210
  tasks:
  # with predefined vars
  - name: Print phone records
    debug:
      msg: "User {{ item.key }} is {{ item.value.name }} ({{ item.value.telephone }})"
    loop: "{{ lookup('dict', users) }}"
  # with inline dictionary
  - name: show dictionary
    debug:
      msg: "{{item.key}}: {{item.value}}"
    with_dict: {a: 1, b: 2, c: 3}
  # Items from loop can be used in when: statements
  - name: set_fact when alice in key
    set_fact:
      alice_exists: true
    loop: "{{ lookup('dict', users) }}"
    when: "'alice' in item.key"
执行如下:
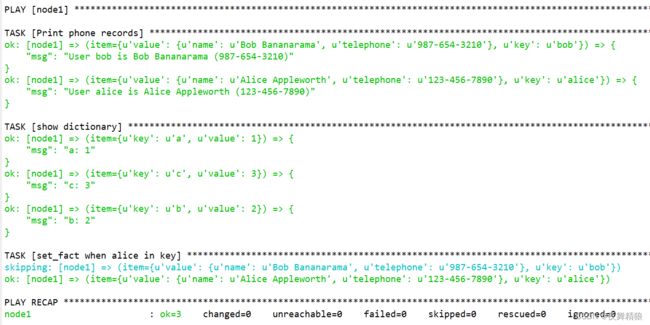
dict 插件能循环的获取到”字典”中的每个键值对,跟前文的with_dict循环效果一样。
file插件可以获取到指定文件的文件内容(注:文件位于ansible主机中),示例如下
---
- hosts: node1
  remote_user: root
  gather_facts: no
  tasks:
  - debug:
      msg: "{{ lookup('file','/testdir/testfile') }}"  #该文件在ansible主控端,不是受控节点,不能受hosts误导
...
执行如下:

获取多个文件的内容
---
- hosts: node1
  remote_user: root
  gather_facts: no
  tasks:
  - debug:
      msg: "{{ lookup('file','/testdir/testfile','/testdir/testfile1') }}"
...
执行如下:

file插件获得多个文件中的内容时,会将多个文件中的内容放置在一个字符串中,并用”逗号”隔开每个文件中的内容,当我们想要得到一个完整的字符串时,这样非常方便,但是在某些时候,我可能并不想将所有文件的内容变成一整个字符串,而是想要获得一个字符串列表,将每个文件的内容当做列表中的一个独立的字符串,如果我想要实现这样的需求,该怎样做呢?我们可以使用”wantlist”参数,表示我们想要获取到的值是一个列表,而非字符串,示例如下
---
- hosts: node1
  remote_user: root
  gather_facts: no
  tasks:
  - debug:
      msg: "{{ lookup('file','/testdir/testfile','/testdir/testfile1',wantlist=true) }}"
...
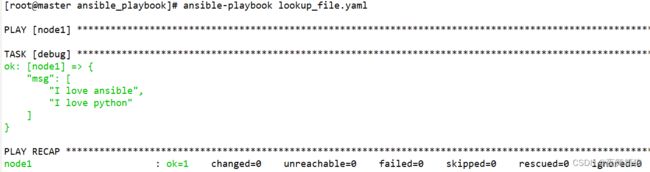
大多数lookup插件的默认行为会返回一个用逗号隔开的字符串,如果想要返回一个列表,则需要使用”wantlist=True”,在2.5版本的ansible中,引入了一个新的jinja2函数,这个函数叫做”query”,通过query函数也可以调用lookup插件,但是通过query函数调用lookup插件时,query函数的默认行为是返回一个列表,也就是说,如下两种写法是等价的
  - debug:
      msg: "{{ lookup('file','/testdir/testfile',wantlist=true) }}"
  - debug:
      msg: "{{ query('file','/testdir/testfile') }}"

而”query”函数又有一个简写的格式”q”,所以,如下写法与上述两种写法也是等价的
  - debug:
      msg: "{{ q('file','/testdir/testfile') }}"
在2.6版本的ansible中,我们可以使用errors关键字控制lookup插件出错时的处理机制,如果我想要在lookup插件执行出错时忽略错误,则可以将errors的值设置为ignore,示例如下:
  - debug:
      msg: "{{ lookup('file','/testdir/testfil',errors='ignore') }}"
errors的值可以设置为ignore、warn或者strict,缺省值为strict
file插件对多个文件进行操作时,与之前总结的with_file在本质上没有什么区别。
一些其他的lookup插件的用法
---
- hosts: node1
  remote_user: root
  gather_facts: no
  tasks:
  #file插件可以获取ansible主机中指定文件的内容
  - debug:
      msg: "{{ lookup('file','/testdir/testfile') }}"
  #env插件可以获取ansible主机中指定变量的值
  - debug:
      msg: "{{ lookup('env','PATH') }}"
  #first_found插件可以获取列表中第一个找到的文件
  #按照列表顺序在ansible主机中查找
  - debug:
      msg: "{{ lookup('first_found',looklist) }}"
    vars:
      looklist:
        - /testdir
        - /tmp/staging
  #当使用with_first_found时,可以在列表的最后添加- skip: true
  #表示如果列表中的所有文件都没有找到,则跳过当前任务,不会报错
  #当不确定有文件能够被匹配到时,推荐这种方式
  - debug:
      msg: "{{item}}"
    with_first_found:
      - /testdir1
      - /tmp/staging
      - skip: true
  #ini插件可以在ansible主机中的ini文件中查找对应key的值
  #如下示例表示从test.ini文件中的testA段落中查找testa1对应的值
  #测试文件/testdir/test.ini的内容如下(不包含注释符#号)
  #[testA]
  #testa1=Andy
  #testa2=Armand
  #
  #[testB]
  #testb1=Ben
  - debug:
      msg: "{{ lookup('ini','testa1 section=testA file=/testdir/test.ini') }}"
  #当未找到对应key时,默认返回空字符串,如果想要指定返回值,可以使用default选项,如下
  #msg: "{{ lookup('ini','test666 section=testA file=/testdir/test.ini default=notfound') }}"
  #可以使用正则表达式匹配对应的键名,需要设置re=true,表示开启正则支持,如下
  #msg: "{{ lookup('ini','testa[12] section=testA file=/testdir/test.ini re=true') }}"
  #ini插件除了可以从ini类型的文件中查找对应key,也可以从properties类型的文件中查找key
  #默认在操作的文件类型为ini,可以使用type指定properties类型,如下例所示
  #如下示例中,application.properties文件内容如下(不包含注释符#号)
  #http.port=8080
  #redis.no=0
  #imageCode = 1,2,3
  - debug:
      msg: "{{ lookup('ini','http.port type=properties file=/testdir/application.properties') }}"
  #dig插件可以获取指定域名的IP地址
  #此插件依赖dnspython库,可使用pip安装pip install dnspython
  #如果域名使用了CDN,可能返回多个地址
  - debug:
      msg: "{{ lookup('dig','www.baidu.com',wantlist=true) }}"
  #password插件可以生成随机的密码并保存在指定文件中
  - debug:
      msg: "{{ lookup('password','/tmp/testpasswdfile') }}"
  #以上插件还有一些参数我们没有涉及到,而且也还有很多插件没有总结,等到用到对应的插件时,再行介绍吧
  #你也可以访问官网的lookup插件列表页面,查看各个插件的用法
  #https://docs.ansible.com/ansible/latest/plugins/lookup.html
10. include
在某个剧本中引用某一个文件在该剧本中执行
搭建lamp和lnmp环境,提前定义好mp环境,这样可以直接在其它剧本中直接引用,示例如下。
# cat lamp.yml
---
- hosts: test70
  remote_user: root
  gather_facts: no
  tasks:
  - include: install_MysqlAndPhp.yml
  - yum:
      name: httpd
      state: present

# cat lnmp.yml
---
- hosts: test70
  remote_user: root
  gather_facts: no
  tasks:
  - include: install_MysqlAndPhp.yml
  - yum:
      name: nginx
      state: present
11. include_tasks
# cat intest.yml
---
- hosts: node1
  remote_user: root
  gather_facts: no
  tasks:
  - debug:
      msg: "test task1"
  - include_tasks: in.yml
  - debug:
      msg: "test task2"

# cat in.yml
- debug:
    msg: "task1 in in.yml"
- debug:
    msg: "task2 in in.yml"

当我们使用”include_tasks”时,”include_tasks”本身会被当做一个”task”,这个”task”会把被include的文件的路径输出在控制台中,这就是”include_tasks模块”与”include模块”之间的区别,如果将上例中的”include_tasks”关键字替换成”include”,控制台中则不会显示上图中标注的任务信息,由此可见”include”是透明的,”include_tasks”是可见的,”include_tasks”更像是一个任务,这个任务包含了其他的一些任务。
12. jinja2模板
12.1 template
假设现在需要部署10台redis服务,每台机器的redis都应该监听在自己的非本地回环地址上,但是,每个主机的IP地址都不一样,我们怎样才能获取到每个机器的IP地址呢?你肯定已经想到了,我们在使用ansible连接到对应主机时,就已经获取到了对应主机的IP地址,对应的IP就存放在”ansible_host”变量中(在配置ansible清单时也是将远程主机的IP地址写入到ansible_host变量中,如果你忘记了,情回顾前文,但是需要注意,ansible控制机对应的ansible_host变量的值并不是自己的IP,而是在清单中配置的主机别名),所以,我们只要在bind设置中使用”ansible_host”变量进行替换即可,修改redis.conf文件,如下所示:
...
bind 12.0.0.1  # 此处改成每台主机的IP地址
...
实现如下:
# 在控制节点先准备好redis.confw文件,通过 ansible_host 变量来获取每台主机IP
[root@master redis]# cat redis.conf
# hello wrod jlkfjkdjlmlmlmfdmm, .jolfd
bind {{ ansible_host }}

---
- hosts: node1
  remote_user: root
  tasks:
  - template:
      src: ~/ansible_playbook/redis/redis.conf
      dest: /etc/redis.conf
...

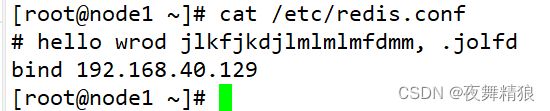
以上操作通过命令行也可以实现
# ansible node1 -m template -a "src=~/ansible_playbook/redis/redis.conf dest=/etc/redis.conf"
template模块还有以下常用参数
owner参数: 指定最终生成的文件拷贝到远程主机后的属主。
group参数: 指定最终生成的文件拷贝到远程主机后的属组。
mode参数: 指定最终生成的文件拷贝到远程主机后的权限,如果你想将权限设置为”rw-r–r–“,则可以使用mode=0644表示,如果你想要在user对应的权限位上添加执行权限,则可以使用mode=u+x表示。
force参数: 当远程主机的目标路径中已经存在同名文件,并且与最终生成的文件内容不同时,是否强制覆盖,可选值有yes和no,默认值为yes,表示覆盖,如果设置为no,则不会执行覆盖拷贝操作,远程主机中的文件保持不变。
backup参数: 当远程主机的目标路径中已经存在同名文件,并且与最终生成的文件内容不同时,是否对远程主机的文件进行备份,可选值有yes和no,当设置为yes时,会先备份远程主机中的文件,然后再将最终生成的文件拷贝到远程主机。
jinja2常用基本语法:
{{ }} :用来装载表达式,比如变量、运算表达式、比较表达式等。
{% %} :用来装载控制语句,比如 if 控制结构,for循环控制结构。
{# #} :用来装载注释,模板文件被渲染后,注释不会包含在最终生成的文件中。
{{ }} 示例:
# 在主机准备好如下模板
[root@master vars]# cat test.j2
This is jinja2 {{ testvar }}.

# 在命令行通过 -e 选项给 testvar 赋值 var11
[root@master vars]# ansible node1 -m template -e "testvar=var11" -a "src=test.j2 dest=/tmp/ owner=lxr group=lxr mode=0777"
node1 | CHANGED => {
    "ansible_facts": {
        "discovered_interpreter_python": "/usr/bin/python"
    },
    "changed": true,
    "checksum": "408104cc6c8b37e83e3fe6d97f2500ab95789c34",
    "dest": "/tmp/test.j2",
    "gid": 1001,
    "group": "lxr",
    "md5sum": "22e8c91e3c6b8b008c3fd867a948d88b",
    "mode": "0777",
    "owner": "lxr",
    "secontext": "unconfined_u:object_r:admin_home_t:s0",
    "size": 22,
    "src": "/root/.ansible/tmp/ansible-tmp-1678565841.64-35187-38359699137181/source",
    "state": "file",
    "uid": 1001
}
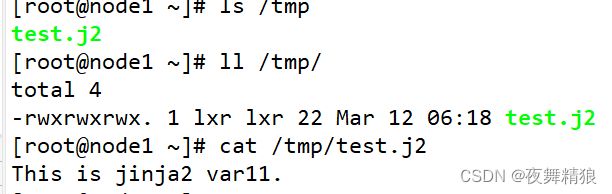
比较表达式的相关示例如下:
模板文件内容如下:
# cat test.j2
jinja2 test
{{ 1 == 1 }}
{{ 2 != 2 }}
{{ 2 > 1 }}
{{ 2 >= 1 }}
{{ 2 < 1 }}
{{ 2 <= 1 }}

生成文件内容如下:
# cat test
jinja2 test
True
False
True
True
False
False
逻辑运算的相关示例如下:
模板文件内容
# cat test.j2
jinja2 test
{{ (2 > 1) or (1 > 2) }}
{{ (2 > 1) and (1 > 2) }}

{{ not true }}
{{ not True }}
{{ not false }}
{{ not False }}


生成文件内容
# cat test
jinja2 test
True
False

False
False
True
True
算数运算的相关示例如下:
模板文件内容
# cat test.j2
jinja2 test
{{ 3 + 2 }}
{{ 3 - 4 }}
{{ 3 * 5 }}
{{ 2 ** 3 }}
{{ 7 / 5 }}
{{ 7 // 5 }}
{{ 17 % 5 }}

生成文件内容
# cat test
jinja2 test
5
-1
15
8
1.4
1
2
成员运算的相关示例如下:
模板文件内容
# cat test.j2
jinja2 test
{{ 1 in [1,2,3,4] }}
{{ 1 not in [1,2,3,4] }}

生成文件内容
# cat test
jinja2 test
True
False
在上述成员运算的示例中,in运算符后面对应的是一个”列表”,所以你一定已经想到了,一些基础的数据类型,都可以包含在”{{ }}”中,jinja2本身就是基于python的模板引擎,所以,python的基础数据类型都可以包含在”{{ }}”中,这也是再自然不过的了,相关示例如下:
模板文件内容如下:
# cat test.j2
jinja2 test
### str
{{ 'testString' }}
{{ "testString" }}
### num
{{ 15 }}
{{ 18.8 }}
### list
{{ ['Aa','Bb','Cc','Dd'] }}
{{ ['Aa','Bb','Cc','Dd'].1 }}
{{ ['Aa','Bb','Cc','Dd'][1] }}
### tuple
{{ ('Aa','Bb','Cc','Dd') }}
{{ ('Aa','Bb','Cc','Dd').0 }}
{{ ('Aa','Bb','Cc','Dd')[0] }}
### dic
{{ {'name':'bob','age':18} }}
{{ {'name':'bob','age':18}.name }}
{{ {'name':'bob','age':18}['name'] }}
### Boolean
{{ True }}
{{ true }}
{{ False }}
{{ false }}


生成文件内容如下:
# cat test
jinja2 test
### str
testString
testString
### num
15
18.8
### list
['Aa', 'Bb', 'Cc', 'Dd']
Bb
Bb
### tuple
('Aa', 'Bb', 'Cc', 'Dd')
Aa
Aa
### dic
{'age': 18, 'name': 'bob'}
bob
bob
### Boolean
True
True
False
False
除了变量和各种常用的运算符,过滤器也可以直接在”{{ }}”中使用,与前文示例中的用法没有任何区别,示例如下:
模板文件内容
# cat test.j2
jinja2 test
{{ 'abc' | upper }}


生成文件内容
# cat test
jinja2 test
ABC
test,lookup均能在”{{ }}”中使用,这里不在一一列举。
{# #}:使用此语法,括号内的内容是注释内容,在远程主机最终生成的文件中不会有使用此语法注释的内容。
{% %}语法演示
if控制语句
{% if 条件 %}
...
...
...
{% endif %}

if   else结构
{% if 条件 %}
...
{% else %}
...
{% endif %}


if  elif结构
{% if 条件一 %}
...
{% elif 条件二 %}
...
{% elif 条件N %}
...
{% endif %}


if  elif  else结构
{% if 条件一 %}
...
{% elif 条件N %}
...
{% else %}
...
{% endif %}
示例演示:
[root@master vars]# cat hello.j2
{% if num > 3 %}
hello world,I love ansible
{% endif %}


---
- hosts: node1
  remote_user: root
  gather_facts: no
  tasks:
  - template:
      src: ~/ansible_playbook/vars/hello.j2
      dest: /tmp
    vars:
      num: 10
...

[root@node1 ~]# cat /tmp/hello.j2
hello world,I love ansible
注:不要使用ad-hoc命令调用template模块进行渲染,因为使用命令调用template模块时,无论你传入的数据是哪种类型,都会被当做字符串进行处理,所以此处使用playbook渲染模板,以保证数据类型的正确。
for循环
{% for 迭代变量 in 可迭代对象 %}
{{ 迭代变量 }}
{% endfor %}
示例演示:
[root@master vars]# cat test_for.j2
{% for i in [3,2,6,1] %}
{{ i }}
{% endfor %}

命令行直接使用
# ansible node1 -m template -a "src=test_for.j2 dest=/tmp"

最终结果如下:
[root@node1 ~]# cat /tmp/test_for.j2
3
2
6
1
使用~作为连接符,自定义最终生成的格式,示例如下:
[root@master vars]# cat test_for.j2
{% for i in [3,2,6,1] -%}
{{ i ~ ' ' }}
{%- endfor %}

最终结果如下:
[root@node1 ~]# cat /tmp/test_for.j2    #使用~和空格连接在一起
3 2 6 1
13. 角色
角色是基于已知文件结构自动加载某些vars_files、任务和处理程序的方法。按角色对内容进行分组还允许与其他用户轻松共享角色。
通过以下方式均可以调用角色:
- 同级目录中的roles目录中。
- 当前系统用户的家目录中的.ansible/roles目录,即 ~/.ansible/roles目录中。
- 将playbook和角色写在同级目录中
- 修改ansible的配置文件,设置自己的角色搜索目录,编辑/etc/ansible/ansible.cfg配置文件,设置roles_path选项,此项默认是注释掉的,将注释符去掉,当你想要设置多个路径时,多个路径之间用冒号隔开
- 使用绝对路径的方式,调用对应的角色。
角色官方定义好的目录结构如下,每个目录中都有一个 main.yml 文件
[root@master testrole]# tree
.
└── project1
    ├── defaults
    │   └── main.yml
    ├── files
    │   └── main.yml
    ├── handlers
    │   └── main.yml
    ├── meta
    │   └── main.yml
    ├── tasks
    │   └── main.yml
    ├── templates
    │   └── main.yml
    └── vars
        └── main.yml
如上所示,project1为我定义的一个角色,角色中的每个目录释义如下:
- tasks:包含角色要执行的任务的主列表。默认会执行main.yml文件中的任务,你也可以将其他需要执行的任务文件通过include的方式包含在tasks/main.yml文件中。
- handlers:包含处理程序,这些处理程序可以由此角色使用,甚至可以由此角色之外的任何位置使用。
- defaults:角色的默认变量,定义在defaults/main.yml文件中的变量的优先级是最低的。
- vars:角色的其他变量,vars/main.yml文件中的变量的优先级非常高,如果你只是想提供一个默认的配置,那么你可以把对应的变量定义在defaults/main.yml中,如果你想要确保别人在调用角色时,使用的值就是你指定的值,则可以将变量定义在vars/main.yml中,因为定义在vars/main.yml文件中的变量的优先级非常高,所以其值比较难以覆盖。
- files:包含可通过此角色部署的文件。
- templates:包含可通过此角色部署的模板,当使用角色相关的模板时,如果没有指定路径,会默认从此目录中查找对应名称的模板文件。
- meta:为此角色定义一些元数据,这些元数据用于描述角色的相关属性,比如 作者信息、角色主要作用等等,你也可以在meta/main.yml文件中定义这个角色依赖于哪些其他角色,或者改变角色的默认调用设定。
13.1 tasks
演示一个简单的角色示例:
[root@master testrole]# tree
.
├── project1
│   ├── defaults
│   │   └── main.yml
│   ├── files
│   │   └── main.yml
│   ├── handlers
│   │   └── main.yml
│   ├── meta
│   │   └── main.yml
│   ├── tasks
│   │   └── main.yml
│   ├── templates
│   │   └── main.yml
│   └── vars
│       └── main.yml
└── pro.yaml

[root@master testrole]# cat project1/tasks/main.yml
- debug:
    msg: "hello role!"
[root@master testrole]# cat pro.yaml
- hosts: node1
  roles:
  - role: project1
如上所示,我可以将 project1 目录移至到任何ansible主机中进行调用,project1 目录中包含了这个角色所需的所有文件,它是一个独立的的结构,说到独立,它在逻辑上也是独立的,因为这个角色的配置过程与目标主机是分开的,虽然我们调用角色时,需要编写一个playbook指定对应的目标主机。
13.2 defaults
在角色中使用变量
[root@master testrole]# cat project1/tasks/main.yml
- debug:
    msg: "hello role! {{ var_role }}"

[root@master testrole]# cat pro.yaml
- hosts: node1
  remote_user: root
  gather_facts: no
  vars:
    var_role: "Ni Hao"
  roles:
  - role: project1

为变量设置默认值:
[root@master testrole]# cat project1/defaults/main.yml
var_role: "LOVE ansible"

[root@master testrole]# cat pro.yaml
- hosts: node1
  remote_user: root
  gather_facts: no
#  vars:
#    var_role: "Ni Hao"
  roles:
  - role: project1
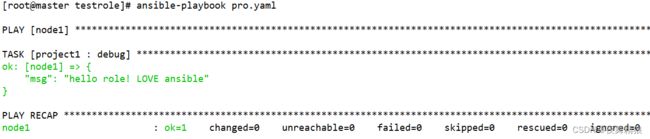
这样即使在调用角色时,即使没有给变量赋值,也不会报错,先前那样如果设置了变量,而没有赋值则会报错,变量会使用默认值。
在默认情况下,角色中的的变量是全局可访问的。假设定义两个角色,设置同样的变量,在调用角色时,指定变量的值,则两个角色都可以发访问这个变量,如果想要解决这个问题,则可以将变量的访问域变成角色所私有的,如果想要将变量变成角色私有的,则需要设置/etc/ansible/ansible.cfg文件,将private_role_vars的值设置为yes,默认情况下,”private_role_vars = yes”是被注释掉的,将前面的注释符去掉皆可。
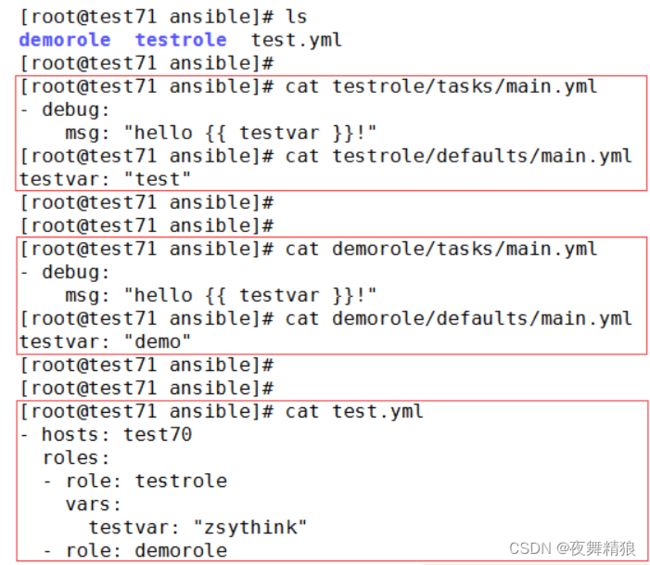
如上图所示示例:传入的 zsythink 值两个角色都能引用到。
默认情况下,我们无法多次调用同一个角色,也就是说,如下playbook只会调用一次project1角色:
- hosts: node1
  remote_user: root
  gather_facts: no
  vars:
    var_role: "Ni Hao"
  roles:
  - role: project1
  - role: project1
如果想要多次调用同一个角色,有两种方法,如下:
方法一:设置角色的allow_duplicates属性 ,让其支持重复的调用。
方法二:调用角色时,传入的参数值不同。
[root@master testrole]# cat project1/meta/main.yml
allow_duplicates: true

如上图所示,成功重复调用 project1 角色两次
调用角色时,传入的参数值不同也可以重复调用,如下所示:
- hosts: node1
  remote_user: root
  gather_facts: no

  roles:
  - role: project1
    vars:
      var_role: "Ni Hao"
  - role: project1
    vars:
      var_role: "How ar you"
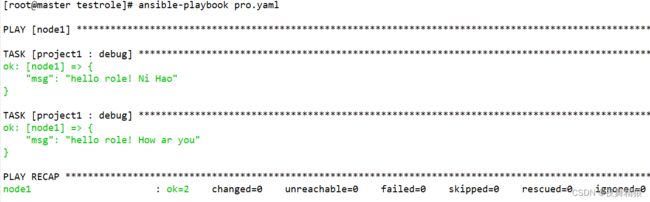
13.3 vars
vars定义的变量优先级最高,如下所示:
[root@master testrole]# cat project1/defaults/main.yml
var_role: "LOVE ansible"

[root@master testrole]# cat project1/vars/main.yml
var_role: "LOVE python"

[root@master testrole]# cat project1/vars/main.yml
var_role: "LOVE python"
[root@master testrole]# cat pro.yaml
- hosts: node1
  remote_user: root
  gather_facts: no

  roles:
  - role: project1
    vars:
      var_role: "Ni Hao"
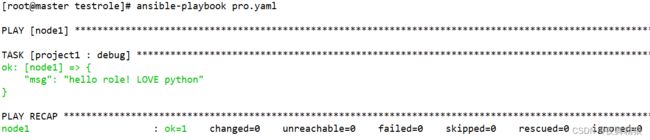
在 defaults 和 vas 中分别定义了同样的值,调用角色的时候,同样也传入变量值,可以看到最终输出的值是 vars 中定义的。
执行剧本时,使用 -e 选项可以优先级高于 vars,其它都是 vars 优先级最高。

13.4 templates
调用角色时,需要使用模板文件,则可以定义在 templates 中,如下所示:
[root@master testrole]# cat project1/templates/template.conf.j2
# something in template;
{{ template_var }}
[root@master testrole]# cat project1/defaults/main.yml
var_role: "LOVE ansible"
template_var: "template"
[root@master testrole]# cat project1/tasks/main.yml
- debug:
    msg: "hello role! {{ var_role }}"
- template:
    src: template.conf.j2
    dest: /tmp/template.conf
[root@master testrole]# cat pro.yaml
- hosts: node1
  remote_user: root
  gather_facts: no
  roles:
  - role: project1
在 templates 定义模板文件,在 tasks 中引用模板时并没有指定具体路径,最终执行如下:

13.5 handlers
想要在角色中使用一些handlers以便进行触发,则可以直接将对应的handler任务写入到handlers/main.yml文件中,示例如下:
[root@master testrole]# cat project1/handlers/main.yml
- name: test_handler
  debug:
    msg: "this is a test handler"

# 为了能够更加简单的触发对应的handler,我直接将tasks/main.yml中的debug任务的状态强行设置为”changed”
[root@master testrole]# cat project1/tasks/main.yml
- debug:
    msg: "hello role! {{ var_role }}"
  changed_when: true
  notify: test_handler

[root@master testrole]# cat pro.yaml
- hosts: node1
  remote_user: root
  gather_facts: no
  roles:
  - role: project1

如上例所示,当需要notify对应handler时,直接写入handler对应的名称即可,角色会自动去handlers/main.yml文件中查找对应的handler。
14. ansible-vault
14.1 encrypt (对文件加密)
语法:
ansible-vault encrypt -name>
如下所示:对某个文件加密,会提示输入两遍密码

再次查看文件时,已经加密

执行该剧本则会报错

使用 --ask-vault-pass 参数执行剧本,在执行的时候会提示输入密码,输入密码后则能执行成功
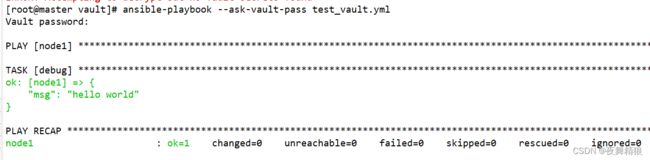
14.2 decrypt (对文件解密)
语法:
ansible-vault decrypt -name>

将密码定义到某个文件,通过 --vault-password-file指定该文件或者执行剧本时指定该文件对文件进行加解密。
语法:
使用密码文件对剧本加密
# ansible-vault encrypt --vault-password-file
使用密码文件执行剧本
# ansible-playbook --vault-password-file
使用密码文件解密剧本
# ansible-vault decrypt --vault-password-file

2.4版本之后官方推荐写法:
# ansible-vault encrypt --vault-id

--vault-id 也可以代替 --ask-vault-pass
# ansible-playbook --vault-id prompt
同时使用多个密码文件解密
有如下两个剧本,分别用两个密码文件对其加密
# cat test_vault.yml
- hosts: node1
  remote_user: root
  gather_facts: no
  tasks:
  - debug:
      msg: "hello world"
  - include_tasks: test1.yml

# cat test1.yml
- debug:
    msg: "message from test1"


[root@master vault]# cat passwd.yml
123
[root@master vault]# cat passwd1.yml
456

# ansible-vault encrypt --vault-id passwd.yml test_vault.yml
# ansible-vault encrypt --vault-id passwd1.yml test1.yml
执行剧本时如下:
# ansible-playbook --vault-id passwd.yml --vault-id passwd1.yml test_vault.yml test1.yml
一次性使用不同的密码文件解密不同的文件,示例如下:
ansible-vault decrypt --vault-id passwd.yml --vault-id passwd1.yml test_vault.yml test1.yml
14.3 加密时多文件进行标记
语法
# ansible-vault encrypt --vault-id <要标记的字符>@<密码文件> 剧本
示例:
[root@master vault]# ansible-vault encrypt --vault-id [email protected] test_vault.yml
Encryption successful
[root@master vault]# cat test_vault.yml
$ANSIBLE_VAULT;1.2;AES256;hello   # 这里可以看到有标记的 hello 字段
63623138396233396462336635383865623266653236383961663961393531333266643538373563
3230353562646664313962313533616230653930366139350a343839633630616463303064373835
63393433626339313538636261633730653663393633653136373162366665336434626135666534
3334346663393763620a346466313930336334383834346431626330303936386636626363363839
34323036656236376463343466396230323463393531373662343863646564383335636632306638
38373532643939306165366136623662383232623036646438326131663830643766346163313238
30393032643461393133343338613732663533363461303864393439343337363036373065336230
30323630613730353861383335356530323736333764366564633266656237313261666566363337
63643963306539303530613333326365626437646336306435393938616339306634663737383636
35633437383032353531343461653632626436376365613562646365353932656663666130616232
323834346162303063323165633464386638
交互式输入密码进行标记
[root@master vault]# ansible-vault encrypt --vault-id Tsc@prompt test_vault.yml
New vault password (Tsc):
Confirm new vault password (Tsc):
Encryption successful
14.4 create
关于加解密的其它选项
[root@master vault]# ansible-vault -h
usage: ansible-vault [-h] [--version] [-v]
                     {create,decrypt,edit,view,encrypt,encrypt_string,rekey}
                     ...

encryption/decryption utility for Ansible data files

positional arguments:
  {create,decrypt,edit,view,encrypt,encrypt_string,rekey}
    create              Create new vault encrypted file
    decrypt             Decrypt vault encrypted file
    edit                Edit vault encrypted file
    view                View vault encrypted file
    encrypt             Encrypt YAML file
    encrypt_string      Encrypt a string
    rekey               Re-key a vault encrypted file

optional arguments:
  --version             show program's version number, config file location,
                        configured module search path, module location,
                        executable location and exit
  -h, --help            show this help message and exit
  -v, --verbose         verbose mode (-vvv for more, -vvvv to enable
                        connection debugging)

See 'ansible-vault > --help' for more information on a specific
command.
创建一个加密文件,使用如下命令时,会提示让你输入密码,然后进入vi 编辑器进行编辑,编辑完之后自动保存为加密文件
ansible-vault create foo.yml
14.5 edit
直接编辑加密文件,此命令会将文件解密为临时文件,并允许您编辑 该文件,完成后将其保存并删除临时文件
ansible-vault edit foo.yml
14.6 view
查看加密文件,在不编辑的情况下查看加密文件的内容
ansible-vault view foo.yml
14.7 rekey
修改加密文件的密码,使用此命令时,第一次提示你输入旧密码,后两次提示都是输入新密码
[root@master vault]# ansible-vault rekey foo.yml
Vault password:
New Vault password:
Confirm New Vault password:
Rekey successful
14.8 encrypt_string
加密剧本中某一些字符串,例如密码,敏感信息等,这样可以让其它内容显示出来,让其他人可以看的到。
有如下剧本
[root@master vault]# cat string.yml
---
- hosts: node1
  remote_user: root
  gather_facts: no
  vars:
    user: "lxr"
    user_passwd: "Tsc@2023085093884509"
  tasks:
  - debug:
      msg: "{{ user }},{{ user_passwd }}"

对剧本中的 user_passwd 进行加密
[root@master vault]# ansible-vault encrypt_string --vault-id passwd.yml --name 'user_passwd' Tsc@2023085093884509
user_passwd: !vault |
          $ANSIBLE_VAULT;1.1;AES256
          38336331313861333064373765313431636633363738643966613839323963323033613933326434
          6264653934663239323837336662383963653630316634310a386139646361306366356333373136
          30623431326432333838646338663437366639343566363730306566326465303464373163643434
          6663626136396238620a636662376432653966343835616331366633313139313066623836623463
          38653762336135396166386166666134656134653036343961643233643639356330
Encryption successful
然后将生成的加密字符串替换进去,如下:
[root@master vault]# cat string.yml
---
- hosts: node1
  remote_user: root
  gather_facts: no
  vars:
    user: "lxr"
    user_passwd: !vault |
          $ANSIBLE_VAULT;1.1;AES256
          38336331313861333064373765313431636633363738643966613839323963323033613933326434
          6264653934663239323837336662383963653630316634310a386139646361306366356333373136
          30623431326432333838646338663437366639343566363730306566326465303464373163643434
          6663626136396238620a636662376432653966343835616331366633313139313066623836623463
          38653762336135396166386166666134656134653036343961643233643639356330
  tasks:
  - debug:
      msg: "{{ user }},{{ user_passwd }}"
执行如下:
