Kubernetes(k8s)集群安装部署
一. 环境说明
| 名称 | IP | 系统 | 配置 |
|---|---|---|---|
| 主控节点 | 192.168.202.101 | CentOS 7.9.2009 | 2核4G |
| 工作节点1 | 192.168.202.102 | CentOS 7.9.2009 | 2核4G |
| 工作节点2 | 192.168.202.103 | CentOS 7.9.2009 | 2核4G |
二. 先决条件配置(所有节点)
2.1 升级操作系统内核
导入elrepo gpg key
rpm --import https://www.elrepo.org/RPM-GPG-KEY-elrepo.org
安装elrepo YUM源仓库
yum -y install https://www.elrepo.org/elrepo-release-7.el7.elrepo.noarch.rpm
安装kernel-ml版本,ml为长期稳定版本,lt为长期维护版本
yum --enablerepo="elrepo-kernel" -y install kernel-ml.x86_64
设置grub2默认引导为0
grub2-set-default 0
重新生成grub2引导文件
grub2-mkconfig -o /boot/grub2/grub.cfg
更新后,需要重启,使用升级的内核生效。
reboot
重启后,需要验证内核是否为更新对应的版本
uname -r
2.2 关闭防火墙
防火墙可能会导致重复的防火墙规则和破坏kube-proxy,并且Kubernetes 必须启用以下这些必要的端口后才能使 Kubernetes 的各组件相互通信,索性这里直接关闭了。

停止防火墙
systemctl stop firewalld
禁用防火墙开机自启
systemctl disable firewalld
2.3 关闭SELinux
SELinux(Security-Enhanced Linux) 是美国国家安全局(NSA)对于强制访问控制的实现,在进程层面管控文件系统资源的访问的一种安全机制,进程只能访问那些在他的任务中所需要文件。
那为什么要关闭这个很好的功能呢?
SELinux安全机制较复杂,可能会与k8s本身的流量机制冲突,因为k8s本身会在netfilter里设置流量规则.
而且有些时候容器需要访问宿主机器去实现一些功能,比如pod 的网络需要方位宿主文件进行实现。
临时关闭SELinux
setenforce 0
修改/etc/selinux/config配置文件,将SELINUX设置为disabled
sed -i 's/^SELINUX=enforcing$/SELINUX=disabled/' /etc/selinux/config
2.4 关闭Swap分区
Swap是一种特殊的分区或文件,可以用作内存扩展,当系统内存不足时,将一部分数据从物理内存中移动到Swap分区中,以释放出更多的内存空间。当需要访问被换出的数据时,系统会将其重新从Swap分区加载到物理内存。
那为什么要关闭这个功能呢?
1.在计算集群中,我们通常希望OOM的时候直接杀掉进程,向运维或者作业提交者报错提示,并且执行故障转移,把进程在其他节点上重启起来。而不是用swap续命,导致节点hang住,集群性能大幅下降,并且还得不到报错提示。
2.Swap会导致docker的运行不正常,性能下降,是个bug,但是后来关闭swap就解决了,就变成了通用方案。
3. Kubernetes 云原生的实现目的是将运行实例紧密包装到尽可能接近 100% 。所有的部署、运行环境应该与 CPU 以及内存限定在一个可控的空间内。所以如果调度程序发送一个 Pod 到某一台节点机器,它不应该使用 Swap。如果使用Swap,则其实node的pod使用内存总和可能超过了node的内存,这样其实就达不到资源的严格限制和管理的目的。
临时关闭swap分区,当前会话生效
swapoff -a
永久关闭swap分区,修改/etc/fstab文件,注释掉有swap的这一行
sed -ri 's/.*swap.*/#&/' /etc/fstab
2.5 转发 IPv4 并让 iptables 看到桥接流量
对于插件开发人员以及时常会构建并部署 Kubernetes 的用户而言, 插件可能也需要特定的配置来支持 kube-proxy。 iptables 代理依赖于 iptables,插件可能需要确保 iptables 能够监控容器的网络通信。 例如,如果插件将容器连接到 Linux 网桥,插件必须将 net/bridge/bridge-nf-call-iptables sysctl 参数设置为 1,以确保 iptables 代理正常工作。 如果插件不使用 Linux 网桥,而是使用类似于 Open vSwitch 或者其它一些机制, 它应该确保为代理对容器通信执行正确的路由。
默认情况下,如果未指定 kubelet 网络插件,则使用 noop 插件, 该插件设置 net/bridge/bridge-nf-call-iptables=1,以确保简单的配置 (如带网桥的 Docker)与 iptables 代理正常工作。
cat <<EOF | sudo tee /etc/modules-load.d/k8s.conf
overlay
br_netfilter
EOF
sudo modprobe overlay
sudo modprobe br_netfilter
设置所需的 sysctl 参数,参数在重新启动后保持不变
cat <<EOF | sudo tee /etc/sysctl.d/k8s.conf
net.bridge.bridge-nf-call-iptables  = 1
net.bridge.bridge-nf-call-ip6tables = 1
net.ipv4.ip_forward                 = 1
EOF
应用 sysctl 参数而不重新启动
sudo sysctl --system
通过运行以下指令确认 br_netfilter 和 overlay 模块被加载
lsmod | grep br_netfilter
lsmod | grep overlay
通过运行以下指令确认 net.bridge.bridge-nf-call-iptables、net.bridge.bridge-nf-call-ip6tables 和 net.ipv4.ip_forward 系统变量在你的 sysctl 配置中被设置为 1
sysctl net.bridge.bridge-nf-call-iptables net.bridge.bridge-nf-call-ip6tables net.ipv4.ip_forward
2.6 同步时间
如果各机器上时间都没有问题,也没有偏差,则可以跳过该步骤。
安装ntp工具
yum install -y ntp
设置时区
timedatectl set-timezone 'Asia/Shanghai'
同步时间
ntpdate ntp1.aliyun.com
2.7 设置主机名
三台机器分别执行
hostnamectl set-hostname k8s-master
hostnamectl set-hostname k8s-work1
hostnamectl set-hostname k8s-work2
2.8 配置hosts文件
cat >> /etc/hosts << EOF
192.168.202.101 k8s-master
192.168.202.102 k8s-work1
192.168.202.103 k8s-work2
EOF
2.9 确保每个节点MAC地址和 product_uuid 的唯一性
你可以使用命令 ip link 或 ifconfig -a 来获取网络接口的 MAC 地址
可以使用 sudo cat /sys/class/dmi/id/product_uuid 命令对 product_uuid 校验
一般来讲,硬件设备会拥有唯一的地址,但是有些虚拟机的地址可能会重复。 Kubernetes 使用这些值来唯一确定集群中的节点。 如果这些值在每个节点上不唯一,可能会导致安装失败。
三. 安装Docker(所有节点)
3.1 安装yum-utils包,并设置docker存储库
yum install -y yum-utils
yum-config-manager --add-repo https://download.docker.com/linux/centos/docker-ce.repo
![]()
3.2 安装最新版本的Docker Engine
yum install docker-ce docker-ce-cli
![]()
3.3 启动Docker
systemctl start docker
设置开机自启
systemctl enable docker
3.4 修改cgroup驱动为systemd,配置国内镜像源
创建daemon.json文件
vi /etc/docker/daemon.json
写入以下内容
{
  "exec-opts": ["native.cgroupdriver=systemd"],
  "registry-mirrors": ["https://xxxxxx.mirror.aliyuncs.com"]
}
重新加载systemctl
systemctl daemon-reload
重启docker
systemctl restart docker
查看配置是否成功
docker info
四. 安装cri-dockerd(所有节点)
Kubernetes 的早期版本仅适用于特定的容器运行时:Docker Engine。 后来,Kubernetes 增加了对使用其他容器运行时的支持。为了实现编排器和许多不同的容器运行时之间交互操作创建了CRI 标准。 Docker Engine 没有实现(CRI)接口,所以Kubernetes 项目创建了特殊代码dockershim来帮助过渡,Dockershim 代码一直是一个临时解决方案(因此得名:shim)。 Kubernetes自v1.24移除了对Dockershim 的支持,而Docker Engine默认又不支持CRI规范,因而二者将无法直接完成整合。为此,Mirantis和Docker联合创建了cri-dockerd项目,用于为Docker Engine提供一个能够支持到CRI规范的垫片,从而能够让Kubernetes基于CRI控制Docker 。
4.1 下载cri-dockerd
https://github.com/Mirantis/cri-dockerd/releases
下载对应版本的cri-dockerd rpm包,注意版本和linux版本,也可以自行下载上传至所有主机
wget https://github.com/Mirantis/cri-dockerd/releases/download/v0.3.3/cri-dockerd-0.3.3-3.el7.x86_64.rpm
4.2 安装cri-dockerd
rpm -ivh cri-dockerd-0.3.3-3.el7.x86_64.rpm
4.3 设置cri-dockerd镜像
修改镜像地址为国内,否则kubelet拉取不了镜像导致启动失败
修改cri-docker.service文件
vi /usr/lib/systemd/system/cri-docker.service
ExecStart=/usr/bin/cri-dockerd --container-runtime-endpoint fd:// --pod-infra-container-image=registry.aliyuncs.com/google_containers/pause:3.9
重新加载systemctl
systemctl daemon-reload
启动cri-docker设置cri-docker开机自启
systemctl enable --now cri-docker.service
Rokcy系统可能出现libcgroup依赖的问题,解决办法如下
wget https://mirror.tuna.tsinghua.edu.cn/centos/7/os/x86_64/Packages/libcgroup-0.41-21.el7.x86_64.rpm
rpm -ivh libcgroup-0.41-21.el7.x86_64.rpm
五. 安装Kubeadm Kubectl Kubelet (所有节点)
Kubeadm 是一个快捷搭建kubernetes(k8s)的安装工具,它提供了kubeadm init 以及 kubeadm join这两个命令来快速创建kubernetes集群。kubeadm 通过执行必要的操作来启动和运行最小可用集群。 按照设计,它只关注启动引导,而非配置机器。
Kubectl 是 Kubernetes 命令行工具 , 让你可以对 Kubernetes 集群运行命令。 你可以使用 kubectl 来部署应用、监测和管理集群资源以及查看日志。
Kubelet 是 kubernetes 工作节点上的一个代理组件,运行在每个节点上。
5.1 设置yum源
cat <<EOF | sudo tee /etc/yum.repos.d/kubernetes.repo
[kubernetes]
name=Kubernetes
baseurl=https://mirrors.aliyun.com/kubernetes/yum/repos/kubernetes-el7-x86_64/
enabled=1
gpgcheck=1
gpgkey=https://mirrors.aliyun.com/kubernetes/yum/doc/yum-key.gpg https://mirrors.aliyun.com/kubernetes/yum/doc/rpm-package-key.gpg
EOF
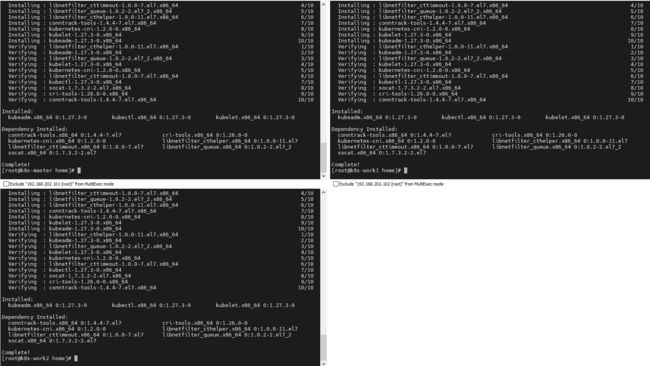
5.2 安装 kubeadm、kubelet、kubectl
yum install -y kubelet kubeadm kubectl
5.4 设置kubelet为开机启动,并且现在启动kubelet服务
systemctl enable --now kubelet
六. 初始化集群(master节点)
kubeadm init \
 --apiserver-advertise-address=192.168.202.101 \
 --image-repository registry.aliyuncs.com/google_containers \
 --pod-network-cidr=10.244.0.0/16 \
 --cri-socket=unix:///var/run/cri-dockerd.sock
--apiserver-advertise-address 指定apiserver所在节点IP
--image-repository 指定镜像下载源
--pod-network-cidr 指定pod网络可以使用的IP网段
--cri-socket 要连接的 CRI 套接字的路径
如果执行init操作失败,找到问题后想重新执行init命令,可以执行reset命令重置
kubeadm reset --cri-socket=unix:///var/run/cri-dockerd.sock
关于两个命令中的cri-socket参数,是因为我装Docker时装了containerd。 导致主机中存在多个CRI unix:///var/run/containerd/containerd.sock unix:///var/run/cri-dockerd.sock 所以要指定一个。
运行日志
[init] Using Kubernetes version: v1.27.3
[preflight] Running pre-flight checks
[preflight] Pulling images required for setting up a Kubernetes cluster
[preflight] This might take a minute or two, depending on the speed of your internet connection
[preflight] You can also perform this action in beforehand using 'kubeadm config images pull'
W0620 11:10:39.200163    9347 checks.go:835] detected that the sandbox image "registry.aliyuncs.com/google_containers/pause:3.7" of the container runtime is inconsistent with that used by kubeadm. It is rec                             ommended that using "registry.aliyuncs.com/google_containers/pause:3.9" as the CRI sandbox image.
[certs] Using certificateDir folder "/etc/kubernetes/pki"
[certs] Generating "ca" certificate and key
[certs] Generating "apiserver" certificate and key
[certs] apiserver serving cert is signed for DNS names [k8s-master kubernetes kubernetes.default kubernetes.default.svc kubernetes.default.svc.cluster.local] and IPs [10.96.0.1 192.168.202.101]
[certs] Generating "apiserver-kubelet-client" certificate and key
[certs] Generating "front-proxy-ca" certificate and key
[certs] Generating "front-proxy-client" certificate and key
[certs] Generating "etcd/ca" certificate and key
[certs] Generating "etcd/server" certificate and key
[certs] etcd/server serving cert is signed for DNS names [k8s-master localhost] and IPs [192.168.202.101 127.0.0.1 ::1]
[certs] Generating "etcd/peer" certificate and key
[certs] etcd/peer serving cert is signed for DNS names [k8s-master localhost] and IPs [192.168.202.101 127.0.0.1 ::1]
[certs] Generating "etcd/healthcheck-client" certificate and key
[certs] Generating "apiserver-etcd-client" certificate and key
[certs] Generating "sa" key and public key
[kubeconfig] Using kubeconfig folder "/etc/kubernetes"
[kubeconfig] Writing "admin.conf" kubeconfig file
[kubeconfig] Writing "kubelet.conf" kubeconfig file
[kubeconfig] Writing "controller-manager.conf" kubeconfig file
[kubeconfig] Writing "scheduler.conf" kubeconfig file
[kubelet-start] Writing kubelet environment file with flags to file "/var/lib/kubelet/kubeadm-flags.env"
[kubelet-start] Writing kubelet configuration to file "/var/lib/kubelet/config.yaml"
[kubelet-start] Starting the kubelet
[control-plane] Using manifest folder "/etc/kubernetes/manifests"
[control-plane] Creating static Pod manifest for "kube-apiserver"
[control-plane] Creating static Pod manifest for "kube-controller-manager"
[control-plane] Creating static Pod manifest for "kube-scheduler"
[etcd] Creating static Pod manifest for local etcd in "/etc/kubernetes/manifests"
[wait-control-plane] Waiting for the kubelet to boot up the control plane as static Pods from directory "/etc/kubernetes/manifests". This can take up to 4m0s
[apiclient] All control plane components are healthy after 23.505554 seconds
[upload-config] Storing the configuration used in ConfigMap "kubeadm-config" in the "kube-system" Namespace
[kubelet] Creating a ConfigMap "kubelet-config" in namespace kube-system with the configuration for the kubelets in the cluster
[upload-certs] Skipping phase. Please see --upload-certs
[mark-control-plane] Marking the node k8s-master as control-plane by adding the labels: [node-role.kubernetes.io/control-plane node.kubernetes.io/exclude-from-external-load-balancers]
[mark-control-plane] Marking the node k8s-master as control-plane by adding the taints [node-role.kubernetes.io/control-plane:NoSchedule]
[bootstrap-token] Using token: xcgee8.b3srke9dgefk14cs
[bootstrap-token] Configuring bootstrap tokens, cluster-info ConfigMap, RBAC Roles
[bootstrap-token] Configured RBAC rules to allow Node Bootstrap tokens to get nodes
[bootstrap-token] Configured RBAC rules to allow Node Bootstrap tokens to post CSRs in order for nodes to get long term certificate credentials
[bootstrap-token] Configured RBAC rules to allow the csrapprover controller automatically approve CSRs from a Node Bootstrap Token
[bootstrap-token] Configured RBAC rules to allow certificate rotation for all node client certificates in the cluster
[bootstrap-token] Creating the "cluster-info" ConfigMap in the "kube-public" namespace
[kubelet-finalize] Updating "/etc/kubernetes/kubelet.conf" to point to a rotatable kubelet client certificate and key
[addons] Applied essential addon: CoreDNS
[addons] Applied essential addon: kube-proxy

Your Kubernetes control-plane has initialized successfully!

To start using your cluster, you need to run the following as a regular user:

  mkdir -p $HOME/.kube
  sudo cp -i /etc/kubernetes/admin.conf $HOME/.kube/config
  sudo chown $(id -u):$(id -g) $HOME/.kube/config

Alternatively, if you are the root user, you can run:

  export KUBECONFIG=/etc/kubernetes/admin.conf

You should now deploy a pod network to the cluster.
Run "kubectl apply -f [podnetwork].yaml" with one of the options listed at:
  https://kubernetes.io/docs/concepts/cluster-administration/addons/

Then you can join any number of worker nodes by running the following on each as root:

kubeadm join 192.168.202.101:6443 --token xcgee8.b3srke9dgefk14cs \
        --discovery-token-ca-cert-hash sha256:7f8b47118e2c1dc13d83d0bfc1cd29470a827030bd76f29ed479564e14b6c394
要使非 root 用户可以运行 kubectl,请运行以下命令
mkdir -p $HOME/.kube
sudo cp -i /etc/kubernetes/admin.conf $HOME/.kube/config
sudo chown $(id -u):$(id -g) $HOME/.kube/config
如果使用root用户
export KUBECONFIG=/etc/kubernetes/admin.conf
七. 将节点加入集群 (所有work节点)
在所有work节点中执行以下命令(以init日志为准,增加–cri-socket参数)
kubeadm join 192.168.202.101:6443 --token xcgee8.b3srke9dgefk14cs \
        --discovery-token-ca-cert-hash sha256:7f8b47118e2c1dc13d83d0bfc1cd29470a827030bd76f29ed479564e14b6c394 \
        --cri-socket=unix:///var/run/cri-dockerd.sock
八. 安装网络插件(master节点)
完成上述步骤后,我们查看节点状态,会发现状态显示NotReady
kubectl get nodes
查看pods发现coredns状态为Pending
kubectl get pods -A

此时我们需要安装一个网络插件,CNI(Container NetworkInterface)意为容器网络接口,它是一种标准的设计,为了让用户在容器创建或销毁时都能够更容易地配置容器网络。由Google和CoreOS联合定制的网络标准,是Kubernetes网络插件的基础。
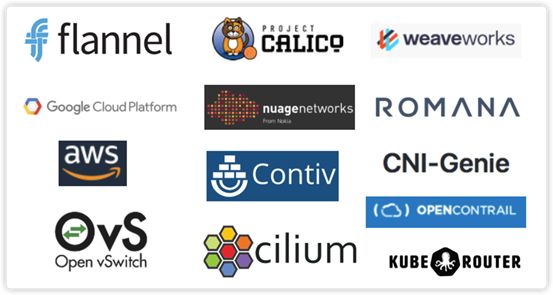
基于CNI标准,有如下常见的CNI网络插件产品。

我们选择安装Calico
Calico是Kubernetes生态系统中另一种流行的网络选择。虽然Flannel被公认为是最简单的选择,但Calico以其性能、灵活性而闻名。Calico的功能更为全面,不仅提供主机和pod之间的网络连接,还涉及网络安全和管理。Calico CNI插件在CNI框架内封装了Calico的功能。
参考官网安装说明
https://docs.tigera.io/calico/latest/getting-started/kubernetes/self-managed-onprem/onpremises#install-calico-with-etcd-datastore
8.1 下载用于etcd的Calico网络清单
curl https://raw.githubusercontent.com/projectcalico/calico/v3.26.1/manifests/calico-etcd.yaml -o calico.yaml
也可以自行下载上传,上传后更改文件名为:calico.yaml
8.2 修改etcd配置
etcd 部署完成后证书默认在 /etc/kubernetes/pki/etcd 目录下
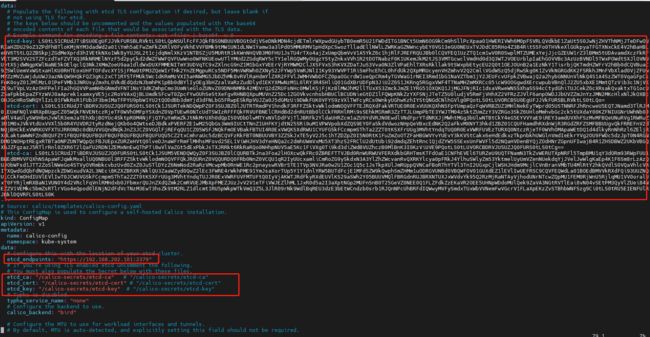
配置 etcd 证书,vim calico.yaml 命令模式下输入/ 搜索 calico-etcd-secrets
修改data下的
etcd-key 对应 /etc/kubernetes/pki/etcd/server.key
etcd-cert 对应 /etc/kubernetes/pki/etcd/server.crt
etcd-ca 对应 /etc/kubernetes/pki/etcd/ca.crt
可以使用下面命令避免复制换行符
cat /etc/kubernetes/pki/etcd/ca.crt | base64 | tr -d '\n'
vim calico.yaml 命令模式下输入/ 搜索 ConfigMap
修改ConfigMap下data的etcd_endpoints 为 "https://192.168.202.101:2379"
修改ConfigMap下data的
etcd_ca: "/calico-secrets/etcd-ca"
etcd_cert: "/calico-secrets/etcd-cert"
etcd_key: "/calico-secrets/etcd-key"
8.3 修改CIDR
命令模式下输入/ 搜索 CALICO_IPV4POOL_CIDR ,取消注释,配置value值和 执行kubeadm init 命令时的 --pod-network-cidr参数值一致
8.4 安装calico
kubectl apply -f calico.yaml
8.5 等待安装完成
可通过这个命令随时查看pod状态
watch -n 10 kubectl get pods -A
当所有 pod 都为 Running 状态后我们集群搭建就完成了

查看节点
kubectl get nodes -owide


