SpringBoot实现微信授权登录、二维码登录
微信扫码授权登录 + 微信授权登录
微信官方文档:https://developers.weixin.qq.com/doc/oplatform/Website_App/WeChat_Login/Wechat_Login.html
1.首先需要注册相应的公众号、小程序应用,并得到认证。
其中,需要配置ip白名单,将调用该应用的ip都配上,换行为多个分隔符。
配置服务器配置时需要注意,微信需要配置的URL指定返回一个字符串:echostr,如下:
@GetMapping(value = "/test")
public String test(HttpServletRequest request){
   String echostr = request.getParameter("echostr");
   return echostr;
}
需要在此配置你需要授权登录的域名


配置时,同样需要注意,微信会让你下载一个文件,需要将文件放入该接口能够获取的路径,意思就是你配置的域名直接访问,能够读取该文件即可。
注意:如果是本地开发,需要自行开通域名,此处我这边用到的是Sunny-Ngrok
需要用到的几个参数:
appId、secret、回调url
2.编写后台代码
1>生成微信登录二维码
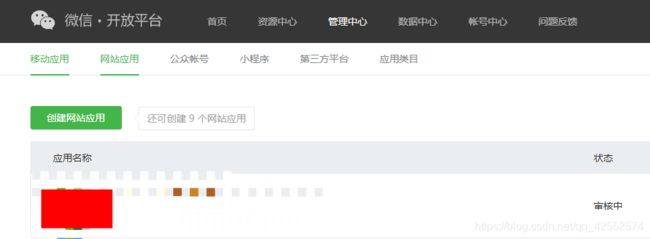
生成微信登录的二维码需要特别注意,跟普通公众号不同,它是需要在微信开放平台中注册网址应用的。
注意:若无网站应用,切未通过认证,会出现Scope参数错误或没有Scope权限的错误!!!

此处的appid与secret也是需要配置网站应用的appid和secret。
审核通过后会提供微信登录接口。

获取微信二维码有两种方式,一种是内嵌二维码,另一种是直接跳转微信的二维码界面。
一:内嵌二维码
步骤1:在页面中先引入如下JS文件(支持https):
http://res.wx.qq.com/connect/zh_CN/htmledition/js/wxLogin.js
步骤2:在需要使用微信登录的地方实例以下JS对象:
var obj = new WxLogin({
     self_redirect:true,
     id:"login_container",
     appid: "",
     scope: "",
     redirect_uri: "",
      state: "",
     style: "",
     href: ""
});
说明:微信该JS是去调用微信接口,获取二维码,将二维码渲染在指定的容器中显示,扫码登录授权 后,调用配置的redirect_uri进行登录操作,此处的redirect_uri需要注意,填写的是如下图的授权回调域

/**
 * 获取配置文件的相应参数配置
 */
@Value("${oauth.wx.appid}")
private String appid;

@Value("${oauth.wx.appsecret}")
private String appsecret;

@Value("${oauth.callback.http}")
private String http;

private String access_Token;
private String openId;


/**
 * 生成微信登录二维码
 * @param request
 * @param response
 */
@GetMapping(value = "/getWechatQrCode")
public void getWechatQrCode(HttpServletRequest request,HttpServletResponse response) {
   try {
      String oauthUrl = "https://open.weixin.qq.com/connect/qrconnect?appid=APPID&redirect_uri=REDIRECT_URI&response_type=code&scope=SCOPE&state=STATE#wechat_redirect";
      String redirect_uri = URLEncoder.encode(http, "utf-8");
      System.out.println("redirect_uri:"+redirect_uri);
      oauthUrl =  oauthUrl.replace("APPID",appid).replace("REDIRECT_URI",redirect_uri).replace("SCOPE","snsapi_login");
      response.sendRedirect(oauthUrl);
   } catch (Exception e) {
      log.error("二维码生成失败!");
   }
}
这里主要是去调用微信的接口,重定向微信接口的url,并配上自己认证应用的appid、secret以及回调url。
需要注意,这里的回调url是用作接下来微信授权的关键。
2>回调方法
/**
 * 微信认证/微信扫二维码登录的回调方法
 * 根据code获取获取access_token和openId
 * 再根据access_token和openId获取用户信息
 */
@GetMapping(value = "/callBack")
public Result<JSONObject> wxCallBack(HttpServletRequest request,HttpServletResponse response) throws IOException {
   String code = request.getParameter("code");

   //获取access_token
   String url = "https://api.weixin.qq.com/sns/oauth2/access_token" +
         "?appid=" + appid +
         "&secret=" + appsecret +
         "&code=" + code +
         "&grant_type=authorization_code";
   JSONObject resultObject = HttpUtils.httpGet(url);

   //请求获取userInfo
   String infoUrl = "https://api.weixin.qq.com/sns/userinfo" +
         "?access_token=" + resultObject.getString("access_token") +
         "&openid=" + resultObject.getString("openid") +
         "&lang=zh_CN";

   JSONObject resultInfo = HttpUtils.httpGet(infoUrl);

   //此时已获取到userInfo,再根据业务进行处理
   System.err.println("请求获取userInfo:" + resultInfo);

   //做登录或注册操作
   JSONObject jsonObject = new JSONObject();
   jsonObject.put("openId",resultObject.getString("openid"));
   Result<JSONObject> result = XXXService.doLogin(jsonObject);//做业务操作
   return result;
}
上面的回调函数主要做了一下几件事情:
1.拿到相应微信用户扫码或者授权后的code
2.拿到code、appid、secret去调用微信接口,获取access_token和openId
3.根据access_token和openId调用微信接口,获取相应微信的用户信息
4.拿到用户信息就可以去做你想要的业务了
3>微信授权接口实现
上面讲了微信的扫码登录,现在来实现微信授权登录
/**
 * 微信认证授权
 * @param response
 * @throws IOException
 */
@GetMapping(value = "/login")
public void login(HttpServletResponse response) throws IOException{
   String url ="https://open.weixin.qq.com/connect/oauth2/authorize" +
         "?appid=" + appid + "" +
         "&redirect_uri=" + http + "" +
         "&response_type=code" +
         "&scope=snsapi_userinfo" +
         "&state=STATE#wechat_redirect";
   //重定向
   response.sendRedirect(url);
}
其实与扫码登录原理一样, 还是获取code。
只是调用的接口不同,最主要还是需要注意这个回调url,回调url与扫码登录相同,还是调用上面的callBack接口。
注意:上面代码中,用到了HttpUtils工具类,附下
package org.jeecg.modules.system.util;

import com.alibaba.fastjson.JSONObject;
import org.apache.http.HttpEntity;
import org.apache.http.HttpStatus;
import org.apache.http.client.config.RequestConfig;
import org.apache.http.client.methods.CloseableHttpResponse;
import org.apache.http.client.methods.HttpGet;
import org.apache.http.client.methods.HttpPost;
import org.apache.http.entity.StringEntity;
import org.apache.http.impl.client.CloseableHttpClient;
import org.apache.http.impl.client.HttpClients;
import org.apache.http.util.EntityUtils;
import org.slf4j.Logger;
import org.slf4j.LoggerFactory;

import java.io.IOException;

public class HttpUtils {

    private static Logger logger = LoggerFactory.getLogger(HttpUtils.class);

    private static RequestConfig requestConfig = null;

    static {
        // 设置请求和传输超时时
        requestConfig = RequestConfig.custom().setSocketTimeout(2000).setConnectTimeout(2000).build();
    }

    /**
     * post请求传输json参数
     *
     * @param url       url地址
     * @param jsonParam 参数
     * @return
     */
    public static JSONObject httpPost(String url, JSONObject jsonParam) {
        // post请求返回结果
        CloseableHttpClient httpClient = HttpClients.createDefault();
        JSONObject jsonResult = null;
        HttpPost httpPost = new HttpPost(url);
        // 设置请求和传输超时时请求
        httpPost.setConfig(requestConfig);
        try {
            System.out.println(jsonParam);
            if (null != jsonParam) {
                // 解决中文乱码问题
                StringEntity entity = new StringEntity(jsonParam.toString(), "utf-8");
                entity.setContentEncoding("UTF-8");
                entity.setContentType("application/json");
                httpPost.setEntity(entity);
            }
            System.out.println(jsonParam);
            CloseableHttpResponse result = httpClient.execute(httpPost);
            // 请求发请求成功,并得到响应
            if (result.getStatusLine().getStatusCode() == HttpStatus.SC_OK) {
                String str = "";
                try {
                    // 读取服务器返回过来的json字符串数
                    str = EntityUtils.toString(result.getEntity(), "utf-8");
                    // 把json字符串转换成json对象
                    jsonResult = JSONObject.parseObject(str);
                } catch (Exception e) {
                    logger.error("post请求提交失败:" + url, e);
                }
            }
        } catch (IOException e) {
            logger.error("post请求提交失败:" + url, e);
        } finally {
            httpPost.releaseConnection();
        }
        return jsonResult;
    }

    /**
     * post请求传输String参数 例如:name=Jack&sex=1&type=2
     * Content-type:application/x-www-form-urlencoded
     *
     * @param url      url地址
     * @param strParam 参数
     * @return
     */
    public static JSONObject httpPost(String url, String strParam) {
        // post请求返回结果
        CloseableHttpClient httpClient = HttpClients.createDefault();
        JSONObject jsonResult = null;
        HttpPost httpPost = new HttpPost(url);
        httpPost.setConfig(requestConfig);
        try {
            if (null != strParam) {
                // 解决中文乱码问题
                StringEntity entity = new StringEntity(strParam, "utf-8");
                entity.setContentEncoding("UTF-8");
                entity.setContentType("application/x-www-form-urlencoded");
                httpPost.setEntity(entity);
            }
            CloseableHttpResponse result = httpClient.execute(httpPost);
            // 请求发宋成功,并得到响应
            if (result.getStatusLine().getStatusCode() == HttpStatus.SC_OK) {
                String str = "";
                try {
                    // 读取服务器返回过来的json字符串数据
                    str = EntityUtils.toString(result.getEntity(), "utf-8");
                    // 把json字符串转换成json对象
                    jsonResult = JSONObject.parseObject(str);
                } catch (Exception e) {
                    logger.error("post请求提交失败:" + url, e);
                }
            }
        } catch (IOException e) {
            logger.error("post请求提交失败:" + url, e);
        } finally {
            httpPost.releaseConnection();
        }
        return jsonResult;
    }

    /**
     * 发送get请求
     *
     * @param url 路径
     * @return
     */
    public static JSONObject httpGet(String url) {
        // get请求返回结果
        JSONObject jsonResult = null;
        CloseableHttpClient client = HttpClients.createDefault();
        // 发送get请求
        HttpGet request = new HttpGet(url);
        request.setConfig(requestConfig);
        try {
            CloseableHttpResponse response = client.execute(request);

            // 请求发送成功,并得到响应
            if (response.getStatusLine().getStatusCode() == HttpStatus.SC_OK) {
                // 读取服务器返回过来的json字符串数组
                HttpEntity entity = response.getEntity();
                String strResult = EntityUtils.toString(entity, "utf-8");
                // 把json字符串转换成json对象
                jsonResult = JSONObject.parseObject(strResult);
            } else {
                logger.error("get请求提交失败:" + url);
            }
        } catch (IOException e) {
            logger.error("get请求提交失败:" + url, e);
        } finally {
            request.releaseConnection();
        }
        return jsonResult;
    }
}
注:此文为自己实操的记录,查了好多文档,结合起来大致能够解决,但有些还是没法解决,所以实现后把过程记录下来,希望大家少踩点坑,如有错误请及时纠正!下期我们讲一下:实现微信各应用统一账号信息登录开发 + 微信公众测试号开发


