如何在PyCharm中选择并使用Anaconda建立的TensorFlow、Keras和PyTorch Python环境
目录
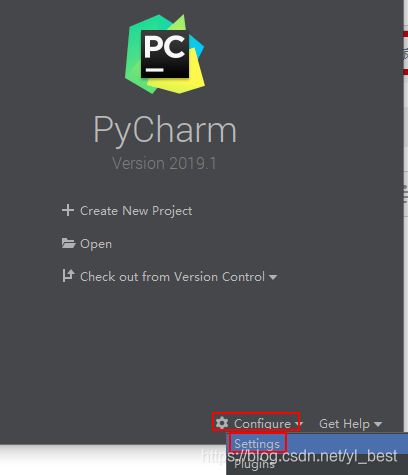
Step#1 双击PyCharm进入欢迎界面,点击右下角Configure => Settings
Step#2 添加Python解释器Add Python Interpreter
Step#3 选择Conda Environment => Existing environment
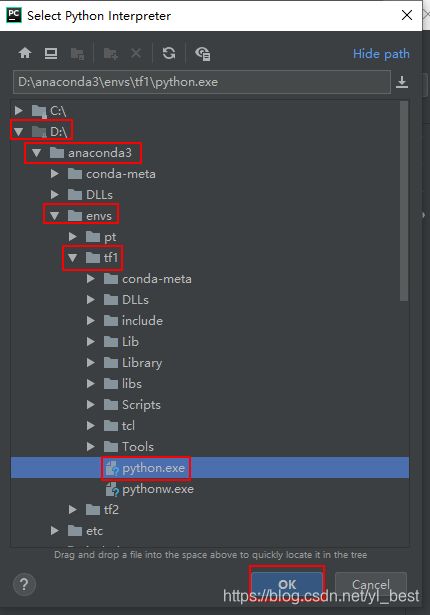
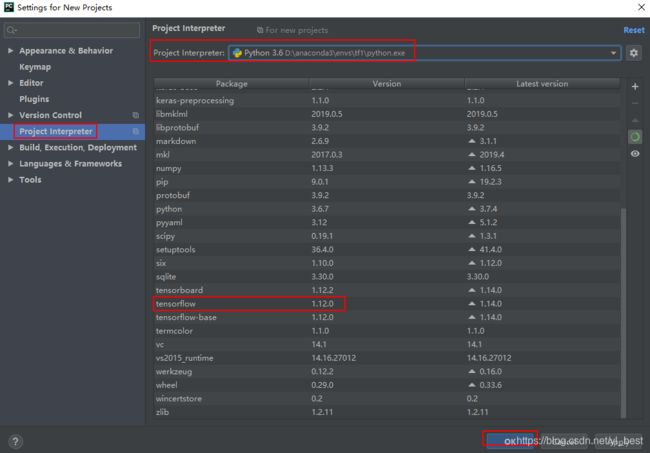
Step#4 选择之前建好的tf1环境下python,点击OK
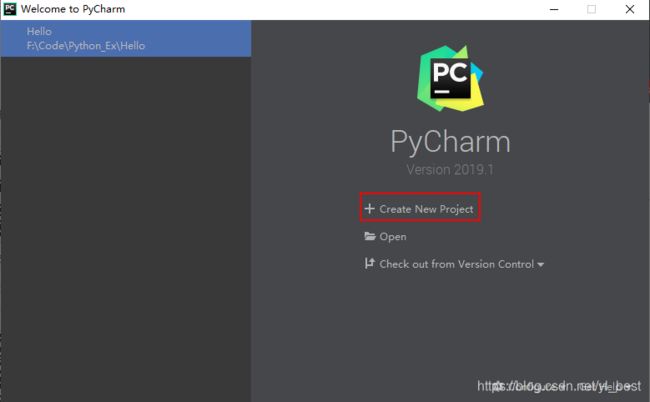
Step#5 新建一个项目TfTest
Step#6 新建一个ex1.py
Step#7 TensorFlow验证代码及输出结果
Step#8 Keras验证代码及输出结果
Step#9 PyTorch验证代码及输出结果
接上篇《Win10快速搭建TensorFlow, Keras与PyTorch深度学习环境》
Step#1 双击PyCharm进入欢迎界面,点击右下角Configure => Settings
Step#2 添加Python解释器Add Python Interpreter
选择Project Interpreter
Step#3 选择Conda Environment => Existing environment
Step#4 选择之前建好的tf1环境下python,点击OK
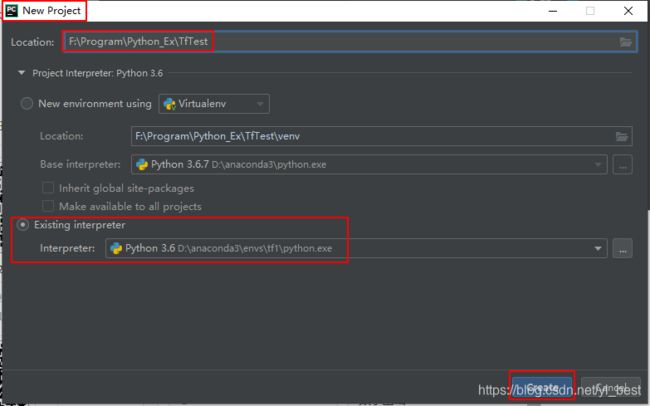
Step#5 新建一个项目TfTest
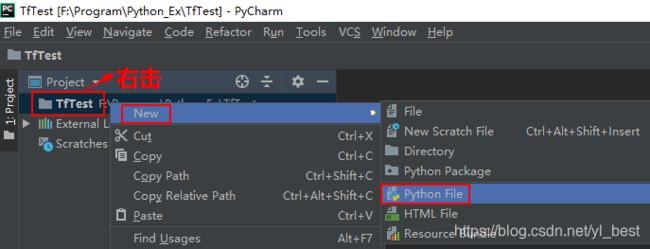
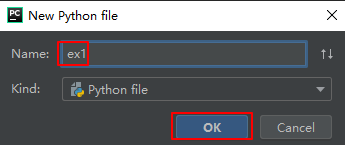
Step#6 新建一个ex1.py
Step#7 TensorFlow验证代码及输出结果
# import the necessary packages
import tensorflow as tf

print(tf.__version__)       # 输出TensorFlow版本
se = tf.Session()           # 创建一个Session会话
ar1 = tf.ones([2, 3])       # 创建一个2x3矩阵,其值全部为一
result = se.run(ar1)        # 执行
print(result)               # 输出执行结果

hello = tf.constant("Hello World")      # 创建常量
result = se.run(hello)      # 执行
print(result)               # 输出执行结果
se.close()                  # 关闭Session会话
输出结果:
D:\anaconda3\envs\tf1\python.exe F:/Program/Python_Ex/TfTest/ex1.py
1.12.0
2019-10-08 15:00:23.621853: I tensorflow/core/platform/cpu_feature_guard.cc:141] Your CPU supports instructions that this TensorFlow binary was not compiled to use: AVX AVX2
2019-10-08 15:00:23.623791: I tensorflow/core/common_runtime/process_util.cc:69] Creating new thread pool with default inter op setting: 8. Tune using inter_op_parallelism_threads for best performance.
[[ 1. 1. 1.]
[ 1. 1. 1.]]
b'Hello World'
Step#8 Keras验证代码及输出结果
因为Keras和TensorFlow安装在同一个环境tf1下,所以就使用同一个Python解释器
# import the necessary packages
from keras.models import Sequential
from keras.layers import Dense, Activation

model = Sequential()        # 实例化一个Sequential
# 输入层
model.add(Dense(units=64, input_dim=100))       # 全连接层,64个神经元,100个输入
model.add(Activation("relu"))           # 激活函数为 relu
# 输出层
model.add(Dense(units=10))              # 全连接层,10个神经元
model.add(Activation("softmax"))        # 激活函数为softmax
输出结果:
D:\anaconda3\envs\tf1\python.exe F:/Program/Python_Ex/TfTest/ex2.py
Using TensorFlow backend.
Step#9 PyTorch验证代码及输出结果
PyTorch的Python解释器添加过程与TensorFlow一样,此处不赘述。
区别就是python.exe路径不同,笔者之前建立好的路径为D:\anaconda3\envs\pt\python.exe
# import the necessary packages
import torch as t     # 导入Torch
a = t.zeros([2,3])    # 创建一个2x3的矩阵,其值全部为零
print(a)              # 输出矩阵
输出结果:
D:\anaconda3\envs\pt\python.exe F:/Program/Python_Ex/PtTest/ex1.py
tensor([[0., 0., 0.],
[0., 0., 0.]])
