kubernetes集群编排——k8s高可用集群
实验环境
| 主机名 |
IP |
角色 |
| k8s1 |
192.168.92.11 |
harbor |
| k8s2 |
192.168.92.12 |
control-plane |
| k8s3 |
192.168.92.13 |
control-plane |
| k8s4 |
192.168.92.14 |
control-plane |
| k8s5 |
192.168.92.15 |
haproxy,pacemaker |
| k8s6 |
192.168.92.16 |
haproxy,pacemaker |
| k8s7 |
192.168.92.17 |
worker node |
haproxy负载均衡
配置节点解析,所有节点解析保持一致
[root@k8s5 ~]# cat /etc/hosts
[root@k8s5 ~]# yum install -y haproxy net-tools
[root@k8s5 ~]# cd /etc/haproxy/
[root@k8s5 haproxy]# vim haproxy.cfg
#---------------------------------------------------------------------
# Example configuration for a possible web application. See the
# full configuration options online.
#
# http://haproxy.1wt.eu/download/1.4/doc/configuration.txt
#
#---------------------------------------------------------------------
#---------------------------------------------------------------------
# Global settings
#---------------------------------------------------------------------
global
# to have these messages end up in /var/log/haproxy.log you will
# need to:
#
# 1) configure syslog to accept network log events. This is done
# by adding the '-r' option to the SYSLOGD_OPTIONS in
# /etc/sysconfig/syslog
#
# 2) configure local2 events to go to the /var/log/haproxy.log
# file. A line like the following can be added to
# /etc/sysconfig/syslog
#
# local2.* /var/log/haproxy.log
#
log 127.0.0.1 local2
chroot /var/lib/haproxy
pidfile /var/run/haproxy.pid
maxconn 4000
user haproxy
group haproxy
daemon
# turn on stats unix socket
stats socket /var/lib/haproxy/stats
#---------------------------------------------------------------------
# common defaults that all the 'listen' and 'backend' sections will
# use if not designated in their block
#---------------------------------------------------------------------
defaults
mode http
log global
#option httplog
option dontlognull
option http-server-close
#option forwardfor except 127.0.0.0/8
option redispatch
retries 3
timeout http-request 10s
timeout queue 1m
timeout connect 10s
timeout client 1m
timeout server 1m
timeout http-keep-alive 10s
timeout check 10s
maxconn 3000
listen status *:80
stats uri /status
stats auth admin:westos
#---------------------------------------------------------------------
# main frontend which proxys to the backends
#---------------------------------------------------------------------
frontend main *:6443
mode tcp
default_backend k8s
#---------------------------------------------------------------------
# round robin balancing between the various backends
#---------------------------------------------------------------------
backend k8s
mode tcp
balance roundrobin
server app1 192.168.92.12:6443 check
server app2 192.168.92.13:6443 check
server app3 192.168.92.14:6443 check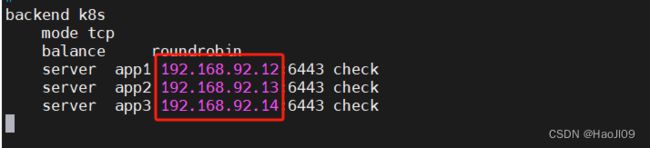
#注意:需要修改为自己的k8s control-plane地址
[root@k8s5 haproxy]# systemctl  start haproxy

[root@k8s5 haproxy]# netstat -antlp|grep :6443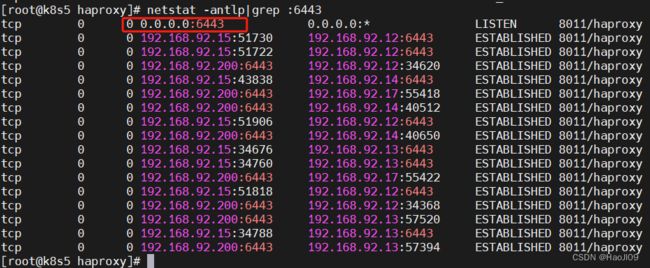
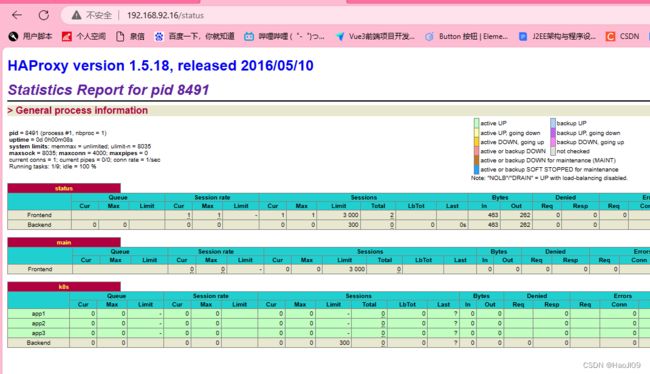
访问监控页面:http://192.168.92.15/status

测试成功后关闭服务,不要设置自启动
[root@k8s5 haproxy]# systemctl stop haproxy设置免密
[root@k8s5 haproxy]# ssh-keygen

[root@k8s5 haproxy]# ssh-copy-id k8s6
k8s6节点安装haproxy软件
[root@k8s6 ~]# yum install -y haproxy从k8s5拷贝配置文件
[root@k8s5 haproxy]# scp haproxy.cfg k8s6:/etc/haproxy/测试服务
访问监控页面:http://192.168.92.16/status
测试成功后关闭服务,不要设置自启动
[root@k8s6 haproxy]# systemctl stop haproxypacemaker高可用
[root@k8s5 ~]# cd /etc/yum.repos.d/
[root@k8s5 yum.repos.d]# vim hjl.repo
[dvd]
name=dvd
baseurl=file:///media
gpgcheck=0
[HighAvailability]
name=HighAvailability
baseurl=file:///media/addons/HighAvailability
gpgcheck=0同步配置文件
[root@k8s5 yum.repos.d]# scp hjl.repo k8s6:/etc/yum.repos.d/安装软件
[root@k8s5 yum.repos.d]# yum install  -y pacemaker pcs psmisc policycoreutils-python

[root@k8s6 ~]# yum install  -y pacemaker pcs psmisc policycoreutils-python
启动pcsd服务
[root@k8s5 ~]# systemctl enable --now pcsd.service

[root@k8s5 ~]# ssh k8s6 systemctl enable --now pcsd.service
设置用户密码
[root@k8s5 ~]# echo westos | passwd --stdin hacluster

[root@k8s5 ~]# ssh k8s6 'echo westos | passwd --stdin hacluster'
节点认证
[root@k8s5 ~]# pcs cluster auth k8s5 k8s6创建集群
[root@k8s5 ~]# pcs cluster setup --name mycluster k8s5 k8s6启动集群
[root@k8s5 ~]# pcs cluster start --all集群自启动
[root@k8s5 ~]# pcs cluster enable --all禁用stonith
[root@k8s5 ~]# pcs property set stonith-enabled=false[root@k8s5 ~]# pcs status
添加集群资源
[root@k8s5 ~]# pcs resource create vip ocf:heartbeat:IPaddr2 ip=192.168.56.200 op monitor interval=30s

[root@k8s5 ~]# pcs resource create haproxy systemd:haproxy op  monitor interval=60s

[root@k8s5 ~]# pcs resource group add hagroup vip haproxy
测试
[root@k8s5 ~]# pcs node standby资源全部迁移到k8s6
[root@k8s5 ~]# pcs status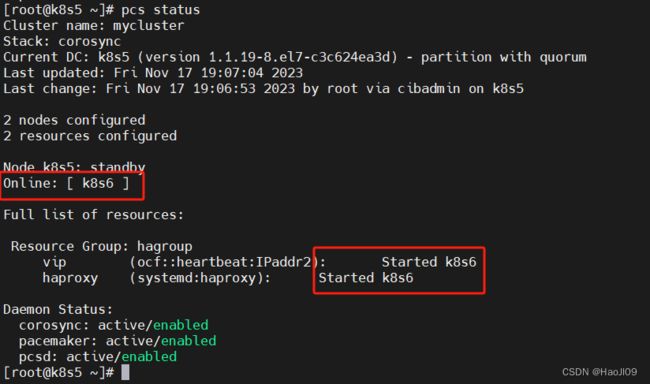
恢复
[root@k8s5 ~]# pcs node  unstandby

[root@k8s5 ~]# pcs status
部署control-plane
加载内核模块(在所有集群节点执行)
[root@k8s2 ~]# vim /etc/modules-load.d/k8s.confoverlay
br_netfilter[root@k8s2 ~]# modprobe overlay
[root@k8s2 ~]# modprobe br_netfilter
[root@k8s3 ~]# modprobe overlay
[root@k8s3 ~]# modprobe br_netfilter
[root@k8s4 ~]# modprobe overlay
[root@k8s4 ~]# modprobe br_netfilter[root@k8s2 ~]# vim /etc/sysctl.d/docker.confnet.bridge.bridge-nf-call-iptables=1
net.bridge.bridge-nf-call-ip6tables=1
net.ipv4.ip_forward=1[root@k8s2 ~]# sysctl --system确认软件版本
[root@k8s2 ~]# rpm -q kubeadm kubelet kubectl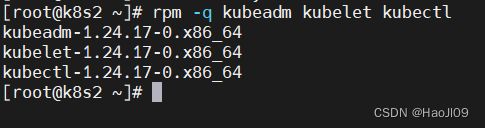
生成初始化配置文件
[root@k8s2 ~]# kubeadm config print init-defaults > kubeadm-init.yaml修改配置
[root@k8s2 ~]# vim kubeadm-init.yamlapiVersion: kubeadm.k8s.io/v1beta3
bootstrapTokens:
- groups:
- system:bootstrappers:kubeadm:default-node-token
token: abcdef.0123456789abcdef
ttl: 24h0m0s
usages:
- signing
- authentication
kind: InitConfiguration
localAPIEndpoint:
advertiseAddress: 192.168.92.12
bindPort: 6443
nodeRegistration:
criSocket: unix:///var/run/containerd/containerd.sock
imagePullPolicy: IfNotPresent
name: k8s2
taints: null
---
apiServer:
timeoutForControlPlane: 4m0s
apiVersion: kubeadm.k8s.io/v1beta3
certificatesDir: /etc/kubernetes/pki
clusterName: kubernetes
controlPlaneEndpoint: "192.168.92.200:6443"
controllerManager: {}
dns: {}
etcd:
local:
dataDir: /var/lib/etcd
imageRepository: reg.westos.org/k8s
kind: ClusterConfiguration
kubernetesVersion: 1.24.17
networking:
dnsDomain: cluster.local
serviceSubnet: 10.96.0.0/12
podSubnet: 10.244.0.0/16
scheduler: {}
---
apiVersion: kubeproxy.config.k8s.io/v1alpha1
kind: KubeProxyConfiguration
mode: ipvs
初始化集群
[root@k8s2 ~]# kubeadm init --config kubeadm-init.yaml --upload-certs部署网络组件
[root@k8s2 calico]# kubectl apply -f calico.yaml[root@k8s2 ~]# kubectl get pod -A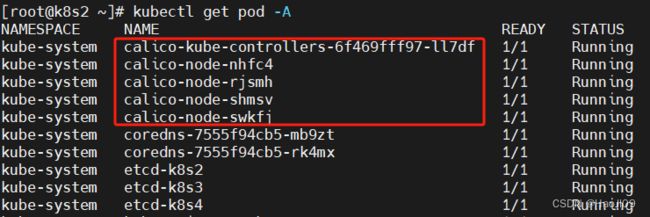
添加其它control-plane节点
[root@k8s3 ~]# kubeadm join 192.168.92.200:6443 --token abcdef.0123456789abcdef         --discovery-token-ca-cert-hash sha256:a1f977a7de194528e84da253c3cf6c89aac1d7e78cfd5ca733ebff9e5c5c3330         --control-plane --certificate-key 35c53e03e75b37ab5ac1a6401589a6bb8d8cff5e4e8f23a03ffd1dcf2256aa9a


[root@k8s4 ~]# kubeadm join 192.168.92.200:6443 --token abcdef.0123456789abcdef         --discovery-token-ca-cert-hash sha256:a1f977a7de194528e84da253c3cf6c89aac1d7e78cfd5ca733ebff9e5c5c3330         --control-plane --certificate-key 35c53e03e75b37ab5ac1a6401589a6bb8d8cff5e4e8f23a03ffd1dcf2256aa9a
[root@k8s2 ~]# kubectl get nodes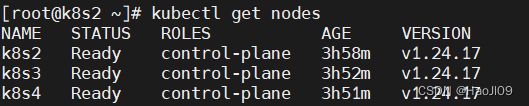
部署worker node
新添加的节点需要初始化配置
- 禁用selinux、firewalld、swap分区
- 部署containerd
- 安装kubelet、kubeadm、kubectl
- 配置内核模块
添加解析
[root@k8s7 ~]# cat /etc/hosts
禁用swap
[root@k8s7 ~]# swapoff -a

[root@k8s7 ~]# vim /etc/fstab
安装containerd、kubelet、kubeadm、kubectl
从其它节点拷贝repo文件
[root@k8s4 yum.repos.d]# scp docker.repo k8s.repo k8s7:/etc/yum.repos.d/安装软件
[root@k8s7 ~]# yum install -y containerd.io kubeadm-1.24.17-0 kubelet-1.24.17-0 kubectl-1.24.17-0自启动服务
[root@k8s7 ~]# systemctl enable --now containerd

[root@k8s7 ~]# systemctl enable --now kubelet
拷贝containerd的配置文件
[root@k8s4 yum.repos.d]# cd /etc/containerd/
[root@k8s4 containerd]# ls
[root@k8s4 containerd]# scp -r * k8s7:/etc/containerd/重启服务
[root@k8s7 containerd]# systemctl  restart containerd
[root@k8s7 containerd]# crictl config runtime-endpoint unix:///run/containerd/containerd.sock
[root@k8s7 containerd]# crictl pull myapp:v1
配置内核模块
[root@k8s4 containerd]# cd /etc/modules-load.d/
[root@k8s4 modules-load.d]# scp k8s.conf k8s7:/etc/modules-load.d/
[root@k8s4 modules-load.d]# cd /etc/sysctl.d/
[root@k8s4 sysctl.d]# scp docker.conf k8s7:/etc/sysctl.d/

[root@k8s7 ~]# modprobe overlay
[root@k8s7 ~]# modprobe br_netfilter
[root@k8s7 ~]# sysctl --system
加入集群
[root@k8s7 ~]# kubeadm join 192.168.92.200:6443 --token abcdef.0123456789abcdef --discovery-token-ca-cert-hash sha256:a1f977a7de194528e84da253c3cf6c89aac1d7e78cfd5ca733ebff9e5c5c3330测试
[root@k8s2 ~]# kubectl get nodes
[root@k8s2 ~]# kubectl create deployment myapp --image myapp:v1

[root@k8s2 ~]# kubectl get pod -o wide