WPF依赖属性和附加属性
普通属性
private bool _IsSpinning;
public bool IsSpinning
{
  get { return _IsSpinning; }
  set { _IsSpinning = value; }
}
然后我们使用DependencyProperty类定义一个对象,这个对象将作为IsSpinning属性的依赖,如下:
public static readonly DependencyProperty IsSpinningProperty
然后,我们在将这个依赖对象,注册到属性IsSpinning的所在类上,如下:
DependencyProperty.Register( "IsSpinning", typeof(bool), typeof(你的属性所在的类的名称));从注册代码中,我们可以看到,他注册了三个信息:
1,当前DependencyProperty类定义的对象IsSpinningProperty,依赖于属性IsSpinning。
2,对象IsSpinningProperty的依赖类型与属性IsSpinning的类型一样都是bool。
3,对象IsSpinningProperty注册的类是声明属性IsSpinning的类,即,在其他类里,将看不到该依赖对象。
现在,我们做最后的操作,修改属性,将依赖对象IsSpinningProperty与属性IsSpinning绑定。
如何绑定呢?很简单,将我们属性定义里的【private bool _IsSpinning】替换为我们刚刚定义的依赖【IsSpinningProperty】即可。
public bool IsSpinning
{
  get { return (bool)GetValue(IsSpinningProperty); }
  set { SetValue(IsSpinningProperty, value); }
}
这里我们看到了,在给属性赋值和取值时,用到了GetValue和SetValue,他们俩是哪来的呢?
使用F12,我们跟踪进去,发现它们是类DependencyProperty里定义的方法,那么为什么我们在窗体里也可以用呢?
很简单,我们跟进一下Window的父类,发现最后的父类Visual继承了DependencyProperty,所以我们可以直接使用GetValue和SetValue来赋值和获取依赖对象的值。也就是只要是继承了类DependencyProperty的子类,都可以使用依赖属性。
完整版依赖属性定义代码:
public static readonly DependencyProperty IsSpinningProperty =
DependencyProperty.Register("IsSpinning", typeof(bool), typeof(DependecyUserControl));
public bool IsSpinning
{
  get { return (bool)GetValue(IsSpinningProperty); }
  set { SetValue(IsSpinningProperty, value); }
}
到这里,依赖属性的拆分就完事了,现在,大家应该很清楚依赖属性到底是什么了吧。
现在你已经理解这些依赖属性的概念了,只要熟练一点点,实现手敲依赖属性已经不是梦了。
PS:有没有人曾经告诉你,依赖属性的命名必须是 属性名+Property,然后你还信以为真了。哈哈。
依赖属性的简单应用
现在让我们来自定义一个带依赖属性的系统控件来加深记忆。
public class KButton : Button
{
  public static readonly DependencyProperty ForeImageProperty;
  public static readonly DependencyProperty BackImageProperty;
  public static readonly DependencyProperty MouseOverBackColorProperty;
  public static readonly DependencyProperty StretchProperty;
  static KButton()
  {
    ForeImageProperty = DependencyProperty.Register("ForeImage", typeof(string), typeof(KButton),null);
    ForeImageProperty = DependencyProperty.Register("BackImage", typeof(string), typeof(KButton),null);
    MouseOverBackColorProperty = DependencyProperty.Register("MouseOverBackColor", typeof(Brush), typeof(KButton), null);
    StretchProperty = DependencyProperty.Register("Stretch", typeof(Stretch), typeof(KButton), null);
    DefaultStyleKeyProperty.OverrideMetadata(typeof(KButton), new FrameworkPropertyMetadata(typeof(KButton)));//使KButton去读取KButton类型的样式,而不是去读取Button的样式
  }
  public string ForeImage
  {
    get { return (string)GetValue(ForeImageProperty); }
    set { SetValue(ForeImageProperty, value); }
  }
  public string BackImage
  {
    get { return (string)GetValue(BackImageProperty); }
    set { SetValue(BackImageProperty, value); }
  }
  public Brush MouseOverBackColor
  {
    get { return (Brush)GetValue(MouseOverBackColorProperty); }
    set { SetValue(MouseOverBackColorProperty, value); }
  }
  public Stretch Stretch
  {
    get { return (Stretch)GetValue(StretchProperty); }
    set { SetValue(StretchProperty, value); }
  }
}
如上述代码所示,我们定义了一个继承至Button的类KButton。
在KButtion中,我们定义了四个依赖属性:
ForeImageProperty:按钮的前景图片。
BackImageProperty:按钮的背景图片。
MouseOverBackColorProperty:按钮在鼠标经过时的颜色。
StretchProperty:按钮图片的拉伸模式。
代码非常简洁,除了四个依赖属性之外,什么也没有;现在我们去定义Kbutton类型的样式。
为了演示方便,我直接将样式定义在了App.xaml文件内。
样式代码如上所示,也非常简单,就是定义了一个模板,然后在模板里摆放好按钮背景图和按钮文字的位置。然后将我们之前定义好的依赖属性绑定到对应的值上。
其中需要注意的是,在模板中绑定自定义依赖属性,是使用RelativeSource.TemplatedParent的,如
{Binding ForeImage,
RelativeSource={x:Static RelativeSource.TemplatedParent}}。
而在模板的数据事件DataTrigger中,绑定依赖属性的模式却是分两种的。
第一种,绑定数据事件DataTrigger的条件时,使用RelativeSource.Self,如{Binding IsMouseOver,RelativeSource={x:Static RelativeSource.Self}}。
第二种,条件成立,触发模板变化时,使用RelativeSource.TemplatedParent,如{Binding BackImage, RelativeSource={x:Static RelativeSource.TemplatedParent}}。
现在我们使用下我们制作好的自定义控件,代码如下所示:
自定义用户控件中使用依赖属性
首先我们添加新项,然后选择用户控件。
然后,我们添加一个依赖属性HeaderTitle,同时设置当前控件的DataContext为自身—this.DataContext = this。
public string HeaderTitle

{

  get { return (string)GetValue(HeaderTitleProperty); }

  set { SetValue(HeaderTitleProperty, value); }

}

public static readonly DependencyProperty HeaderTitleProperty = DependencyProperty.Register("HeaderTitle", typeof(string), typeof(DependecyUserControl), null);

public DependecyUserControl()

{

  this.DataContext = this;

  InitializeComponent();

}| 现在,我们在用户控件的Xaml页面添加一个TextBlock,并绑定他的Text为我们刚刚定义的HeaderTitle,代码如下所示。 |
| 1 2 3 |
|
接着我们回到主窗体,引用这个用户控件,代码如下所示:
| 1 |
|
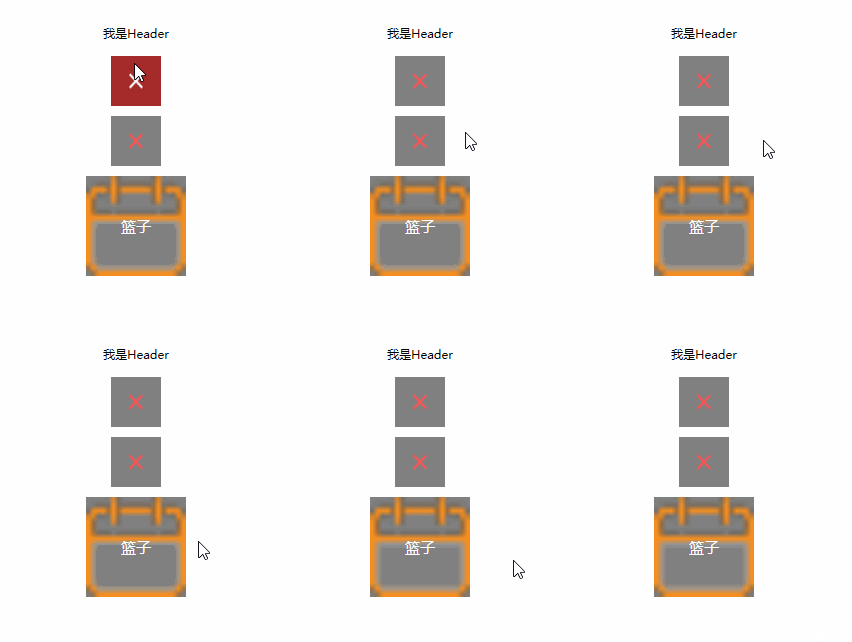
运行结果:可以看到,我们成功在主页面设置了用户控件的依赖属性,并让他成功的绑定到了用户控件中的TextBlock的Text属性。也就是说,我们简单的实现了Header的Title动态设置。
结语
WPF拥有非常强大的自定义能力,而,正确的学会了依赖属性是体会到它强大的第一步。
----------------------------------------------------------------------------------------------------
到此WPF依赖属性的正确学习方法就已经讲解完成了。
