IDEA 搭建 SpringCloud 项目【超详细步骤】
文章目录
-
- 一、前言
- 二、项目搭建
-
- 1. 数据库准备
- 2. 创建父工程
- 3. 创建注册中心
- 4. 服务注册
- 5. 编写业务代码
- 6. 服务拉取
一、前言
所谓微服务,就是要把整个业务模块拆分成多个各司其职的小模块,做到单一职责原则,不会重复开发相同的业务代码,实现真正意义上的高内聚、低耦合。同时,微服务可以对外暴露接口,供其它微服务使用。
如果我们在 A 服务中发起一个 http 请求到 B 服务,那么就可以实现微服务的远程调用。(restTemplate 的 getForObject 方法可以向浏览器发起请求)
这种方法看起来是可行的,但是把 url 路径和 Java 代码耦合到一起,是不符合开闭原则的。于是就出现了 Eureka 注册中心。
每一个微服务在启动的那一刻都需要做一件事情,就是把自己的服务信息注册给 Eureka,比如服务名称、服务端口等,其它微服务想要调用另一个服务的时候,直接去 Eureka 里面拉取信息就可以了。
同时,为了避免拉取的服务已经挂掉了,我们的服务每隔 30 秒就会向 Eureka 发起一次心跳,来证明自己还活着,如果有一天不跳了,Eureka 就会把它从注册列表中剔除。
如果存在多个服务提供者,服务消费者就会利用负载均衡算法,从服务列表中挑选一个!
二、项目搭建
1. 数据库准备
此处我们要准备两个数据库,user 服务和 order 服务各自拥有自己的数据库。
CREATE TABLE USER (
id INT NOT NULL PRIMARY KEY AUTO_INCREMENT,
NAME VARCHAR(20) NOT NULL,
phone VARCHAR(15) NOT NULL,
address VARCHAR(50) NOT NULL
);

INSERT INTO USER VALUES (1, "栈老师不回家", 13299075426, "山西省大同市")
INSERT INTO USER(NAME, phone, address) VALUES ("肖恩", 18834267011, "山西省太原市")
INSERT INTO USER(NAME, phone, address) VALUES ("李华", 12481076533, "山西省运城市")
CREATE TABLE orders (
id INT NOT NULL PRIMARY KEY AUTO_INCREMENT,
NAME VARCHAR(30) NOT NULL,
price INT NOT NULL,
user_id INT NOT NULL REFERENCES USER(id)
)

INSERT INTO orders VALUES (1, "可乐鸡翅", 32, 1);
INSERT INTO orders(NAME, price, user_id) VALUES("冰镇啤酒", 12, 1);
INSERT INTO orders(NAME, price, user_id) VALUES("草莓冰激凌", 8, 2);
INSERT INTO orders(NAME, price, user_id) VALUES("狼牙土豆", 10, 3);
2. 创建父工程
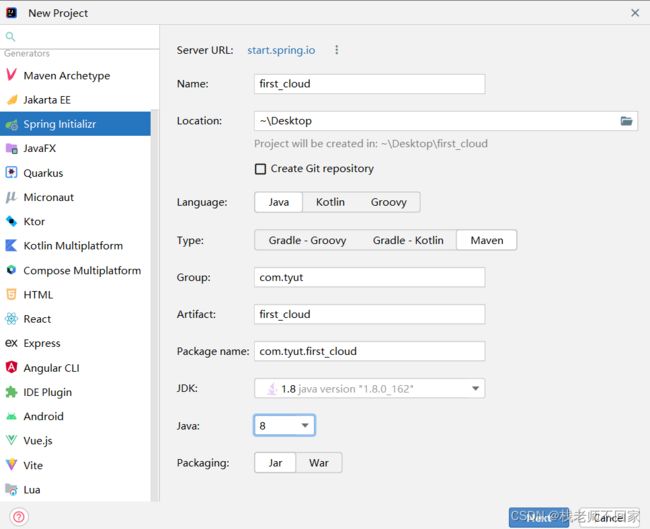
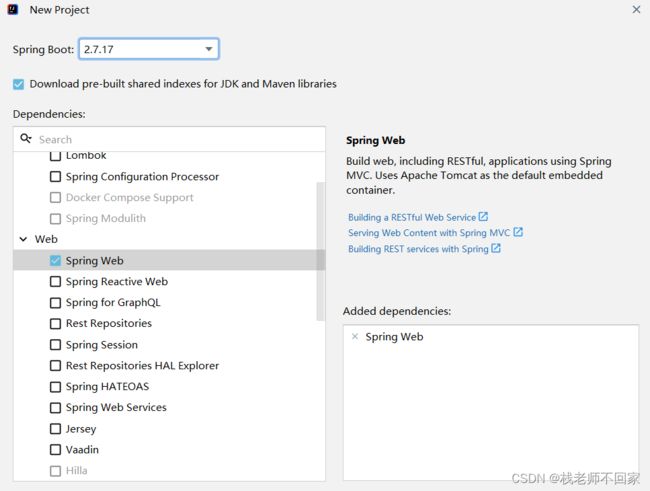
① 还是 SpringBoot 项目,选择 Spring Web 依赖
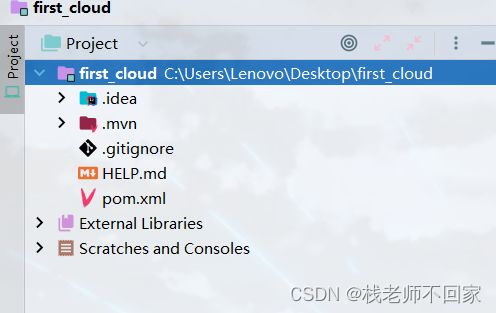
② 删掉 src 目录及 mvnw 开头的两个文件
③ 在 pom 文件中添加 packaging 标签和 SpringCloud 版本,并修改 SpringBoot 版本
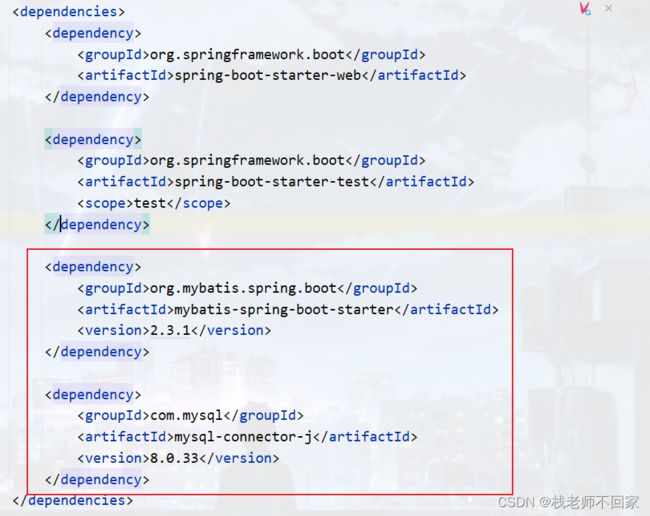
④ 引入 mysql 和 mybatis 依赖,供后续使用
⑤ 添加 SpringCloud 依赖库,后续子模块使用的时候就不需要再指定版本了
3. 创建注册中心
① 在父级项目上新建模块
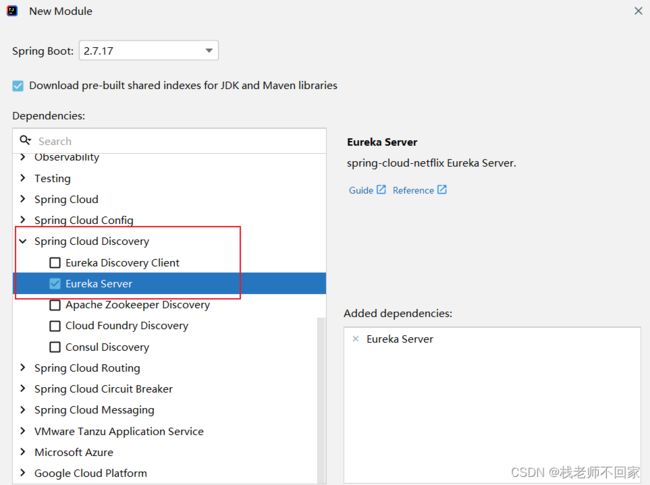
② 选择 Eureka Server
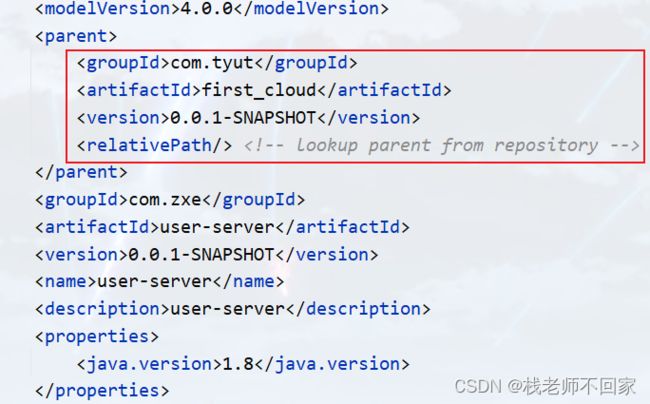
③ 修改子模块的 parent 标签内容,指向父工程
因为父模块中已经指定了 SpringCloud 的版本,所以子模块不需要再重复写!
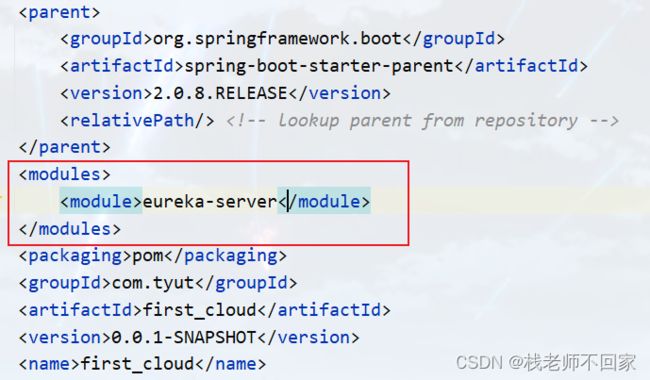
④ 在父级 pom 中添加该子模块
⑤ 因为子类会继承父类的依赖,所以子类中多余的依赖可以删掉,后续需要什么加什么
⑤ 编写 application.yml 文件
#服务端口,随便起
server:
  port: 11011
#服务名称
spring:
  application:
    name: eurekaserver
  datasource:
    url: jdbc:mysql:///ZXEdb?serverTimezone=UTC
    username: root
    password: 856724bb
    driver-class-name: com.mysql.cj.jdbc.Driver

#eureka地址
eureka:
  client:
    service-url:
      defaultZone: http://127.0.0.1:11011/eureka/
    register-with-eureka: false
    fetch-registry: false
服务名称和 eureka 地址的配置我们可以认为是服务注册的配置,而 eureka 自己也是一个微服务,所以在服务启动的时候,它也会把自己注册到 eureka 上!
⑥ 启动类上添加 @EnableEurekaServer 注解
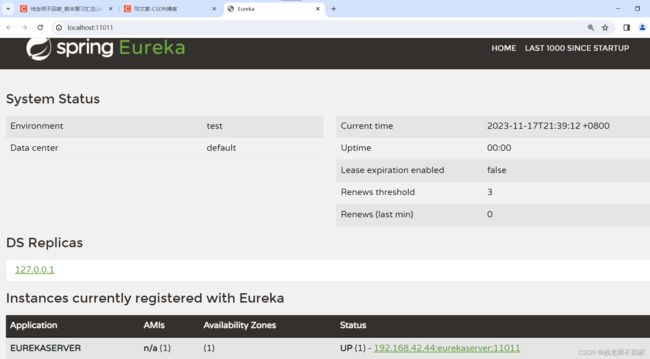
⑦ 输入 http://localhost:11011/,出现以下界面即 Eureka 创建成功。
4. 服务注册
情形:
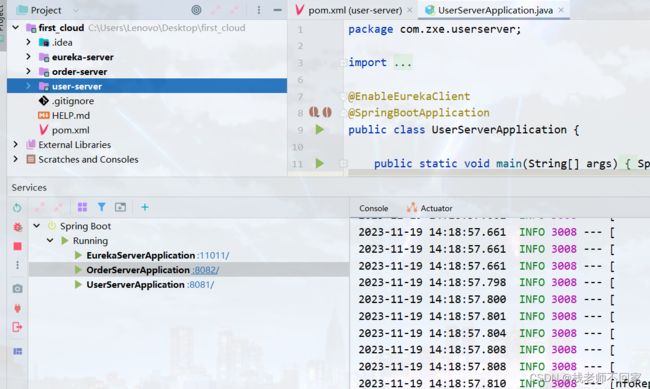
创建一个 order 服务和一个 user 服务,并把它们都注册到 eureka 中。order 里面需要用到 user,所以此时的 order 是消费者,user 是提供者。
对于服务的注册,我们只需要完成两步:
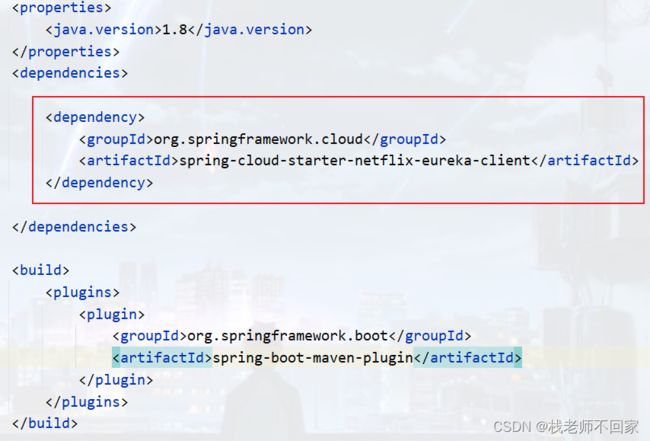
① 引入 spring-cloud-starter-netflix-eureka-client 依赖;
② 在 yml 文件中配置服务名称和 eureka 地址。
eureka 服务的依赖是 server,其余微服务都是 client!
① 创建 order 服务和 user 服务
② 引入 eureka 客户端依赖
③ 在父级 pom 中添加该子模块
④ 编写 yml 配置文件
#服务端口,随便起
server:
  port: 8081
#服务名称
spring:
  application:
    name: userserver
  datasource:
    url: jdbc:mysql:///user?serverTimezone=UTC
    username: root
    password: 856724bb
    driver-class-name: com.mysql.cj.jdbc.Driver

#eureka地址
eureka:
  client:
    service-url:
      defaultZone: http://127.0.0.1:11011/eureka/
④ 启动类上添加 @EnableEurekaServer 注解
以上是 user 的注册,order 同理!
5. 编写业务代码
要求查询订单表,其中订单表里面包含用户信息。
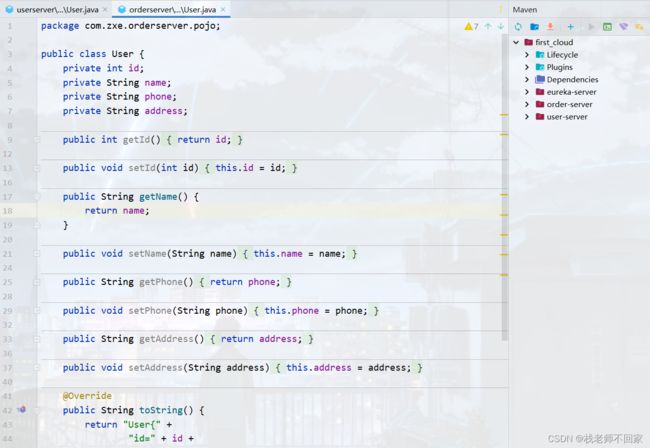
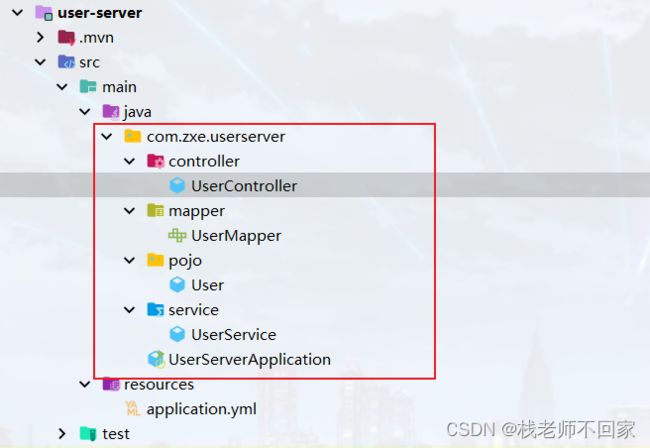
① 实体类
② 配置文件中添加驼峰命名功能及实体映射
#开启驼峰命名及实体映射
mybatis:
  type-aliases-package: com.zxe.orderserver.pojo
  configuration:
    map-underscore-to-camel-case: true
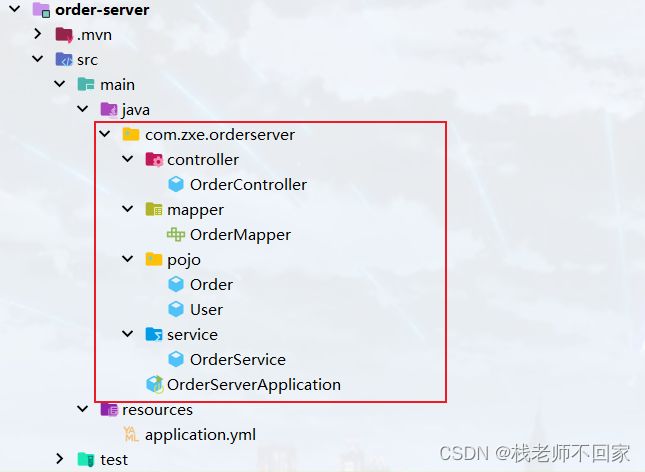
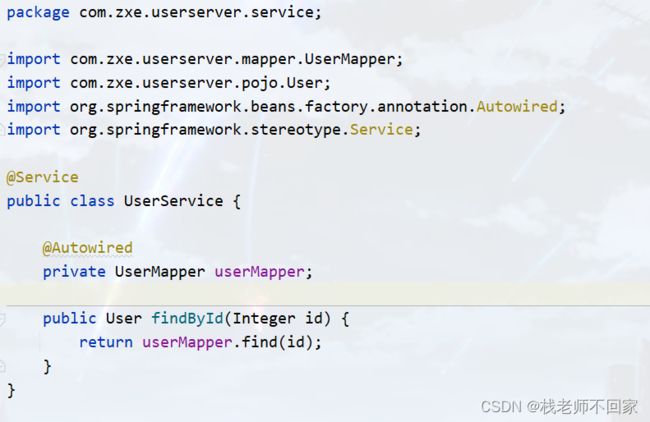
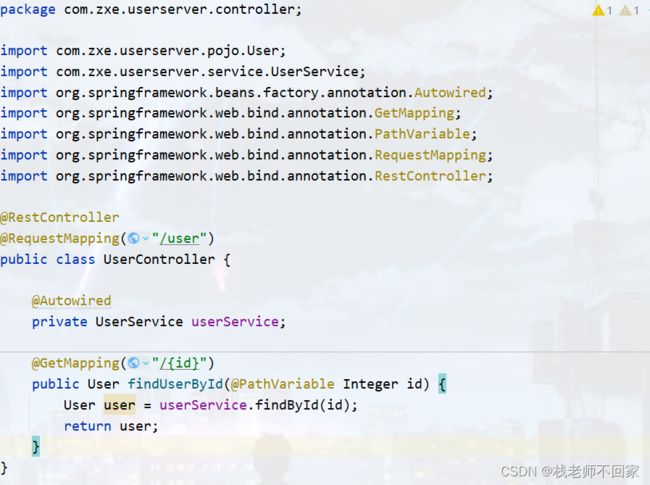
③ 编写数据层、业务层及控制层的代码
6. 服务拉取
服务拉取是基于服务名称获取服务列表,然后再对服务列表做负载均衡。
① 在 order-service 的启动类中注册 RestTemplate
@LoadBalanced 注解用来做负载均衡!
② 编写 OrderService 代码,order 要调用 user,自然要用到 user 接口的访问路径,此处的路径中我们用服务名来代替 localhost
@Service
public class OrderService {

    @Autowired
    private OrderMapper orderMapper;
    @Autowired
    private RestTemplate restTemplate;

    public Order findById(Integer id) {
        Order order = orderMapper.find(id);
        String url = "http://userserver/user/" + order.getUserId();
        User user = restTemplate.getForObject(url, User.class);
        order.setUser(user);
        return order;
    }
}
③ 运行结果


