12-海豚调度器DolphinScheduler
一、概述
跟之前学习过的Azkaban非常的相似,两者二选一。架构师就是老中医(同样的病,抓不同的药)。
Azkaban 能做任务调度,任务编排  A --> B
        还可以做定时任务,还能预警(发邮件,发钉钉,打电话)
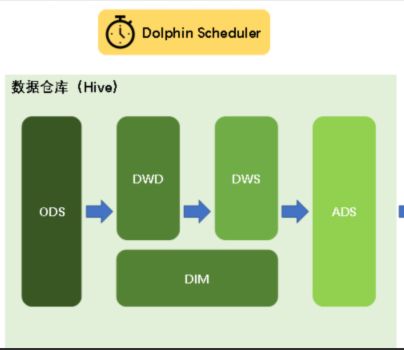
数仓项目因为是分层的,分层的数据之间,是有先后顺序的。所以可以编写
ods.sh dwd.sh dws.sh dim.sh ads.sh 编排好顺序,每天执行一次,每天自动分析,自动导出指标,可视化界面一刷新就是新的指标数据。DolphinScheduler是2019年中国易观公司开源的一个调度系统。目前是apache顶级项目之一:https://dolphinscheduler.apache.org/zh-cn/index.html
Apache DolphinScheduler是一个分布式、易扩展的可视化DAG工作流任务调度平台。致力于解决数据处理流程中错综复杂的依赖关系,使调度系统在数据处理流程中开箱即用(拎包入住)。
DAG --有向无环图,有顺序,但是不会形成环的图表。二、DS架构图(了解即可)
DolphinScheduler的主要角色如下:
MasterServer采用分布式无中心设计理念,MasterServer主要负责 DAG 任务切分、任务提交、任务监控,并同时监听其它MasterServer和WorkerServer的健康状态。
WorkerServer也采用分布式无中心设计理念,WorkerServer主要负责任务的执行和提供日志服务。
ZooKeeper服务,系统中的MasterServer和WorkerServer节点都通过ZooKeeper来进行集群管理和容错。
Alert服务,提供告警相关服务。
API接口层,主要负责处理前端UI层的请求。
UI,系统的前端页面,提供系统的各种可视化操作界面。
三、DolphinScheduler部署说明
DS是一个大型的,专业的调度工具,非常的耗内存。

到公司一定要看好是什么操作系统:
CentOS  6.x和7.x 命令有所变化  7.x  systemctl restart 服务名
                              6.x  service mysql restart等
Unbantu 或者 redhat 命令也不一样。
四、安装部署
DolphinScheduler支持多种部署模式,包括单机模式(Standalone)、伪集群模式(Pseudo-Cluster)、集群模式(Cluster)等。
虚拟机的准备工作:
如果是集群的话(至少 8G+3G+3G),如果是单台的(10G+)
4.1 单机模式
单机模式(standalone)模式下,所有服务均集中于一个StandaloneServer进程中,并且其中内置了注册中心Zookeeper和数据库H2。只需配置JDK环境,就可一键启动DolphinScheduler,快速体验其功能。
配置链接:
https://dolphinscheduler.apache.org/zh-cn/docs/latest/user_doc/guide/installation/standalone.html
注意: Standalone 仅建议 20 个以下工作流使用,因为其采用内存式的 H2 Database, Zookeeper Testing Server,任务过多可能导致不稳定,并且如果重启或者停止 standalone-server 会导致内存中数据库里的数据清空。

如何启动和关闭单机版:
# 启动 Standalone Server 服务
bash ./bin/dolphinscheduler-daemon.sh start standalone-server
# 停止 Standalone Server 服务
bash ./bin/dolphinscheduler-daemon.sh stop standalone-server
# 查看 Standalone Server 状态
bash ./bin/dolphinscheduler-daemon.sh status standalone-server单机启动,不需要zk,它内置了zk,把我们自己的zk服务停掉。单机模式比较省内存:
访问地址:http://bigdata01:12345/dolphinscheduler
账号和密码:  admin  dolphinscheduler123
4.2 伪集群模式
伪集群模式(Pseudo-Cluster)是在单台机器部署 DolphinScheduler 各项服务,该模式下master、worker、api server、logger server等服务都只在同一台机器上。Zookeeper和数据库需单独安装并进行相应配置。
配置链接:
https://dolphinscheduler.apache.org/zh-cn/docs/latest/user_doc/guide/installation/pseudo-cluster.html
4.3 集群模式
集群模式(Cluster)与伪集群模式的区别就是在多台机器部署 DolphinScheduler各项服务,并且可以配置多个Master及多个Worker。
五、 DolphinScheduler伪分布部署
5.1 前期准备工作
1)节点均需部署JDK(1.8+),并配置相关环境变量。
2)需部署数据库,支持MySQL(8.0+)或者PostgreSQL(8.2.15+)。
3)需部署Zookeeper(3.4.6+)。
4)需安装进程管理工具包psmisc
   yum install -y psmisc
把没有用的服务可以停掉了。
停止azkban : azkaban.sh 0
停止datax-web服务:
[root@bigdata01 bin]# cd /opt/installs/datax-web-2.1.2/
[root@bigdata01 datax-web-2.1.2]# cd bin
[root@bigdata01 bin]# ./stop-all.sh
停止hive服务:
hive-server-manager.sh stop
停止hdfs以及yarn:
stop-all.sh
停止单机模式:
[root@bigdata01 bin]# cd /opt/modules/apache-dolphinscheduler-1.3.9-bin/bin
[root@bigdata01 bin]# ./dolphinscheduler-daemon.sh stop standalone-server原生的命令:
zkServer.sh start
关闭:
zkServer.sh stop
查看状态:
zkServer.sh status
使用脚本命令:
zk.sh start初始化数据库:
创建一个用户,设置密码:
CREATE USER 'dolphinscheduler'@'%' IDENTIFIED BY '123456';

需要设置数据库的密码规则:
set global validate_password.policy=LOW;
set global validate_password.length=4;
set global validate_password.mixed_case_count=0;
set global validate_password.number_count=0;
set global validate_password.special_char_count=0;

开始创建一个数据库:
CREATE DATABASE dolphinscheduler DEFAULT CHARACTER SET utf8 DEFAULT COLLATE utf8_general_ci;

创建用户之后,赋予权限:
GRANT ALL PRIVILEGES ON dolphinscheduler.* TO 'dolphinscheduler'@'%';
flush privileges;
连接数据库:
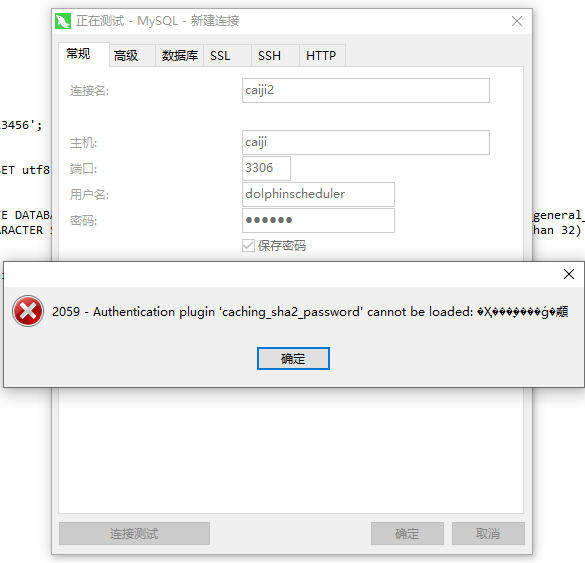
ALTER USER 'dolphinscheduler'@'%' IDENTIFIED WITH mysql_native_password BY '123456';

为什么不需要设置远程连接?
因为创建用户的时候,这个% 就是所有IP的意思。
开始修改数据库连接:
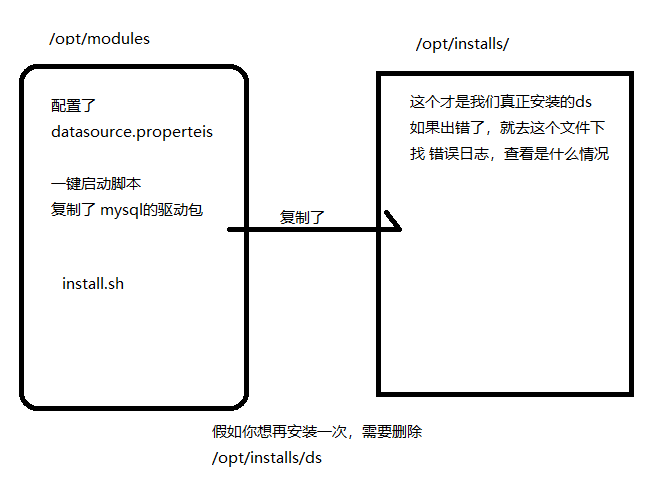
cd /opt/modules/apache-dolphinscheduler-1.3.9-bin/conf修改:datasource.properties
spring.datasource.driver-class-name=com.mysql.cj.jdbc.Driver
spring.datasource.url=jdbc:mysql://bigdata01:3306/dolphinscheduler?useUnicode=true&characterEncoding=UTF-8
spring.datasource.username=dolphinscheduler
spring.datasource.password=123456
拷贝一个mysql的驱动包:
第一次安装:
cp /opt/modules/mysql-connector-java-8.0.26.jar /opt/modules/apache-dolphinscheduler-1.3.9-bin/lib/

如果没有这个jar,从hive中拷贝一个:
cp /opt/installs/hive/lib/mysql-connector-java-8.0.26.jar /opt/modules/apache-dolphinscheduler-1.3.9-bin/lib/

假如已经安装过,需要修复:
cp /opt/modules/mysql-connector-java-8.0.26.jar /opt/installs/dolphinscheduler/lib/
初始化数据库:
进入  /opt/modules/apache-dolphinscheduler-1.3.9-bin/script
执行脚本:create-dolphinscheduler.sh
./create-dolphinscheduler.sh
5.2 配置一键部署脚本
该软件由于不是一解压就能使用的,所以,需要进行一键部署,在部署之前需要配置脚本中的数据1)先上传
2)解压
tar -zxvf apache-dolphinscheduler-1.3.9-bin.tar.gz
不要解压到 /opt/installs 下,因为还没有安装呢。
3)修改一键部署脚本
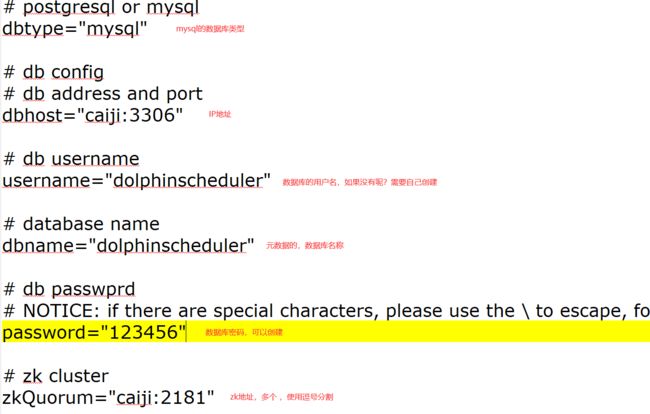
cd /opt/modules/apache-dolphinscheduler-1.3.9-bin/conf/config修改解压目录下的conf/config目录下的install_config.conf文件
#
# Licensed to the Apache Software Foundation (ASF) under one or more
# contributor license agreements.  See the NOTICE file distributed with
# this work for additional information regarding copyright ownership.
# The ASF licenses this file to You under the Apache License, Version 2.0
# (the "License"); you may not use this file except in compliance with
# the License.  You may obtain a copy of the License at
#
#     http://www.apache.org/licenses/LICENSE-2.0
#
# Unless required by applicable law or agreed to in writing, software
# distributed under the License is distributed on an "AS IS" BASIS,
# WITHOUT WARRANTIES OR CONDITIONS OF ANY KIND, either express or implied.
# See the License for the specific language governing permissions and
# limitations under the License.
#


# NOTICE :  If the following config has special characters in the variable `.*[]^${}\+?|()@#&`, Please escape, for example, `[` escape to `\[`
# postgresql or mysql
dbtype="mysql"

# db config
# db address and port
dbhost="bigdata01:3306"

# db username
username="dolphinscheduler"

# database name
dbname="dolphinscheduler"

# db passwprd
# NOTICE: if there are special characters, please use the \ to escape, for example, `[` escape to `\[`
password="123456"

# zk cluster
zkQuorum="bigdata01:2181,bigdata02:2181,bigdata03:2181"

# Note: the target installation path for dolphinscheduler, please not config as the same as the current path (pwd)
installPath="/opt/installs/dolphinscheduler"

# deployment user
# Note: the deployment user needs to have sudo privileges and permissions to operate hdfs. If hdfs is enabled, the root directory needs to be created by itself
deployUser="root"


# alert config
# mail server host
mailServerHost="smtp.exmail.qq.com"

# mail server port
# note: Different protocols and encryption methods correspond to different ports, when SSL/TLS is enabled, make sure the port is correct.
mailServerPort="25"

# sender
mailSender="xxxxxxxxxx"

# user
mailUser="xxxxxxxxxx"

# sender password
# note: The mail.passwd is email service authorization code, not the email login password.
mailPassword="xxxxxxxxxx"

# TLS mail protocol support
starttlsEnable="true"

# SSL mail protocol support
# only one of TLS and SSL can be in the true state.
sslEnable="false"

#note: sslTrust is the same as mailServerHost
sslTrust="smtp.exmail.qq.com"

# user data local directory path, please make sure the directory exists and have read write permissions
dataBasedirPath="/tmp/dolphinscheduler"

# resource storage type: HDFS, S3, NONE
resourceStorageType="HDFS"

# resource store on HDFS/S3 path, resource file will store to this hadoop hdfs path, self configuration, please make sure the directory exists on hdfs and have read write permissions. "/dolphinscheduler" is recommended
resourceUploadPath="/dolphinscheduler"

# if resourceStorageType is HDFS,defaultFS write namenode address,HA you need to put core-site.xml and hdfs-site.xml in the conf directory.
# if S3,write S3 address,HA,for example :s3a://dolphinscheduler,
# Note,s3 be sure to create the root directory /dolphinscheduler
defaultFS="hdfs://bigdata01:9820"

# if resourceStorageType is S3, the following three configuration is required, otherwise please ignore
s3Endpoint="http://192.168.xx.xx:9010"
s3AccessKey="xxxxxxxxxx"
s3SecretKey="xxxxxxxxxx"

# resourcemanager port, the default value is 8088 if not specified
resourceManagerHttpAddressPort="8088"

# if resourcemanager HA is enabled, please set the HA IPs; if resourcemanager is single, keep this value empty
yarnHaIps=

# if resourcemanager HA is enabled or not use resourcemanager, please keep the default value; If resourcemanager is single, you only need to replace ds1 to actual resourcemanager hostname
singleYarnIp="bigdata01"

# who have permissions to create directory under HDFS/S3 root path
# Note: if kerberos is enabled, please config hdfsRootUser=
hdfsRootUser="root"

# kerberos config
# whether kerberos starts, if kerberos starts, following four items need to config, otherwise please ignore
kerberosStartUp="false"
# kdc krb5 config file path
krb5ConfPath="$installPath/conf/krb5.conf"
# keytab username
keytabUserName="[email protected]"
# username keytab path
keytabPath="$installPath/conf/hdfs.headless.keytab"
# kerberos expire time, the unit is hour
kerberosExpireTime="2"

# api server port
apiServerPort="12345"


# install hosts
# Note: install the scheduled hostname list. If it is pseudo-distributed, just write a pseudo-distributed hostname
ips="bigdata01"

# ssh port, default 22
# Note: if ssh port is not default, modify here
sshPort="22"

# run master machine
# Note: list of hosts hostname for deploying master
masters="bigdata01"

# run worker machine
# note: need to write the worker group name of each worker, the default value is "default"
workers="bigdata01:default"

# run alert machine
# note: list of machine hostnames for deploying alert server
alertServer="bigdata01"

# run api machine
# note: list of machine hostnames for deploying api server
apiServers="bigdata01"
开始进行安装:
安装之前先启动zk,因为安装完会自动启动,启动过程需要zk,否则启动失败
因为这个软件比较大,所以需要先停止到没有用的服务。

cd /opt/modules/apache-dolphinscheduler-1.3.9-bin
执行一键安装脚本:  ./install.sh
以下操作都是在安装目录下:
1)一键启停所有服务
./bin/start-all.sh
./bin/stop-all.sh
注意同Hadoop的启停脚本进行区分。
2)启停 Master
./bin/dolphinscheduler-daemon.sh start master-server
./bin/dolphinscheduler-daemon.sh stop master-server
3)启停 Worker
./bin/dolphinscheduler-daemon.sh start worker-server
./bin/dolphinscheduler-daemon.sh stop worker-server
4)启停 Api
./bin/dolphinscheduler-daemon.sh start api-server
./bin/dolphinscheduler-daemon.sh stop api-server
5)启停 Logger
./bin/dolphinscheduler-daemon.sh start logger-server
./bin/dolphinscheduler-daemon.sh stop logger-server
6)启停 Alert
./bin/dolphinscheduler-daemon.sh start alert-server
./bin/dolphinscheduler-daemon.sh stop alert-server进入:
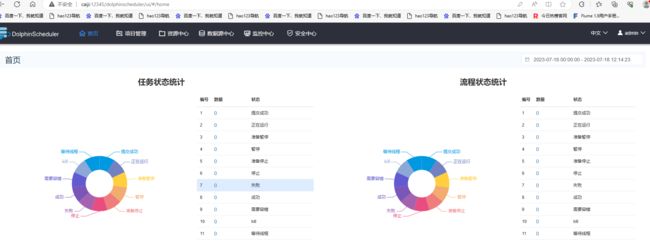
DolphinScheduler UI地址为http://bigdata01:12345/dolphinscheduler
初始用户的用户名为:admin,密码为dolphinscheduler123
查看安装路径:
/opt/installs/dolphinscheduler 以后都使用这个文件夹下的命令或者配置文件安装原理图:
    假如zookeeper 在安装的时候,你安装的是集群的话,启动的时候也必须是集群,否则会zk 有可能没启动,这个错误。
假如启动完成后连接不上:
检查你的数据库连接是否初始化成功了。
去查看日志:/opt/installs 这个文件夹下的ds中的logs 查看
检查zk状态是否正常(如果是集群,就要启动集群)
查看防火墙是否关系
六、使用DS
1、安全中心
1)队列(了解一下)
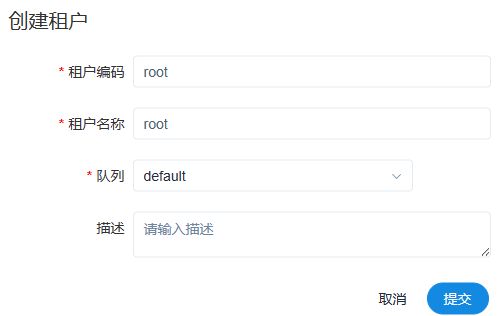
2)租户管理--执行任务的
租户对应的是Linux系统用户,是Worker执行任务使用的用户。如果Worker所在节点没有这个用户,Worker会在执行任务时创建这个用户。比如Linux中 root , 还可以创建laoyan,假如你使用了一个Linux中不存在的用户,会在linux中创建该用户。
一看上面的错误,就知道hadoop没有启动hdfs
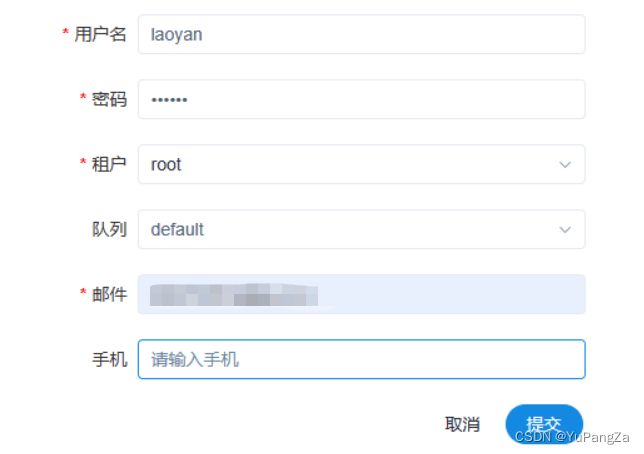
start-all.sh 启动hadoop集群3)创建用户--操作ds的
可以使用普通用户登录ds
4) 创建worker分组--工作的worker节点
![]()
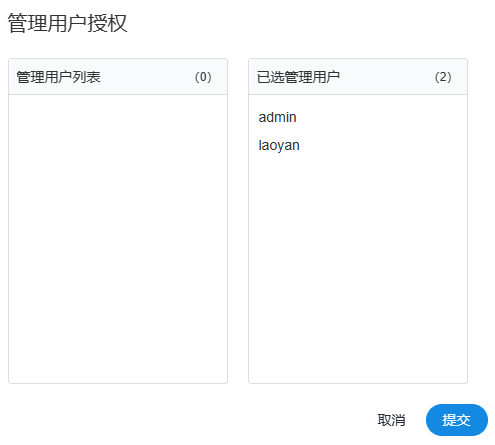
5)告警组-- 任务执行情况通知谁
添加组内成员:
2 如何使用ds执行任务
切换普通用户
1) 创建项目
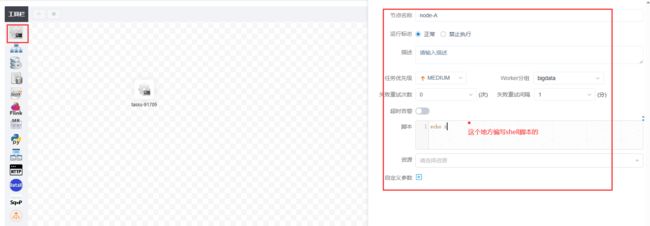
2)创建任务
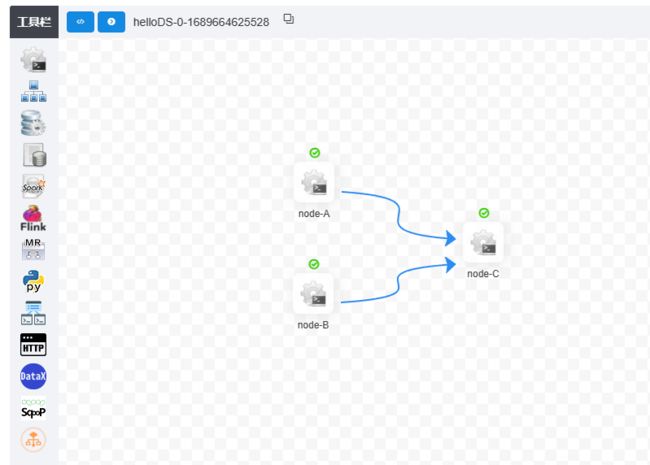
下图为工作流配置页面,共包含三个模快,分别为工作流定义、工作流实例和任务实例。
工作流定义:用于定义工作流,包括工作流各节点任务详情及各节点依赖关系等。
工作流实例:工作流每执行一次就会生成一个工作流示例。此处可查看正在运行的工作流以及已经完成的工作流。
任务实例:工作流中的一个节点任务,每执行一次就会生成一个任务实例。此处可用于查看正在执行的节点任务以及已经完成的节点任务。
定义工作流:
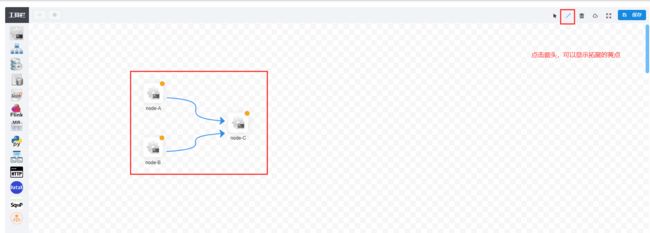
依次创建B任务,和C任务
将这三个任务,进行任务编排:
点击保存按钮,出现保存界面:
定义任务结束:
3)执行任务
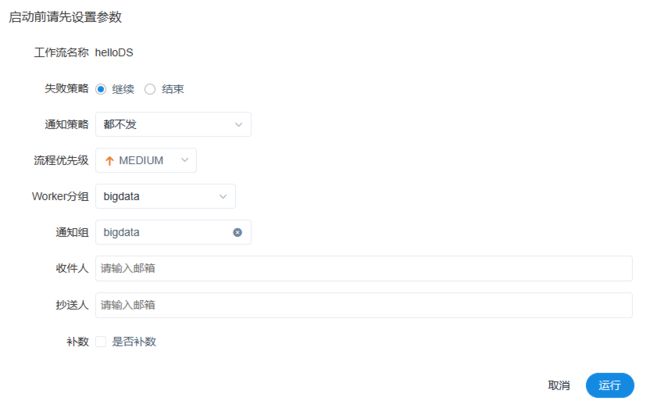
任务必须先上线才能执行,只有下线才能编辑点击上线,并没有运行,需要点击--执行
此时任务实例就会出现:
假如你的任务运行了,但是没有工作流实例,只提示成功,可以查看一下是否为内存不够了。
 worker 192.168.233.128:1234 current cpu load average 0.43 is too high or available memory 0.17G is too low
提升一下内存即可。
4)定时任务
创建好的定时任务需要将定时任务上线才可以运行。
查看定时任务是否运行了:
当Linux的系统时间,不对的时候,定时任务,普通任务都会受到影响
同步时间的两个命令:
systemctl restart chronyd
ntpdate time1.aliyun.com
七、进阶
1、传参数
此处的传参,有两种,一个是局部变量,一个是全局变量
1)局部变量--只针对一个任务
将工作流上线,执行,查看A的日志,发现打印了:
2)全局变量--多个任务中都需要一个字段
目前 A\B\C 任务都需要一个变量 dt。
在保存工作流的时候,弹出来的界面可以指定全局变量。
执行结果:
B和C都是打印的2023-7-20,唯独A打印的是2023-7-18
因为A设置了局部变量,当一个任务有局部变量又有全局变量的时候,以局部变量的值为准(就近原则)
3)日期
Linux中获取前一天数据的命令:date -d '1 day ago' +'%y%m%d'
date1=`date -d '1 day ago' +'%y%m%d'`
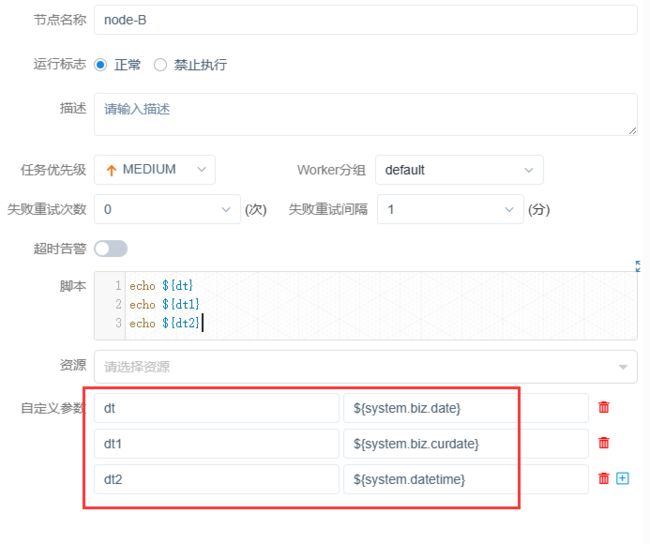
DolphinScheduler提供了一些时间相关的系统参数,方便定时调度使用
1)系统参数--格式太固定,没法自定义
实战:
查看B的日志:
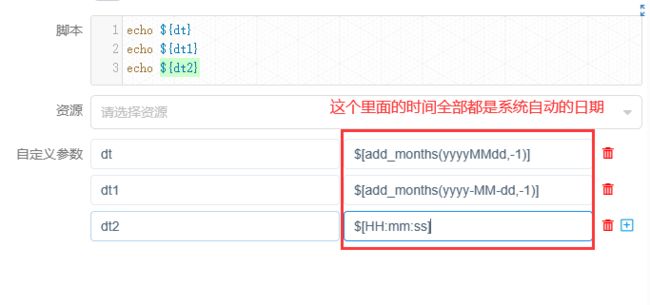
4)自定义时间
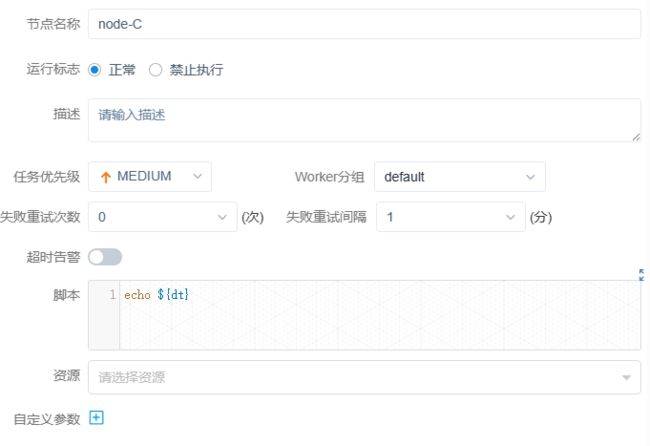
在C任务中:
自定义日期格式
$[yyyyMMdd], $[HHmmss], $[yyyy-MM-dd]
$[yyyyMMdd]也可以写成$[yyyy-MM-dd]
$[HHmmss] 也可以添加: $[HH:mm:ss]
2、资源中心
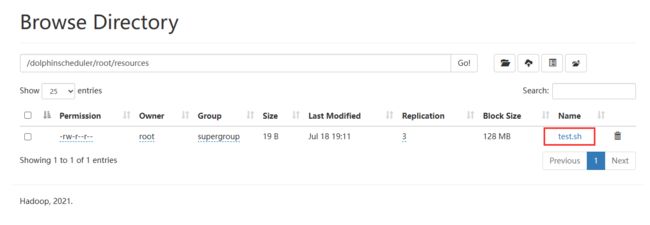
保存之后其实本质上是上传到了hdfs路径下。
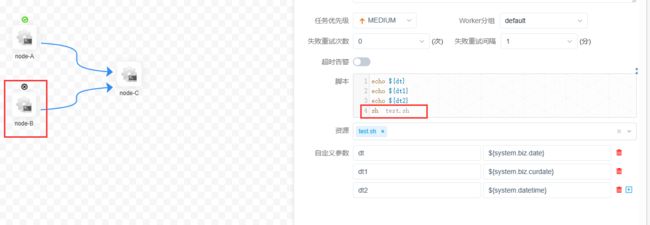
资源如何使用?
3、告警通知
DS默认支持两种告警:邮件和SMS(短信),短信这个功能有点Bug,可以演示邮件。
DS是一个任务调度工具,任务执行很慢,所以我们不需要一个告警通知,不管是成功还是失败,都需要第一时间通知我。
联想到Azkaban 里面有 邮箱、电话、钉钉
需要一个能够发送邮件的邮箱(这个邮箱是一个发送方,需要将信息发送给需要的人)
vi /opt/installs/dolphinscheduler/conf/alert.properties

   不要修改/opt/modules下的dolphinscheduler,这个文件夹下的内容在你安装完之后的那一刻已经没有任何价值了。
修改alert.properties中的文件:
# mail server configuration
mail.protocol=SMTP
mail.server.host=smtp.163.com
mail.server.port=25
mail.sender=邮箱
mail.user=邮箱
mail.passwd=授权码
# TLS
mail.smtp.starttls.enable=false
# SSL
mail.smtp.ssl.enable=false
mail.smtp.ssl.trust=smtp.exmail.qq.com重启alert服务:
./bin/dolphinscheduler-daemon.sh start alert-server
./bin/dolphinscheduler-daemon.sh stop alert-server
记得同步一下时间,在ds中,同步时间有奇效。
假如需要你做一个电话通知,怎么办?默认不支持。
使用第三方平台 -- 睿象云
只需要获取一个睿象云的邮箱即可得到电话通知。
4、工作流重跑
当一个工作流特长,任务特别复杂的时候,执行到某一处失败了,下一次想从失败的地方开始运行,而不是重新开始。修改任务,将失败的地方修复一下,开始运行。
重跑:从头开始,再来一遍
恢复失败:从失败的节点开始运行,直到运行结束。
八、如何在项目中使用
数仓项目中,其实只统计了一天的数据  20230711
真实的数仓,应该是每天都会将我们编写的SQL语句执行一遍,手动执行的效率太低了,占用大量的时间。
可以使用ds将任务进行编排。

可以编写4个脚本:
ods.sh dwd.sh dws.sh ads.sh
这四个脚本依次执行,有先后顺序的。
每一个脚本中:
以ods.sh 为例:
第一:执行sqoopJob.sh
第二:采集本地的数据到hdfs上(flume)执行导入语句
第三:广告数据每天都在采集中,所以不用管了。

dwd.sh 干点:
/opt/installs/hive/bin/hive -f dwd.hql
dwd.hql语句:

比如这样的语句:
insert overwrite table dwd_nshop.dwd_nshop_actlog_launch partition(bdp_day='20230711')
select
customer_id ,
device_num ,
device_type ,
os  ,
os_version ,
manufacturer,
carrier,
network_type,
area_code,
case
when from_unixtime(cast(ct/1000 as int) + 3600*8,'HH')  between 0 and 6 then 1
when from_unixtime(cast(ct/1000 as int) + 3600*8,'HH')  between 7 and 12 then 2
when from_unixtime(cast(ct/1000 as int) + 3600*8,'HH')  between 13 and 18 then 3
when  from_unixtime(cast(ct/1000 as int) + 3600*8,'HH') between 19 and 24 then 4
  end launch_time_segment,
   ct
from ods_nshop.ods_nshop_01_useractlog where action='02'
   and bdp_day='20230711';

一个文件中,写一堆这样的语句,后缀名修改为hql即可。hql语句中需要动态传参,每日日期不一样。

将4个任务编写完之后,还有定时执行,一般 在12:30, 因为12点之后,还有一些采集数据的任务没有执行完。
九、如何关闭linux中的提醒
cat /dev/null > /var/spool/mail/root
echo "unset MAILCHECK" >> /etc/profile
source /etc/profile
