【Java】Centos7配置Nacos开机自启动并后台运行(包含使用Docker运行nacos)
文章目录
- 下载Nacos
- 配置开机自启动
- 启动失败(JDK环境问题)
- 结果
- Docker版
- 安装Docker
- 配置阿里云加速
- Docker安装nacos
下载Nacos
Nacos1.4.4下载
这里我使用的Nacos版本是1.4.4。
下载完毕tar.gz文件之后进行解压
tar -zxvf nacos-server-1.4.4.tar.gz
这里我解压完毕之后使用mv命令重命名了一下目录名
mv nacos nacos1.4.4

配置开机自启动
首先创建一个nacos的服务文件
vim /lib/systemd/system/nacos.service
内容如下
[Unit]
Description=nacos
After=network.target

[Service]
Type=forking
ExecStart=/opt/software/nacos1.4.4/bin/startup.sh -m standalone
ExecReload=/opt/software/nacos1.4.4/bin/shutdown.sh
ExecStop=/opt/software/nacos1.4.4/bin/shutdown.sh
PrivateTmp=true

[Install]
WantedBy=multi-user.target
其中Exec后面的路径是你nacos的路径

配置完毕文件之后,重载系统配置
systemctl daemon-reload
然后开启开机自启
systemctl enable nacos.service
之后启动nacos
systemctl start nacos.service
然后使用status命令查看是否启动成功
systemctl status nacos.service
启动失败(JDK环境问题)
如果启动失败,可能是出现了JDK配置的问题,不用担心,这里假设你已经配置了JDK在系统环境中,然后按照如下配置即可解决
首先是创建软连接
 ln -s /opt/software/jdk8/bin/javac /usr/bin/javac
 ln -s /opt/software/jdk8/bin/jar /usr/bin/jar
 ln -s /opt/software/jdk8/bin/java /usr/bin/java
此时可以先试着启动一下nacos
systemctl start nacos.service
如果还是不行,那么就修改nacos的startup.sh文件即可,操作如下
vim /opt/software/nacos1.4.4/bin/startup.sh
把这里原本是空着的JAVA_HOME直接指定为你的JDK位置即可

当然如果还是不行,有可能是以为你的nacos启动的方式为集群cluster方式,那么修改为单机启动即可

结果

然后云服务器就可以访问到这个nacos了,端口是8848

Docker版
众所周知Docker肯定也是可以运行nacos的,而且使用docker去运行nacos更快。

如果没有安装Docker的,可以按照如下方式安装
官方教程
安装Docker
首先可以先检查本机是否已经安装过Docker,如果有的话就会直接删除。
 sudo yum remove docker \
                  docker-client \
                  docker-client-latest \
                  docker-common \
                  docker-latest \
                  docker-latest-logrotate \
                  docker-logrotate \
                  docker-engine
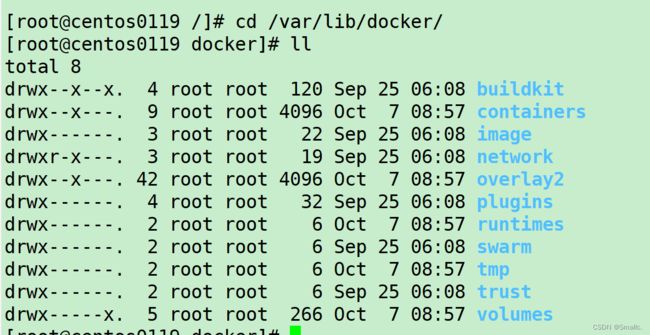
当然你可以直接去/vat/lib/docker 这个目录下查看,Docker安装完毕之后默认在这个目录里。
之后为Dokcer下载一些必要的配置
yum -y install gcc
yum -y install gcc-c++
yum install -y yum-utils
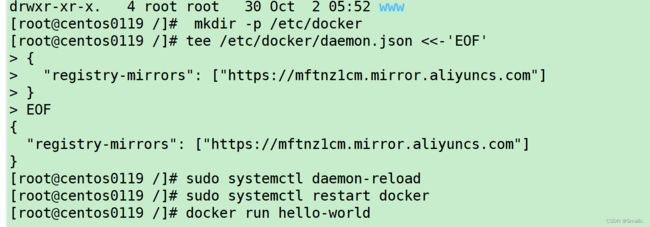
安装完毕上面之后为配置文件中添加阿里云的镜像而不是使用官方说的官方镜像,毕竟国内访问外网非常慢。
yum-config-manager --add-repo http://mirrors.aliyun.com/docker-ce/linux/centos/docker-ce.repo
之后安装Docker的引擎
yum install docker-ce docker-ce-cli containerd.io docker-compose-plugin
此时Docker已经安装完毕了,可以启动docker了
systemctl start docker
配置阿里云加速

进来之后需要创建一个个人实例

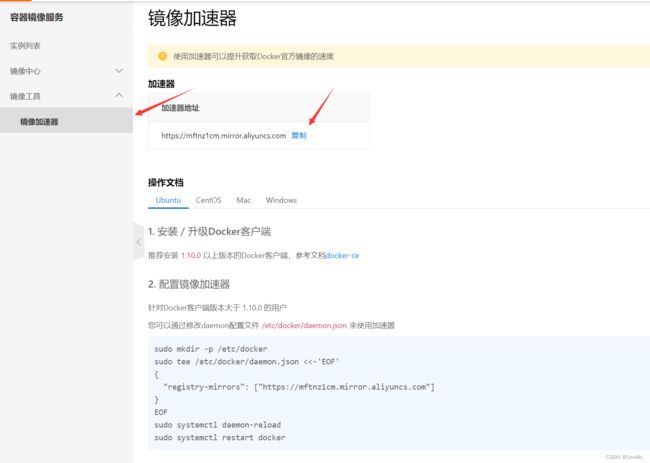
此时Docker就已经安装完毕了,那么下面开始使用docker安装nacos
Docker安装nacos
docker hub地址
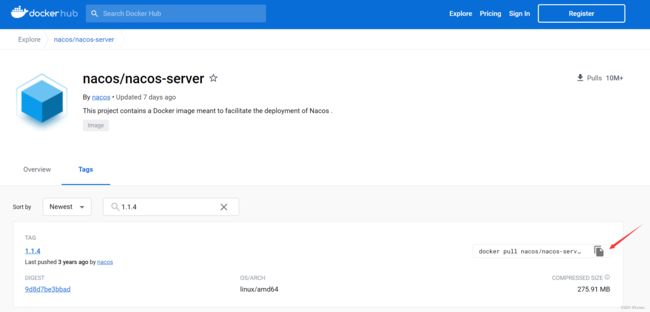
直接复制命令即可
docker pull nacos/nacos-server:1.1.4
拉取镜像完毕之后就可以简单的运行镜像了
docker run --name nacos1.1.4 -e MODE=standalone -p 8850:8848 -d nacos/nacos-server:1.1.4
当然如果只是这个样子的运行,那么docker重启之后,nacos中的配置也会消失,因此我们需要挂载一下数据卷。
首先创建两个映射文件
mkdir /opt/docker/nacos1.1.4/logs -p
mkdir /opt/docker/nacos1.1.4/conf -p

创建一个application.properties文件
其中application.properties文件的内容为
你需要修改的地方只有与数据库连接有关的地方
#
# Copyright 1999-2018 Alibaba Group Holding Ltd.
#
# Licensed under the Apache License, Version 2.0 (the "License");
# you may not use this file except in compliance with the License.
# You may obtain a copy of the License at
#
#      http://www.apache.org/licenses/LICENSE-2.0
#
# Unless required by applicable law or agreed to in writing, software
# distributed under the License is distributed on an "AS IS" BASIS,
# WITHOUT WARRANTIES OR CONDITIONS OF ANY KIND, either express or implied.
# See the License for the specific language governing permissions and
# limitations under the License.
#

#*************** Spring Boot Related Configurations ***************#
### Default web context path:
server.servlet.contextPath=/nacos
### Default web server port:
server.port=8849

#*************** Network Related Configurations ***************#
### If prefer hostname over ip for Nacos server addresses in cluster.conf:
# nacos.inetutils.prefer-hostname-over-ip=false

### Specify local server's IP:
# nacos.inetutils.ip-address=


#*************** Config Module Related Configurations ***************#
### If use MySQL as datasource:
# spring.datasource.platform=mysql

### Count of DB:
db.num=1

### Connect URL of DB:
db.url.0=jdbc:mysql://114.115.134.76:3306/nacos_config?characterEncoding=utf8&connectTimeout=1000&socketTimeout=3000&autoReconnect=true&useUnicode=true&useSSL=false&serverTimezone=UTC
db.user.0=root
db.password.0=root

### Connection pool configuration: hikariCP
db.pool.config.connectionTimeout=30000
db.pool.config.validationTimeout=10000
db.pool.config.maximumPoolSize=20
db.pool.config.minimumIdle=2

#*************** Naming Module Related Configurations ***************#
### Data dispatch task execution period in milliseconds:
# nacos.naming.distro.taskDispatchPeriod=200

### Data count of batch sync task:
# nacos.naming.distro.batchSyncKeyCount=1000

### Retry delay in milliseconds if sync task failed:
# nacos.naming.distro.syncRetryDelay=5000

### If enable data warmup. If set to false, the server would accept request without local data preparation:
# nacos.naming.data.warmup=true

### If enable the instance auto expiration, kind like of health check of instance:
# nacos.naming.expireInstance=true

nacos.naming.empty-service.auto-clean=true
nacos.naming.empty-service.clean.initial-delay-ms=50000
nacos.naming.empty-service.clean.period-time-ms=30000


#*************** CMDB Module Related Configurations ***************#
### The interval to dump external CMDB in seconds:
# nacos.cmdb.dumpTaskInterval=3600

### The interval of polling data change event in seconds:
# nacos.cmdb.eventTaskInterval=10

### The interval of loading labels in seconds:
# nacos.cmdb.labelTaskInterval=300

### If turn on data loading task:
# nacos.cmdb.loadDataAtStart=false


#*************** Metrics Related Configurations ***************#
### Metrics for prometheus
#management.endpoints.web.exposure.include=*

### Metrics for elastic search
management.metrics.export.elastic.enabled=false
#management.metrics.export.elastic.host=http://localhost:9200

### Metrics for influx
management.metrics.export.influx.enabled=false
#management.metrics.export.influx.db=springboot
#management.metrics.export.influx.uri=http://localhost:8086
#management.metrics.export.influx.auto-create-db=true
#management.metrics.export.influx.consistency=one
#management.metrics.export.influx.compressed=true


#*************** Access Log Related Configurations ***************#
### If turn on the access log:
server.tomcat.accesslog.enabled=true

### The access log pattern:
server.tomcat.accesslog.pattern=%h %l %u %t "%r" %s %b %D %{User-Agent}i %{Request-Source}i

### The directory of access log:
server.tomcat.basedir=file:.


#*************** Access Control Related Configurations ***************#
### If enable spring security, this option is deprecated in 1.2.0:
#spring.security.enabled=false

### The ignore urls of auth, is deprecated in 1.2.0:
nacos.security.ignore.urls=/,/error,/**/*.css,/**/*.js,/**/*.html,/**/*.map,/**/*.svg,/**/*.png,/**/*.ico,/console-ui/public/**,/v1/auth/**,/v1/console/health/**,/actuator/**,/v1/console/server/**

### The auth system to use, currently only 'nacos' is supported:
nacos.core.auth.system.type=nacos

### If turn on auth system:
nacos.core.auth.enabled=false

### The token expiration in seconds:
nacos.core.auth.default.token.expire.seconds=18000

### The default token:
nacos.core.auth.default.token.secret.key=SecretKey012345678901234567890123456789012345678901234567890123456789

### Turn on/off caching of auth information. By turning on this switch, the update of auth information would have a 15 seconds delay.
nacos.core.auth.caching.enabled=true

### Since 1.4.1, Turn on/off white auth for user-agent: nacos-server, only for upgrade from old version.
nacos.core.auth.enable.userAgentAuthWhite=true

### Since 1.4.1, worked when nacos.core.auth.enabled=true and nacos.core.auth.enable.userAgentAuthWhite=false.
### The two properties is the white list for auth and used by identity the request from other server.
nacos.core.auth.server.identity.key=
nacos.core.auth.server.identity.value=

#*************** Istio Related Configurations ***************#
### If turn on the MCP server:
nacos.istio.mcp.server.enabled=false


###*************** Add from 1.3.0 ***************###


#*************** Core Related Configurations ***************#

### set the WorkerID manually
# nacos.core.snowflake.worker-id=

### Member-MetaData
# nacos.core.member.meta.site=
# nacos.core.member.meta.adweight=
# nacos.core.member.meta.weight=

### MemberLookup
### Addressing pattern category, If set, the priority is highest
# nacos.core.member.lookup.type=[file,address-server]
## Set the cluster list with a configuration file or command-line argument
# nacos.member.list=192.168.16.101:8847?raft_port=8807,192.168.16.101?raft_port=8808,192.168.16.101:8849?raft_port=8809
## for AddressServerMemberLookup
# Maximum number of retries to query the address server upon initialization
# nacos.core.address-server.retry=5
## Server domain name address of [address-server] mode
# address.server.domain=jmenv.tbsite.net
## Server port of [address-server] mode
# address.server.port=8080
## Request address of [address-server] mode
# address.server.url=/nacos/serverlist

#*************** JRaft Related Configurations ***************#

### Sets the Raft cluster election timeout, default value is 5 second
# nacos.core.protocol.raft.data.election_timeout_ms=5000
### Sets the amount of time the Raft snapshot will execute periodically, default is 30 minute
# nacos.core.protocol.raft.data.snapshot_interval_secs=30
### raft internal worker threads
# nacos.core.protocol.raft.data.core_thread_num=8
### Number of threads required for raft business request processing
# nacos.core.protocol.raft.data.cli_service_thread_num=4
### raft linear read strategy. Safe linear reads are used by default, that is, the Leader tenure is confirmed by heartbeat
# nacos.core.protocol.raft.data.read_index_type=ReadOnlySafe
### rpc request timeout, default 5 seconds
# nacos.core.protocol.raft.data.rpc_request_timeout_ms=5000
使用如下代码启动nacos,其中-p对应的端口第一个是对应你主机上的端口,第二个端口对应的是你配置文件中nacos开放的端口,我的配置文件中的端口设定的是8849,所以第二个端口写的是8849。
docker  run --name nacos -p 8849:8849   \
--privileged=true \
--restart=always \
-e JVM_XMS=256m \
-e JVM_XMX=256m \
-e MODE=standalone \
-e PREFER_HOST_MODE=hostname \
-v /opt/docker/nacos1.1.4/logs:/home/nacos/logs \
-v /opt/docker/nacos1.1.4/conf/application.properties:/home/nacos/conf/application.properties \
-d nacos/nacos-server:1.1.4
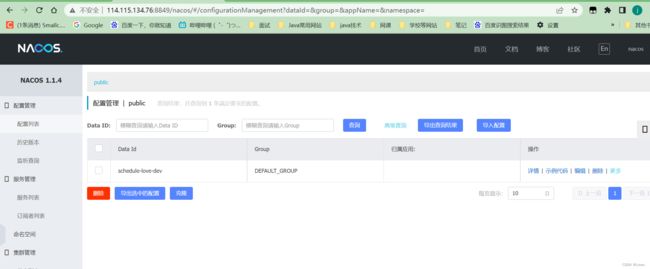
之后就可以成功登录nacos了