原生微信小程序学习之旅(一) -来简单的使用
文章目录
-
-
- 取消导航栏标头
- 组件创建
-
- 添加Component
- 组件接收传入的数据
- 页面创建(Page)
- 关于tabBar
-
- tabBar自定义样式
- 自定义跳转
- 轮播图
-
- 轮播图指示点样式改变
- 微信小程序快速获取用户信息
- 路由跳转
-
- 获取url路径中的参数
- bindtap(click)传参
- wx:if编写
- 用户登陆
-
- 关于默认工程
- 目前的获取方法
- 尝试一下服务端(登陆)
-
-
- 初始化nodejs
- 获取openid
- 获取access_token
-
- 视频播放
- 二维码扫描
- 获取到微信用户后的初始化存值(本来要数据库,最好是开通云开发)
-
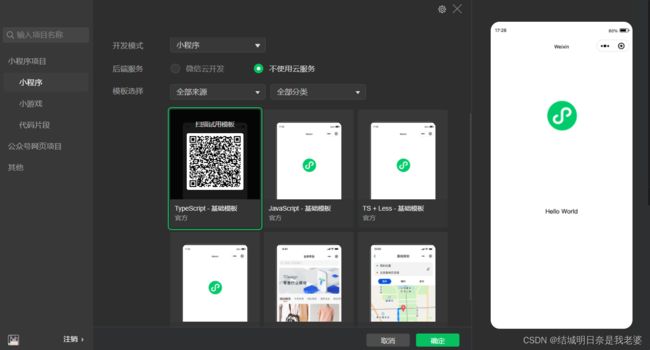
使用的模板是
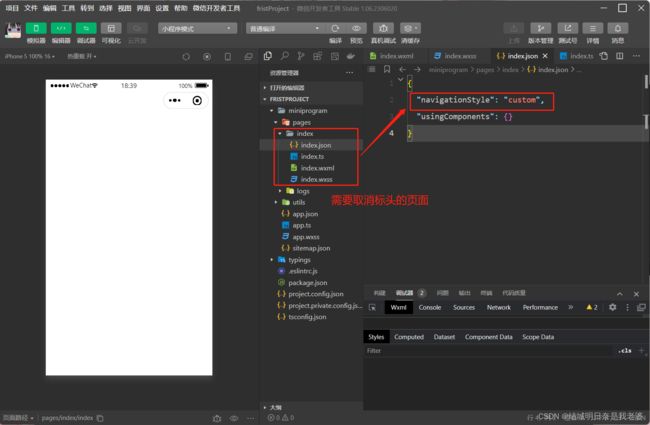
取消导航栏标头
{
  "navigationStyle": "custom",//取消导航栏标头
  "usingComponents": {} //这只是添加需要用到的组件
}
组件创建
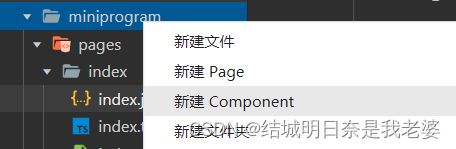
就是
创建Component
添加Component
{
  "usingComponents": {
    "componentName":"componentPath"
  }
}
组件接收传入的数据
object.ts(pages)
<showAnimeComponent1 FanName="{{value}}" />
child.ts(components)
// components/child.ts
Component({
  /**
   * 组件的属性列表
   */
  properties: {
    FanName:{
      type: String
    }
  },

  /**
   * 组件的初始数据
   */
  data: {

  },

  /**
   * 组件的方法列表
   */
  methods: {

  }
})
页面创建(Page)
关于tabBar
//app.json
{
  "pages": [//页面的路径
    "pages/index/index",
    "pages/my/my"
  ],
  "window": {
    "backgroundTextStyle": "light",
    "navigationBarBackgroundColor": "#fff",
    "navigationBarTitleText": "Weixin",
    "navigationBarTextStyle": "black"
  },
  "style": "v2",
  "sitemapLocation": "sitemap.json",
  "tabBar": {//主要
    "selectedColor": "#f00",
    "list": [{
      "pagePath": "pages/index/index",
      "text": "首页",
      "iconPath": "resources/images/index/home.png",
      "selectedIconPath": "resources/images/index/homeSelect.png"
    },{
      "pagePath": "pages/my/my",
      "text": "我的",
      "iconPath": "resources/images/index/my.png",
      "selectedIconPath": "resources/images/index/mySelect.png"
    }]
  }
}
注意点
- 这个list必须2个以上5个及以下
iconPath和selectedIconPath俩个标签路径的图片必须是jpg,png和jpeg的格式
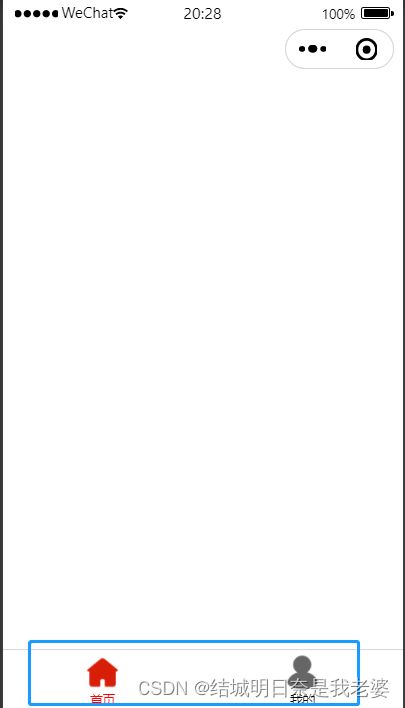
tabBar自定义样式
官方文档
//app.json
{
	//...
	"tabBar": {
    	"custom": true, //添加这句
    	//....
    	"list": [{
    		//...
    	}],
    }
}
在项目的根目录下自定义创建一个
custom-tab-bar文件夹,在这个文件夹下新建Component,取名为index
<text>custom-tab-bar/index.wxmltext>
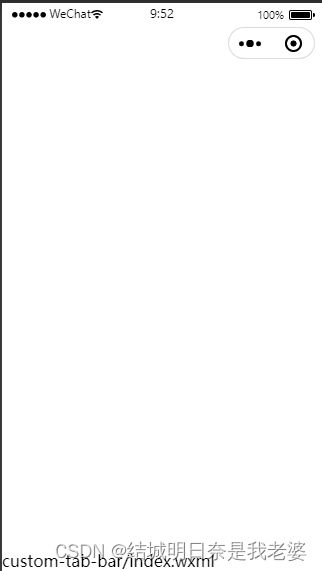
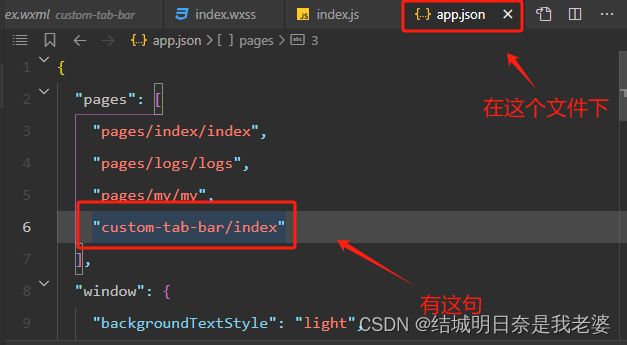
出现这段话说明我们的自定义tabBar就算初步完成了,记下来就是html的编写了。当然app.json也要有这句
自定义跳转
<view class="all-tabBar">

  <image src="/assets/image/home.svg" mode="" class="homeImage1" wx:if="{{selected != 0}}" bindtap="goToSwitchTab" data-path="0"/>
  <image src="/assets/image/home_select.svg" mode="" class="homeImage1" wx:else="{{selected == 0}}" bindtap="goToSwitchTab"/>

  <image src="/assets/image/my.svg" mode="" class="myImage1" bindtap="goToSwitchTab" wx:if="{{selected != 2}}" data-path="2"/>
  <image src="/assets/image/my_select.svg" mode="" class="myImage1" bindtap="goToSwitchTab" wx:else="{{selected == 2}}"/>
view>
Component({
  properties: {
	//父组件传入的变量
  },
  data:{
  //变量
  	selected:0,//控制那个tabBar选中
  },
  methods:{
  	//方法
  	goToSwitchTab(e) { //这个方法名最好不要跟switchTab重名
      console.log(e.target.dataset.path) //打印输出接收到的实参值,这里的path就是要在wxml中写成data-path
      if(e.target.dataset.path == 0){ //判断传入的值来确认到哪
        wx.switchTab({url: '/pages/index/index',})
      }
      if(e.target.dataset.path == 2){
        wx.switchTab({url: '/pages/my/my',})
      }
    }
  }
})
到这一步还没结束
//  /pages/index/index.js
Page({
  data:{},
  onLoad(){},
  onShareAppMessage(){},
  onShow(){//在onShow()生命周期钩子中进行selected(控制tabBar的变量)进行改变
    this.getTabBar().setData({
      selected:0
    })
  }
})
//  /pages/my/my
Page({
  data:{},
  onLoad(){},
  onShareAppMessage(){},
  onShow(){//在onShow()生命周期钩子中进行selected(控制tabBar的变量)进行改变
    this.getTabBar().setData({
      selected:2
    })
  }
})
轮播图
微信小程序官方文档-swiper
<swiper class="indexTitleSwiper" 	indicator-dots="true"
  autoplay="true"
  interval="3000"
  circular="true">
    <swiper-item wx:for="{{indexSwiperImages}}" wx:key="index">
    	<image src="{{item.url}}" mode=""/>
	swiper-item>
swiper>
Page({
	data: {
    	indexSwiperImages:[
      		'jpg文件路径,可以是相对路径',
      		'jpg文件路径,可以是相对路径',
      		...
    	]
  	}
})
轮播图指示点样式改变
.wx-swiper-dots: 指示点容器样式.wx-swiper-dots-horizontal: 水平滑动的指示点容器样式,其在.wx-swiper-dots内。.wx-swiper-dot:指示点样式.wx-swiper-dot-active: 当前指示点样式
/*轮播图指示点样式。indexTitleSwiper:*/
.indexTitleSwiper .wx-swiper-dot{
  position: relative;
  left: -320rpx;
  width: 20rpx;
  height: 10rpx;
  background-color: #fff;
}
.indexTitleSwiper .wx-swiper-dot.wx-swiper-dot-active{
  width: 20rpx;
  height: 10rpx;
  background-color: #f00;
}

微信小程序快速获取用户信息
微信官方文档
如果以上文档不能使用就用
wx.login,附上微信小程序官方wx.login文档
<view>
  <view class="myTitleBox">
    <image src="{{myImageUrl}}" mode="" bindtap="loginBtn"/>
  view>
view>
.myTitleBox{
  position: absolute;
  left: 0;
  top: 0;
  width: 100vw;
  height: 30vh;
  background-color: yellow;
  display: flex;
  align-items: center;
}

.myTitleBox image{
  position: relative;
  left: 20rpx;
  width: 30%;
  height: 50%;
  border-radius: 50%;
  background-color: rgba(200, 200, 200, 0.9);
}
//默认头像
const defaultMyUrl:string = "https://thirdwx.qlogo.cn/mmopen/vi_32/POgEwh4mIHO4nibH0KlMECNjjGxQUq24ZEaGT4poC6icRiccVGKSyXwibcPq4BWmiaIGuG1icwxaQX6grC9VemZoJ8rg/132"
//暂时为定,学习中
路由跳转
- wx.navigateTo(Object object):保留当前页面,跳转到应用内的某个页面。但是不能跳到 tabbar 页面。
- wx.navigateBack(Object object):返回上一级
- wx.redirectTo(Object object): 关闭当前页面,跳转到应用内的某个页面。但是不允许跳转到 tabbar 页面。
- wx.reLaunch(Object object):关闭所有页面
- wx.switchTab(Object object):跳转到 tabBar 页面,并关闭其他所有非 tabBar 页面
//最基础的页面跳转
wx.navigateTo({
	url:"/pages/showAnime/showAnime"
})
获取url路径中的参数
//跳转的页面的ts,比如说上面的pages/showAnime/showAnime路径
Page({
  data:{},
  onLoad(option){
	console.log(option)
  }
})

bindtap(click)传参
<image src="url" mode="" bindtap="functionName" data-name="value"/>
functionName(event:any){
    console.log(event.currentTarget.dataset.name) //event.currentTarget.dataset.name:data-name。可以是data-id那就是event.currentTarget.dataset.id
    wx.navigateTo({
      url:`urlPath`//比如:/pages/showAnime?name=${接收到的值}
    })
  }
wx:if编写
<view wx:if="{{otherValue == '刀剑神域'}}">
    <view>刀剑神域1view>
view>
<view wx:if="{{otherValue == '野良神'}}">
    <view>野良神1view>
view>
用户登陆
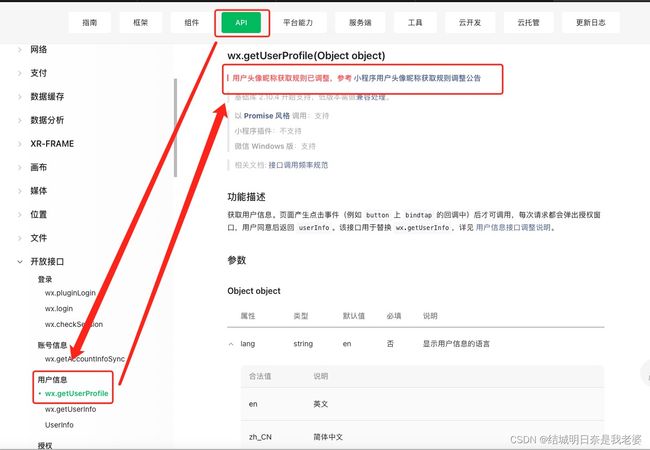
如果说你还在用wx.getUserProfile那在至少我发表的这篇文章后,这个API是用不了的
要想获取用户头像和昵称可以你在ts创建默认工程hello world中的官方获取用户信息参考论坛
关于默认工程
canIUseGetUserProfile: wx.canIUse('getUserProfile'),
发现这段是不是和
wx.getUserProfile很像?我们可以试一下
尝试了以后才发现微信官方还用的是wx.getUserProfile这时我就在看它的代码的时候发现了一句话:2.10.4的库)
我们顺着这个思路来设置还是不行,所以我们得另想办法。。。。
目前的获取方法
其实微信开发者人员说是为了一些用户拒绝授权还是一打开页面开发者就用这个api获取微信用户个人信息啊,各种理由会删删改改很多api,可能我这个文章发布后过一段时间可能就不能这么获取了,所以大家要时常看官方文档的习惯,其实目前微信小程序官方还没有更新只是说这个废弃了。。。
目前我们只能按照官方的说法使用wx.login去尝试一下,但是官方的案例也是只是获取我们的code请求的话还是要另使用后端。。。那这样login只有code的功能。。。
尝试一下服务端(登陆)
服务端(登陆)很多人说像nodejs这种后端就是玩具,但是微信为了前端开发者提供的就是口中的玩具,所以不管玩不玩具你还是得学nodejs,因为nodejs语法也是javascript的一种所以会前端,学起来也不费劲
注意使用到的wx.request在开发模式下,你可以使用本地的ip(localhost)进行求求,但是发布的话,你得有个服务器或者云服务器这种而且在服务上进行服务端的开发,而且你得买域名什么的,关键是你得在网页端小程序控制台要给域名设置白名单什么的,所以没有稳定的经济来源或者给别人进行开发建议使用申请测试号和本地后端开发学习

这图是关键。很好理解
- (小程序上操作)使用
wx.login获取code- (小程序上操作)通过
wx.request发送code到自己的服务端- (自己的服务端)通过自己获取的
code,小程序的appid,小程序的appsecret和获取的code来去请求这个微信接口- (自己的服务端)把
openid返回给小程序端
结论
这是注册号的
wx.getUserProfile()不能用,自己申请的正式版还是可以使用的
所以只要最简单的
wx.getUserProfile({
      desc: '用户头像获取',
      success:(res)=>{
        console.log(res.userInfo)
        this.setData({
        })
      },
      fail:(err)=>{
        console.log(err)
      }
    })
即可获取到微信用户
初始化nodejs
你可以先创建main.js在执行一下指令(因为无文件默认创建的入口文件名称是
index.js,这个一创建就是main.js是入口文件,当然名字随意)
npm init -y
我们使用
express框架
npm i express
如果是mac系统的话执行npm得是sudo npm i express
const express = require('express')

const app = express()
const port = 8088

app.get('/',(req,res)=>{
    res.send('hello')
})

app.listen(port,()=>{
    console.log(`${port}已开始监听`)
})
开启服务
node main.js
你可以访问一下localhost:8088
目前你可以使用小程序开始访问这个本地api
wx.request({
	url:`http://localhost:8088`,
    success:async res=>{
    	console.log(res)
    }
})
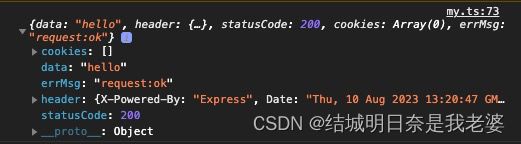
这个data就是我们后端的数据
获取openid
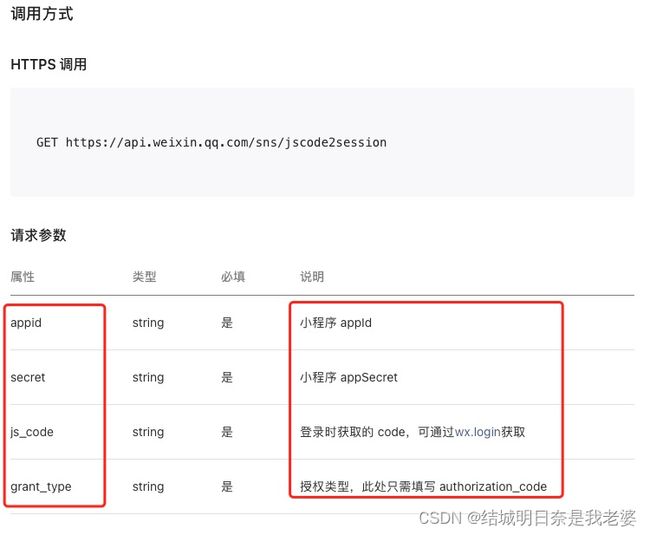
所以我们需要引入https
npm i https
const appid= "appid"
const secret = "secret"
app.get('/getCode2Session',(req,res)=>{
    https.get(`https://api.weixin.qq.com/sns/jscode2session?appid=${appid}&secret=${secret}
    &js_code=${req.query.code}&grant_type=authorization_code`,(response)=>{
        response.on('data',(data)=>{
            console.log(data.toString())
        })
    })
})
微信小程序对接是
wx.login({
	success:async res=>{
		console.log('my code:',res.code)
        wx.request({
          url:`http://localhost:8088/getCode2Session?code=${res.code}`,
          success:async res=>{
            console.log(res)
          }
		})
	}
})
若出现{"errcode":40125,"errmsg":"invalid appsecret, rid: 64d4e97c-26c012bb-6555fe6f"}说明你的appsecret是有问题的或者是拼接的时候出现空格换行等操作会有问题
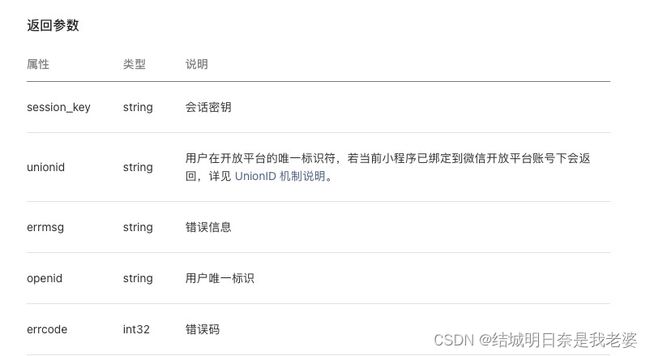
{"session_key":"....","openid":"...."}
这个格式的出现就说明你的请求是没问题的,后端接收到了你的
openid(这个一定要保密,因为这是你的唯一凭证)
如果你在烦恼与怎么把它返回给小程序,你可以这么鬼才的来写
let openid = null

app.get('/getCode2Session',async(req,res)=>{
    // console.log(req.query.code)
    https.get(`https://api.weixin.qq.com/sns/jscode2session?appid=${appid}&secret=${secret}&js_code=${req.query.code}&grant_type=authorization_code`,async(response)=>{
        response.on('data',async(data)=>{
            let data2 = JSON.parse(data.toString()) //data.toString():将二进制转成可看的字符串;JSON.parse:将字符串转成对象
            openid = await data2.openid //获取openid这个openid是全局变量
            console.log(openid)//打印输出
            res.send(openid)//响应给发送请求的前端
        })
    })
})
?我们获取完
openid就好了?当然不是,我们需要通过这个唯一凭证去进行用户数据的获取,可参考官方文档看不懂可以看我接下来的演示(服务端的nodejs)
获取access_token
在众多选择中,我们肯定是想要更快捷的手机登陆方式但无论怎么样都需要access_token所以我们需要再搞一个api。
app.get('/getAccessToken',(req,res)=>{
    let inter = null
    https.get(`https://api.weixin.qq.com/cgi-bin/token?grant_type=client_credential&appid=${appid}&secret=${secret}`,(response)=>{
        response.on('data',async(data)=>{
            let data1 = await JSON.parse(data.toString())
            console.log('token:',data1)
        })

    })
})
官方说你最好还是保存access_token在本地但是你可以像我这样一直请求,这样的坏处是access_token一直在变化和微信小程序开发人员给我们设置的每天请求数的问题
接下来是发送手机号的问题
看来看去这个手机的code与之前的code是不一样的,而且需要用钱申请服务,身为没有钱的穷人开发者当然打算不去考虑了
视频播放
虽然个体的小程序可以使用
video这个标签,但是你去提交版本微信工作人员审核后是不会基于通过的,所以使用这个视频插件最好小程序申请的是服务号
<video src="{{videoUrl}}" class=""/>