nginx+keepalived安装配置
文章目录
- 一、nginx安装及配置
-
- 1.1 安装&&配置
- 1.2 配置开机自启(第二种)
- 1.3 日志分隔
- 二、keepalived安装配置
-
- 2.1 **keepalived安装**
- 2.2 keepalived配置
- 2.3 检测脚本
- 2.4 相关命令
一、nginx安装及配置
两台服务器:192.168.211.2(master) 192.168.211.3(slave)
1.1 安装&&配置
yum -y install pcre* zlib* openssl*
yum install -y gcc
yum install -y gcc-c++
cd /data
wget http://nginx.org/download/nginx-1.20.1.tar.gz
tar zxf nginx-1.20.1.tar.gz
#然后进入nginx解压目录,执行:
cd nginx-1.20.1
./configure --prefix=/data/nginx --with-http_stub_status_module --with-http_ssl_module --with-http_realip_module
# 如果没有错误,执行编译
make && make install
# 启动服务命令
/data/nginx/sbin/nginx -c /data/nginx/conf/nginx.conf
# 关闭服务
/data/nginx/sbin/nginx -s stop
# nginx设置开机自启命令(第一种)
echo "/data/nginx/sbin/nginx -c /data/nginx/conf/nginx.conf" >> /etc/rc.d/rc.local
chmod +x /etc/rc.d/rc.local
注意:
nginx.conf–必须修改第一行的user nobody为user root,原因是Nginx用到的缓存存在tmp文件夹,只有root用户有权限
nginx.conf修改完后生效:进入Nginx安装目录sbin下运行:
cd /data/nginx/sbin
./nginx -s reload
直接访问:http://192.168.211.2 http://192.168.211.3 均可以访问
nginx.conf具体配置:(keepalived安装后在进行补充)
1.2 配置开机自启(第二种)
在/etc/init.d创建nginx文件,并添加如下内容
vim /etc/init.d/nginx
#!/bin/sh
#
# nginx - this script starts and stops the nginx daemon
#
# chkconfig:   - 85 15
# description:  NGINX is an HTTP(S) server, HTTP(S) reverse \
#               proxy and IMAP/POP3 proxy server
# processname: nginx
# config:      /etc/nginx/nginx.conf
# config:      /etc/sysconfig/nginx
# pidfile:     /var/run/nginx.pid

# Source function library.
. /etc/rc.d/init.d/functions

# Source networking configuration.
. /etc/sysconfig/network

# Check that networking is up.
[ "$NETWORKING" = "no" ] && exit 0

nginx="/usr/sbin/nginx"
prog=$(basename $nginx)

NGINX_CONF_FILE="/etc/nginx/nginx.conf"

[ -f /etc/sysconfig/nginx ] && . /etc/sysconfig/nginx

lockfile=/var/lock/subsys/nginx

make_dirs() {
   # make required directories
   user=`$nginx -V 2>&1 | grep "configure arguments:.*--user=" | sed 's/[^*]*--user=\([^ ]*\).*/\1/g' -`
   if [ -n "$user" ]; then
      if [ -z "`grep $user /etc/passwd`" ]; then
         useradd -M -s /bin/nologin $user
      fi
      options=`$nginx -V 2>&1 | grep 'configure arguments:'`
      for opt in $options; do
          if [ `echo $opt | grep '.*-temp-path'` ]; then
              value=`echo $opt | cut -d "=" -f 2`
              if [ ! -d "$value" ]; then
                  # echo "creating" $value
                  mkdir -p $value && chown -R $user $value
              fi
          fi
       done
    fi
}

start() {
    [ -x $nginx ] || exit 5
    [ -f $NGINX_CONF_FILE ] || exit 6
    make_dirs
    echo -n $"Starting $prog: "
    daemon $nginx -c $NGINX_CONF_FILE
    retval=$?
    echo
    [ $retval -eq 0 ] && touch $lockfile
    return $retval
}

stop() {
    echo -n $"Stopping $prog: "
    killproc $prog -QUIT
    retval=$?
    echo
    [ $retval -eq 0 ] && rm -f $lockfile
    return $retval
}

restart() {
    configtest || return $?
    stop
    sleep 1
    start
}

reload() {
    configtest || return $?
    echo -n $"Reloading $prog: "
    killproc $nginx -HUP
    RETVAL=$?
    echo
}

force_reload() {
    restart
}

configtest() {
  $nginx -t -c $NGINX_CONF_FILE
}

rh_status() {
    status $prog
}

rh_status_q() {
    rh_status >/dev/null 2>&1
}

case "$1" in
    start)
        rh_status_q && exit 0
        $1
        ;;
    stop)
        rh_status_q || exit 0
        $1
        ;;
    restart|configtest)
        $1
        ;;
    reload)
        rh_status_q || exit 7
        $1
        ;;
    force-reload)
        force_reload
        ;;
    status)
        rh_status
        ;;
    condrestart|try-restart)
        rh_status_q || exit 0
            ;;
    *)
        echo $"Usage: $0 {start|stop|status|restart|condrestart|try-restart|reload|force-reload|configtest}"
        exit 2
esac
这个脚本的来自于nginx官网,网址:https://www.nginx.com/resources/wiki/start/topics/examples/redhatnginxinit/
nginx=“/usr/sbin/nginx”//修改成自己的目录
NGINX_CONF_FILE=“/etc/nginx/nginx.conf” //修改成自己的目录
保存文件后对文件设置权限
chmod a+x nginx
把脚本添加到系统服务
chkconfig --add /etc/init.d/nginx
验证系统服务
service nginx start //开户nginx
service nginx stop //关闭nginx
以上部分将nginx添加到了系统服务,下面将nginx添加到开机自启中
添加到开机自启
chkconfig nginx on
#查看配置
chkconfig --list
可能遇到的问题
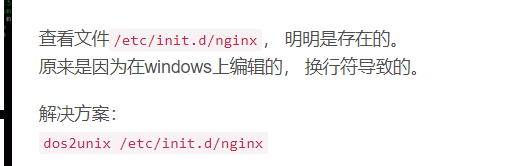
问题1:nginx脚本格式问题
由于在Windows上编辑的文件,放到Linux中可能会存在格式问题,通过dos2unix修改文件格式。
问题2:pid路径不对
systemd: Starting nginx - high performance web server...
nginx: nginx: the configuration file /etc/nginx/nginx.conf syntax is ok
nginx: nginx: configuration file /etc/nginx/nginx.conf test is successful
systemd: PID file /run/nginx.pid not readable (yet?) after start.
systemd: nginx.service start operation timed out. Terminating.
systemd: Failed to start nginx - high performance web server.
systemd: Unit nginx.service entered failed state.
systemd: nginx.service failed.
解决:
修改nginx.conf中pid文件的路径为/var/run/nginx.pid
1.3 日志分隔
在nginx.conf中开启日志文件配置
将切割日志脚本上传服务器目录:/data/nginx/sbin/(可以上传到任何位置,和下面定时任务对应即可)
#!/bin/bash
#########################

s_log="/data/logs/nginx/access.log"
d_log="/data/logs/nginx/access-$(date +%F).log"
d_log_dir="/data/logs/nginx"

#判断备份目录是否存在,不存在则创建
if [ ! -d "$d_log_dir" ];then
       mkdir -p "$d_log_dir"
fi

#判断原日志文件是否存在,存在则移动并改名
if [ -f "$s_log" ];then
        mv "$s_log" "$d_log"
fi

#以下两条命令任选其一:
#kill -USR1 `cat /usr/local/nginx/logs/nginx.pid`

/usr/local/nginx/sbin/nginx -s reopen

if [ $? -eq 0 ];then
    echo "$(date +%F) 日志切割成功"
fi
将脚本加入定时任务
crontab -e
59  23  *  *  *  /bin/bash  /data/nginx/sbin/nginx_cut_log.sh >>/data/logs/nginx/nginx_cut.log 2>&1
二、keepalived安装配置
两台服务器:192.168.211.2(master) 192.168.211.3(slave) 虚IP:192.168.211.12.1 keepalived安装
# 1、安装keepalived:
yum install keepalived -y

# 2、查看版本:
keepalived -v
2.2 keepalived配置
192.168.211.2(master) 配置
vim /etc/keepalived/keepalived.conf
! Configuration File for keepalived

global_defs {
   router_id bb-master						#自定义名称
   vrrp_skip_check_adv_addr

   script_user root
   enable_script_security
}

vrrp_script chk_nginx {
    script "/etc/keepalived/nginx_check.sh" #监测应用可用脚本
    interval 2								#脚本监测时间
    weight 2								#脚本的权重值
}

vrrp_instance BB_VI22 {
    state MASTER
    interface ens191						#网卡
    virtual_router_id 33					#主备机virtual_router_id必须相同
    priority 100							#优先级
    advert_int 1							#vrrp通告时间间隔,主备,默认是1s
    nopreempt 								#设置非抢占模式,默认是抢占模式
    authentication {
        auth_type PASS						#认证类型
        auth_pass 3333						#认证密码
    }
    track_script {
        chk_nginx
    }
    # 设置单播模式
    unicast_src_ip 192.168.211.2 			#源IP即本地IP
    unicast_peer{
        192.168.211.3						#目标IP即slave服务器IP
   }

    virtual_ipaddress {
        192.168.211.1 						#VIP
    }
}
192.168.211.3(slave) 配置
vim /etc/keepalived/keepalived.conf
! Configuration File for keepalived

global_defs {
   router_id bb-backup
   vrrp_skip_check_adv_addr

   script_user root
   enable_script_security
}

vrrp_script chk_nginx {
    script "/etc/keepalived/nginx_check.sh"
    interval 2
    weight 2
}

vrrp_instance BB_VI22 {
    state BACKUP
    interface ens191
    virtual_router_id 33
    priority 99
    advert_int 1
    nopreempt
    authentication {
        auth_type PASS
        auth_pass 3333
    }
    track_script {
        chk_nginx
    }
    unicast_src_ip 192.168.211.3
    unicast_peer{
        192.168.211.2
    }
    virtual_ipaddress {
        192.168.211.1
    }
}
2.3 检测脚本
监测nginx应用脚本
vi /etc/keepalived/nginx_check.sh
# 获取nginx、keepalived的进程数
nginxcheck=`ps -C nginx --no-header | wc -l`
keepalivedcheck=`ps -C keepalived --no-header | wc -l`

# 如果检测到(nginx)进程数等于0,并且(keepalived)进程数不等于0,则关闭(keepalived)
if [ $nginxcheck -eq 0 ];then
    if [ $keepalivedcheck -ne 0 ];then
        killall -TERM keepalived
    else
        echo "keepalived is stoped"
    fi

# 如果检测到(nginx)进程数不等于0,则(keepalived)进程数等于0,那么启动keepalived服务
else
    if [ $keepalivedcheck -eq 0 ];then
         systemctl start keepalived
   else
        echo "keepalived is running"
    fi
fi
2.4 相关命令
keepalived相关命令:
systemctl enable keepalived  #添加开机自启
systemctl disable keepalived #取消开机自启
systemctl start keepalived
systemctl stop keepalived
systemctl status keepalived
systemctl restart keepalived