PyQt配合Pyinstaller搭建简易的设备管理控制台
1:为啥要写
想来也奇怪,我咋这么好呢?最近设备的销售回暖,客服的数量多了起来,客服小姐姐每天都冲我抱怨;设备的信息查询和操作突然增加了起来,各种各样的命令和指令纷繁杂乱,每天都要查询文档来控制设备和查询信息,眼看着Postman里面的URL要爆红,总要想个办法处理下这个没效率又烦心的问题;怎么办,弄一个丑的不行的工具吧;
电脑桌面应用开发咋也没尝试过啊,怎么办?前期调研发现,选择的还不少,有PyQT,有Electron,有JavaFX.....,简直眼花缭乱,一一分析后选择了PyQT,一来是JavaFX不适合,因为我要继续用一段时间的python,Electron很香,打包后实在是太大,还要各种依赖,简直噩梦,算了,就PyQt吧
2:开发准备
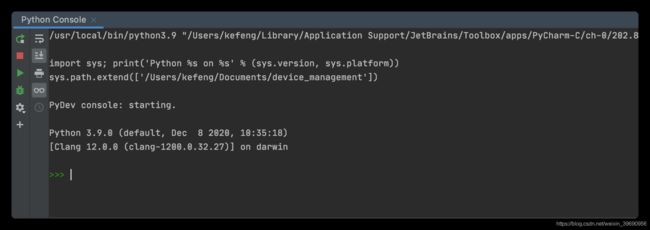
检查下您电脑的环境,当然就是python环境,大概做开发的各位都应该有Python环境吧,看看我家的
有了环境,继续准备其他,现在需要找到一份可以让你走弯路的开发文档
开发文档:http://zetcode.com/gui/pyqt5/
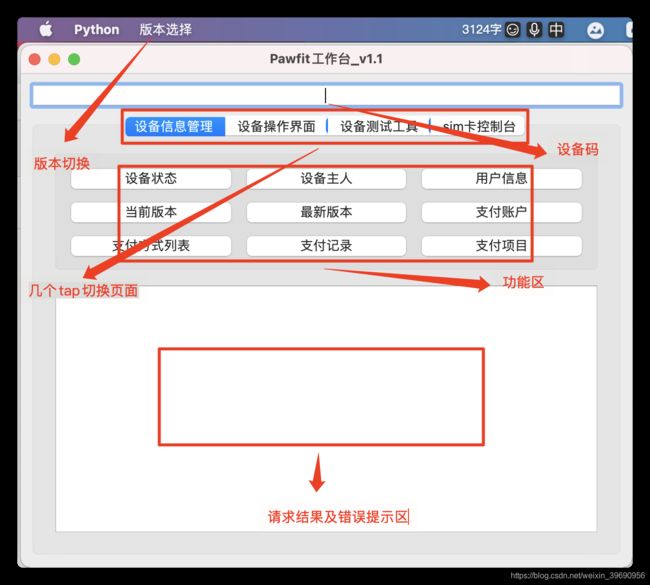
好了,接下来就是设计下应用的样式了,为了尽可能简单,就不麻烦善良的UI妹妹了,直接动手画画吧
现在就是繁杂的界面框架搭建了,因为没有样式的要求,也不在乎美观度,怎么喜欢怎么来;
以上就是整个应用的全貌了,很捡漏;但是开发,测试和客户的哥哥姐姐妹妹们都喜欢,干脆就分享给他们用用;接下来就是一一解析这几个区域的搭建
3:界面的搭建
别看代码很多,又长又臭,但是关键的就几个地方,一是主界面结构的代码,一是引入图中其他区域的代码,代码注释中都一对一对应上了,接着全都是处理点击的代码,后面会介绍到;
class PawfitTools(QMainWindow):
    configSingleton = ConfigSingleton()
    manage = RequestManahement()
    utils = Utils()

    def __init__(self):
        super().__init__()
        self.title = 'Pawfit工作台_v1.1'
        self.left = 0
        self.top = 0
        self.width = PawfitConfit().window_width
        self.height = PawfitConfit().window_height
        self.setWindowTitle(self.title)
        self.setGeometry(self.left, self.top, self.width, self.height)
        self.resize(400, 500)
        bar = self.menuBar()
        version = bar.addMenu("版本选择")
        self.china = QAction("中文版")
        self.english = QAction("英文版")
        self.china.triggered.connect(self.change_mode_to_china)
        self.english.triggered.connect(self.change_mode_to_english)
        version.addAction(self.china)
        version.addAction(self.english)
        self.top_layout = QVBoxLayout()
        self.table_widget = PawfitMenu(self)
        self.table_widget.device_id.textChanged.connect(self.set_device_id)
        # 获取设备信息
        self.table_widget.toolbar.btn_of_get_tracker_type.clicked.connect(self.get_tracker_type)
        self.table_widget.toolbar.btn_of_get_tracker_owner.clicked.connect(self.get_device_owner)
        self.table_widget.toolbar.btn_of_get_user_info.clicked.connect(self.get_user_info)
        self.table_widget.toolbar.btn_of_get_tracker_current_version.clicked.connect(self.get_current_firm_version)
        self.table_widget.toolbar.btn_of_get_last_firmware_version.clicked.connect(self.get_late_firm_version)
        self.table_widget.toolbar.btn_of_get_billing_account.clicked.connect(self.get_billing_account)
        self.table_widget.toolbar.btn_of_get_payment_history.clicked.connect(self.get_payment_history)
        self.table_widget.toolbar.btn_of_get_paymentmethod_list.clicked.connect(self.get_paymentmethod_list)
        self.table_widget.toolbar.btn_of_get_priceplan_list.clicked.connect(self.get_priceplan_list)
        # 操控设备
        self.table_widget.device_operation_toolbar.gps_btn.clicked.connect(self.open_gps)
        self.table_widget.device_operation_toolbar.ring_btn.clicked.connect(self.open_right)
        self.table_widget.device_operation_toolbar.light_btn.clicked.connect(self.open_right)
        self.table_widget.device_operation_toolbar.bluetooth_bnt.clicked.connect(self.open_bluetooth)
        self.table_widget.device_operation_toolbar.un_binding_btn.clicked.connect(self.unbinding_tracker)
        self.table_widget.device_operation_toolbar.block_sim.clicked.connect(self.block_sim)
        self.table_widget.device_operation_toolbar.query_location.clicked.connect(self.query_location)
        self.table_widget.device_operation_toolbar.un_block_sim.clicked.connect(self.unblock_sim)
        self.table_widget.device_operation_toolbar.cm_sim_statue.clicked.connect(self.check_sim_statue)
        # 设备测试界面
        # self.table_widget.device_test_page.btn_of_live_tracke.clicked.connect(self.live_track)
        self.table_widget.device_test_page.btn_of_live_mix_location.clicked.connect(self.mix_location)
        self.table_widget.device_test_page.btn_of_disconnect_tracker.clicked.connect(self.disconnect_tracker)
        self.table_widget.device_test_page.btn_of_set_temperature_warning.clicked.connect(self.set_temperature_warning)
        self.table_widget.device_test_page.btn_of_delete_payment_items.clicked.connect(self.delete_payment_items)
        self.table_widget.device_test_page.btn_of_update_audio.clicked.connect(self.get_version_bin)
        self.table_widget.device_test_page.btn_of_query_power.clicked.connect(self.query_power)
        # self.table_widget
        # sim卡管理界面
        self.table_widget.sim_management_page.block_sim_btn.clicked.connect(self.control_of_sim_block_sim)
        self.table_widget.sim_management_page.un_block_sim_btn.clicked.connect(self.control_of_sim_unblock_sim)
        self.table_widget.sim_management_page.clear_data_btn.clicked.connect(self.control_of_sim_clear_data)
        self.table_widget.sim_management_page.save_data_btn.clicked.connect(self.control_of_sim_save_data)
        self.setCentralWidget(self.table_widget)
        QMetaObject.connectSlotsByName(self)
        self.show()
#此处几百行省略逻辑处理代码,不适合摆出来,又臭又长,况且有些关于接口的东西,不适合乱摆,原谅

if __name__ == '__main__':
    app = QApplication(sys.argv)
    ex = PawfitTools()
    sys.exit(app.exec_())
版本切换:版本切换其实非常的简单,在代码中仅仅几行,即可进行版本的切换。
bar = self.menuBar()
version = bar.addMenu("版本选择")
self.china = QAction("中文版")
self.english = QAction("英文版")
self.china.triggered.connect(self.change_mode_to_china)
self.english.triggered.connect(self.change_mode_to_english)
接下来是tap页代码开发,核心的代码就是穿件tap控件,然后添加到PawfitMenu即可,对,就是这么简单
from PyQt5 import QtCore
from PyQt5.QtCore import QRect
from PyQt5.QtWidgets import QWidget, QTabWidget, QVBoxLayout, QPushButton, QGroupBox, QGridLayout, QLineEdit, \
    QPlainTextEdit

from ConfigSingleton import ConfigSingleton
from Device_info_management_toolbar import Device_info_management_toolbar
from Device_operation_toolbar import Device_operation_toolbar
from Device_test_page import Device_test_page
from Sim_management_page import Sim_management_page


class PawfitMenu(QWidget):
    single=ConfigSingleton()
    barcode=""
    def __init__(self,parent):

        super(QWidget, self).__init__(parent)
        self.layout = QVBoxLayout(self)
        # 创建顶部设备ID输入框
        self.device_id=QLineEdit(self)
        # self.configSingleton.get_device_id()
        self.device_id.setAlignment(QtCore.Qt.AlignHCenter)
        self.device_id.setPlaceholderText("请在此位置输入设备ID")
        # Initialize tab screen
        self.tabs = QTabWidget()
        self.tab1 = QWidget()
        self.tab2 = QWidget()
        self.tab3= QWidget()
        self.tab4=QWidget()
        # Add tabs
        self.tabs.addTab(self.tab1, "设备信息管理")
        self.tabs.addTab(self.tab2, "设备操作界面")
        self.tabs.addTab(self.tab3, "设备测试工具")
        self.tabs.addTab(self.tab4, "sim卡控制台")
        # Create first tab
        self.tab1.layout = QVBoxLayout()
        self.device_info_result_box=QPlainTextEdit(self)
        self.toolbar=Device_info_management_toolbar()
        self.toolbar.create_toolbar()
        self.tab1.layout.addWidget(self.toolbar.horizontalGroupBox)
        self.tab1.layout.addWidget(self.device_info_result_box)
        self.tab1.setLayout(self.tab1.layout)
        # 创建第二个tap界面
        self.tab2.layout=QVBoxLayout()
        self.operation_result=QPlainTextEdit(self)
        self.device_operation_toolbar= Device_operation_toolbar()
        self.device_operation_toolbar.create_toolbar()
        self.tab2.layout.addWidget(self.device_operation_toolbar.horizontalGroupBox)
        self.tab2.layout.addWidget(self.operation_result)
        self.tab2.setLayout(self.tab2.layout)
        # 创建第三个tap界面
        self.tab4.layout=QVBoxLayout()
        self.sim_management_page=Sim_management_page(self)
        self.tab4.layout.addWidget(self.sim_management_page)
        self.tab4.setLayout(self.tab4.layout)
        # 创建第四个tap界面
        self.tab3.layout=QVBoxLayout()
        self.device_test_result=QPlainTextEdit(self)
        self.device_test_page= Device_test_page()
        self.device_test_page.create_toolbar()
        self.tab3.layout.addWidget(self.device_test_page.horizontalGroupBox)
        self.tab3.layout.addWidget(self.device_test_result)
        self.tab3.setLayout(self.tab3.layout)
        # Add tabs to widget
        self.layout.addWidget(self.device_id)
        self.layout.addWidget(self.tabs)
        self.setLayout(self.layout)
    def set_device_id(self):
        print("执行了我")
        self.single.handle_device_id(self.device_id.text())
        return self.single.device_id
再往下就是功能区,这里的功能区就是简单的按钮的布局组合,即QpushButton,使用的是horizontalGroupBox()方法进行排版,可看代码;其他的几个tap页面中的内容也是按照类似设计代码。
from PyQt5.QtWidgets import *

from ConfigSingleton import ConfigSingleton
from RequestManagement import RequestManahement


class Device_info_management_toolbar(QWidget):
    request = RequestManahement()
    single = ConfigSingleton()

    def __int__(self):
        self.create_toolbar()
        # self.request=RequestManahement

    def create_toolbar(self):
        self.horizontalGroupBox = QGroupBox("")
        self.layout = QGridLayout()
        self.layout.setColumnStretch(0, 1)
        self.layout.setColumnStretch(1, 1)
        self.layout.setColumnStretch(2, 1)
        self.btn_of_get_tracker_type = QPushButton('设备状态')
        self.btn_of_get_tracker_owner = QPushButton('设备主人')
        self.btn_of_get_user_info = QPushButton('用户信息')
        self.btn_of_get_tracker_current_version = QPushButton('当前版本')
        self.btn_of_get_last_firmware_version = QPushButton('最新版本')
        self.btn_of_get_billing_account = QPushButton('支付账户')
        self.btn_of_get_paymentmethod_list = QPushButton('支付方式列表')
        self.btn_of_get_payment_history = QPushButton('支付记录')
        self.btn_of_get_priceplan_list = QPushButton('支付项目')
        self.layout.addWidget(self.btn_of_get_tracker_type, 0, 0)
        self.layout.addWidget(self.btn_of_get_tracker_owner, 0, 1)
        self.layout.addWidget(self.btn_of_get_user_info, 0, 2)
        self.layout.addWidget(self.btn_of_get_tracker_current_version, 1, 0)
        self.layout.addWidget(self.btn_of_get_last_firmware_version, 1, 1)
        self.layout.addWidget(self.btn_of_get_billing_account, 1, 2)
        self.layout.addWidget(self.btn_of_get_paymentmethod_list, 2, 0)
        self.layout.addWidget(self.btn_of_get_payment_history, 2, 1)
        self.layout.addWidget(self.btn_of_get_priceplan_list, 2, 2)
        self.horizontalGroupBox.setLayout(self.layout)
请求结果和信息提示区域,其实就是一个简单的文本编辑框,全部的结果和错误处理结果都在该位置显示。
self.device_test_result=QPlainTextEdit(self)到此,所有的界面搭建功能基本就已经完成了,剩下就是业务逻辑的开发了,基本的原则就是通过获取输入框中的设备码,点击所需要的功能,获取返回的结果
点击按钮,链接到对应的函数clicked.connect(self.get_tracker_type),主意,这里的方法没有()
self.table_widget.toolbar.btn_of_get_tracker_type.clicked.connect(self.get_tracker_type)
关联到对应的方法
def get_tracker_type(self):
    self.set_func(self.manage.get_tracker_type,self.table_widget.device_info_result_box)
按钮的点击后有网络请求,主意要使用多线程来处理请求,否者容易出现不响应;
Python方法作为参数传递到线程中进行处理。
 def set_func(self, func, ele):
        self.clear_text(ele)
        if self.configSingleton.flag:
            thread = RequestThread()
            thread.set_func(func, ele)
            thread.start()
            thread.join()
            ele.appendPlainText(thread.get_result())
        else:
            ele.appendPlainText(self.configSingleton.error_msg)
import threading
import time
from PyQt5 import QtCore
import json

from PyQt5.QtCore import pyqtSignal, QThread
from ConfigSingleton import ConfigSingleton
class RequestThread(threading.Thread):
    breakSignal = pyqtSignal(str)
    lock = threading.Lock()
    word = ""
    single=ConfigSingleton()
    re = ""
    def __init__(self, parent=None):
        super().__init__(parent)

    def run(self):
        xx = self.lock.acquire(blocking=False)
        if xx == True:
            result = self.word()
            try:
                result = json.loads(result)
                text = json.dumps(result, sort_keys=True, indent=4, separators=(',', ': '))
                self.set_result(text)
            except Exception as e:
                self.set_result(result)
            self.lock.release()

    def set_func(self, func, element):
        self.word = func
        self.ele = element

    def set_result(self, text):
        self.re = text
        return self.re

    def get_result(self):
        return self.re
4:效果展示
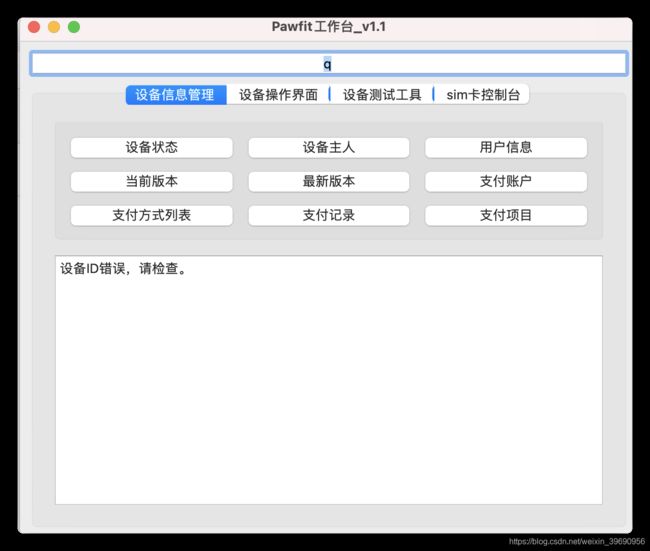
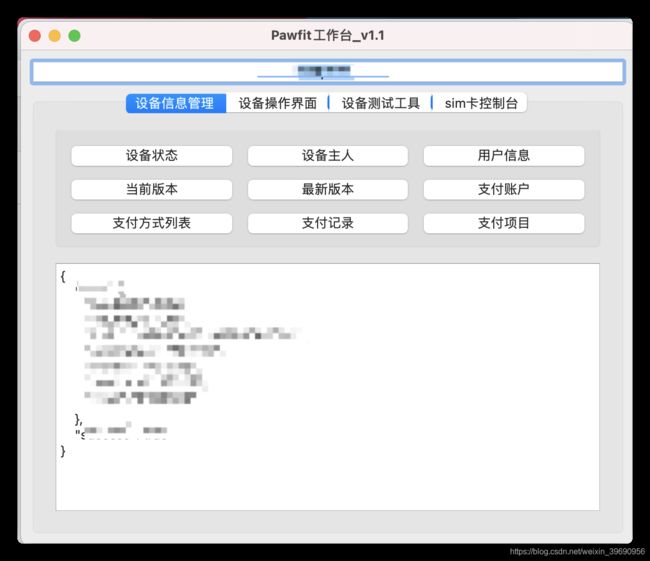
设备码和部分的配置文件建议使用单例模式进行开发,因为有接口的问题,这里不进行提供大家参考了,到此,整个小工具的开发就结束了,我们看看效果
请求效果
5:应用生成
这里会使用pyinstaller来打包应用,pip安装pyinstaller即可,
pip install pyinstaller最后就是打包应用了,解析参数的含义,-F是打包必须的,-i是指定应用图标的文件,--noconsole是指生成的应用文件不含控制台,最后的py文件就是你的应用主类了。
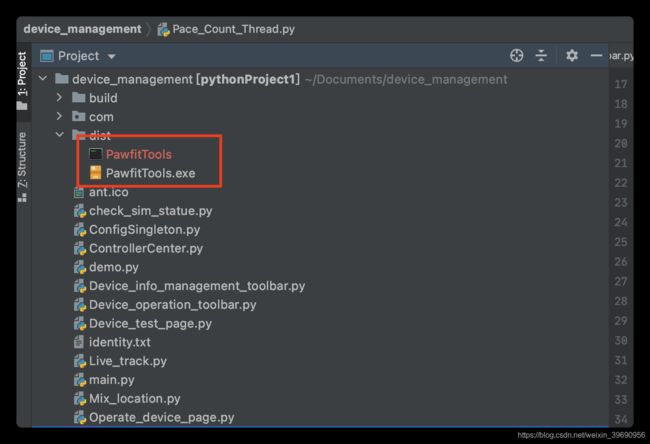
pyinstaller -F -i weila.ico --noconsole PawfitTools.py打包完成会生成一个应用文件,生成何种类型应用取决于你是什么平台,我这里两个平台都生成了,刚好有两个系统的电脑,刚好,整个开发流程就结束了
6:总结:
由于开发匆忙,前后一周时间的调研和开发,没有对代码的架构设计进行通盘的考虑,结果写出来的代码结构非常凌乱,请大神看在安拉的面子上微微的砍下屠刀,如果同为菜鸟,参考下即可,绝不要类似设计;因为这代码有设计的问题,导致槽 信号的传递有问题;
