配置中心
服务配置中心介绍
首先我们来看一下,微服务架构下关于配置文件的一些问题:
1. 配置文件相对分散。
在一个微服务架构下,配置文件会随着微服务的增多变的越来越多,而且分散 在各个微服务中,不好统一配置和管理。
2. 配置文件无法区分环境。
微服务项目可能会有多个环境,例如:测试环境、预发布环境、生产环 境。每一个环境所使用的配置理论上都是不同的,一旦需要修改,就需要我们去各个微服务下手动 维护,这比较困难。
3. 配置文件无法实时更新。
我们修改了配置文件之后,必须重新启动微服务才能使配置生效,这对一 个正在运行的项目来说是非常不友好的。 基于上面这些问题,我们就需要配置中心的加入来解决这些问题。
配置中心的思路是:
首先把项目中各种配置全部都放到一个集中的地方进行统一管理,并提供一套标准的接口。
当各个服务需要获取配置的时候,就来配置中心的接口拉取自己的配置。
当配置中心中的各种参数有更新的时候,也能通知到各个服务实时的过来同步最新的信息,使之动 态更新。
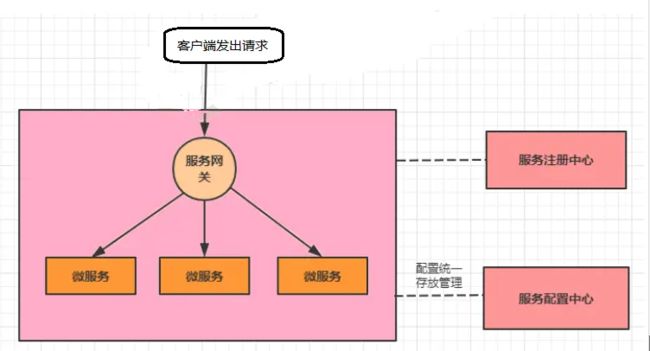
当加入了服务配置中心之后,我们的系统架构图会变成下面这样
在业界常见的服务配置中心,
有下面这些:
Apollo
Apollo是由携程开源的分布式配置中心。特点有很多,比如:配置更新之后可以实时生效,支持灰 度发布功能,并且能对所有的配置进行版本管理、操作审计等功能,提供开放平台API。并且资料 也写的很详细。
Disconf
Disconf是由百度开源的分布式配置中心。它是基于Zookeeper来实现配置变更后实时通知和生效 的。
SpringCloud Config
这是Spring Cloud中带的配置中心组件。它和Spring是无缝集成,使用起来非常方便,并且它的配 置存储支持Git。不过它没有可视化的操作界面,配置的生效也不是实时的,需要重启或去刷新。
Nacos
这是SpingCloud alibaba技术栈中的一个组件,前面我们已经使用它做过服务注册中心。其实它也 集成了服务配置的功能,我们可以直接使用它作为服务配置中心。
Nacos Config
1.添加jar包
    org.projectlombok
    lombok


    com.baomidou
    mybatis-plus-boot-starter
    3.5.3


    com.baomidou
    mybatis-plus-generator
    3.5.3


    org.apache.velocity
    velocity-engine-core
    2.3


    org.freemarker
    freemarker


    mysql
    mysql-connector-java
    8.0.33


    cn.hutool
    hutool-all
    5.5.8
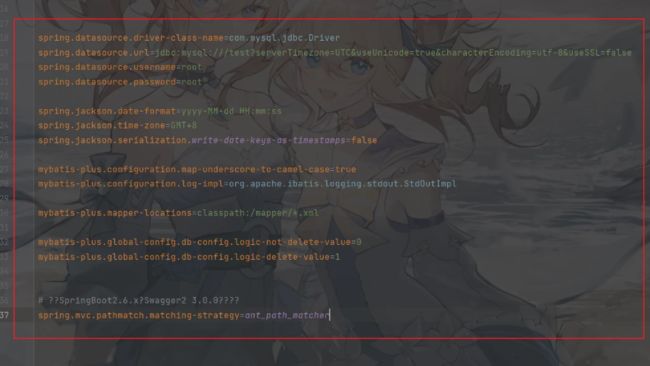
2.将配置文件中的公共部分提取
spring.datasource.driver-class-name=com.mysql.jdbc.Driver
spring.datasource.url=jdbc:mysql:///test?serverTimezone=UTC&useUnicode=true&characterEncoding=utf-8&useSSL=false
spring.datasource.username=root
spring.datasource.password=123456
spring.jackson.date-format=yyyy-MM-dd HH:mm:ss
spring.jackson.time-zone=GMT+8
spring.jackson.serialization.write-date-keys-as-timestamps=false
mybatis-plus.configuration.map-underscore-to-camel-case=true
mybatis-plus.configuration.log-impl=org.apache.ibatis.logging.stdout.StdOutImpl
mybatis-plus.mapper-locations=classpath:/mapper/*.xml
mybatis-plus.global-config.db-config.logic-not-delete-value=0
mybatis-plus.global-config.db-config.logic-delete-value=1


# ??SpringBoot2.6.x?Swagger2 3.0.0????
spring.mvc.pathmatch.matching-strategy=ant_path_matcher
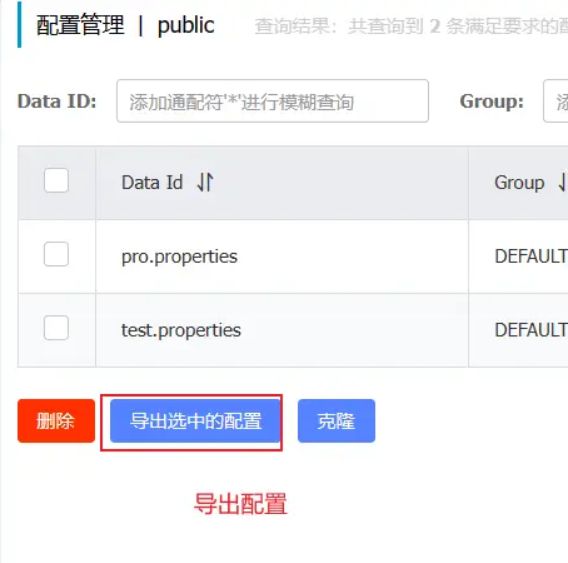
3.在nacos中创建配置文件
4.在项目中使用配置中心
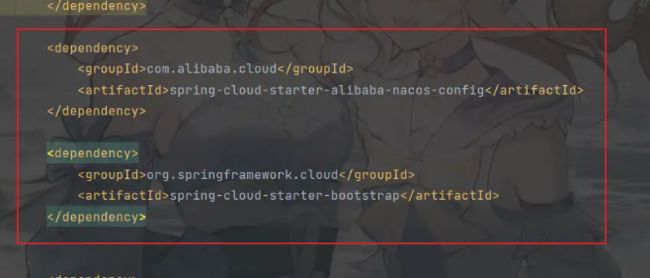
引入jar
com.alibaba.cloud
spring-cloud-starter-alibaba-nacos-config


org.springframework.cloud
spring-cloud-starter-bootstrap
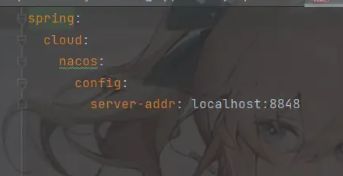
创建配置文件 bootstrap.yml
spring:
  cloud:
    nacos:
      config:
        server-addr: localhost:8848
- Nacos 应该在localhost:8848
- 配置中心里面设置的配置的名字 = 当前的微服务的名字.properties
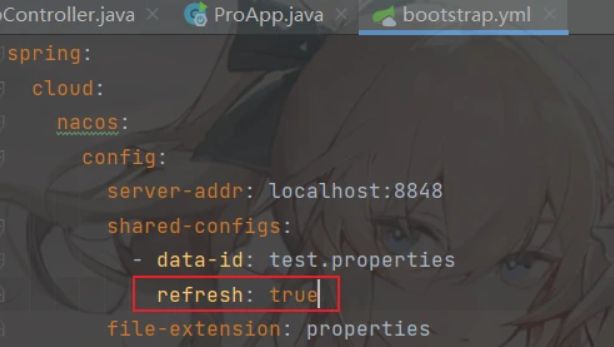
5.共享配置
项目在运行的时候 bootstrap jar
先去配置中心寻找 微服务.properties 文件 找到了 直接注入到项目里面 没有找到
Bootstrap文件里面 的配置 使用的是是哪一个配置文件 使用的配置文件的后缀名是什么
共享微服务的配置:
Shared-configs:
需要多个配置文件就写多个就可以了
查询数据
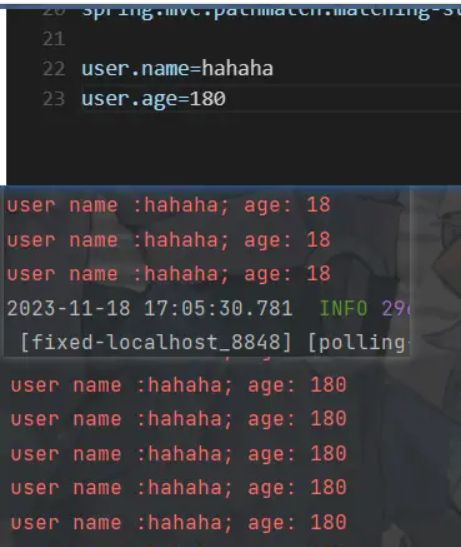
6.配置中心的动态更新
创建测试类
ConfigurableApplicationContext applicationContext = SpringApplication.run(ProApp.class);
while(true) {
        }
修改配置文件
修改配置中心
测试
单体项目不能使用配置中心
链路追踪
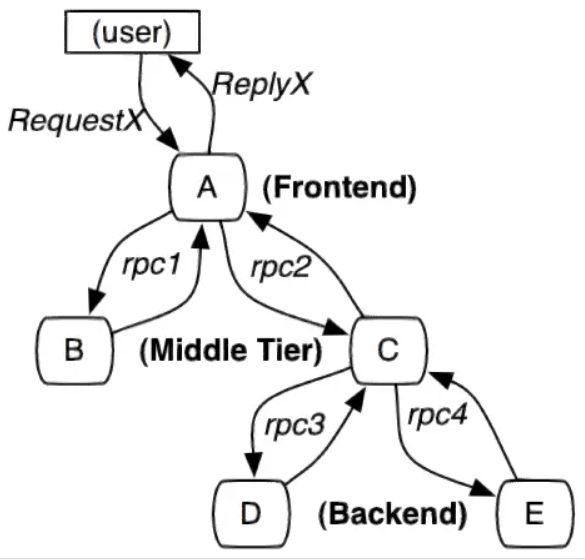
在大型系统的微服务化构建中,一个系统被拆分成了许多模块。这些模块负责不同的功能,组合成 系统,最终可以提供丰富的功能。在这种架构中,一次请求往往需要涉及到多个服务。互联网应用构建 在不同的软件模块集上,这些软件模块,有可能是由不同的团队开发、可能使用不同的编程语言来实现、有可能布在了几千台服务器,横跨多个不同的数据中心,也就意味着这种架构形式也会存在一些问题
如何快速发现问题?
如何判断故障影响范围?
如何梳理服务依赖以及依赖的合理性?
如何分析链路性能问题以及实时容量规划?
分布式链路追踪(Distributed Tracing),就是将一次分布式请求还原成调用链路,进行日志记 录,性能监控并将一次分布式请求的调用情况集中展示。比如各个服务节点上的耗时、请求具体到达哪 台机器上、每个服务节点的请求状态等等。
常见的链路追踪技术有下面这些:
cat 由大众点评开源,基于Java开发的实时应用监控平台,包括实时应用监控,业务监控 。 集成 方案是通过代码埋点的方式来实现监控,比如: 拦截器,过滤器等。 对代码的侵入性很大,集成 成本较高。风险较大。
zipkin 由Twitter公司开源,开放源代码分布式的跟踪系统,用于收集服务的定时数据,以解决微 服务架构中的延迟问题,包括:数据的收集、存储、查找和展现。该产品结合spring-cloud-sleuth 使用较为简单, 集成很方便, 但是功能较简单。
pinpoint Pinpoint是韩国人开源的基于字节码注入的调用链分析,以及应用监控分析工具。特点 是支持多种插件,UI功能强大,接入端无代码侵入。
skywalking SkyWalking是本土开源的基于字节码注入的调用链分析,以及应用监控分析工具。特点是支持多 种插件,UI功能较强,接入端无代码侵入。目前已加入Apache孵化器。 Sleuth SpringCloud 提供的分布式系统中链路追踪解决方案。
注意:SpringCloud alibaba技术栈中并没有提供自己的链路追踪技术的,我们可以采用Sleuth + Zinkin(客户端)来做链路追踪解决方案
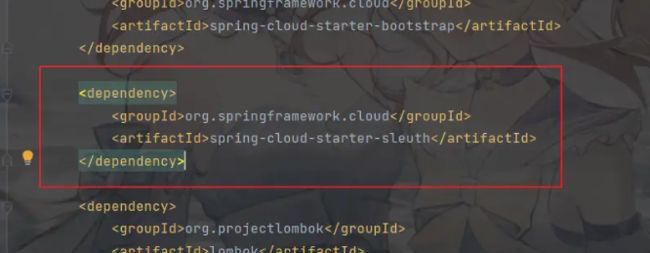
1.添加jar包
org.springframework.cloud
spring-cloud-starter-sleuth
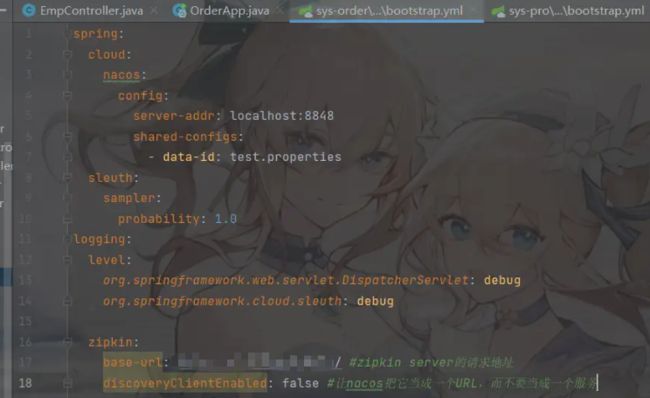
2.修改配置文件
开启日志
logging:
level:
org.springframework.web.servlet.DispatcherServlet: debug
org.springframework.cloud.sleuth: debug
两个测试项目都要修改
访问
链路追踪设置成功
[gateway,07f28cae728ca375,07f28cae728ca375,false]
[order, 07f28cae728ca375,c87034d250e4d991,false]
启动对应的微服务观察对应的输出
其中4eb62b629769eadc4eb62b629769eadc 是TraceId,4eb62b629769eadc 是SpanId,依次调用有一个全局的 TraceId,将调用链路串起来。仔细分析每个微服务的日志,不难看出请求的具体过程。 查看日志文件并不是一个很好的方法,当微服务越来越多日志文件也会越来越多,通过Zipkin可以 将日志聚合,并进行可视化展示和全文检索
Zipkin日志追踪
1.ZipKin介绍
Zipkin 是 Twitter 的一个开源项目,它基于Google Dapper实现,它致力于收集服务的定时数据, 以解决微服务架构中的延迟问题,包括数据的收集、存储、查找和展现。
我们可以使用它来收集各个服务器上请求链路的跟踪数据,并通过它提供的REST API接口来辅助我 们查询跟踪数据以实现对分布式系统的监控程序,从而及时地发现系统中出现的延迟升高问题并找出系 统性能瓶颈的根源。
除了面向开发的 API 接口之外,它也提供了方便的UI组件来帮助我们直观的搜索跟踪信息和分析请 求链路明细,比如:可以查询某段时间内各用户请求的处理时间等。
Zipkin 提供了可插拔数据存储方式:In-Memory、MySql、Cassandra 以及 Elasticsearch。
上图展示了 Zipkin 的基础架构,它主要由 4 个核心组件构成:
Collector:收集器组件,它主要用于处理从外部系统发送过来的跟踪信息,将这些信息转换为 Zipkin内部处理的 Span 格式,以支持后续的存储、分析、展示等功能。
Storage:存储组件,它主要对处理收集器接收到的跟踪信息,默认会将这些信息存储在内存中, 我们也可以修改此存储策略,通过使用其他存储组件将跟踪信息存储到数据库中。 RESTful API:API 组件,它主要用来提供外部访问接口。比如给客户端展示跟踪信息,或是外接 系统访问以实现监控等。
Web UI:UI 组件, 基于API组件实现的上层应用。通过UI组件用户可以方便而有直观地查询和分 析跟踪信息。
Zipkin分为两端,一个是 Zipkin服务端,一个是 Zipkin客户端,客户端也就是微服务的应用。 客户端会 配置服务端的 URL 地址,一旦发生服务间的调用的时候,会被配置在微服务里面的 Sleuth 的监听器监 听,并生成相应的 Trace 和 Span 信息发送给服务端。
2.添加Zipkin客户端
1.下载ZipKin的jar包
https://search.maven.org/remote_content?g=io.zipkin.java&a=zipkin-server&v=LATEST&c=exec
2.通过命令行,输入下面的命令启动ZipKin Server
java -jar zipkin-server-2.12.9-exec.jar
3.通过浏览器访问
http://localhost:9411访问
3.Zipkin客户端集成
添加jar包
            org.springframework.cloud
            spring-cloud-starter-zipkin
            2.2.8.RELEASE
添加配置
spring:
zipkin:
base-url: http://127.0.0.1:9411/ #zipkin server的请求地址
discoveryClientEnabled: false #让nacos把它当成一个URL,而不要当成一个服务
sleuth:
sampler: probability: 1.0 #采样的百分比
4.访问ui页面
查看信息
全局异常处理
创建异常处理类
package com.example.globalexception;
import com.example.util.Result;
import org.springframework.web.bind.annotation.ControllerAdvice;
import org.springframework.web.bind.annotation.ExceptionHandler;
import org.springframework.web.bind.annotation.ResponseBody;
import org.springframework.web.bind.annotation.RestControllerAdvice;
//@ControllerAdvice
//@ResponseBody
@RestControllerAdvice
public class MyGlobalException {
    //
    @ExceptionHandler(Exception.class)
    public Result aaa(){
        return new Result(500,"除数为0","除数为0");
    }
}
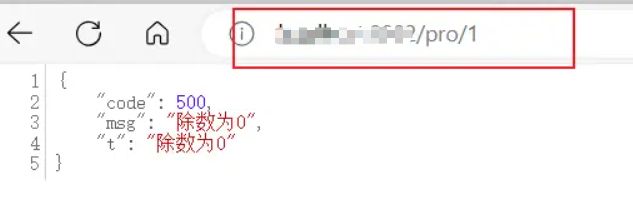
测试
访问页面 异常处理成功
网关添加swagger
1.添加jar包
            io.springfox
            springfox-swagger2
            2.7.0


            io.springfox
            springfox-swagger-ui
            2.7.0


            com.github.xiaoymin
            swagger-bootstrap-ui
            1.9.6
2.添加配置
package com.example.config;
import org.springframework.context.annotation.Bean;
import org.springframework.context.annotation.Configuration;
import springfox.documentation.builders.ApiInfoBuilder;
import springfox.documentation.builders.PathSelectors;
import springfox.documentation.builders.RequestHandlerSelectors;
import springfox.documentation.service.ApiInfo;
import springfox.documentation.spi.DocumentationType;
import springfox.documentation.spring.web.plugins.Docket;
import springfox.documentation.swagger2.annotations.EnableSwagger2;
@Configuration
@EnableSwagger2
public class Swagger2 {


    @Bean
    public Docket createRestApi() {
        return new Docket(DocumentationType.SWAGGER_2)  // 文档的类型  swagger2
                .apiInfo(apiInfo())
                .select()
                .apis(RequestHandlerSelectors.basePackage("com.example.controller")) // controller 所在的包是哪里
                .paths(PathSelectors.any()) // 所有的路径全部都写到接口文档里面
                .build();
    }


    /**
     * 文档的信息
     * @return
     */
    private ApiInfo apiInfo() {
        return new ApiInfoBuilder()
                .title("服务:发布为daocke镜像,权限管理,用户管理,页面管理,日志 后台 APIs")
                .description("服务:发布为daocke镜像,权限管理,用户管理,页面管理,日志 后台")
                .termsOfServiceUrl("http://www.baidu.com") //代码的路径
                .contact("AAA")
                .version("1.0")
                .build();
    }


}
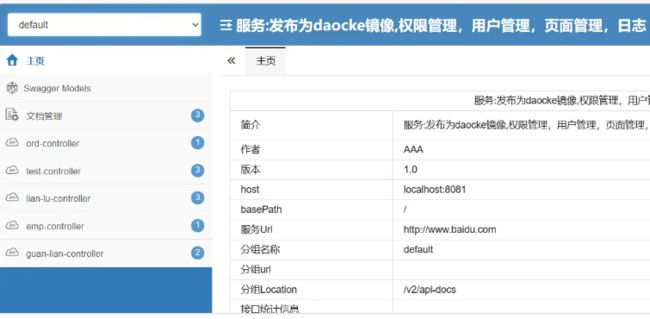
3.访问swagger
http://localhost:端口号/swagger-ui.html
http://localhost:端口号/doc.html
4.配置swagger聚合网关
说明:
将swagger升级到3.0.0可用支持webflux,同时有以下这些变化:
1、自动化注解变更:由之前的 @EnableSwagger2 更改为 @EnableOpenApi,当然@EnableOpenApi可以放在配置类,也可以放在启动类上
2、页面访问变更:
项目访问地址从2.x的 http://localhost:端口号/swagger-ui.html 到 3.x的 http://localhost:端口号/swagger-ui/index.html 或 http://localhost:8080/swagger-ui/
注:@EnableSwagger2在springfox3版本依然可以继续使用
3、DocumentationType变更
Docket构造函数中的DocumentationType指向更改:由之前的DocumentationType.SWAGGER_2 更改为 DocumentationType.OAS_30
注:DocumentationType.SWAGGER_2在springfox3版本依然可以继续使用
核心思想:以前能用的现在依然可以使用
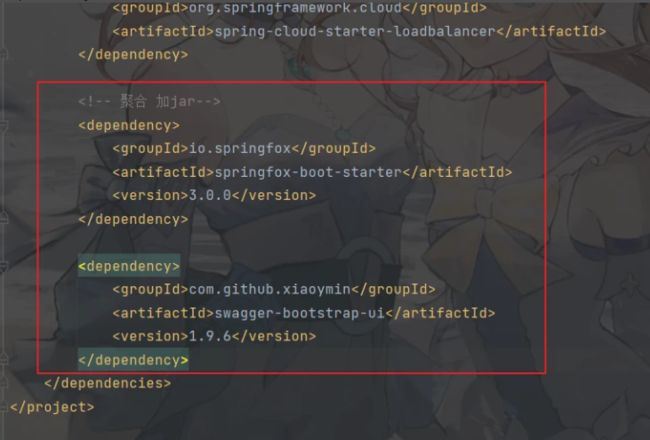
添加聚合jar包
            io.springfox
            springfox-boot-starter
            3.0.0


            com.github.xiaoymin
            swagger-bootstrap-ui
            1.9.6
添加配置文件
package com.example.config;
import org.springframework.context.annotation.Bean;
import org.springframework.context.annotation.Configuration;
import springfox.documentation.builders.ApiInfoBuilder;
import springfox.documentation.builders.PathSelectors;
import springfox.documentation.builders.RequestHandlerSelectors;
import springfox.documentation.service.ApiInfo;
import springfox.documentation.service.Contact;
import springfox.documentation.spi.DocumentationType;
import springfox.documentation.spring.web.plugins.Docket;
import springfox.documentation.swagger2.annotations.EnableSwagger2;
@Configuration
@EnableSwagger2
public class Swagger2 {


    @Bean
    public Docket createRestApi() {
        return new Docket(DocumentationType.SWAGGER_2)  // 文档的类型  swagger2
                .apiInfo(apiInfo())
                .select()
                .apis(RequestHandlerSelectors.basePackage("com.example.controller")) // controller 所在的包是哪里
                .paths(PathSelectors.any()) // 所有的路径全部都写到接口文档里面
                .build();
    }

    /**
     * 文档的信息
     * @return
     */
    private ApiInfo apiInfo() {
        return new ApiInfoBuilder()
                .title("服务:发布为daocke镜像,权限管理,用户管理,页面管理,日志 后台 APIs")
                .description("服务:发布为daocke镜像,权限管理,用户管理,页面管理,日志 后台")
                .termsOfServiceUrl("http://www.baidu.com") //代码的路径
                .contact(new Contact("AAA","http://www.baidu.com","@qq.com"))
                .version("1.0")
                .build();
    }


}
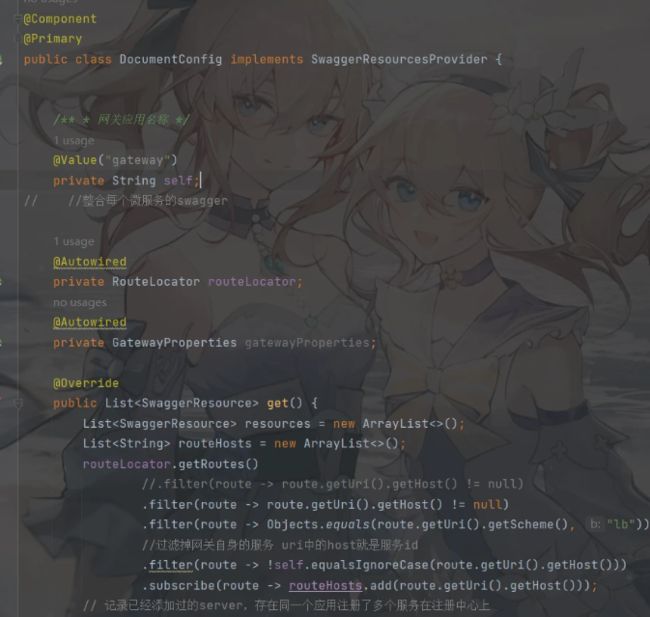
package com.example.config;

import org.springframework.beans.factory.annotation.Autowired;
import org.springframework.beans.factory.annotation.Value;
import org.springframework.cloud.gateway.config.GatewayProperties;
import org.springframework.cloud.gateway.route.RouteLocator;
import org.springframework.context.annotation.Primary;
import org.springframework.stereotype.Component;
import springfox.documentation.swagger.web.SwaggerResource;
import springfox.documentation.swagger.web.SwaggerResourcesProvider;
import java.util.*;
@Component
@Primary
public class DocumentConfig implements SwaggerResourcesProvider {


    /** * 网关应用名称 */
    @Value("${spring.application.name}")
    private String self;
//    //整合每个微服务的swagger
    @Autowired
    private RouteLocator routeLocator;
    @Autowired
    private GatewayProperties gatewayProperties;
    @Override
    public List get() {
        List resources = new ArrayList<>();
        List routeHosts = new ArrayList<>();
        routeLocator.getRoutes()
                //.filter(route -> route.getUri().getHost() != null)
                .filter(route -> route.getUri().getHost() != null)
                .filter(route -> Objects.equals(route.getUri().getScheme(), "lb"))
                //过滤掉网关自身的服务 uri中的host就是服务id
                .filter(route -> !self.equalsIgnoreCase(route.getUri().getHost()))
                .subscribe(route -> routeHosts.add(route.getUri().getHost()));
        // 记录已经添加过的server,存在同一个应用注册了多个服务在注册中心上
        Set dealed = new HashSet<>();
        routeHosts.forEach(instance -> {
            // 拼接url ,请求swagger的url
            String url = "/"+ instance.toLowerCase() + "/v2/api-docs";
            if (!dealed.contains(url)) {
                dealed.add(url);
                SwaggerResource swaggerResource = new SwaggerResource();
                swaggerResource.setUrl(url);
                swaggerResource.setName(instance);
                swaggerResource.setSwaggerVersion("2.0");
                resources.add(swaggerResource);
            }
        });
        return resources;
    }
//    public List get() {
//        List resources = new ArrayList<>();
//        SwaggerResource swaggerResource = new SwaggerResource();
//        swaggerResource.setName("pro");
//        swaggerResource.setLocation("pro/v2/api-docs");// pro
//        swaggerResource.setSwaggerVersion("2.0");
//        resources.add(swaggerResource);
//
//
//        SwaggerResource swaggerResource1 = new SwaggerResource();
//        swaggerResource1.setName("order1");
//        swaggerResource1.setLocation("order1/v2/api-docs");// pro
//        swaggerResource1.setSwaggerVersion("2.0");
//        resources.add(swaggerResource1);
//
//
//
//        return resources;
//
//    }
    //
//
//    private SwaggerResource swaggerResource(String name, String location, String version) {
//
//        SwaggerResource swaggerResource = new SwaggerResource();
//        swaggerResource.setName(name);
//        swaggerResource.setLocation(location);
//        swaggerResource.setSwaggerVersion(version);
//        return swaggerResource;
//
//    }
}
