vue3-admin商品管理后台项目(创建vite项目以及配置)
秋招0 offer,继续充实自己,学学之前一直想做没做的vue-admin项目,目前是参考网易云课堂的一门课,后续会根据自己的项目学习进度一直更新下去。
首先是创建一个文件夹,然后作为我们项目的总文件夹,然后检查自己的node版本,我这使用的是较新的16.17版本。然后为了防止后面下载npm包的时候因为墙的原因卡住,所以我们进行换源。
查看当前源:
npm config get registry
更换源为国内镜像
npm config set registry=https://registry.npmmirror.com
更换成功后,在你创建的总文件夹下打开powershell,使用vite命令创建项目,比如我这里创建的项目名就叫shop-admin。
npm create vite@latest shop-admin -- --template vue
创建完成后,到这个项目目录下
cd shop-admin
然后经典:
npm install
然后运行项目:
npm run dev

到这里就是运行成功,界面挺好看的。
使用的编辑器是vscode,下载插件的话基本的是三个
Chinese汉化插件
volar
vue 3 snippets
Element plus
项目会使用到Element plus
element plus中文官网地址
所以根据官网教程,安装Element plus
npm install element-plus --save
然后编辑项目的main.js
直接使用下面代码进行覆盖
import { createApp } from 'vue'
import './style.css'
import App from './App.vue'
import ElementPlus from 'element-plus'
import 'element-plus/dist/index.css'

const app = createApp(App)

app.use(ElementPlus)

app.mount('#app')
然后清除App.vue项目里的所有内容,只保留基本的三对标签,script,template,以及style,然后在element plus的组件里面随便找个组件的源代码粘贴到App.vue文件夹下,就行了。
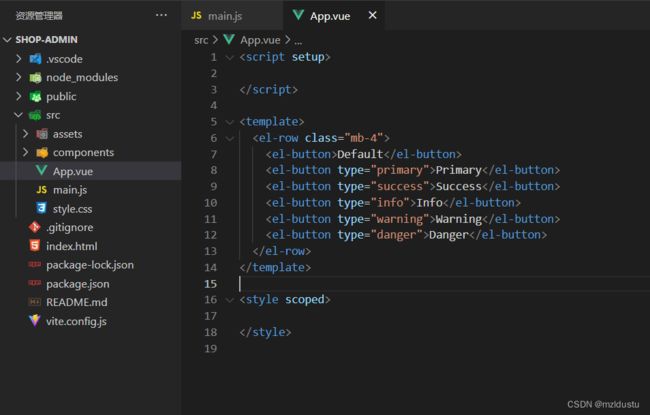
然后原本的项目默认启动端口就会
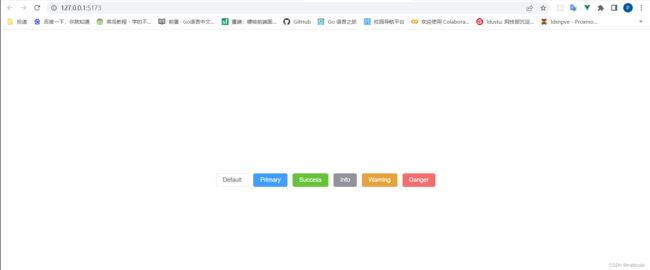
所以到这里说明element plus导入成功能正常使用了
windi css
项目会用到windi css
windi css中文官网地址
安装相关包
npm i -D vite-plugin-windicss windicss
编辑vite.config.js
import { defineConfig } from 'vite'
import vue from '@vitejs/plugin-vue'
import WindiCSS from 'vite-plugin-windicss'

// https://vitejs.dev/config/
export default defineConfig({
  plugins: [vue(),WindiCSS()]
})
然后在main.js里面加入
import 'virtual:windi.css'
然后为了后续开发更友好,安装windicss插件
到此windi css就引入成功了
vue-router 4.0
项目会用到vue-router 4.0
npm install vue-router@4
然后再src目录下创建router文件夹,在其下面创建index.js编辑
import { createRouter, createWebHashHistory } from 'vue-router'

const routes = []

const router = createRouter({
    history:createWebHashHistory(),
    routes
})
export default router
在main.js里引入
import { createApp } from 'vue'
import './style.css'
import App from './App.vue'
import ElementPlus from 'element-plus'
import 'element-plus/dist/index.css'
import router from './router'

const app = createApp(App)

app.use(router)

app.use(ElementPlus)
import 'virtual:windi.css'

app.mount('#app')
当域名地址那出现了/#/的hash路由标志着vue-router引入成功
![]()
路由配置以及404页面配置
为了方便后续开发,给src配置一个别名
在vite.config.js进行编辑
import { defineConfig } from 'vite'
import vue from '@vitejs/plugin-vue'
import WindiCSS from 'vite-plugin-windicss'

import path from "path"

// https://vitejs.dev/config/
export default defineConfig({
  resolve:{
    alias:{
      "~":path.resolve(__dirname,"src")
    }
  },
  plugins: [vue(),WindiCSS()]
})
然后在src下面创建pages,加入一个index.vue
在里面写上
<template>
    <div>
        后台首页
    </div>
</template>
接着编辑router下的index.js
import { createRouter, createWebHashHistory } from 'vue-router'
import Index from '~/pages/index.vue'

const routes = [{
    path:"/",
    component:Index
}]

const router = createRouter({
    history:createWebHashHistory(),
    routes
})
export default router
然后来到App.vue下面,在template标签里面加上
我们就会发现后台首页四个字显示在了页面上
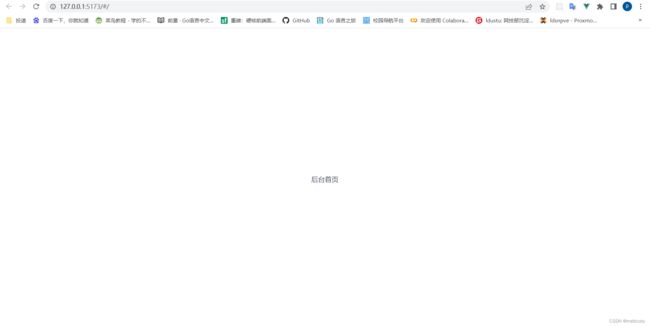
意味着首页路由配置成功
再举个例子,比如说在pages下面再创建一个about.vue页面
配置router下面的index.js
import { createRouter, createWebHashHistory } from 'vue-router'
import Index from '~/pages/index.vue'
import About from '~/pages/about.vue'

const routes = [{
    path:"/",
    component:Index
},{
    path:"/about",
    component:About
}]

const router = createRouter({
    history:createWebHashHistory(),
    routes
})
export default router
然后在域名后面加上about
你就会发现about页面也能成功显示

这就是路由配置
404页面配置
在pages下面新建404.vue
然后编辑router下面的index.js
import { createRouter, createWebHashHistory } from 'vue-router'
import Index from '~/pages/index.vue'
import About from '~/pages/about.vue'
import NotFound from '~/pages/404.vue'

const routes = [{
    path:"/",
    component:Index
},{
    path:"/about",
    component:About
},{
    // // 将匹配所有内容并将其放在 `$route.params.pathMatch` 下
    path: '/:pathMatch(.*)*',
    name: 'NotFound',
    component: NotFound
}]

const router = createRouter({
    history:createWebHashHistory(),
    routes
})
export default router
然后美化404页面,使用的是element plus里面的一个警告组件
<template>
    <div>
        <el-result
        icon="warning"
        title="404提示"
        sub-title="你找的页面走丢了哦"
      >
            <template #extra>
            <el-button type="primary" @click="$router.push('/')">回到首页</el-button>
            </template>
        </el-result>
    </div>
</template>
然后随便输入一个不存在的页面,发现效果还是可以的,可以点击回到首页,这里使用的是router提供的$router.push(‘/’),/就是根路径下。

到这里404页面就配置完成了!