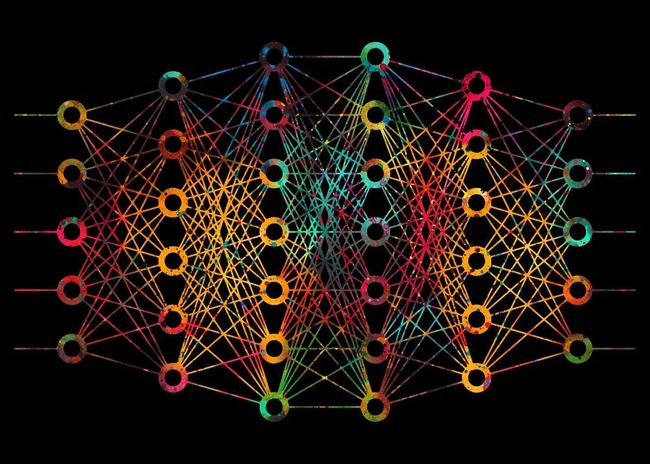
深入了解前馈网络、CNN、RNN 和 Hugging Face 的 Transformer 技术!
本篇在此对自然语言模型做一个简短总结,从CNN\RNN\变形金刚,和抱脸的变形金刚库说起。
二、基本前馈神经网络:
让我们分解一个基本的前馈神经网络,也称为多层感知器(MLP)。此代码示例将:
- 定义神经网络的架构。
- 初始化权重和偏差。
- 使用 sigmoid 激活函数实现前向传播。
- 使用均方误差损失函数实现训练的反向传播。
- 演示在简单数据集上的训练。
import numpy as np

class NeuralNetwork:
    def __init__(self, input_size, hidden_size, output_size):
        # Initialize weights and biases with random values
        self.weights1 = np.random.randn(input_size, hidden_size)
        self.weights2 = np.random.randn(hidden_size, output_size)
        self.bias1 = np.random.randn(1, hidden_size)
        self.bias2 = np.random.randn(1, output_size)

    def sigmoid(self, x):
        return 1 / (1 + np.exp(-x))

    def sigmoid_derivative(self, x):
        return x * (1 - x)

    def forward(self, X):
        self.hidden = self.sigmoid(np.dot(X, self.weights1) + self.bias1)
        output = self.sigmoid(np.dot(self.hidden, self.weights2) + self.bias2)
        return output

    def train(self, X, y, epochs, learning_rate):
        for epoch in range(epochs):
            # Forward propagation
            output = self.forward(X)

            # Compute error
            error = y - output

            # Backward propagation
            d_output = error * self.sigmoid_derivative(output)
            error_hidden = d_output.dot(self.weights2.T)
            d_hidden = error_hidden * self.sigmoid_derivative(self.hidden)

            # Update weights and biases
            self.weights2 += self.hidden.T.dot(d_output) * learning_rate
            self.bias2 += np.sum(d_output, axis=0, keepdims=True) * learning_rate
            self.weights1 += X.T.dot(d_hidden) * learning_rate
            self.bias1 += np.sum(d_hidden, axis=0, keepdims=True) * learning_rate

            # Print the error at every 1000 epochs
            if epoch % 1000 == 0:
                print(f"Epoch {epoch}, Error: {np.mean(np.abs(error))}")

# Sample data for XOR problem
X = np.array([[0, 0], [0, 1], [1, 0], [1, 1]])
y = np.array([[0], [1], [1], [0]])

# Create neural network instance and train
nn = NeuralNetwork(input_size=2, hidden_size=4, output_size=1)
nn.train(X, y, epochs=10000, learning_rate=0.1)

# Test the neural network
print("Predictions after training:")
for data in X:
    print(f"{data} => {nn.forward(data)}")
在这个例子中,我们使用神经网络来解决异或问题,这是一个单层感知器无法解决的经典问题。
这种前馈神经网络只有一个隐藏层,这使得它能够学习非线性关系。调整隐藏层大小、学习率和周期数等参数会影响神经网络的性能和准确性。
三、卷积神经网络 (CNN)
CNN 专为图像处理而设计,包括称为卷积层的层,这些层对输入数据应用卷积运算,强调局部特征。
3.1 CNN的基本结构:
以下是使用 TensorFlow 和 Keras 库的基本卷积神经网络 (CNN) 的更全面实现。此示例将:
- 加载 MNIST 数据集,这是一个用于手写数字识别的常用数据集。
- 对数据进行预处理。
- 定义基本的 CNN 架构。
- 使用优化器、损失函数和度量编译模型。
- 在 MNIST 数据集上训练 CNN。
- 评估经过训练的 CNN 在测试数据上的准确性。
3.2 相关代码实现
# Import necessary libraries
import numpy as np
import tensorflow as tf
from tensorflow.keras.datasets import mnist
from tensorflow.keras.utils import to_categorical

# Load and preprocess the dataset
(train_images, train_labels), (test_images, test_labels) = mnist.load_data()
train_images = train_images.reshape((60000, 28, 28, 1)).astype('float32') / 255
test_images = test_images.reshape((10000, 28, 28, 1)).astype('float32') / 255

train_labels = to_categorical(train_labels)
test_labels = to_categorical(test_labels)

# Define the CNN architecture
model = tf.keras.Sequential([
    tf.keras.layers.Conv2D(32, (3, 3), activation='relu', input_shape=(28, 28, 1)),
    tf.keras.layers.MaxPooling2D(2, 2),
    tf.keras.layers.Conv2D(64, (3, 3), activation='relu'),
    tf.keras.layers.MaxPooling2D(2, 2),
    tf.keras.layers.Conv2D(64, (3, 3), activation='relu'),
    tf.keras.layers.Flatten(),
    tf.keras.layers.Dense(64, activation='relu'),
    tf.keras.layers.Dense(10, activation='softmax')
])

# Compile the model
model.compile(optimizer='adam', loss='categorical_crossentropy', metrics=['accuracy'])

# Train the model
model.fit(train_images, train_labels, epochs=5, batch_size=64)

# Evaluate the model's accuracy on the test data
test_loss, test_acc = model.evaluate(test_images, test_labels)
print(f'Test accuracy: {test_acc}')
在此示例中,基本 CNN 有三个卷积层,后跟最大池化层。在卷积层之后,我们将输出展平,并将其传递到两个密集(全连接)层。
最后的密集层有 10 个神经元,每个神经元代表一个从 0 到 9 的数字,具有 softmax 激活函数来产生类概率。
这是MNIST数据集的一个简单而有效的CNN。您可以通过添加更多层、使用正则化 dropout 等技术或采用高级优化技术来进一步改进网络。
四、循环神经网络 (RNN)
RNN 旨在识别数据序列中的模式,例如文本或时间序列。它们保留对先前输入的记忆。
4.1 基本RNN结构:
让我们使用 TensorFlow 和 Keras 创建一个基本的递归神经网络 (RNN)。此示例将演示:
- 加载序列数据集(我们将使用 IMDB 情感分析数据集)。
- 预处理数据。
- 定义一个简单的 RNN 架构。
- 使用优化器、损失函数和度量编译模型。
- 在数据集上训练 RNN。
- 评估经过训练的 RNN 在测试数据上的准确性。
4.2 相关代码实现
# Import necessary libraries
import tensorflow as tf
from tensorflow.keras.datasets import imdb
from tensorflow.keras.preprocessing.sequence import pad_sequences

# Constants
VOCAB_SIZE = 10000
MAX_LEN = 500
EMBEDDING_DIM = 32

# Load and preprocess the dataset
(train_data, train_labels), (test_data, test_labels) = imdb.load_data(num_words=VOCAB_SIZE)

# Pad sequences to the same length
train_data = pad_sequences(train_data, maxlen=MAX_LEN)
test_data = pad_sequences(test_data, maxlen=MAX_LEN)

# Define the RNN architecture
model = tf.keras.Sequential([
    tf.keras.layers.Embedding(VOCAB_SIZE, EMBEDDING_DIM, input_length=MAX_LEN),
    tf.keras.layers.SimpleRNN(32, return_sequences=True),
    tf.keras.layers.SimpleRNN(32),
    tf.keras.layers.Dense(1, activation='sigmoid')
])

# Compile the model
model.compile(optimizer='rmsprop', loss='binary_crossentropy', metrics=['accuracy'])

# Train the model
model.fit(train_data, train_labels, epochs=10, batch_size=128, validation_split=0.2)

# Evaluate the model's accuracy on the test data
test_loss, test_acc = model.evaluate(test_data, test_labels)
print(f'Test accuracy: {test_acc}')
在此示例中,我们首先使用嵌入层将整数序列转换为固定大小的密集向量。然后,两个 RNN 层处理序列。
具有 sigmoid 激活函数的最后一个密集层输出一个概率,指示评论的情绪(0 表示负面,1 表示正面)。
值得注意的是,在实际应用中,您可能需要考虑使用更高级的递归层,如 LSTM 或 GRU,因为它们可以比基本 RNN 更好地捕获远程依赖关系。
此外,可以根据特定的应用程序和数据集对超参数(如 、 和)进行微调,以获得最佳结果。
VOCAB_SIZEMAX_LENEMBEDDING_DIM
五、变形金刚
Transformer 最初是为自然语言处理任务而设计的,具有自注意力机制,允许它们权衡输入不同部分的重要性。
5.1 Transformer 片段(使用 Hugging Face 的 Transformers 库):
Hugging Face 的 Transformers 库使使用 BERT、GPT-2 等 Transformer 架构变得非常容易。让我们创建一个基本示例:
- 加载用于文本分类的预训练 BERT 模型。
- 标记化一些输入句子。
- 通过 BERT 模型传递标记化输入。
- 输出预测的类概率。
5.2 相关代码实现
在本演示中,让我们使用 BERT 模型进行序列分类:
# Installation (if you haven't done it yet)
#!pip install transformers

# Import required libraries
from transformers import BertTokenizer, BertForSequenceClassification
import torch

# Load pretrained model and tokenizer
model_name = 'bert-base-uncased'
model = BertForSequenceClassification.from_pretrained(model_name, num_labels=2)  # For binary classification
tokenizer = BertTokenizer.from_pretrained(model_name)

# Tokenize input data
input_texts = ["I love using transformers!", "This library is difficult to understand."]
inputs = tokenizer(input_texts, return_tensors='pt', padding=True, truncation=True, max_length=512)

# Forward pass: get model predictions
with torch.no_grad():
    outputs = model(**inputs)
    logits = outputs.logits
    probabilities = torch.nn.functional.softmax(logits, dim=-1)

# Display predicted class probabilities
print(probabilities)
此脚本初始化用于二进制序列分类的 BERT 模型,对输入句子进行标记,然后根据模型的对数进行预测。
最终输出 , 包含输入句子的预测类概率。
probabilities请注意,此模型已针对二元分类(使用 )进行了初始化,因此它最适合情绪分析等任务。
num_labels=2对于多类分类或其他任务,您可以调整并可能选择不同的预训练模型,或者在特定数据集上微调模型。
num_labels
六、结论
深度学习的世界是广阔的,正如所展示的那样,其算法可能会根据其应用领域变得复杂。然而,多亏了 TensorFlow 和 Hugging Face 等高级库,使用这些算法变得越来越容易。
旅程
