WPF中TreeView的使用
WPF中对树控件的使用主要有两种方法, 方法一,对TreeView进行静态搭建,对应的XAML文件代码如下:
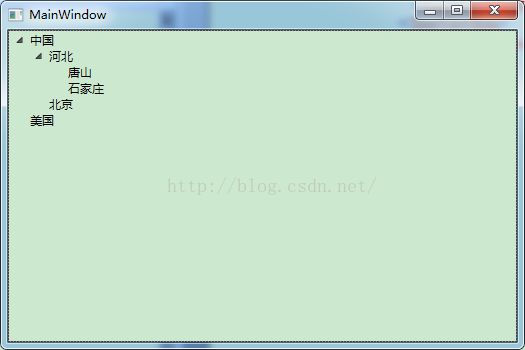
运行的效果如下,可以看到,这种方法只适合在确定的树形关系下使用,而且树的枝叶不能过多,否则会大量的增加代码量。
方法二,利用Binding技术动态的搭建树。这种方法比较常见,下面进行详细的介绍:
1.搭建树
首先,在XAML文件中添加TreeView控件:
这里,我们要用到TreeView的ItemTemplate属性,通过对该属性以HierarchicalDataTemplate进行赋值,从而能够实现自动搭建树的功能。HierarchicalDataTemplate,顾名思义就是以等级划分的数据模板的意思,适合类似树形结构这种有严格等级划分的控件的数据的绑定。在使用HierarchicalDataTemplate进行树的搭建之前,我们需要先在cs文件中,定义一个用于绑定的数据源Local,如下:
public class Location
    {
        public string Name { get; set; }
        public List childern { get; set; }
    }
我们需要将Location对象作为数据源绑定给树控件每个Item,对应的XAML文件代码如下:
在HierarchicalDataTemplate中我们指定他的ItemsSource为Childern,即为Location对象中的Childern,然后将TextBlock对其赋值,并将TextBlock的Text绑定到数据源的Name上。接下来,我们在cs文件中构建List< Location >对象作为树的数据源:
Location loc = new Location()
            {
                Name = "China",
                Childern = new List()
                {
                    new Location()
                    {
                        Name="HeBei",
                        Childern=new List()
                        {
                            new Location(){Name="TangShan"},
                            new Location(){Name="ShiJiaZhuang"}
                        }
                    },
                    new Location(){Name="BeiJing"}
                }
            };
            List list = new List() { loc };
进行数据源绑定:
treeView.ItemsSource = list;
运行程序,我们发现已经成功搭建出了这么一棵树:

2、为树的Item添加点击事件。
中我们为树绑定数据源,如果我们需要给每个Item添加事件或者显示Style,我们就需要用到,接下来我们为每个Item添加一个选中事件SelectedItemChanged:
由上面的代码可以看到,设置树节点的选中事件属于控件的Style,并用此对TreeView.ItemContainerStyle进行赋值,这和后面我们要设置的树节点的表现风格一致。
在cs文件中定义对应的item_SelectedItemChanged事件:
private void item_SelectedItemChanged(object sender, RoutedEventArgs e)
        {
            MessageBox.Show("ItemSelected");
        }
点击每个树节点,都会弹出下面的提示框。

3.接下来,我们实现让每个树节点的背景色编程红色,此时我们还是需要在style中设置树节点的表现风格,如下:
运行程序如下:

4.展开全部树节点。运行时我们发现,树节点是默认全部折叠的,此时需要我们用代码进行打开。首先说明一下,通过这种方式创建的树,每个树节点其实包含两部分内容,一个是我们用于绑定的数据,另一个是用于盛放该数据的容器,我们展开树节点的方法就是通过递归的方式,找到每个树节点的容器,然后利用其IsExpanded
属性进行展开,其代码如下:
/展开全部树节点Ì?
        public static void ExpandAll(System.Windows.Controls.TreeView treeView)
        {
            //展1开a全¨?部?树º¡Â节¨²点Ì?
            ExpandInternal(treeView);
        }
        ///
        /// 递ÌY归¨¦展1开a全¨?部?树º¡Â节¨²点Ì?
        ///
        ///
        private static void ExpandInternal(System.Windows.Controls.ItemsControl targetItemContainer)
        {
            var itemsControl = targetItemContainer as ItemsControl;

            if (itemsControl == null || itemsControl.ItemsSource == null) return;
            foreach (object item in itemsControl.ItemsSource)
            {
                //获?取¨?包㨹含?节¨²点Ì?的Ì?容¨Y器¡Â
                TreeViewItem container = itemsControl.ItemContainerGenerator.ContainerFromItem(item) as TreeViewItem;
                if (container != null)
                {
                    //全¨?部?展1开a
                    container.IsExpanded = true;

                    if (container.ItemContainerGenerator.Status != System.Windows.Controls.Primitives.GeneratorStatus.ContainersGenerated)
                    {
                        container.UpdateLayout();
                    }
                }
                ExpandInternal(container);
            }
5.设置默认选中的树节点。
思路是将树节点的IsSelected属性绑定数据源的布尔量属性,从而控制树节点的选中状态,这里不再详述,对应的XAML代码如下:
