Flutter桌面开发 — Windows App打包以及使用Inno Setup生成.exe文件安装包
文章目录
- 1 打包 Flutter Windows App
-
- 1.1 开发环境准备
- 1.2 支持Windows
- 1.3 构建Windows App
- 2 使用Inno Setup生成.exe文件安装包
-
- 2.1 Inno Setup下载
- 2.2 Inno Setup 配置打包程序
-
- 2.2.1 新建.iss程序文件
- 2.2.2 设置应用信息
- 2.2.3 设置打包的可执行文件、资源文件
- 2.2.4 配置安装协议、安装前介绍、安装后描述内容
- 2.2.5 配置语言、应用图标、安装包文件输出路径等
- 2.2.6 生成打包代码
- 2.3 安装包安装效果图
- 3 常见问题
-
- 3.1 安装包安装协议、说明文字中文出现乱码
- 3.2 找不到flutter_windows.dll, 无法继续运行代码
- Flutter windows 文档
1 打包 Flutter Windows App
1.1 开发环境准备
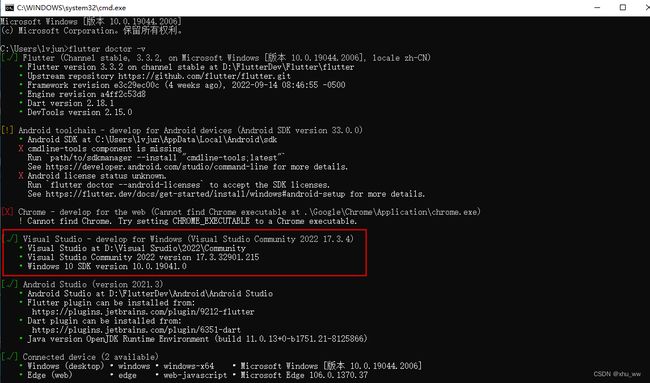
执行以下命令,检测开发环境是否搭建完整,是否支持Windows。
flutter doctor -v
安装好
Visual Studio,Flutter 运行Windows应用时需要。
1.2 支持Windows
新建Flutter项目时,勾选windows平台
若是旧项目则执行以下命令,在Windows平台下即可创建支持windows系统的代码
flutter create .
代码结构如下图:
图中圈出的地方指示出如何修改Windows app的应用图标。
1.3 构建Windows App
执行Flutter打包命令
flutter build windows
构建成功后在 ~/build/windows/runner/文件夹下可看到 Release文件夹,拖拽出去即为免安装的windows应用,双击xxx.exe文件即可启动应用。
图中圈出的.dll文件是另外在放进去的,默认打包处理并没有该文件
建议将msvcp140.dll、vcruntime140.dll、vcruntime140_1.dll文件放在该路径下,在导出或生成安装包。
不然用户可能出现缺少VCRUNTIME140_1.dll文件的提示。
2 使用Inno Setup生成.exe文件安装包
第一步中打出的包是免安装的,将 ~/build/windows/runner/Release文件夹提取出来,双击xxx.exe文件即可启动应用。但一般给到用户还是习惯使用 .exe安装包,自定义安装。所以使用Inno Setup软件生成.exe文件安装包。
2.1 Inno Setup下载
Inno Setup 历史版本下载:https://jrsoftware.org/isdlold.php
本文使用的是5.5版本:https://files.jrsoftware.org/is/5/
2.2 Inno Setup 配置打包程序
Inno Setup软件安装完成后,使用人机交互页面即可配置打包程序,细节需要修改的地方后续在更改代码即可。
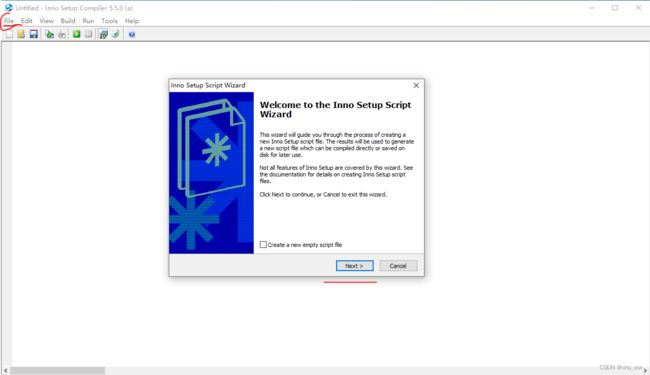
2.2.1 新建.iss程序文件
File -> New 即可。
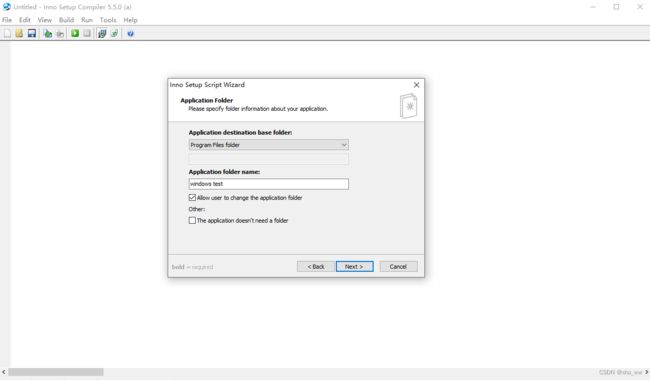
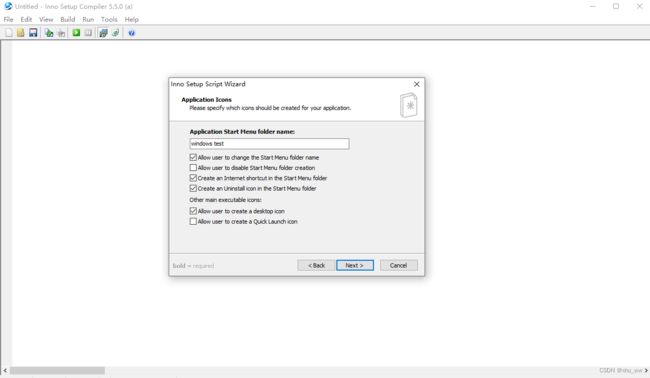
2.2.2 设置应用信息
按图中的文字提示填入App的信息即可。
2.2.3 设置打包的可执行文件、资源文件
Application main executable file: 此处指定flutter中打包出来的.exe文件路径 ~\build\windows\runner\Release\windows_test.exe
Other application files:需要点击Add folder,添加~\build\windows\runner\Release\*文件夹,确保其它资源文件能打入安装包中,不然会出现 找不到Flutter_windows.dll文件,无法运行程序。
后续进行下一步配置
2.2.4 配置安装协议、安装前介绍、安装后描述内容
可以看到,我创建了3个.txt文件,然后按需分别指定文件路径即可。
需要注意.txt文件的编码格式,创建文件时默认是
UTF-8,打包安装后会出现乱码,需要将文件格式指定为UTF-8-boom格式。
2.2.5 配置语言、应用图标、安装包文件输出路径等
Inno Setup默认不支持中文,需要进行额外的操作进行配置,本文就不重复了,百度一下很多相关博客。

配置安装包导出路径、以及应用图标:
在1.2中图示,默认情况下logo放置是在
~windows\runner\resources\文件下
2.2.6 生成打包代码
经过上述步骤后,在操作几下并保存文件即可看到生成的打包代码。

运行即可打包生成 .exe文件安装包,文件输出路径由步骤2.2.5中指定。
代码示例如下:
; Script generated by the Inno Setup Script Wizard.
; SEE THE DOCUMENTATION FOR DETAILS ON CREATING INNO SETUP SCRIPT FILES!

#define MyAppName "windows test"
#define MyAppVersion "1.0"
#define MyAppPublisher "My Company, Inc."
#define MyAppURL "http://www.example.com/"
#define MyAppExeName "windows_test.exe"

[Setup]
; NOTE: The value of AppId uniquely identifies this application.
; Do not use the same AppId value in installers for other applications.
; (To generate a new GUID, click Tools | Generate GUID inside the IDE.)
AppId={{791A7386-D35D-4A3A-8A55-6F0B84BF5C3C}
AppName={#MyAppName}
AppVersion={#MyAppVersion}
;AppVerName={#MyAppName} {#MyAppVersion}
AppPublisher={#MyAppPublisher}
AppPublisherURL={#MyAppURL}
AppSupportURL={#MyAppURL}
AppUpdatesURL={#MyAppURL}
DefaultDirName={pf}\{#MyAppName}
DefaultGroupName={#MyAppName}
LicenseFile=C:\Users\lvjun\Desktop\license.txt
InfoBeforeFile=C:\Users\lvjun\Desktop\before_installation.txt
InfoAfterFile=C:\Users\lvjun\Desktop\after_installation.txt
OutputDir=E:\
OutputBaseFilename=windows_test_安装包
SetupIconFile=E:\windows_test\windows\runner\resources\app_icon.ico
Compression=lzma
SolidCompression=yes

[Languages]
Name: "english"; MessagesFile: "compiler:Default.isl"

[Tasks]
Name: "desktopicon"; Description: "{cm:CreateDesktopIcon}"; GroupDescription: "{cm:AdditionalIcons}"; Flags: unchecked

[Files]
Source: "E:\windows_test\build\windows\runner\Release\windows_test.exe"; DestDir: "{app}"; Flags: ignoreversion
Source: "E:\windows_test\build\windows\runner\Release\*"; DestDir: "{app}"; Flags: ignoreversion recursesubdirs createallsubdirs
; NOTE: Don't use "Flags: ignoreversion" on any shared system files

[Icons]
Name: "{group}\{#MyAppName}"; Filename: "{app}\{#MyAppExeName}"
Name: "{group}\{cm:ProgramOnTheWeb,{#MyAppName}}"; Filename: "{#MyAppURL}"
Name: "{group}\{cm:UninstallProgram,{#MyAppName}}"; Filename: "{uninstallexe}"
Name: "{commondesktop}\{#MyAppName}"; Filename: "{app}\{#MyAppExeName}"; Tasks: desktopicon

[Run]
Filename: "{app}\{#MyAppExeName}"; Description: "{cm:LaunchProgram,{#StringChange(MyAppName, '&', '&&')}}"; Flags: nowait postinstall skipifsilent
2.3 安装包安装效果图
安装协议
安装完成后在菜单中运行
3 常见问题
3.1 安装包安装协议、说明文字中文出现乱码
在2.2.4 配置安装协议、安装前介绍、安装后描述内容已有介绍,此处在重复说明一下。
描述文件.txt的编码格式创建时默认是
UTF-8,打包安装后会出现乱码,需要将文件格式指定为UTF-8-boom格式。
3.2 找不到flutter_windows.dll, 无法继续运行代码
打包完成,安装完成后,启动应用出现报错。提示:找不到flutter_windows.dll, 无法继续运行代码
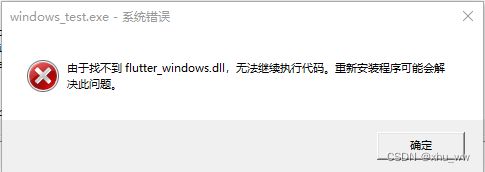
这是打包时未将资源文件以及其它.dll文件打包进去。在 2.2.3 设置打包的可执行文件、资源文件中也提过。
需要在
Other application files:下,点击Add folder,添加~\build\windows\runner\Release\*文件夹,确保其它资源文件能打入安装包中。
对应的代码为:
[Files]
Source: "E:\windows_test\build\windows\runner\Release\windows_test.exe"; DestDir: "{app}"; Flags: ignoreversion
Source: "E:\windows_test\build\windows\runner\Release\*"; DestDir: "{app}"; Flags: ignoreversion recursesubdirs createallsubdirs
; NOTE: Don't use "Flags: ignoreversion" on any shared system files
Flutter windows 文档
https://docs.flutter.dev/deployment/windows#updating-the-apps-version-number
https://docs.flutter.dev/development/platform-integration/windows/building
