Linux云计算架构师:熬夜给你们总结出来的超详细的SSHD服务搭建管理和防止暴力破解
文章目录
- 一、Linux服务前期环境准备、 搭建CentOS 7环境
-
-
- 清空关闭防火墙
- SElinux设置
- 配置IP
- 配置主机和IP映射关系
- 修改主机名
- 配置Yum源
-
- 1.配置本地Yum源:
- 2.配置网络yum源:
- 安装epel源
- SSHD服务安装-ssh命令使用方法
-
- SSHD服务
- 安装SSH服务
- 如何使用SSH来远程连接主机
- SSHD服务配置和管理
- SSHD服务防止暴力破解
-
- 配置安全的SSHD服务(方法一)
- 通过开源的防护软件来防护安全
- 实战通过升级SSH服务修复安全漏洞
-
一、Linux服务前期环境准备、 搭建CentOS 7环境
清空关闭防火墙
由于前期尚未学习“防火墙”为了不受到防火墙影响实验的顺利进行,因此清空并关闭防火墙。
[root@xuegod63 ~]# iptables -F
[root@xuegod63 ~]# systemctl stop firewalld
[root@xuegod63 ~]# systemctl disable firewalld
SElinux设置
[root@xuegod63 ~]# getenforce
Disabled
临时关闭(机器重启则会失效):
[root@xuegod63 ~]# setenforce 0
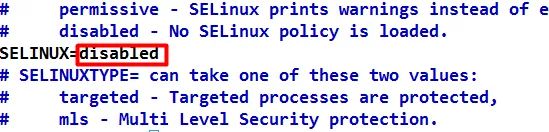
永久关闭SElinux:
[root@xuegod63 ~]# vim /etc/selinux/config
配置IP
[root@xuegod63 ~]# vim /etc/sysconfig/network-scripts/ifcfg-ens33
TYPE="Ethernet"
PROXY_METHOD="none"
BROWSER_ONLY="no"
BOOTPROTO="static"
DEFROUTE="yes"
IPV4_FAILURE_FATAL="no"
IPADDR=192.168.1.63
GATEWAY=192.168.1.1
NETMASK=255.255.255.0
DNS1=114.114.114.114
NAME="ens33"
UUID="5e02ab66-a084-404a-bb4c-50bf47bd1bd5"
DEVICE="ens33"
ONBOOT="yes"
注释:修改网卡配置文件,主要修改内容项
BOOTPROTO="static" 、
ONBOOT="yes" 、
IPADDR=192.168.1.63 、
GATEWAY=192.168.1.1 、
NETMASK=255.255.255.0 、
DNS1=114.114.114.114  以上6项。
重启服务:systemctl restart network
配置主机和IP映射关系
[root@xuegod63 ~]# vim /etc/hosts
127.0.0.1   localhostlocalhost.localdomain localhost4 localhost4.localdomain4
::1         localhost localhost.localdomain localhost6 localhost6.localdomain6
192.168.1.63    xuegod63.cn     xuegod63
192.168.1.64    xuegod64.cn     xuegod64
注释:修改 /etc/hosts配置文件,添加以下两项。
192.168.1.63    xuegod63.cn     xuegod63
192.168.1.64    xuegod64.cn     xuegod64
修改主机名
[root@xuegod63 ~]# vim /etc/hostname      #永久
xuegod63
[root@xuegod63 ~]# hostnamectl set-hostname “hostname”   #永久
[root@xuegod63 ~]# hostname xuegod63   #临时。
xuegod63
配置Yum源
1.配置本地Yum源:
[root@xuegod63 ~]# mount /dev/sr0  /mnt/
[root@xuegod63 ~]# echo "/dev/sr0 /mnt iso9660 defaults 0 0" >> /etc/fstab
#设置开机自动挂载光驱
[root@xuegod63 ~]# mkdir /root/yum
[root@xuegod63 ~]# mv /etc/yum.repos.d/* /root/yum/
[root@xuegod63 ~]# cat > /etc/yum.repos.d/centos7.repo <
> [centos7-source]
>name= centos7-source
>baseurl=file:///mnt
> enabled=1
>gpgcheck=0
> EOF
或:
[root@xuegod63 ~]# vim /etc/yum.repos.d/centos7.repo
[centos7-source]
name= centos7-source
baseurl=file:///mnt
enabled=1
gpgcheck=0
更多技术干货尽在公众号【学神来啦】!
2.配置网络yum源:
阿里云镜像源站点(http://mirrors.aliyun.com/)。
CentOS镜像参考:
http://mirrors.aliyun.com/help/centos
备份:
把CentOS-Base.repo文件重新命名为CentOS-Base.repo.backup 。
[root@xuegod63 ~]# mv /etc/yum.repos.d/CentOS-Base.repo{,.backup}
下载新的CentOS-Base.repo
到/etc/yum.repos.d/
安装wget工具:
[root@xuegod63 ~]# rpm -ivh /mnt/Packages/wget-1.14-15.el7.x86_64.rpm
下载yum源:
[root@xuegod63 ~]# wget -O /etc/yum.repos.d/CentOS-Base.repo \
http://mirrors.aliyun.com/repo/Centos-7.repo
生成yum缓存:
[root@xuegod63 ~]# yum makecache
安装epel源
[root@xuegod63 ~]# yum -y install epel-release
可以做个快照
SSHD服务安装-ssh命令使用方法
SSHD服务
什么是服务?
Linux中的服务是一类常驻在内存中的进程,这类进程启动后就在后台当中一直持续不断的运行,因为这类进程通常是负责一些系统提供的功能来服务用户的各项任务,所以这类进程被称为服务,比如crond、atd、syslog、Apache都是属于服务。
作用:SSHD服务使用SSH协议可以用来进行远程控制,或在计算机之间传送文件。
相比较之前用Telnet方式来传输文件要安全很多,因为Telnet使用明文传输,SSH是加密传输。
安装SSH服务
安装方法有两种:
通过yum安装(推荐使用):
[root@xuegod63 ~]# yum -y install openssh openssh-clients openssh-server
本地直接安装rpm包文件:
[root@xuegod63 ~]# rpm -ivh /mnt/Packages/openssh*.rpm
以上选择一种安装方式即可。
确认软件包是否已经安装:
[root@xuegod63 ~]# rpm -qa | grep openssh
#使用rpm -qa查看所有安装的程序包,并过虑openssh的程序包。
openssh-askpass-5.3p1-114.el6_7.x86_64
openssh-clients-5.3p1-114.el6_7.x86_64
openssh-5.3p1-114.el6_7.x86_64
openssh-server-5.3p1-114.el6_7.x86_64
查看软件安装生产的文件:
[root@xuegod63 ~]# rpm -ql openssh
/etc/ssh
/etc/ssh/moduli
/usr/bin/ssh-keygen
/usr/libexec/openssh
/usr/libexec/openssh/ssh-keysign
/usr/share/doc/openssh-5.3p1
OpenSSH配置文件:
OpenSSH常用配置文件有两个/etc/ssh/ssh_config和/etc/ssh/sshd_config。
ssh_config为客户端配置文件,设置与客户端相关的应用可通过此文件实现。
sshd_config为服务器端配置文件,设置与服务端相关的应用可通过此文件实现。
服务启动关闭脚本:
[root@xuegodssh]# systemctl restart|stop|start|status sshd
注释:Linux下一般用“|”表示或者(多选一),其中 restart|stop|start|status,在同一时间仅使用一个。
开机启动服务:
[root@xuegod63 ~]# chkconfig sshd on
注意:正在将请求转发到“systemctl enable sshd.service”。
查看sshd服务是否开机启动:
[root@xuegod63 ~]# systemctl is-enabled sshd
查看所有开机管理服务,过虑sshd服务:
[root@xuegod63 ssh]# systemctl list-unit-files | grep sshd
anaconda-sshd.service                         static
sshd-keygen.service                           static
sshd.service                                  enabled
sshd@.service                                 static
sshd.socket                                   disabled
如何使用SSH来远程连接主机
方法一:
ssh [远程主机用户名] @[远程服务器主机名或IP地址] -p port
[root@xuegod ssh]# ssh 192.168.1.64
以当前用户身份去登录
方法二:
ssh -l [远程主机用户名] [远程服务器主机名或IP 地址] -p port

[root@xuegod63 ~]# ssh -l cat 192.168.1.64
-l :-l选项,指定登录用户。
-p:-p选项,指定登录端口(当服务端的端口非默认时,需要使用-p指定端口进行登录)。
SCP命令:scp可以实现远程主机之间的文件复制,scp使用ssh协议。
命令格式:scp user@host1:file1 user@host2:file2
命令格式:scp file user@host1:/路径
常用选项:
-r:复制目录时使用。
-P:大写的P指定端口。
SSHD服务配置和管理
配置文件详解
注:在配置文件中参数前面有#号,表示是默认值,当然#号也表示注释。
/etc/ssh/sshd_config配置文件内容详解。
Port 22
设置SSHD监听端口号。
SSH 预设使用 22 这个port,也可以使用多个port,即重复使用 port 这个设定项!例如想要开放SSHD端口为 22和222,则多加一行内容为:Port 222 即可。然后重新启动SSHD这样就好了。建议大家修改 port number 为其它端口,防止别人暴力破解。
服务的配置文件修改之前最好copy一份。
例:修改SSHD服务默认监听的端口为222.
[root@xuegod63 ~]# vim /etc/ssh/sshd_config
改:
Port 22
为:
Port 222
[root@xuegodssh]# systemctl restart sshd
测试:
[root@xuegod74 ~]# netstat -tlunp | grep sshd
tcp        0      0 0.0.0.0:222                 0.0.0.0:*                   LISTEN      4139/sshd
tcp        0      0 :::222                      :::*                        LISTEN      4139/sshd
修改完端口默认端口后,登录方法:
[root@xuegod63 ~]# ssh -p 222 192.168.1.63
ListenAddress 0.0.0.0
设置SSHD服务器绑定的IP 地址,0.0.0.0 表示侦听所有地址
安全建议:如果主机不需要从公网ssh访问,可以把监听地址改为内网地址
这个值可以写成本地IP地址,也可以写成所有地址,即0.0.0.0 表示所有IP。
实战:安全调优的重点:
1.LoginGraceTime 2m
grace意思是系统给与多少秒来进行登录。当使用者连上 SSH server 之后,会出现输入密码的画面,在该画面中。在多久时间内没有成功连上 SSH server 就强迫断线!若无单位则默认时间为秒。
2.PermitRootLogin yes
是否允许 root 登入,默认是允许的,但是建议设定成 no,真实的生产环境服务器,是不允许root账号直接登陆的,仅允许普通用户登录,需要用到root用户再切换到root用户。
3.PasswordAuthentication yes
密码验证当然是需要的!所以这里写 yes(即允许密码和密钥验证),也可以设置为no(no只允许密钥验证不允许密码验证),在真实的生产服务器上,根据不同安全级别要求,有的是设置不需要密码登陆的,通过认证的秘钥来登陆。
4.PermitEmptyPasswords no
是否允许空密码的用户登录,默认为no,不允许空密码登录。
5.PrintLastLog yes
显示上次登入的信息!默认为 yes 。
例:
[root@xuegod ~]# ssh 192.168.1.63
#登录主机。改回22端口
Last login: Tue Nov 4 19:57:31 2014 from 192.168.1.107 #PrintLastLog yes项定义即是该回显上次登录的信息。
扩展:
6.给sshd服务添加一些警告信息。
[root@xuegod ~]# cat /etc/motd
[root@xuegod ~]# echo 'Warning ! From now on, all of your operation has been record!'> /etc/motd
测试:
[root@xuegod ~]# ssh 192.168.1.64
 #登录主机。

root@192.168.1.64's password:
Last login: Thu Jun 23 14:02:38 2016 from 192.168.1.1
Warning ! From now on, all of your operation has been record!
7.UseDNS yes
一般来说,为了要判断客户端来源是正常合法的,因此会使用 DNS 去反查客户端的主机名,但通常在内网互连时,一般设置为no,因此使联机速度会快些。
SSHD服务防止暴力破解
配置安全的SSHD服务(方法一)
密码足够的复杂:密码的长度要大于8位不大于20位。密码的复杂度是密码要尽可能有数字、大小写字母和特殊符号混合组成。
修改默认端口号。
禁止root登录:不允许root账号直接登陆到系统,添加普通账号,使用普通账号登录系统,授予root的权限,必要时再从普通用户切换到root用户。
不允许密码登陆,只能通过认证的密钥来登陆系统。
1.通过密钥认证实现SSHD认证。
实验环境:
服务端:xuegod63 IP:192.168.1.63
客户端:xuegod64 IP:192.168.2.64
客户端生成密钥对,然后把公钥传输到服务端
[root@xuegod64 ~]# ssh-keygen
Generating public/private rsa key pair.
#生成公共/私有rsa密钥对。
Enter file in which to save the key (/root/.ssh/id_rsa):
#输入保存密钥的文件(/root/.ssh/id\u rsa):

Enter passphrase (empty for no passphrase):
#输入密码短语(无密码短语为空):

Enter same passphrase again:
#再次输入相同的密码短语:

Your identification has been saved in /root/.ssh/id_rsa.
#您的标识已保存在/root/.ssh/id_rsa中。

Your public key has been saved in /root/.ssh/id_rsa.pub.
#您的公钥已保存在/root/.ssh/id_rsa.pub中。

The key fingerprint is:
#关键指纹是:

SHA256:toCXv2xpFWsS6ClyN1sAKPIyup7VEdaQLKJH/tD+EZk root@bogon
The key's randomart image is:
#钥匙的随机图像是:

+---[RSA 2048]----+
|   ....   |
|o.o..oo   |
|o=...+ =   |
|+ = o.E.. .  |
|.+ +.o++S. o  |
|. . *.B+o.+  |
| . + = =o=  |
|. o   o.+.  |
|.o     oo  |
+----[SHA256]-----+
[root@xuegod64 ~]# cd /root/.ssh/
[root@xuegod64 .ssh]# ls
id_rsa  id_rsa.pub  known_hosts
发布公钥到服务端。
使用ssh-copy-id 命令将客户端生成的公钥发布到远程服务器192.168.1.63 xuegod63。
[root@xuegod64 .ssh]# ssh-copy-id -i 192.168.1.63
The authenticity of host '192.168.1.63(192.168.1.63)' can't be established.
RSA key fingerprint is d9:17:d7:db:38:7c:e8:56:9c:4b:7e:00:7f:9e:1c:74.
Are you sure you want to continue connecting (yes/no)? yes  #输入yes
Warning: Permanently added '192.168.1.64' (RSA) to the list of known hosts.
root@192.168.1.63's password:   #输入192.168.1.63主机登录密码。
Now try logging into the machine, with "ssh '192.168.1.63'", and check in:
  .ssh/authorized_keys
to make sure we haven't added extra keys that you weren't expecting
#这个时候可以通过ssh 无密钥直接登陆主机
注意:如果服务器不是监听22端口,则需要指定端口传输密钥:
[root@xuegod64 .ssh]# ssh-copy-id -i ~/.ssh/id_rsa.pub -p 222 root@192.168.1.63
通过开源的防护软件来防护安全
优点:使用简单、灵活、功能强大
实战背景:
最近公网网站一直被别人暴力破解SSHD服务密码。虽然没有成功,但会导致系统负载很高,原因是在暴力破解的时候,系统会不断地认证用户,从而增加了系统资源额外开销,导致访问公司网站速度很慢。
然而fail2ban程序可以监视你的系统日志,然后匹配日志的错误信息(正则式匹配)执行相应的屏蔽动作(一般情况下是防火墙),而且可以发送e-mail通知系统管理员,很实用、很强大!
简单来说其功能就是防止暴力破解。工作的原理是通过分析一定时间内的相关服务日志,将满足动作的相关IP利用iptables加入到dorp列表一定时间。
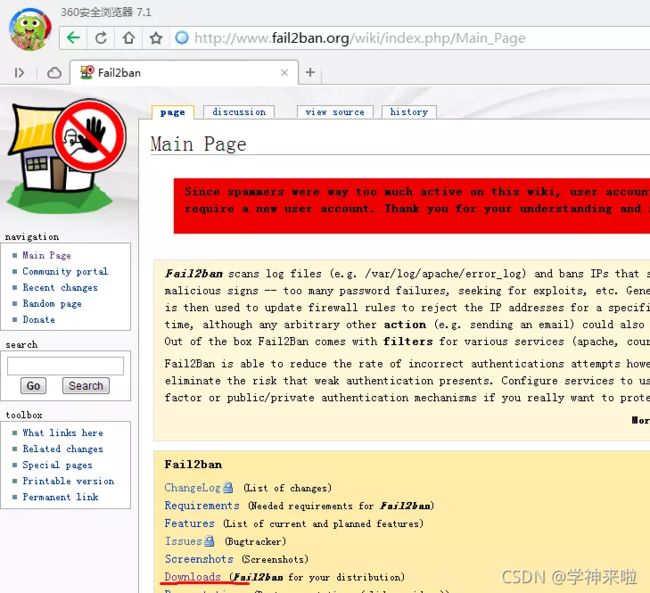
下载软件包
官方地址:http://www.fail2ban.org,
如图 所示
fail2ban程序下载地址:
http://www.fail2ban.org/wiki/index.php/Downloads
如图所示。
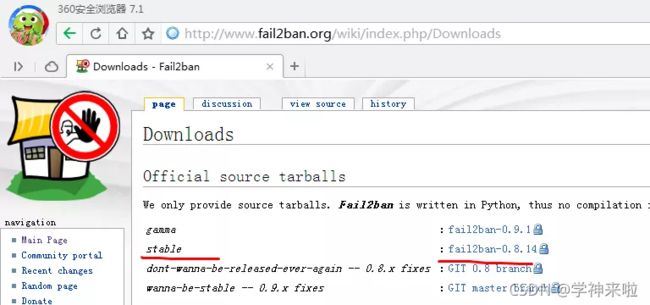
注意:以上展示fail2ban的源码包下载,以下实验使用yum安装。
需要安装python开发环境,并且版本要大于2.4。
[root@xuegod63 ~]# python -V
Python 2.7.5
使用yum安装fail2ban
[root@xuegod63 ~]# yum -y install epel-release
[root@xuegod63 ~]# yum -y install fail2ban
相关主要文件说明

/etc/fail2ban/jail.conf
应用实例
设置条件:SSH远程登录5分钟内3次密码验证失败,禁止用户IP访问主机1小时,1小时后该限制自动解除,用户可重新登录。
因为动作文件(action.d/iptables.conf)以及日志匹配条件文件(filter.d/sshd.conf )安装后是默认存在的。基本不用做任何修改。所有主要需要设置的就只有jail.conf文件。启用SSHD服务的日志分析,指定动作阀值即可。
实例文件:/etc/fail2ban/jail.conf及说明如下:
[root@xuegod63 ~]# vim /etc/fail2ban/jail.conf
279行
[sshd] #单个服务检查设置,
如设置bantime、findtime、maxretry和全局冲突,服务优先级大于全局设置。
port    = ssh
logpath = %(sshd_log)s
backend = %(sshd_backend)s
#加入如下内容
enabled  = true
#是否激活此项(true/false)修改成 true。
filter = sshd
#过滤规则filter的名字,对应filter.d目录下的sshd.conf。
action = iptables[name=SSH,
port=ssh, protocol=tcp]
#动作的相关参数,对应action.d/iptables.conf文件。
sendmail-whois[name=SSH, dest=you@example.com, sender=fail2ban@example.com, sendername="Fail2Ban"]
#触发报警的收件人。
logpath = /var/log/secure
#检测的系统的登陆日志文件。
这里要写sshd服务日志文件。
默认为logpath = /var/log/sshd.log
(在centos8当中需要删除默认的ssh区域logpath选项) 。
#5分钟内3次密码验证失败,禁止用户IP访问主机1小时。配置如下。
bantime = 3600    #禁止用户IP访问主机1小时。
findtime = 300    #在5分钟内内出现规定次数就开始工作。
maxretry = 3      #3次密码验证失败。
可直接复制以下内容
enabled  = true
filter = sshd
action = iptables[name=SSH, port=ssh, protocol=tcp]
sendmail-whois[name=SSH, dest=you@example.com, sender=fail2ban@example.com, sendername="Fail2Ban"]
logpath = /var/log/secure
bantime = 3600
findtime = 300
maxretry = 3
启动服务
[root@xuegod63 ~]# systemctl start fail2ban   #启动fail2ban服务。
[root@xuegod63 ~]# systemctl enable fail2ban  #设置开机自动启动。
或systemctl enable --now fai2ban
测试
测试:故意输入错误密码3次,再进行登录时,会拒绝登录。
root@192.168.1.63's password:
#故意输入错误密码。
Permission denied, please try again.
root@192.168.1.63's password:
#故意输入错误密码。
Permission denied, please try again.
root@192.168.1.63's password:
#故意输入错误密码。
Permission denied (publickey,gssapi-keyex,gssapi-with-mic,password).
[root@xuegod64 ~]# ssh 192.168.1.63
ssh: connect to host 192.168.1.63 port 22: Connection refused
[root@xuegod63 ~]# fail2ban-client status
#配置好之后我们检测下fail2ban是否工作。
Status
|- Number of jail: 1
`- Jail list: sshd #具体看某一项的状态也可以看,如果显示被ban的ip和数目就表示成功了,如果都是0,说明没有成功。
[root@xuegod63 ~]# fail2ban-client status sshd
Status for the jail: sshd
|- Filter
|  |- Currently failed: 0
|  |- Total failed: 0
|  `- Journal matches: _SYSTEMD_UNIT=sshd.service + _COMM=sshd
`- Actions
   |- Currently banned: 1
   |- Total banned: 1
   `- Banned IP list: 192.168.1.64
实战通过升级SSH服务修复安全漏洞
SSH服务用于远程连接服务器,但是如果ssh服务存在漏洞,黑客就可以通过ssh服务远程控制服务器。
例如:以下版本范围内都存在漏洞。
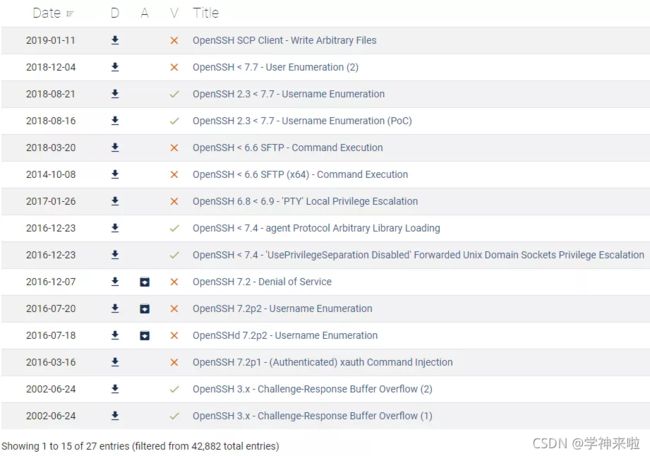
更新ssh版本修复漏洞
如果你的ssh版本过低可以通过yum直接升级sshd服务。如果可以使用yum升级尽量使用yum进行升级,因为yum升级维护起来很方便。
[root@xuegod63 ~]# yum update openssh -y
如果想安装到最新版本的openssh则需要使用源码安装。
配置备用连接方式telnet,以防止配置失败不能连接服务器。
[root@xuegod63 ~]# yum install xinetd telnet-server -y
检查配置文件,如果存在/etc/xinetd.d/telnet文件则需要修改配置使root用户可以通过telnet登陆,如果不存在该文件则无需配置。
[root@xuegod63 ~]# ll /etc/xinetd.d/telnet
ls: cannot access /etc/xinetd.d/telnet: No such file or directory
扩展:/etc/xinetd.d/telnet文件配置
改:
disable = no
为:
disable = yes
配置telnet登录的终端类型,添加pts终端,文件末尾添加即可。
[root@xuegod63 ~]# vim /etc/securetty
pts/0
pts/1
pts/2
pts/3
配置开机自启
[root@xuegod63 ~]# systemctl enable xinetd && systemctl start xinetd
[root@xuegod63 ~]# systemctl start telnet.socket
telnet连接服务器,xshell协议选择telnet。

输入用户名和密码
安装依赖库:
[root@xuegod63 ~]# yum -y install gcc gcc-c++ zlib zlib-devel openssl openssl-devel pam-devel libselinux-devel
下载源码包
[root@xuegod63 ~]# wget -c https://cdn.openbsd.org/pub/OpenBSD/OpenSSH/portable/openssh-8.3p1.tar.gz
-c 断点续传
备份现有ssh配置文件
[root@xuegod63 ~]# mkdir /opt/sshbak
[root@xuegod63 ~]# mv /etc/ssh/* /opt/sshbak/
创建新的安装目录
[root@xuegod63 ~]# mkdir /usr/local/sshd
解压源码包
[root@xuegod63 ~]# tar xf openssh-8.3p1.tar.gz -C /usr/local/src/
[root@xuegod63 ~]# cd /usr/local/src/openssh-8.3p1/
[root@xuegod63 openssh-8.3p1]# ./configure --with-md5-passwords --with-pam --with-selinux --with-privsep-path=/usr/local/sshd/ --sysconfdir=/etc/ssh

由于启用了PAM则需要安装一个配置文件,该文件在contrib目录下。
[root@xuegod63 openssh-8.3p1]# cp -a contrib/redhat/sshd.pam /etc/pam.d/sshd.pam
拷贝开机启动脚本
[root@xuegod63 openssh-8.3p1]# cp -a contrib/redhat/sshd.init /etc/init.d/sshd
[root@xuegod63 openssh-8.3p1]# make -j 4 && make install
[root@xuegod63 openssh-8.3p1]# vim /etc/ssh/sshd_config
改:

32 #PermitRootLogin prohibit-password

为:

32 PermitRootLogin yes

改:(去掉注释即可)

37 #PubkeyAuthentication yes

为:

37 PubkeyAuthentication yes
改:(去掉注释即可,此处是优化项如果使用DNS解析速度会很慢)
98 #UseDNS no

为:

98 UseDNS no
配置开机自启动
[root@xuegod63 openssh-8.3p1]# chkconfig --add sshd
[root@xuegod63 openssh-8.3p1]# systemctl enable sshd
删除原有的system开机启动项
[root@xuegod63 openssh-8.3p1]# mv /usr/lib/systemd/system/sshd.service /opt/sshbak/
开机自启
[root@xuegod63 openssh-8.3p1]# chkconfig sshd on
服务管理测试
[root@xuegod63 openssh-8.3p1]# /etc/init.d/sshd restart
[root@xuegod63 openssh-8.3p1]# ss -antup|grep 22
![]()
[root@xuegod63 openssh-8.3p1]# systemctl stop sshd
[root@xuegod63 openssh-8.3p1]# ss -antup|grep 22
![]()
[root@xuegod63 ~]# ssh -V
OpenSSH_8.3p1, OpenSSL 1.0.2k-fips  26 Jan 2017
禁用telnet服务
[root@xuegod63 openssh-8.3p1]# systemctl disable telnet.socket && systemctl stop telnet.socket
更多技术干货尽在公众号【学神来啦】!