- Linux系统启动流程以及基础命令下一些根目录的含义
Linux系统启动流程:1.开机自检,BIOS,在主板上的ROM芯片上存储2.加载MBR\UEFI3.GRUB2引导菜单4.加载内核5.启动init(初始化)0~6·0关机·1无网络的单用户模式(root)·2无网络的多用户模式·3有网络的多用户模式·4(无)保留模式·5GUI有网络多用户模式·6重启模式6.启动内核模块7.启动不同级别的脚本8.启动成功(sshd)Linux系统启动过程详解一、启
- 云原生技术与应用-Kubernetes服务发布基础
慕桉 ~
云原生kubernetes容器
目录一.service定义二.K8s服务发布的核心组件1.Pod:服务的基本运行单元2.Service:稳定访问Pod的抽象层3.Deployment:管理Pod的部署与更新三.service的工作原理四.service的负载均衡机制1.userspace模式2.iptables模式3.ipvs模式service的四种类型五.测试service的四种类型1.ClusterIP2.NodePort3
- 云原生安全工具:数字基础设施的免疫长城
花海如潮淹
云原生安全经验分享笔记
⚡运维团队的三重核灾难1.容器漏洞的连锁爆炸某金融平台因基础镜像包含未修复的Log4j漏洞,黑客横向穿透182个Pod,导致2.3亿用户数据泄露(CNCF2024安全报告)。更致命的是,53%的漏洞存在于第三方镜像(Sysdig研究),传统扫描器漏检率超35%。2.微服务边界的信任崩塌某电商因未限制服务账户权限,攻击者通过促销API入侵支付系统,45分钟盗取$4300万(FBI加密犯罪档案)。Ku
- 高阶知识库搭建实战五、(向量数据库Milvus安装)
伯牙碎琴
大模型数据库milvus大模型AI
以下是关于在Windows环境下直接搭建Milvus向量数据库的教程:本教程分两部分,第一部分是基于docker安装,在Windows环境下直接安装Milvus向量数据库,目前官方推荐的方式是通过Docker进行部署,因为Milvus的运行环境依赖于Linux系统。如果你希望在Windows上直接运行Milvus,可以考虑使用MilvusLite版本,这是一个轻量级的Python库,适用于快速原型
- 以管理为桨 划向网络安全“合规彼岸“——等保2.0时代企业安全管理的实践与思考
两圆相切
网络规划设计师安全web安全网络
今天,我想先问大家一个问题:如果把企业的网络安全比作一艘航行在数字海洋中的巨轮,技术防护是"船体装甲",那么什么才是"掌舵的手"?答案是——安全管理。 2023年,某头部互联网企业因未严格执行"账号分级管理制度",一名普通运维人员的误操作引发了全网流量暴增,核心业务中断3小时,直接经济损失超2000万元。更令人痛心的是,该企业早已通过等保2.0测评,但测评时"制度健全"的结论与实际执行的"管
- Linux 压缩、解压文件的 4 种方式。tar、gzip、gunzip、zip、unzip、7z命令使用方法
寒水馨
Linux问题解决方案linux服务器运维压缩解压
Linux压缩、解压文件的4种方式。tar、gzip、gunzip、zip、unzip、7z命令使用方法文章目录Linux压缩、解压文件的4种方式。tar、gzip、gunzip、zip、unzip、7z命令使用方法1.tar1.1.压缩:1.2.解压:1.3.tar命令各参数含义2.gzip、gunzip2.1.压缩:2.2.解压:2.3.gzip、gunzip命令各参数含义2.3.1.gzip
- 全球软件技术峰会 2025:聚焦大模型开发、智能运维与架构创新,共赴技术实战盛宴
向日葵也有悲伤
运维架构推荐算法数据结构大数据数据库架构
全球软件技术峰会2025:聚焦大模型开发、智能运维与架构创新,共赴技术实战盛宴在软件定义未来的时代,人工智能与数字化技术正以颠覆性力量重塑全球产业格局。2025年8月15-16日,以"全球专家、卓越智慧"为宗旨的全球软件技术峰会将盛大启幕,特邀全球近50位来自微软、谷歌、亚马逊、字节跳动等企业的技术领袖及一线实战专家,围绕大模型智能应用开发、AI与ML智能运维、软件开发智能化、架构设计与演进四大核
- 微软CEO Satya Nadella提出AI重构法则:从范式跃迁到社会盈余
TGITCIC
AI-大模型的落地之道AI大模型大模型AIAIAgentAI智能体AI落地大模型落地
1.范式跃迁:AI作为第四次技术革命的核心驱动力1.1技术代际的复合效应从客户端到互联网、移动互联网再到云计算,技术平台的演进始终遵循“平台变革→产品跃迁→反哺平台”的螺旋上升逻辑。AI的特殊性在于其叠加了前三代技术的基础设施能力:云计算:提供百亿级参数模型的分布式训练能力互联网:构建全球数据流动与反馈闭环移动终端:扩展AI服务的触达边界技术范式核心特征代表产品对AI的支撑作用客户端本地化计算Wi
- Three.js入门:创建第一个3D场景
薯条说影
Three.js3D场景创建跨平台设置安全异常处理HTML骨架搭建
背景简介Three.js是一个轻量级的3D图形库,它让Web开发者能够在浏览器中创建和显示3D图形。本章介绍如何设置环境以开始使用Three.js,包括不同操作系统下的安装步骤、安全异常处理以及基本的HTML骨架创建。安装与设置操作系统兼容性:Three.js的使用不仅限于Windows系统。对于其他操作系统,如Linux和MacOS,需要将可执行文件复制到目标目录,并通过命令行启动。无论是哪种操
- 2 MySQL配置文件详解
笑Skr人啊
Windows图片.png复制配置文件[root@rootmysql]#cp/usr/share/mysql/my-huge.cnf/etc/my.cnfcp:是否覆盖"/etc/my.cnf"?y[client]port=3306#客户端端口号socket=/data/3306/mysql.sock#socket文件是linux/unix系统特有的,用户在该环境下的客户端连接可以不通过tcp/i
- 从0到1构建数据库安全审计系统:设计、实现与实战
小张在编程
数据库
引言2024年某金融机构发生数据泄露事件,内部审计日志显示,某运维人员在非工作时间执行了SELECT*FROMcustomer_info的全表查询,但当时未触发任何告警——这并非技术漏洞,而是数据库安全审计系统的“失效”。随着《数据安全法》《个人信息保护法》的落地,数据库作为企业核心资产,其操作行为的可追溯、风险的可预警已成为合规刚需。本文将从需求分析到代码实现,带你拆解一个企业级数据库安全审计系
- Linux命令行入门指南:基础操作与系统结构详解
运维帮手大橙子
linux运维服务器
什么是Linux指令?指在Linux终端中输入的内容就称为指令,用于与操作系统进行交互。文件:一般都是一个独立的东西,可以通过一些特定的工具进行打开,并且不能再包含除文字以外的东西,包括文本、图片、二进制可执行程序等,一切皆文件指的不仅是普通文件,也包括设备、进程、套接字等。文件夹:可以在其中包含其他文件的东西linux一切皆文件,/dev/sda是磁盘设备,/proc/cpuinfo是一个文件,
- python docker
阿狸的家
SDNdocker
我们的开发人员和布署人员经常因环境问题,而使得安装过程困难重重,相比于虚拟机较少硬件资源的虚拟化,同时不需要加载虚拟机操作系统的耗时,因为docker共享宿主机的操作系统Centos和Ubunta共用内核kernel即bootfs相同,但是加载内核的rootfs不同,即文件的结构目录不同docker三要素docker可以看作为一个小型的linux系统,部署时秒级启动镜像:模板(应用程序代码),一个
- 电科金仓AI数据库一体机发布:30%性能提升+自然语言运维,重塑数据底座!
Loving_enjoy
计算机学科论文创新点人工智能深度学习迁移学习经验分享
>百万级并发处理与聊天式数据库运维,正在中国企业机房掀起静默革命。“替换数据库是一件非常困难的事。”电科金仓总裁杜胜在7月15日北京发布会现场坦言。过去20多年里,国外数据库建立的标准让应用软件与数据库深度耦合,迁移复杂度高、改造成本大、停机风险难控。随着他身后大屏幕亮起**“数据库平替用金仓”**的全新口号,电科金仓正式向这一行业痛点宣战。这场名为“融合进化智领未来”的发布会,最耀眼的明星是**
- 云原生周刊:K8s 中的后量子密码学
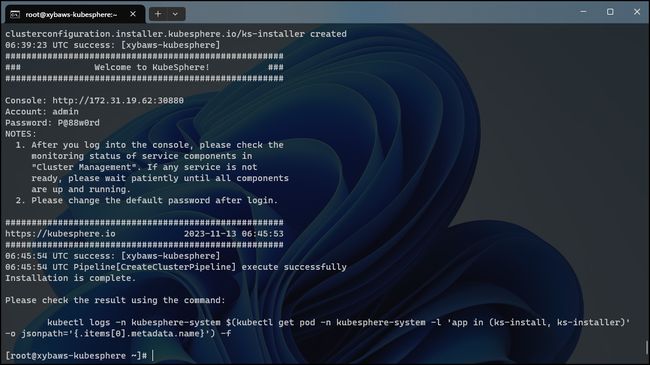
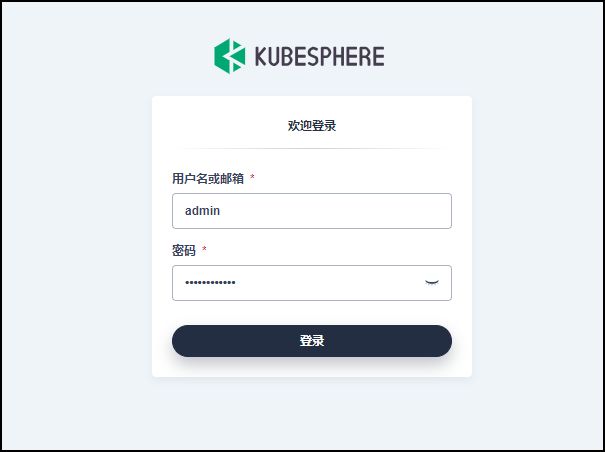
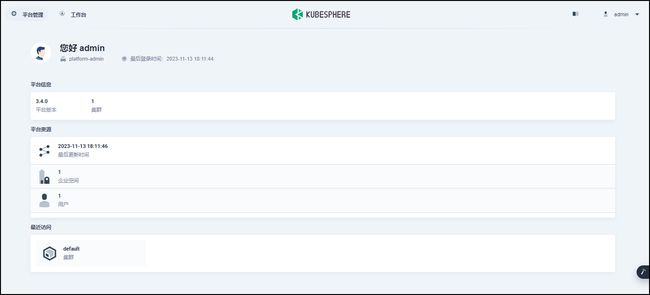
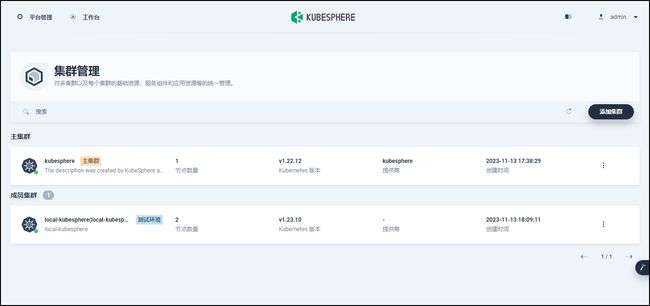
KubeSphere 云原生
云原生kubernetes密码学
开源项目推荐KanisterKanister是一个由CNCF托管的开源框架,最初由VeeamKasten团队创建,旨在简化Kubernetes上的应用程序级别数据操作管理。它通过定义Blueprint、ActionSet和Profile等CRD(自定义资源)及其相关组件,为专家提供一种模板化的方式,将复杂的数据库或分布式系统备份/恢复逻辑封装在可重用、可共享的蓝图中。Kanister支持异步或同步
- 大数据集群运维常见的一些问题以及处理方式
态);若为YARN节点,重启NodeManager后手动将其加入集群。若为节点整体宕机:排查电源和网络,重启节点后,依次启动HDFS、YARN等服务进程,确认数据块完整性(避免因节点宕机导致副本不足)。2.网络问题现象:节点间通信超时(如HDFS心跳超时、YARN任务调度延迟)、数据传输卡顿。可能原因:交换机故障、网线松动、网络带宽过载、防火墙规则拦截。处理方式:用ping、traceroute检
- Kubernetes面试题分类整理
jarenyVO
面试题K8skubernetes容器云原生
Kubernetes面试题分类整理文章目录Kubernetes面试题分类整理一、基础概念类1.什么是Kubernetes?它解决了什么问题?2.Pod是什么?为什么需要Pod而不是直接使用容器?二、核心组件类1.Kubernetes主节点(Master)有哪些核心组件?各自的作用是什么?2.kubelet和kube-proxy有什么区别?三、网络类1.Kubernetes网络模型的基本原则是什么?
- 学习人工智能开发的详细指南
Ws_
学习人工智能python
一、引言人工智能(AI)开发是一个充满挑战与机遇的领域,它融合了数学、计算机科学、统计学、认知科学等多个学科的知识。随着大数据、云计算和深度学习技术的快速发展,AI已经成为推动社会进步和产业升级的关键力量。本文将为初学者提供一份详细的学习指南,帮助大家逐步掌握AI开发的核心技能。二、基础知识准备数学基础:线性代数:理解向量、矩阵、线性变换等基本概念,掌握矩阵运算和特征值分解等技巧。概率论与统计学:
- Linux机器上Selenium+Python3+Chrome使用driver.get()只能获取到标签而没有内容的解决方法
代码:#!/usr/bin/python3#coding=utf8fromseleniumimportwebdriverfromselenium.webdriver.chrome.optionsimportOptionschrome_options=Options()chrome_options.add_argument('--headless')chrome_options.add_argume
- 自建K8s集群无法通过公网访问解决方案
大A崛起
kubernetes容器云原生
问题原因通过ckube搭建k8s集群时,由于没有指定公网IP,导致签发的apiserver.cert默认可提供给对外访问的是内网IP,不包含宿主机的公网IP,所以直接通过admin.conf中配置宿主机的公网IP去访问kubernetes是不可能的。解决方案手动通过kubeadm重新签发apiserver.cert,并在签发时指定宿主机的公网IP,使签发的apiserver.cert可以将宿主机的
- Mac安装Homebrew(国内源)步骤指南
莲华君
MacbookHomebrew
一、准备工作安装XcodeCommandLineTools(仅限Mac用户)在终端执行以下命令,按提示完成安装:xcode-select--install二、一键安装Homebrew(推荐)使用国内开发者维护的Gitee镜像脚本,自动配置国内源:执行安装脚本复制以下命令到终端运行(支持Mac和Linux):/bin/zsh-c"$(curl-fsSLhttps://gitee.com/cunkai
- 大学专业科普 | 人工智能、物联网和云计算技术
鸭鸭鸭进京赶烤
人工智能物联网云计算5G信号处理信息与通信网络
一、专业概述人工智能专业是一门融合计算机科学、数学、信息学等多学科知识的交叉学科。它旨在培养学生掌握人工智能领域的基本理论、方法和技能,以应对人工智能在各个领域的应用需求和发展挑战。二、主要课程基础课程:包括高等数学、线性代数、概率论与数理统计、离散数学等数学基础课程,为人工智能算法提供理论支撑;以及数据结构、算法设计与分析、计算机组成原理、操作系统、计算机网络等计算机科学基础课程,帮助学生理解人
- Reids
子柒s
redis数据库
标题目录Redis概述Redis数据库特点Redis应用场景Redis安装RockyLinux操作系统Windows操作系统Mac操作系统Redis服务启动失败解决方案配置文件详解常见数据类型全局命令String类型字符串数值应用场景列表List基本命令应用场景Hash散列特性基本命令应用场景Set类型基本命令应用场景SortedSet类型有序集合示例基本命令应用场景数据持久化RDB数据持久化SA
- 300个网络安全软件和在线工具(归类版)(非常详细),零基础入门到精通,看这一篇就够了_安恒云沙箱
网络安全k叔
web安全安全服务器数据库学习
系统下载1、KALI安装版https://pan.quark.cn/s/483c664db4fb2、KALI免安装版https://pan.quark.cn/s/23d4540a800b3、下载所有Kali系统https://pan.quark.cn/s/7d8b9982012f4、KALI软件源https://pan.quark.cn/s/33781a6f346d5、所有Linux系统https
- MySql 运维性能优化
内存相关配置innodb_buffer_pool_size:这是InnoDB存储引擎最重要的参数,用于缓存数据和索引。建议设置为服务器可用内存的50%-70%(对于专用数据库服务器)。innodb_buffer_pool_size=8G#根据服务器内存调整innodb_log_buffer_size:用于缓存InnoDB日志。对于写入频繁的系统,可适当调大(默认16M):innodb_log_bu
- 【python】向AWS Dynamodb中插入数据
一、背景AWSDynamodb数据库在架构中起到的作用是配置数据库,s3上buckect_a-->bucket_b-->bucket_c对应着层与层之间的关系,总所周知,Dynamobd是非关系型数据库,数据插入的格式是键值对形式的二、代码importboto3importjsonimportpandasaspdAWS_ACCESS_KEY_ID=''AWS_SECRET_ACCESS_KEY='
- 在Python中对嵌套对象(DynamoDB和表)使用模拟
潮易
python开发语言
在Python中,我们可以使用boto3库来模拟AWSDynamoDB的行为。以下是一个简单的例子,说明如何使用boto3来模拟DynamoDB的表,然后插入和查询数据:首先,你需要安装boto3库。你可以使用pip来安装:```bashpipinstallboto3```然后,你可以创建一个模拟器,并添加一些模拟的数据:```pythonimportboto3frombotocore.stubi
- MySQL(150)如何进行数据库自动化运维?
辞暮尔尔-烟火年年
MySQL数据库运维mysql
数据库自动化运维(DBAAutomation)是确保数据库高效、安全运行的关键步骤。自动化运维可以涵盖备份、恢复、监控、性能优化、数据迁移等多个方面。以下是一个详细的指南,展示如何使用Java进行数据库自动化运维,包括代码示例。一、环境准备确保安装有Java开发环境(JDK)、Maven(或Gradle)以及一个数据库(例如MySQL)。我们将使用JDBC来进行数据库操作,以及QuartzSche
- 转行网络安全需要学什么?(非常详细)零基础入门到精通,收藏这一篇就够了
网络安全苏柒
web安全计算机网络网络安全运维转业程序员编程
什么是网络安全?网络安全是指保护网络系统的硬件、软件及其系统中的数据,破坏、更改、泄露,使系统连续可靠正常地运行,网络服务不会中断。未来,我国将着重发展数字经济,发展云计算、大数据、物联网、工业互联网、区块链和人工智能等产业,这些产业全部都基于网络互联。网络的安全就是以上这些产业能够良性发展的基础,也是建设制造强国和网络强国的基础保障。什么是网络安全工程师?网络安全工程师是负责保护计算机网络系统,
- 转行网络安全需要学什么?(非常详细)从零基础到精通,收藏这篇就够了!
~小羊没烦恼~
黑客技术黑客网络安全web安全安全学习运维网络
什么是网络安全?网络安全是指保护网络系统的硬件、软件及其系统中的数据,破坏、更改、泄露,使系统连续可靠正常地运行,网络服务不会中断。未来,我国将着重发展数字经济,发展云计算、大数据、物联网、工业互联网、区块链和人工智能等产业,这些产业全部都基于网络互联。网络的安全就是以上这些产业能够良性发展的基础,也是建设制造强国和网络强国的基础保障。什么是网络安全工程师?网络安全工程师是负责保护计算机网络系统,
- 对股票分析时要注意哪些主要因素?
会飞的奇葩猪
股票 分析 云掌股吧
众所周知,对散户投资者来说,股票技术分析是应战股市的核心武器,想学好股票的技术分析一定要知道哪些是重点学习的,其实非常简单,我们只要记住三个要素:成交量、价格趋势、振荡指标。
一、成交量
大盘的成交量状态。成交量大说明市场的获利机会较多,成交量小说明市场的获利机会较少。当沪市的成交量超过150亿时是强市市场状态,运用技术找综合买点较准;
- 【Scala十八】视图界定与上下文界定
bit1129
scala
Context Bound,上下文界定,是Scala为隐式参数引入的一种语法糖,使得隐式转换的编码更加简洁。
隐式参数
首先引入一个泛型函数max,用于取a和b的最大值
def max[T](a: T, b: T) = {
if (a > b) a else b
}
因为T是未知类型,只有运行时才会代入真正的类型,因此调用a >
- C语言的分支——Object-C程序设计阅读有感
darkblue086
applec框架cocoa
自从1972年贝尔实验室Dennis Ritchie开发了C语言,C语言已经有了很多版本和实现,从Borland到microsoft还是GNU、Apple都提供了不同时代的多种选择,我们知道C语言是基于Thompson开发的B语言的,Object-C是以SmallTalk-80为基础的。和C++不同的是,Object C并不是C的超集,因为有很多特性与C是不同的。
Object-C程序设计这本书
- 去除浏览器对表单值的记忆
周凡杨
html记忆autocompleteform浏览
&n
- java的树形通讯录
g21121
java
最近用到企业通讯录,虽然以前也开发过,但是用的是jsf,拼成的树形,及其笨重和难维护。后来就想到直接生成json格式字符串,页面上也好展现。
// 首先取出每个部门的联系人
for (int i = 0; i < depList.size(); i++) {
List<Contacts> list = getContactList(depList.get(i
- Nginx安装部署
510888780
nginxlinux
Nginx ("engine x") 是一个高性能的 HTTP 和 反向代理 服务器,也是一个 IMAP/POP3/SMTP 代理服务器。 Nginx 是由 Igor Sysoev 为俄罗斯访问量第二的 Rambler.ru 站点开发的,第一个公开版本0.1.0发布于2004年10月4日。其将源代码以类BSD许可证的形式发布,因它的稳定性、丰富的功能集、示例配置文件和低系统资源
- java servelet异步处理请求
墙头上一根草
java异步返回servlet
servlet3.0以后支持异步处理请求,具体是使用AsyncContext ,包装httpservletRequest以及httpservletResponse具有异步的功能,
final AsyncContext ac = request.startAsync(request, response);
ac.s
- 我的spring学习笔记8-Spring中Bean的实例化
aijuans
Spring 3
在Spring中要实例化一个Bean有几种方法:
1、最常用的(普通方法)
<bean id="myBean" class="www.6e6.org.MyBean" />
使用这样方法,按Spring就会使用Bean的默认构造方法,也就是把没有参数的构造方法来建立Bean实例。
(有构造方法的下个文细说)
2、还
- 为Mysql创建最优的索引
annan211
mysql索引
索引对于良好的性能非常关键,尤其是当数据规模越来越大的时候,索引的对性能的影响越发重要。
索引经常会被误解甚至忽略,而且经常被糟糕的设计。
索引优化应该是对查询性能优化最有效的手段了,索引能够轻易将查询性能提高几个数量级,最优的索引会比
较好的索引性能要好2个数量级。
1 索引的类型
(1) B-Tree
不出意外,这里提到的索引都是指 B-
- 日期函数
百合不是茶
oraclesql日期函数查询
ORACLE日期时间函数大全
TO_DATE格式(以时间:2007-11-02 13:45:25为例)
Year:
yy two digits 两位年 显示值:07
yyy three digits 三位年 显示值:007
- 线程优先级
bijian1013
javathread多线程java多线程
多线程运行时需要定义线程运行的先后顺序。
线程优先级是用数字表示,数字越大线程优先级越高,取值在1到10,默认优先级为5。
实例:
package com.bijian.study;
/**
* 因为在代码段当中把线程B的优先级设置高于线程A,所以运行结果先执行线程B的run()方法后再执行线程A的run()方法
* 但在实际中,JAVA的优先级不准,强烈不建议用此方法来控制执
- 适配器模式和代理模式的区别
bijian1013
java设计模式
一.简介 适配器模式:适配器模式(英语:adapter pattern)有时候也称包装样式或者包装。将一个类的接口转接成用户所期待的。一个适配使得因接口不兼容而不能在一起工作的类工作在一起,做法是将类别自己的接口包裹在一个已存在的类中。 &nbs
- 【持久化框架MyBatis3三】MyBatis3 SQL映射配置文件
bit1129
Mybatis3
SQL映射配置文件一方面类似于Hibernate的映射配置文件,通过定义实体与关系表的列之间的对应关系。另一方面使用<select>,<insert>,<delete>,<update>元素定义增删改查的SQL语句,
这些元素包含三方面内容
1. 要执行的SQL语句
2. SQL语句的入参,比如查询条件
3. SQL语句的返回结果
- oracle大数据表复制备份个人经验
bitcarter
oracle大表备份大表数据复制
前提:
数据库仓库A(就拿oracle11g为例)中有两个用户user1和user2,现在有user1中有表ldm_table1,且表ldm_table1有数据5千万以上,ldm_table1中的数据是从其他库B(数据源)中抽取过来的,前期业务理解不够或者需求有变,数据有变动需要重新从B中抽取数据到A库表ldm_table1中。
- HTTP加速器varnish安装小记
ronin47
http varnish 加速
上午共享的那个varnish安装手册,个人看了下,有点不知所云,好吧~看来还是先安装玩玩!
苦逼公司服务器没法连外网,不能用什么wget或yum命令直接下载安装,每每看到别人博客贴出的在线安装代码时,总有一股羡慕嫉妒“恨”冒了出来。。。好吧,既然没法上外网,那只能麻烦点通过下载源码来编译安装了!
Varnish 3.0.4下载地址: http://repo.varnish-cache.org/
- java-73-输入一个字符串,输出该字符串中对称的子字符串的最大长度
bylijinnan
java
public class LongestSymmtricalLength {
/*
* Q75题目:输入一个字符串,输出该字符串中对称的子字符串的最大长度。
* 比如输入字符串“google”,由于该字符串里最长的对称子字符串是“goog”,因此输出4。
*/
public static void main(String[] args) {
Str
- 学习编程的一点感想
Cb123456
编程感想Gis
写点感想,总结一些,也顺便激励一些自己.现在就是复习阶段,也做做项目.
本专业是GIS专业,当初觉得本专业太水,靠这个会活不下去的,所以就报了培训班。学习的时候,进入状态很慢,而且当初进去的时候,已经上到Java高级阶段了,所以.....,呵呵,之后有点感觉了,不过,还是不好好写代码,还眼高手低的,有
- [能源与安全]美国与中国
comsci
能源
现在有一个局面:地球上的石油只剩下N桶,这些油只够让中国和美国这两个国家中的一个顺利过渡到宇宙时代,但是如果这两个国家为争夺这些石油而发生战争,其结果是两个国家都无法平稳过渡到宇宙时代。。。。而且在战争中,剩下的石油也会被快速消耗在战争中,结果是两败俱伤。。。
在这个大
- SEMI-JOIN执行计划突然变成HASH JOIN了 的原因分析
cwqcwqmax9
oracle
甲说:
A B两个表总数据量都很大,在百万以上。
idx1 idx2字段表示是索引字段
A B 两表上都有
col1字段表示普通字段
select xxx from A
where A.idx1 between mmm and nnn
and exists (select 1 from B where B.idx2 =
- SpringMVC-ajax返回值乱码解决方案
dashuaifu
AjaxspringMVCresponse中文乱码
SpringMVC-ajax返回值乱码解决方案
一:(自己总结,测试过可行)
ajax返回如果含有中文汉字,则使用:(如下例:)
@RequestMapping(value="/xxx.do") public @ResponseBody void getPunishReasonB
- Linux系统中查看日志的常用命令
dcj3sjt126com
OS
因为在日常的工作中,出问题的时候查看日志是每个管理员的习惯,作为初学者,为了以后的需要,我今天将下面这些查看命令共享给各位
cat
tail -f
日 志 文 件 说 明
/var/log/message 系统启动后的信息和错误日志,是Red Hat Linux中最常用的日志之一
/var/log/secure 与安全相关的日志信息
/var/log/maillog 与邮件相关的日志信
- [应用结构]应用
dcj3sjt126com
PHPyii2
应用主体
应用主体是管理 Yii 应用系统整体结构和生命周期的对象。 每个Yii应用系统只能包含一个应用主体,应用主体在 入口脚本中创建并能通过表达式 \Yii::$app 全局范围内访问。
补充: 当我们说"一个应用",它可能是一个应用主体对象,也可能是一个应用系统,是根据上下文来决定[译:中文为避免歧义,Application翻译为应
- assertThat用法
eksliang
JUnitassertThat
junit4.0 assertThat用法
一般匹配符1、assertThat( testedNumber, allOf( greaterThan(8), lessThan(16) ) );
注释: allOf匹配符表明如果接下来的所有条件必须都成立测试才通过,相当于“与”(&&)
2、assertThat( testedNumber, anyOf( g
- android点滴2
gundumw100
应用服务器android网络应用OSHTC
如何让Drawable绕着中心旋转?
Animation a = new RotateAnimation(0.0f, 360.0f,
Animation.RELATIVE_TO_SELF, 0.5f, Animation.RELATIVE_TO_SELF,0.5f);
a.setRepeatCount(-1);
a.setDuration(1000);
如何控制Andro
- 超简洁的CSS下拉菜单
ini
htmlWeb工作html5css
效果体验:http://hovertree.com/texiao/css/3.htmHTML文件:
<!DOCTYPE html>
<html xmlns="http://www.w3.org/1999/xhtml">
<head>
<title>简洁的HTML+CSS下拉菜单-HoverTree</title>
- kafka consumer防止数据丢失
kane_xie
kafkaoffset commit
kafka最初是被LinkedIn设计用来处理log的分布式消息系统,因此它的着眼点不在数据的安全性(log偶尔丢几条无所谓),换句话说kafka并不能完全保证数据不丢失。
尽管kafka官网声称能够保证at-least-once,但如果consumer进程数小于partition_num,这个结论不一定成立。
考虑这样一个case,partiton_num=2
- @Repository、@Service、@Controller 和 @Component
mhtbbx
DAOspringbeanprototype
@Repository、@Service、@Controller 和 @Component 将类标识为Bean
Spring 自 2.0 版本开始,陆续引入了一些注解用于简化 Spring 的开发。@Repository注解便属于最先引入的一批,它用于将数据访问层 (DAO 层 ) 的类标识为 Spring Bean。具体只需将该注解标注在 DAO类上即可。同时,为了让 Spring 能够扫描类
- java 多线程高并发读写控制 误区
qifeifei
java thread
先看一下下面的错误代码,对写加了synchronized控制,保证了写的安全,但是问题在哪里呢?
public class testTh7 {
private String data;
public String read(){
System.out.println(Thread.currentThread().getName() + "read data "
- mongodb replica set(副本集)设置步骤
tcrct
javamongodb
网上已经有一大堆的设置步骤的了,根据我遇到的问题,整理一下,如下:
首先先去下载一个mongodb最新版,目前最新版应该是2.6
cd /usr/local/bin
wget http://fastdl.mongodb.org/linux/mongodb-linux-x86_64-2.6.0.tgz
tar -zxvf mongodb-linux-x86_64-2.6.0.t
- rust学习笔记
wudixiaotie
学习笔记
1.rust里绑定变量是let,默认绑定了的变量是不可更改的,所以如果想让变量可变就要加上mut。
let x = 1; let mut y = 2;
2.match 相当于erlang中的case,但是case的每一项后都是分号,但是rust的match却是逗号。
3.match 的每一项最后都要加逗号,但是最后一项不加也不会报错,所有结尾加逗号的用法都是类似。
4.每个语句结尾都要加分