3D模型纹理集合并【Python|C#】
使用 Substance Painter 时,将模型的各个部分分成不同的纹理集非常有用。 这可以帮助遮罩,或者只是保持层栈干净。 不幸的是,Painter 无法将多个纹理集中的所有贴图导出为单个图集,即使在创建单独对象的 UV 时考虑到了这一点。 显然,在游戏设计领域,最好将加载到内存中的大纹理数量保持在最低限度,因此,如果可以的话,我们当然不应该为游戏中的单个对象使用五个纹理集。 公平地说,首先可能有一百万种方法可以防止这个问题。 我怀疑,通过一些巧妙的 ID 屏蔽,你可以相当轻松地仅使用一组纹理来对整个模型进行纹理处理。 但事后解决这个问题应该不会那么烦人。
NSDT在线工具推荐: Three.js AI纹理开发包 - YOLO合成数据生成器 - GLTF/GLB在线编辑 - 3D模型格式在线转换 - 可编程3D场景编辑器
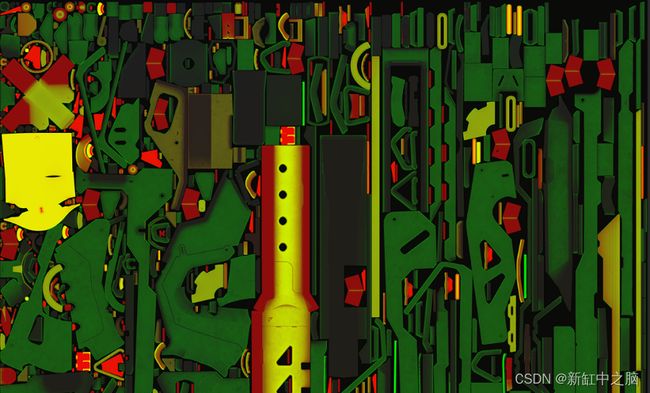
组合这些纹理是一个相对简单的过程:你只需将 UV 岛与任何背景颜色物质分开,然后将它们叠加在一起。 分离图像的哪些部分被 UV 岛覆盖可能听起来很困难,但不用担心,我们实际上不需要从模型中获取 UV。 我们只需要获取与 Substance 用于该贴图的背景填充颜色不同的所有像素,然后从给定纹理组(即所有法线贴图)中的所有贴图复制所有这些像素并将它们粘贴到一个贴图中 ,即最终纹理。 这是一个简单的过程,但手动完成仍然相当乏味,特别是当你需要频繁迭代纹理时。
所以我写了一个 python 脚本来帮我做这件事。 但这(非常)慢,所以我还编写了另一个更快的 C# 脚本。 这不仅是因为 C# 一般来说是一种更快的语言,而且还因为我对它进行了多线程处理,因此它可以立即组合我需要的所有纹理组。
我已经提供了我的代码,欢迎您使用,但请注意,我在 Substance Painter 中使用 Unity HDRP 工作流程; 如果你希望它能够在任何其他用例中正常工作,将需要进行一些更改。
using System.IO;
using System.Drawing;
using System.Drawing.Imaging;
using System.Diagnostics;
using System.Threading;

public class Atlaser
{
    public static void Main(string[] args)
    {
        /*Here I'm creating a thread to combine the maps for each texture set component.
        You'll want to add or remove threads depending on what kinds of maps you're using in your workflow.
        You'll also need to change the filename endings to match those of your textures.
        Finally, change the colors to match the default background color of the maps. Remember that C# formats colors as ARGB (alpha, red, green, blue) for some reason.
        */
        Console.WriteLine("Opening Threads...");
        Thread normal = new Thread(Atlaser.Atlas);
        Thread baseColor = new Thread(Atlaser.Atlas);
        Thread Mask = new Thread(Atlaser.Atlas);
        Thread Emissive = new Thread(Atlaser.Atlas);
        normal.Start(new FileAndCol("_Normal.png", Color.FromArgb(255, 127, 127, 255)));
        baseColor.Start(new FileAndCol("_BaseMap.png", Color.FromArgb(255, 0, 0, 0)));
        Mask.Start(new FileAndCol("_MaskMap.png", Color.FromArgb(178, 0, 0, 0)));
        Emissive.Start(new FileAndCol("_Emissive.png", Color.FromArgb(255, 0, 0, 0)));
    }

    /*
    Atlas() grabs all the files in the current directory with the provided file extension, creates a new texture of the same size filled with the baseline/background color, then moves the deltas from the opened maps over to the new texture, and finally saves the new texture to the disk.
    */
    private static void Atlas(object? fcobj)
    {
        if(fcobj == null)
            return;

        FileAndCol fc = fcobj as FileAndCol;

        var watch = new Stopwatch();
        watch.Start();

        Console.WriteLine("Beginning thread for " + fc.fileExtension + " images.");

        List maps = new List();

        string[] files = Directory.GetFiles(Directory.GetCurrentDirectory(), "*" + fc.fileExtension);

        string o = "Found " + files.Length + " maps : \n ";
        foreach (string file in files)
        {
            o += file + "\n ";
            maps.Add(new Bitmap(file));
        }
        Console.WriteLine(o);

        Bitmap finalMap = new Bitmap(maps[0].Width, maps[0].Height);
        using (Graphics g = Graphics.FromImage(finalMap))
        using (SolidBrush brush = new SolidBrush(Color.FromArgb(fc.col.ToArgb())))
        {
            Rectangle rect = new Rectangle(0, 0, finalMap.Width, finalMap.Height);
            g.FillRectangle(brush, rect);
        }


        //Console.WriteLine("Iterating through maps...");

        for (int i = 0; i < maps.Count; i++)
        {
            Console.WriteLine(" Beginning map: " + files[i] + " (" + fc.fileExtension + ") " + (i+1) + " of " + maps.Count);
            for (int x = 0; x < finalMap.Width; x++)
            {
                for (int y = 0; y < finalMap.Height; y++)
                {
                    Color px = maps[i].GetPixel(x, y);
                    if (!px.Equals(fc.col))
                    {
                        finalMap.SetPixel(x, y, px);
                    }
                }
            }
        }

        finalMap.Save(fc.fileExtension.Remove(fc.fileExtension.Length - 4) + "_Combined.png", ImageFormat.Png);

        watch.Stop();
        Console.WriteLine(" **" + fc.fileExtension + " thread completed in " + watch.ElapsedMilliseconds + " ms");
    }
}
public class FileAndCol
{
    public string fileExtension;
    public Color col;

    public FileAndCol(string s, Color c)
    {
        fileExtension = s;
        col = c;
    }
}
总而言之,这并不是一个非常复杂的脚本。 如果你是 .NET 新手(或者只在 Unity 内部使用过 C#),那么运行它非常简单:
- 在 Visual Studio 或 VS Code(或 Rider 或任何其他 .NET IDE)中创建新的 C# 控制台应用程序
- 创建一个新的空 C# 脚本
- 将上面的代码复制并粘贴到那里
- 进行处理特定纹理所需的任何编辑,保存文件
- 将单独的纹理贴图移动到与脚本相同的目录中
- 通过按顶部的绿色大播放按钮 (Visual Studio) 运行脚本,或者在终端中打开目录并输入以下命令:
dotnet run
一旦确定其按照你想要的方式工作,甚至可以将项目构建为可执行文件,你只需将其拖放到 Substance Painter 导出文件夹中即可。
构建一个小型 GUI 或 CLI 来精确定制哪些贴图到图集以及如何映射也很方便,但它对我来说已经足够好了,所以这就是我留下的地方。 希望你学到了一些东西,或者至少获得了一个有用的工具!
顺便说一句,如果你对我编写的 Python 版本感到好奇,这里是:
import glob, os
from PIL import Image, ImageColor
textures = []
for img in glob.glob("*BaseMap.png"):
textures.append(Image.open(img))
print('Found ' + img)
neutralColor = (0,0,0,1)
finalImg = Image.new('RGBA', textures[0].size, neutralColor)
print('Iterating through maps...')
i = 0
for img in textures:
print(' Beginning map: ' + img.filename)
for x in range(img.size[0]):
#print(" Current col: ", x)
for y in range(img.size[1]):
px = img.getpixel((x,y))
if px != neutralColor:
finalImg.putpixel((x,y), px)
i += 1
finalImg.show()
finalImg.save('combinedBlackMaskTexture.png')这是一个更简单的脚本。 它使用 Pillow 来创建图像,并遵循相同的基本算法:循环遍历每个图像的每个像素,并复制与给定基线颜色不匹配的部分。
我只得到了一个纹理集的图集,并认为 Python 对于我的需求来说有点太慢了。 事实上,绘制单个纹理组所需的时间比 C# 脚本长 2.5 倍。 由于单个集合中可以有四个或更多纹理组,并且 Python 中的并行处理可能有点困难,因此我认为切换到另一种语言是一个好主意。 尽管如此,编写这个脚本要容易得多。
原文链接:合并多个纹理集 - BimAnt