(二)手把手教你 SpringBoot + SpringCloud —— 使用Eureka实现服务注册与发现!
点击上方 "程序员小乐"关注, 星标或置顶一起成长
每天凌晨00点00分, 第一时间与你相约
每日英文
Themorewefind,themorewelose.Themoreweknow,themorewehurt.Themorewecare,themorewearesad.
得到越多,失去越多。懂得越多,伤得越多。在乎越多,难过越多。
每日掏心话
如果你越来越冷漠,你以为你成长了,但其实没有。长大应该是变温柔,对全世界都温柔。
来自:XuePeng77 | 责编:乐乐
链接:my.oschina.net/u/2450666/blog/1162531
程序员小乐(ID:study_tech)第 821 次推文 图片来自百度
往日回顾:微信技术总监:一亿用户背后的架构秘密
正文
手把手教你SpringBoot+SpringCloud系列共8篇:
1、手把手教你 SpringBoot + SpringCloud 开发环境搭建(一)
一、创建Eureka注册中心(Standalone Mode —— 独立模式)
1.1 创建Eureka Server工程
使用STS创建EurekaServer工程。
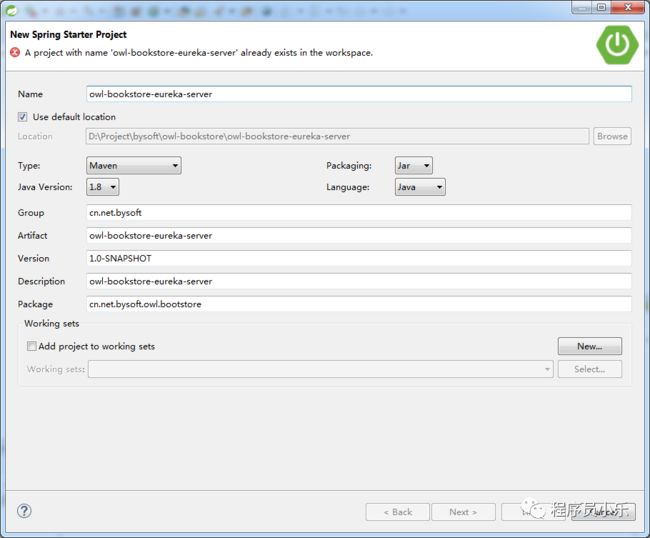
点击File —— New —— Spring Starter Project后,会弹出创建SpringBoot工程的窗口,输入工程信息后点击下一步。
工程信息可以选择构建工具,这里选择的Maven;
选择Packaging,是Jar包还是War包;
选择Java版本;
选择语言(支持Java、Kotlin和Groovy);
Group、Artifact、Version和Description为maven的相关属性;
最后一个Package是我们定义的工程主类的包,SpringBoot默认会识别该包和其下的子包;
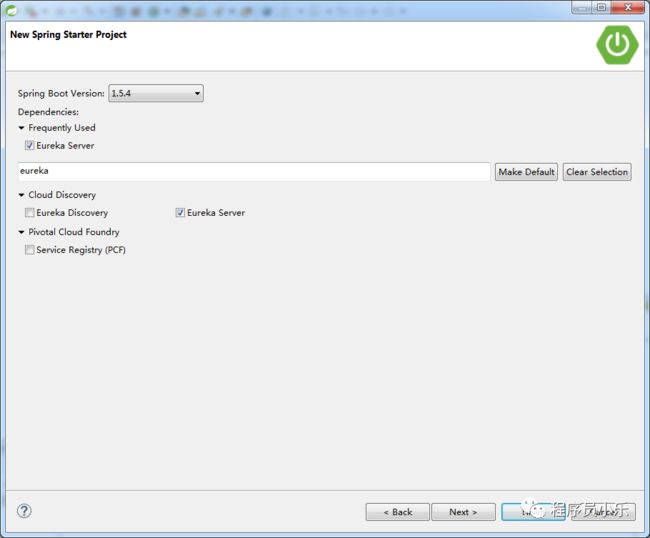
选择SpringBoot的版本,并搜索eureka,勾选Eureka Server后,点击Finish创建工程。
创建好的工程目录结构如下:
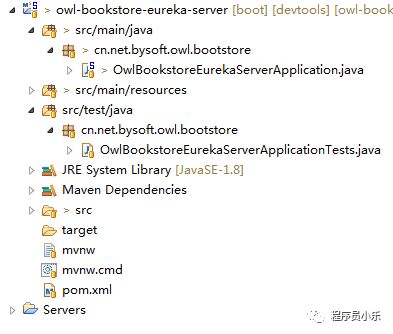
工程会自动为我们创建maven结构的工程,并且创建了OwlBookstoreEurekaServerApplication类和对应的测试类,在resources文件夹下还有一个空白的application.properties属性文件。
1.2 pom文件
为了将工程作为Eureka注册中心,我们在创建工程时引入了Eureka Server包,在pom文件中可以看到:
	4.0.0

	cn.net.bysoft
	owl-bookstore-eureka-server
	1.0-SNAPSHOT
	jar

	owl-bookstore-eureka-server
	owl-bookstore-eureka-server


		org.springframework.boot
		spring-boot-starter-parent
		1.5.4.RELEASE


		UTF-8
		UTF-8
		1.8
		Dalston.SR1


			org.springframework.cloud
			spring-cloud-starter-eureka-server


			org.springframework.boot
			spring-boot-starter-test
			test


			org.springframework.boot
			spring-boot-devtools
			true
			true


				org.springframework.cloud
				spring-cloud-dependencies
				${spring-cloud.version}
				pom
				import


				org.springframework.boot
				spring-boot-maven-plugin


				org.springframework.boot
				spring-boot-maven-plugin

					true
1.3 application文件
接下来,我们修改配置信息,启动Eureka Server。
SpringBoot支持yml格式的配置文件,在resources中创建一个application.yml文件,并编写如下内容:
spring:
  application:
    name: eureka-server
server:
  port: 8761
eureka:
  instance:
    hostname: localhost
  client:
    registerWithEureka: false
    fetchRegistry: false
    serviceUrl:
      defaultZone: http://${eureka.instance.hostname}:${server.port}/eureka/
debug: true
logging:
  file: wol-bookstore-eureka-server.log
  level:
    root: info
spring:application:name:给应用定义一个名称;
server:port:是应用的端口号;
eureka:instance:hostname:是应用所在的主机名;
eureka:client:registerWithEureka:用于应用是注册中心,所以不向注册中心注册自己;
eureka:client:fetchRegistry:用于应用是注册中心,所以不需要去检索服务;
eureka:client:serviceUrl:defaultZone:定义注册中心的地址;
debug:打开日志功能;
logging:file:日志文件指向当前应用的目录;
logging:level:root:输出级别为info;
1.4 修改主类
最后用@EnableEurekaServer修饰主类OwlBookstoreEurekaServerApplication。
package cn.net.bysoft.owl.bootstore;
import org.springframework.boot.SpringApplication;
import org.springframework.boot.autoconfigure.SpringBootApplication;
import org.springframework.cloud.netflix.eureka.server.EnableEurekaServer;
/**
*
* - 使用@EnableEurekaServer来修饰主类;
*
*
* @author xuepeng
*/
@SpringBootApplication
@EnableEurekaServer
public class OwlBookstoreEurekaServerApplication {
public static void main(String[] args) {
SpringApplication.run(OwlBookstoreEurekaServerApplication.class, args);
}
}
1.5 运行注册中心
使用SpringBootApp运行程序,程序运行后访问地址http://localhost:8761来进入注册中心。这里需要注意,虽然配置的是http://${eureka.instance.hostname}:${server.port}/eureka/,但是注册中心的地址不带有/eureka。
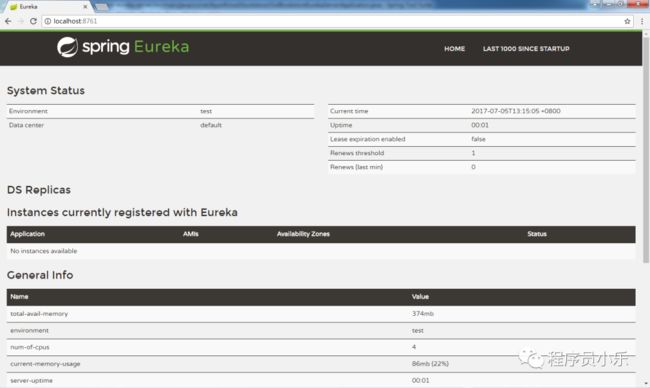
到此,Eureka注册中心已经运行成功了。
二、服务注册
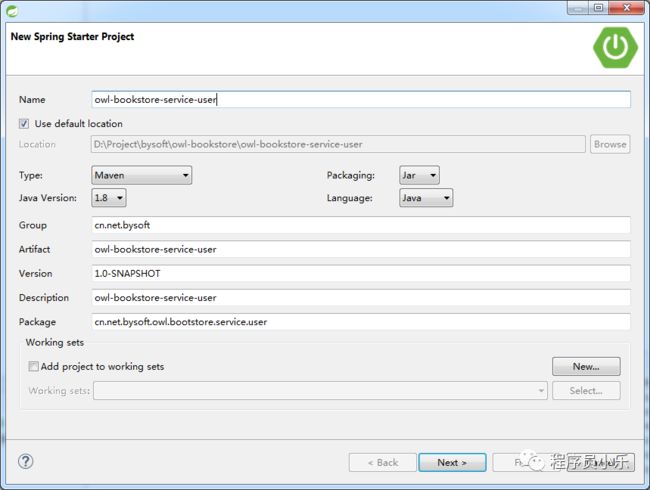
2.1 创建service-user工程
创建一个服务,命名为owl-bookstore-service-user。
2.2 pom文件
在pom文件中,加入spring-cloud-starter-eureka依赖。
	4.0.0

	cn.net.bysoft
	owl-bookstore-service-user
	1.0-SNAPSHOT
	jar

	owl-bookstore-service-user
	owl-bookstore-service-user


		org.springframework.boot
		spring-boot-starter-parent
		1.5.4.RELEASE


		UTF-8
		UTF-8
		1.8
		Dalston.SR1


			org.springframework.cloud
			spring-cloud-starter-eureka


			org.springframework.boot
			spring-boot-starter-test
			test


				org.springframework.cloud
				spring-cloud-dependencies
				${spring-cloud.version}
				pom
				import


				org.springframework.boot
				spring-boot-maven-plugin
2.3 application文件配置
eureka:
  client:
    serviceUrl:
      defaultZone: http://localhost:8761/eureka/
server:
  port: 7001
spring:
  application:
    name: SERVICE-USER
eureka:client:serviceUrl:defaultZone:设置注册中心的地址;
server:port:服务的端口号;
spring:application:name:服务的名称,该名称不要和其他的服务重名;
2.4 编写简单的业务demo
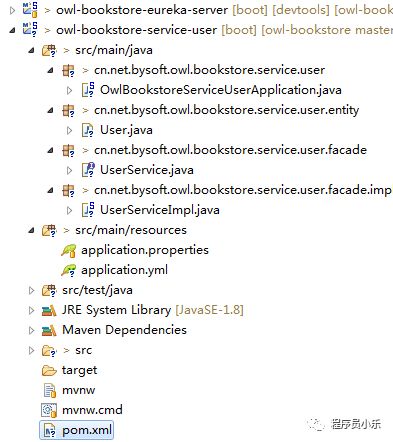
cn.net.bysoft.owl.bookstore.service.user包下存放着主类,使用@EnableDiscoveryClient修饰主类:
package cn.net.bysoft.owl.bookstore.service.user;

import org.springframework.boot.SpringApplication;
import org.springframework.boot.autoconfigure.SpringBootApplication;
import org.springframework.cloud.client.discovery.EnableDiscoveryClient;

@SpringBootApplication
@EnableDiscoveryClient
public class OwlBookstoreServiceUserApplication {

	public static void main(String[] args) {
		SpringApplication.run(OwlBookstoreServiceUserApplication.class, args);
	}
}
cn.net.bysoft.owl.bookstore.service.user.entity包下存放user服务的实体类:
package cn.net.bysoft.owl.bookstore.service.user.entity;

public class User {

    private final long id;
    private final String name;

    public User(long id, String name) {
        this.id = id;
        this.name = name;
    }

    public long getId() {
        return id;
    }

    public String getName() {
        return name;
    }

}
cn.net.bysoft.owl.bookstore.service.user.facade包下存放着具体的user服务:
package cn.net.bysoft.owl.bookstore.service.user.facade;

import java.util.List;

import cn.net.bysoft.owl.bookstore.service.user.entity.User;

public interface UserService {

    List getAll();

}
cn.net.bysoft.owl.bookstore.service.user.facade.impl包下存放着服务的实现,用@RestController修饰类,用@RequestMapping修饰方式,@Value用来读取application.yml文件中的server.port的值:
package cn.net.bysoft.owl.bookstore.service.user.facade.impl;

import java.util.ArrayList;
import java.util.List;

import org.springframework.beans.factory.annotation.Value;
import org.springframework.web.bind.annotation.RequestMapping;
import org.springframework.web.bind.annotation.RequestMethod;
import org.springframework.web.bind.annotation.RestController;

import cn.net.bysoft.owl.bookstore.service.user.entity.User;
import cn.net.bysoft.owl.bookstore.service.user.facade.UserService;

@RestController
public class UserServiceImpl implements UserService {

    @Value("${server.port}")
    String port;

    @RequestMapping(value = "users", method = RequestMethod.GET)
    @Override
    public List getAll() {
        List users = new ArrayList<>();
        users.add(new User(1L, port));
        return users;
    }

}
1、手把手教你 SpringBoot + SpringCloud 开发环境搭建(一)
2.5 启动服务
启动服务,并访问服务地址:http://localhost:7001/users,测试服务是否启动成功:
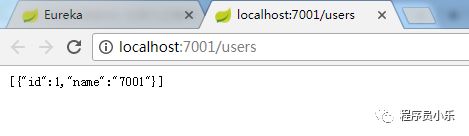
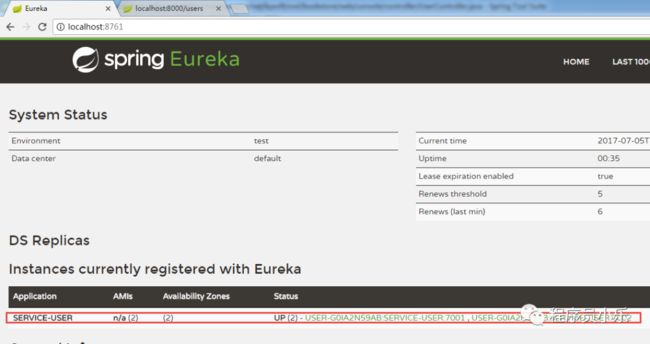
通过上图可以看到服务已经启动成功,接下来刷新注册中心,会发现服务已经注册到Eureka Server中了:

至此,服务的注册已经完成。
三、服务发现与使用
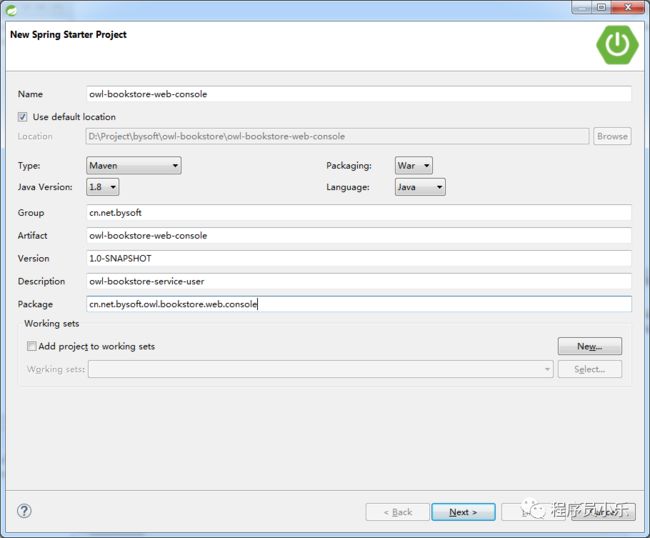
3.1 创建消费服务的工程
这里创建一个bookstore后台管理的springboot工程,选择war包方式:
3.2 pom文件
引入以下依赖:
spring-cloud-starter-eureka;
spring-boot-starter-web;
spring-cloud-starter-ribbon;
pom文件的全部内容如下:
	4.0.0

	cn.net.bysoft
	owl-bookstore-web-console
	1.0-SNAPSHOT
	war

	owl-bookstore-web-console
	owl-bookstore-service-user


		org.springframework.boot
		spring-boot-starter-parent
		1.5.4.RELEASE


		UTF-8
		UTF-8
		1.8
		Dalston.SR1


			org.springframework.cloud
			spring-cloud-starter-eureka


			org.springframework.boot
			spring-boot-starter-web


			org.springframework.cloud
			spring-cloud-starter-ribbon


			org.springframework.boot
			spring-boot-starter-tomcat
			provided


			org.springframework.boot
			spring-boot-starter-test
			test


				org.springframework.cloud
				spring-cloud-dependencies
				${spring-cloud.version}
				pom
				import


				org.springframework.boot
				spring-boot-maven-plugin
3.3 application文件配置
spring:
  application:
    name: owl-bookstore-web-console
eureka:
  client:
    serviceUrl:
      defaultZone: http://localhost:8761/eureka/
server:
  port: 8000
连接到数据中心,并将应用端口设置为8000。
3.4 编写消费(使用)服务的代码
cn.net.bysoft.owl.bookstore.web.console包下存放着主类,使用@EnableDiscoveryClient来修饰它,在类中定义了一个RestTemplate,使用它以rest风格来消费(使用)服务,这个类还被@LoadBalanced所修饰,意为启动负载均衡。
package cn.net.bysoft.owl.bookstore.web.console;

import org.springframework.boot.SpringApplication;
import org.springframework.boot.autoconfigure.SpringBootApplication;
import org.springframework.cloud.client.discovery.EnableDiscoveryClient;
import org.springframework.cloud.client.loadbalancer.LoadBalanced;
import org.springframework.context.annotation.Bean;
import org.springframework.web.client.RestTemplate;

@SpringBootApplication
@EnableDiscoveryClient
public class OwlBookstoreWebConsoleApplication {

    @Bean
    @LoadBalanced
    RestTemplate restTemplate() {
        return new RestTemplate();
    }

    public static void main(String[] args) {
        SpringApplication.run(OwlBookstoreWebConsoleApplication.class, args);
    }
}
cn.net.bysoft.owl.bookstore.web.console.service包内存放的是业务实现类,自动装配RestTemplate,并以rest风格,通过http协议,向服务发送get请求。
此处,uri的地址为服务的[注册名]/[requestmapping]:
package cn.net.bysoft.owl.bookstore.web.console.service;

import org.springframework.beans.factory.annotation.Autowired;
import org.springframework.stereotype.Service;
import org.springframework.web.client.RestTemplate;

@Service
public class UserService {

    @Autowired
    RestTemplate restTemplate;

    public String getAll() {
        return restTemplate.getForEntity("http://SERVICE-USER/users", String.class).getBody();
    }

}
cn.net.bysoft.owl.bookstore.web.console.controller包内存放着控制器:
package cn.net.bysoft.owl.bookstore.web.console.controller;

import org.springframework.beans.factory.annotation.Autowired;
import org.springframework.web.bind.annotation.RequestMapping;
import org.springframework.web.bind.annotation.RestController;

import cn.net.bysoft.owl.bookstore.web.console.service.UserService;

@RestController(value = "/")
public class UserController {

    @Autowired
    UserService userService;

    @RequestMapping(value = "users")
    public String index() {
        return userService.getAll() + " ==> console";
    }

}
3.5 启动应用消费服务
为了测试负载均衡,我们通过命令行的方式启动两个service-user:
首先用maven install将service-user打包成jar包;
进入service-user的target文件夹下;
打开cmd,输入java -jar owl-bookstore-service-user-1.0-SNAPSHOT.jar --server.port=7001;
再打开一个cmd,输入打开cmd,输入java -jar owl-bookstore-service-user-1.0-SNAPSHOT.jar --server.port=7002;
现在刷新注册中心就会发现SERVICE-USER有两个:
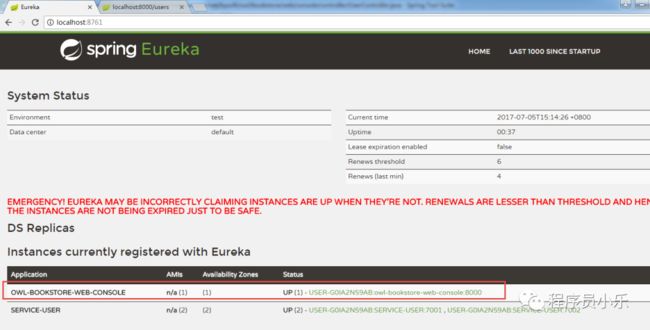
随后,启动owl-bookstore-web-console应用,刷新注册中心,会看到该应用也注册成功:
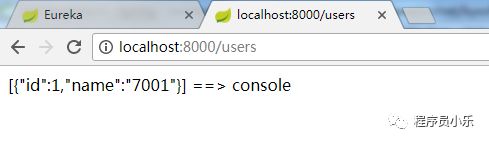
现在,访问http://localhost:8000/users,并刷新页面,会看到应用通过轮询的方式消费7001端口与7002端口的服务了。

以上,就是服务注册与消费的简单demo。
获取项目源码:在公众号后台回复“STS”即可获得。

欢迎在留言区留下你的观点,一起讨论提高。如果今天的文章让你有新的启发,学习能力的提升上有新的认识,欢迎转发分享给更多人。
欢迎各位读者加入订阅号程序员小乐技术群,在后台回复“加群”或者“学习”即可。
猜你还想看
阿里、腾讯、百度、华为、京东最新面试题汇集
强软弱虚引用,只有体会过了,才能记住!
Redis哨兵的配置和原理
答应我!别再写上千行的类了!这样的代码让我生不如死!

关注订阅号「程序员小乐」,收看更多精彩内容
嘿,你在看吗?