AWS通过自动扩展实现高可用 - 创建一个高可用Wordpress站点
文章目录
- 创建两个S3 Bucket,分别存放Image和Code
- 使用CloudFront来访问图片
- 创建一个RDS和一个EC2
-
- 备份上传的图片到`xiongwpmedia2019`的S3 Bucket里
- 备份Wordpress站点代码到`xiongcode2019`的S3 Bucket里
- 修改.htaccess以达到Cloud Front效果
- 设置httpd.conf
- 修改`xiongwpmedia2019`的S3 Bucket Policy
- 创建Application Load Balancer和Route 53
- 创建 Auto Scaling Group
-
- 创建任务计划crontab自动从S3下载代码
- 创建一个AMI image
- 创建AMI image后将原始EC2设置成写节点
- 使用创建的AMI来创建Auto Scaling Group
- 设置Launch Configuration
- 为什么写节点直接跳回到原始地址?
- 测试高可用
- 术语
- Reference
创建两个S3 Bucket,分别存放Image和Code
创建两个S3,分别存放Image和Code,一个S3 Bucket命名为xiongwpmedia2019,存放图片,另一个S3 Bucket命名为xiongcode2019,用来存放Wordpress代码。
使用CloudFront来访问图片
在Networking & Content Delivery下的CloudFront,做以下设置,
- Origin Domain Name选择刚刚创建的S3 Bucket, 为
xiongwpmedia2019.s3.amazonaws.com。
其它设置为默认。
创建一个Security Group,开放 ipv4 and ipv6的http, port 80, 和 ssh, 22 port,名字设置为Webdmz。
再创建一个 RDS使用的Security Group,取名为MyRDSSG, 允许 3306 port, TCP, Mysql/Aurora, 确保它开放给刚刚创建的 名为Webdmz的 Security Group.
这里的DNS域名地址是: df3jgic6atm3p.cloudfront.net
创建一个RDS和一个EC2
创建一个RDS,记得在Availability & durability里, 设置Create a standby instance (recommended for production usage)。这里要收费。RDS的Endpoint是:xiongrds.cn63rtxgzraf.ap-southeast-1.rds.amazonaws.com。
参见使用AWS云安装WordPress + RDS MySQL, 记得在Mysql中新创建一个数据库。
创建一个EC2,记得这里要创建一个可以访问S3 Bucket的IAM角色,这里作为原始的写节点(Write node)。
使用以下启动脚本, 这个脚本来自于Acloud.Guru,这里没有使用最新的Wordpress代码,参见使用AWS云安装WordPress + RDS MySQL,使用最新的Wordpress代码需要升级最新的PHP,比较麻烦。
#!/bin/bash
yum update -y
yum install httpd php php-mysql -y
cd /var/www/html
echo "healthy" > healthy.html
wget https://wordpress.org/wordpress-5.1.1.tar.gz
tar -xzf wordpress-5.1.1.tar.gz
cp -r wordpress/* /var/www/html/
rm -rf wordpress
rm -rf wordpress-5.1.1.tar.gz
chmod -R 755 wp-content
chown -R apache:apache wp-content
wget https://s3.amazonaws.com/bucketforwordpresslab-donotdelete/htaccess.txt
mv htaccess.txt .htaccess
chkconfig httpd on
service httpd start
使用SSH登入EC2.
Connecting to 54.169.190.81:22...
Connection established.
To escape to local shell, press 'Ctrl+Alt+]'.

WARNING! The remote SSH server rejected X11 forwarding request.

       __|  __|_  )
       _|  (     /   Amazon Linux AMI
      ___|\___|___|

https://aws.amazon.com/amazon-linux-ami/2018.03-release-notes/
[ec2-user@ip-172-31-26-252 ~]$ sudo su
[root@ip-172-31-26-252 ec2-user]# cd /var/www/html/
[root@ip-172-31-26-252 html]# pwd
/var/www/html
[root@ip-172-31-26-252 html]# ls
healthy.html  license.txt  wp-activate.php  wp-blog-header.php    wp-config-sample.php  wp-cron.php  wp-links-opml.php  wp-login.php  wp-settings.php  wp-trackback.php
index.php     readme.html  wp-admin         wp-comments-post.php  wp-content            wp-includes  wp-load.php        wp-mail.php   wp-signup.php    xmlrpc.php
[root@ip-172-31-26-252 html]# cat .htaccess
Options +FollowSymlinks
RewriteEngine on
rewriterule ^wp-content/uploads/(.*)$ http://d2jmrva8tfzxcq.cloudfront.net/$1 [r=301,nc]

# BEGIN WordPress

# END WordPress
[root@ip-172-31-26-252 html]#
EC2运行起来后,输入网址对Wordpress站点进行设置,参见使用AWS云安装WordPress + RDS MySQL。包括创建wp-config.php。
创建成功后,下面来做自动使用S3 Bucket备份,同步,使用Auto Scaling Group进行自动扩展,使用Cloud Front提升性能。另外 ,RDS的高可用是由RDS自动备份来完成的,不需要额外操作。
下面验证可以使用AWS指令访问S3 Bucket.
[root@ip-172-31-26-252 html]# aws s3 ls
2019-01-06 13:16:41 xiong-polly
2019-01-06 13:17:07 xiong-polly-mp3
2019-01-01 01:55:31 xiong2019
2019-11-24 11:12:19 xiongcode2019
2019-11-24 11:11:49 xiongwpmedia2019
[root@ip-172-31-26-252 html]#
下面发布一个博客,加上一个图片,如下:
以上上传的图片被存放到以下地址:
http://ec2-54-169-190-81.ap-southeast-1.compute.amazonaws.com/wp-content/uploads/2019/11/DSC09023-Copy.jpg
在SSH shell里检查如下:
[root@ip-172-31-26-252 html]# ls wp-content/uploads/2019/11/DSC09023-Copy.jpg
wp-content/uploads/2019/11/DSC09023-Copy.jpg
[root@ip-172-31-26-252 html]#
备份上传的图片到xiongwpmedia2019的S3 Bucket里
备份上传的图片到xiongwpmedia2019的S3 Bucket里, 如下:
[root@ip-172-31-26-252 html]# cd
[root@ip-172-31-26-252 ~]# pwd
/root
[root@ip-172-31-26-252 ~]# aws s3 cp --recursive /var/www/html/wp-content/uploads s3://xiongwpmedia2019
upload: ../var/www/html/wp-content/uploads/2019/11/DSC09023-Copy.jpg to s3://xiongwpmedia2019/2019/11/DSC09023-Copy.jpg
[root@ip-172-31-26-252 ~]#
[root@ip-172-31-26-252 ~]# aws s3 ls s3://xiongwpmedia2019
                           PRE 2019/
[root@ip-172-31-26-252 ~]#
在AWS的xiongwpmedia2019`的S3 Bucket里检查文件确实被上传。
备份Wordpress站点代码到xiongcode2019的S3 Bucket里
备份Wordpress站点代码到xiongcode2019的S3 Bucket里,如下:
[root@ip-172-31-26-252 ~]# aws s3 cp --recursive /var/www/html s3://xiongcode2019
...
...

[root@ip-172-31-26-252 ~]# aws s3 ls s3://xiongcode2019
                           PRE wp-admin/
                           PRE wp-content/
                           PRE wp-includes/
2019-11-24 15:57:56        165 .htaccess
2019-11-24 15:57:56          8 healthy.html
2019-11-24 15:57:56        420 index.php
2019-11-24 15:57:56      19935 license.txt
2019-11-24 15:57:56       7425 readme.html
2019-11-24 15:57:56       6919 wp-activate.php
2019-11-24 15:57:59        369 wp-blog-header.php
2019-11-24 15:57:59       2283 wp-comments-post.php
2019-11-24 15:57:59       2898 wp-config-sample.php
2019-11-24 15:57:59       3142 wp-config.php
2019-11-24 15:58:00       3847 wp-cron.php
2019-11-24 15:58:05       2502 wp-links-opml.php
2019-11-24 15:58:06       3306 wp-load.php
2019-11-24 15:58:05      38883 wp-login.php
2019-11-24 15:58:05       8403 wp-mail.php
2019-11-24 15:58:06      17947 wp-settings.php
2019-11-24 15:58:06      31085 wp-signup.php
2019-11-24 15:58:06       4764 wp-trackback.php
2019-11-24 15:58:06       3068 xmlrpc.php
[root@ip-172-31-26-252 ~]#
修改.htaccess以达到Cloud Front效果
[root@ip-172-31-26-252 ~]# cd /var/www/html/
[root@ip-172-31-26-252 html]# cat healthy.html
healthy
[root@ip-172-31-26-252 html]# cat .htaccess
Options +FollowSymlinks
RewriteEngine on
rewriterule ^wp-content/uploads/(.*)$ http://d2jmrva8tfzxcq.cloudfront.net/$1 [r=301,nc]

# BEGIN WordPress

# END WordPress
[root@ip-172-31-26-252 html]#
[root@ip-172-31-26-252 html]# vim .htaccess
在Cloud Front里取出DNS域名地址: df3jgic6atm3p.cloudfront.net
在这里把以下
rewriterule ^wp-content/uploads/(.*)$ http://d2jmrva8tfzxcq.cloudfront.net/$1 [r=301,nc]
替换为:
rewriterule ^wp-content/uploads/(.*)$ http://df3jgic6atm3p.cloudfront.net/$1 [r=301,nc]
结果如下:
[root@ip-172-31-26-252 html]# cat .htaccess
Options +FollowSymlinks
RewriteEngine on
rewriterule ^wp-content/uploads/(.*)$ http://df3jgic6atm3p.cloudfront.net/$1 [r=301,nc]

# BEGIN WordPress

# END WordPress
进行一下同步到xiongcode2019的S3 Bucket里,如下:
[root@ip-172-31-26-252 html]# aws s3 sync /var/www/html s3://xiongcode2019
upload: ./.htaccess to s3://xiongcode2019/.htaccess

[root@ip-172-31-26-252 html]#
设置httpd.conf
需要设置设置httpd.conf开放地址改写, 这样就可以使用Cloud Front了。
[root@ip-172-31-26-252 html]# cd /etc/httpd/conf
[root@ip-172-31-26-252 conf]# pwd
/etc/httpd/conf
[root@ip-172-31-26-252 conf]# ls
httpd.conf  magic
[root@ip-172-31-26-252 conf]# cp httpd.conf httpd.conf.bak
[root@ip-172-31-26-252 conf]# vim httpd.conf
修改AllowOverride None为AllowOverride All,并重启httpd.
[root@ip-172-31-26-252 conf]# service httpd restart
Stopping httpd:                                            [  OK  ]
Starting httpd:                                            [  OK  ]
[root@ip-172-31-26-252 conf]#
修改xiongwpmedia2019的S3 Bucket Policy
需要修改xiongwpmedia2019的S3 Bucket Policy,
{
  "Version": "2012-10-17",
  "Statement": [
    {
      "Sid": "PublicReadGetObject",
      "Effect": "Allow",
      "Principal": "*",
      "Action": [
        "s3:GetObject"
        ],
      "Resource": [
        "arn:aws:s3:::xiongwpmedia2019/*"
        ]
    }
  ]
}
修改后有以下警告:
This bucket has public access
You have provided public access to this bucket. We highly recommend that you never grant any kind of public access to your S3 bucket.
再去刷新博客页面,图片地址已经改为以下地址了,说明Cloud Front起作用了。
原始地址:
http://ec2-54-169-190-81.ap-southeast-1.compute.amazonaws.com/wp-content/uploads/2019/11/DSC09023-Copy.jpg
改后地址:
http://df3jgic6atm3p.cloudfront.net/2019/11/DSC09023-Copy.jpg
创建Application Load Balancer和Route 53
创建Application Load Balancer,取名为XiongApplicationLB,这里需要创建一个Target Group,取名为XiongTargetGroup。Health checks设置为/healthy.html,将创建的EC2的写节点加入。
再创建Route 53的记录,这里并没有并没有注册DNS,直接使用Application Load Balancer的地址。
XiongApplicationLB-1325547183.ap-southeast-1.elb.amazonaws.com
创建Hosted Zone和Record Set (可选),Domain Name设置为XiongApplicationLB-1325547183.ap-southeast-1.elb.amazonaws.com
创建 Auto Scaling Group
创建任务计划crontab自动从S3下载代码
既然要高可用,那么任何的代码改动都会自动备份到S3的xiongcode2019 Bucket,这个是称为·Write Node·写节点的EC2实例完成的。而创建Auto Scaling Group达到高可用,是要从Read Node 读节点进行创建读功能的EC2实例以达到自动扩展,失败后重新创建EC2实例,创建新的EC2实例时要从xiongcode2019 Bucket下载最新代码。
以下是是创建任务计划crontab自动从S3下载代码,编辑/etc/crontab文件,然后后面用这个EC2实例来创建一个AMI。
[ec2-user@ip-172-31-26-252 ~]$ sudo su
[root@ip-172-31-26-252 ec2-user]# vim /etc/crontab
[root@ip-172-31-26-252 ec2-user]#
[root@ip-172-31-26-252 ec2-user]# service crond status
crond (pid  2644) is running...
[root@ip-172-31-26-252 ec2-user]#
每分钟做以下同步操作操作,将S3的xiongcode2019 Bucket的代码同步到本地,修改crontab文件如下:
*/1 * * * * root aws s3 sync --delete s3://xiongcode2019 /var/www/html
在S3的xiongcode2019 Bucket创建一个文件进行测试,看看能不能自动下载到本地。
[root@ip-172-31-26-252 ec2-user]# cd /var/www/html/
[root@ip-172-31-26-252 html]# vim hello.txt
[root@ip-172-31-26-252 html]# cat hello.txt
测试Crond同步到S3 bucket!
[root@ip-172-31-26-252 html]# pwd
/var/www/html
[root@ip-172-31-26-252 html]#
检查本地的hello.txt文件,发现文件被同步,测试成功!
创建一个AMI image
在EC2下的Actions里选择Create Image来创建AMI, 取名:XiongAMIReadNodeImage。
创建AMI的镜像,EC2实例会被默认关闭。
创建AMI image后将原始EC2设置成写节点
Write Node:写节点。
前面创建的EC2实例是读节点Read Node,已经用作创建了AMI,下面会进一步用作创建Auto Scaling Group。
那么这个读节点Read Node已经创建完Auto Scaling Group所使用的AMI, 已经没有其它作用了,可以将其改成写结点Write Node。也就是在本地更新会被自动更新到S3 Bucket里去。
[root@ip-172-31-26-252 ~]# vim /etc/crontab
[root@ip-172-31-26-252 ~]# cat /etc/crontab
SHELL=/bin/bash
PATH=/sbin:/bin:/usr/sbin:/usr/bin
MAILTO=root
HOME=/

# For details see man 4 crontabs

# Example of job definition:
# .---------------- minute (0 - 59)
# |  .------------- hour (0 - 23)
# |  |  .---------- day of month (1 - 31)
# |  |  |  .------- month (1 - 12) OR jan,feb,mar,apr ...
# |  |  |  |  .---- day of week (0 - 6) (Sunday=0 or 7) OR sun,mon,tue,wed,thu,fri,sat
# |  |  |  |  |
# *  *  *  *  * user-name command to be executed
*/1 * * * * root aws s3 sync --delete /var/www/html s3://xiongcode2019
*/1 * * * * root aws s3 sync --delete /var/www/html/wp-content/uploads s3://xiongwpmedia2019
[root@ip-172-31-26-252 ~]#
计划任务如下,每分钟执行一次,
*/1 * * * * root aws s3 sync --delete /var/www/html s3://xiongcode2019
*/1 * * * * root aws s3 sync --delete /var/www/html/wp-content/uploads s3://xiongwpmedia2019
进行测试,首先创建一个文件。
[root@ip-172-31-26-252 ~]# cd /var/www/html/
[root@ip-172-31-26-252 html]# pwd
/var/www/html
[root@ip-172-31-26-252 html]# vim test.txt
[root@ip-172-31-26-252 html]# cat test.txt
this is test for the Crontab upload to s3 xiongcode2019 bucket..
[root@ip-172-31-26-252 html]#
到xiongcode2019去检查test.txt这个文件的存在,验证成功上传,测试成功!
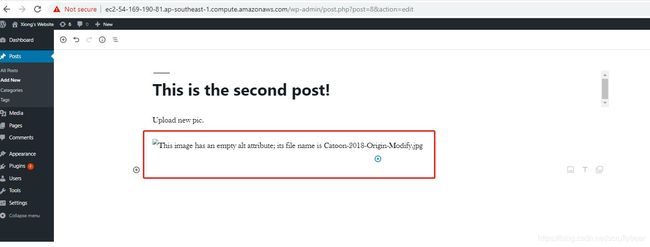
做另一个测试,重新写一个博客,再上传一个图片,再检查xiongwpmedia2019里是否有图片上传。在这里上传图片后,EC2实例中是上传了,如下:
[root@ip-172-31-26-252 html]# ls ./wp-content/uploads/2019/11/
Catoon-2018-Origin-Modify.jpg  DSC09023-Copy.jpg
[root@ip-172-31-26-252 html]#
这里写第二个博客时,图片会不显示,如下图所示,这里是因为Cloud Front起作用了,网址进行了替换,但是Cloud Front需要时间来传播,所以显示不了图片。这里不管,直接进行发布。

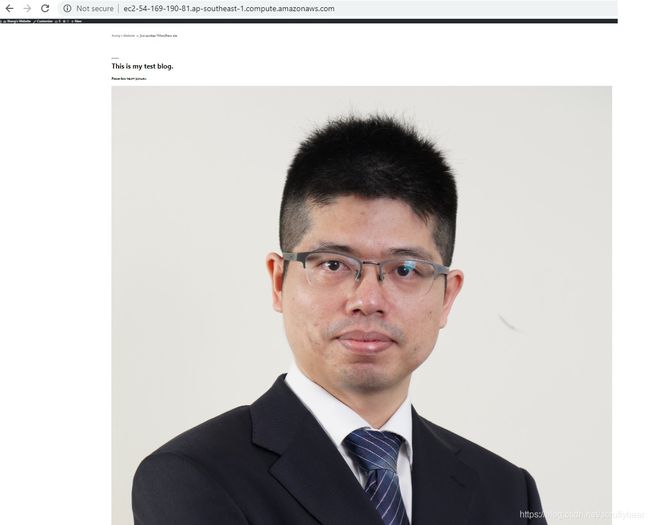
查看博客的第二篇博文,图片是可以正常显示的,一切正常!如果再进去编辑博文,图片也是可以正常显示 的,拷贝图片地址在网页中打开,发现Cloud Front是正常工作的,图片地址也已经被替换成http://df3jgic6atm3p.cloudfront.net/2019/11/Catoon-2018-Origin-Modify.jpg。
使用创建的AMI来创建Auto Scaling Group
前面已经创建了读节点Read NodeEC2实例的AMI,那么使用这个AMI来创建Auto Scaling Group,取名为XiongAutoScalingGroup。
Auto Sacling功能是在EC2界面下,创建一个新的Auto Scaling Group,提示要先创建Launch Configuration。如下章所述。
设置Group size为两个实例,把新加坡的三个Subnet都添加进来。
最后,在设置Launch Configuration的时候会设置Target Group,设置为XiongTargetGroup, 这样Auto Scaling Group就与创建的Application Load Balancer,XiongApplicationLB结合起来了。也就是Target Group,XiongTargetGroup会自动将Auto Scaling Group所创建的EC2实例添加到Target Group里。
这样就创建了Auto Scaling Group,
设置Launch Configuration
使用前面创建的AMI XiongAMIReadNodeImage,创建Launch Configuration,取名为: XiongLaunchConfiguration。
记得添加S3 Admin的角色。
设置启动脚本如下,也就是在创建的时候从S3 Bucket xiongcode2019下载最新的代码。
#!/bin/bash
yum update -y
aws s3 sync --delete s3://xiongcode2019 /var/www/html
将原始的EC2的写节点Write Node从Target Group里去掉,这样就把读节点和写节点分开来,访问站点的时候,就会访问Auto Scaling Group创建的两个读节点,而不会去访问写节点。如果要写新博文,那么就会跳回到原始的写节点Write Node进行新博文添加和其它改动操作。
那么为什么写新博文,那么就会跳回到原始的写节点Write Node呢?如下解释了原因。
为什么写节点直接跳回到原始地址?
这里的写节点直接跳回到原始地址是在Wordpress设置的,Site Address (URL)设置为了http://ec2-54-169-190-81.ap-southeast-1.compute.amazonaws.com,这个是在Wordpress最原始安装的时候设置的,这个参数是可以更改的。参见以下解释:
Q: when you went to /wp-admin, how did wordpress figure out that you were after write not the read node.
A: The answer lies in the DB. Check this on your DB: select * from wp_options where optionn_ame = 'siteurl';

This points to the IP of the instance which set up the original wp site.

I think the php code in wp-login.php uses this information for redirecting when the user is not logged in. So in a way anyone trying to login to post, will always redirect to your original site.

I think someone with php knowledge will be able to say this better.

It really got me that why this redirect happens. My instinct was somewhere this was hard coded. It turns out to be true.

So I think this not the doing of the load balancer.
能过Navicat Premium进行连接测试, 可以验证siteurl为``,注意RDS的Public accessibility要设置为yes.
也可以通过mysql进行连接验证,说明Write Node的地址跳转是Wordpress里写在DB里了,如下:
[root@ip-172-31-26-252 html]# mysql -u scruffybear -h xiongrds.cn63rtxgzraf.ap-southeast-1.rds.amazonaws.com -p
Enter password:
Welcome to the MySQL monitor.  Commands end with ; or \g.
Your MySQL connection id is 353
Server version: 5.7.22-log Source distribution

Copyright (c) 2000, 2018, Oracle and/or its affiliates. All rights reserved.

Oracle is a registered trademark of Oracle Corporation and/or its
affiliates. Other names may be trademarks of their respective
owners.

Type 'help;' or '\h' for help. Type '\c' to clear the current input statement.

mysql>
mysql> select * from wp_options where option_name = 'siteurl';
+-----------+-------------+---------------------------------------------------------------+----------+
| option_id | option_name | option_value                                                  | autoload |
+-----------+-------------+---------------------------------------------------------------+----------+
|         1 | siteurl     | http://ec2-54-169-190-81.ap-southeast-1.compute.amazonaws.com | yes      |
+-----------+-------------+---------------------------------------------------------------+----------+
1 row in set (0.00 sec)

mysql>
测试高可用
也就是随意删除Read NodeEC2实例,不管是删除一个,还是完全删除,Auto Scaling Group会进行重新创建新的Read NodeEC2实例,从xiongcode2019的S3 Bucket里下载最新的Wordpress代码,创建并始终保持有两个的Read NodeEC2实例在运行。而这两个的EC2实例是由Application Load Balancer控制进行访问。
使用网址: http://xiongapplicationlb-1325547183.ap-southeast-1.elb.amazonaws.com/可以不间断地进行访问博客。
术语
AMI: Amazon Machine Image
Reference
使用AWS云安装WordPress + RDS MySQL
USING .HTACCESS REWRITE RULES
Acloud.Guru
Using High-Level (s3) Commands with the AWS CLI
