Milvus入门手册1.0
一、window环境搭建(单机)
1、docker安装
略
2、milvus安装
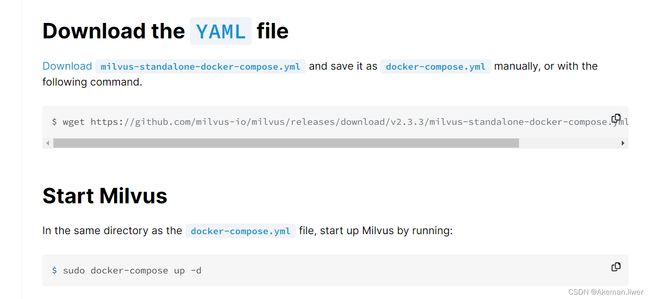
参考文档:https://milvus.io/docs/install_standalone-docker.md
tips:
(1)compose.yaml下载比较慢,可以在网络上找一份。
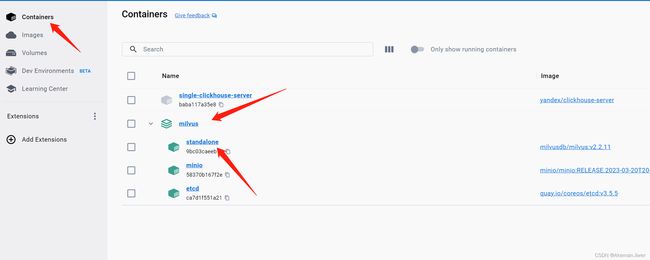
(2)windows运行milvus命令为:
docker compose up -dDocker容器中看到milvus即为安装成功:

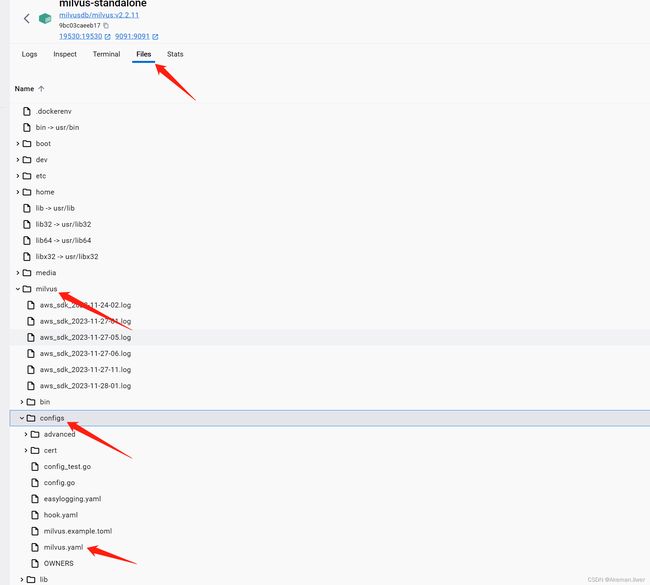
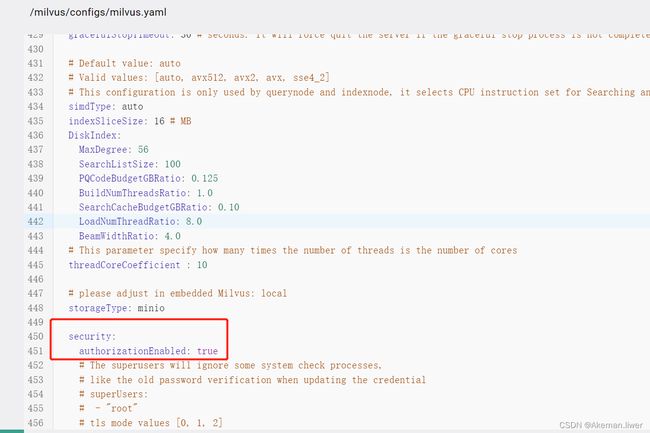
(3)默认安装的milvus是关闭用户鉴权的,线上肯定是开启的,本地开启鉴权步骤如下:
docker容器:milvus-->standalong-->Files-->milvus-->configs-->milvus.yaml,修改配置项:common.security.authorizationEnabled为true,然后重启服务:
Tips:默认用户名密码为root/Milvus
3、Attu安装
官网下载安装包
https://github.com/zilliztech/attu/releases
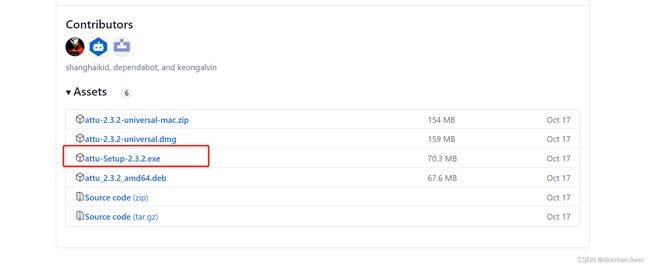
下载后直接点击安装即可。
Tips:下载失败可以多重试几次,或者网络资源也可以。
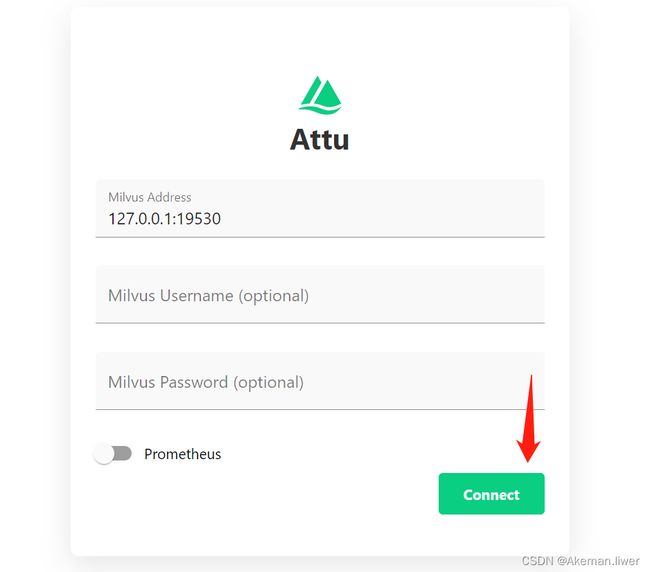
3.1、连接milvus
链接端口为19530,默认安装的milvus用户鉴权是关闭的,所以用户名密码为空直接连接即可:
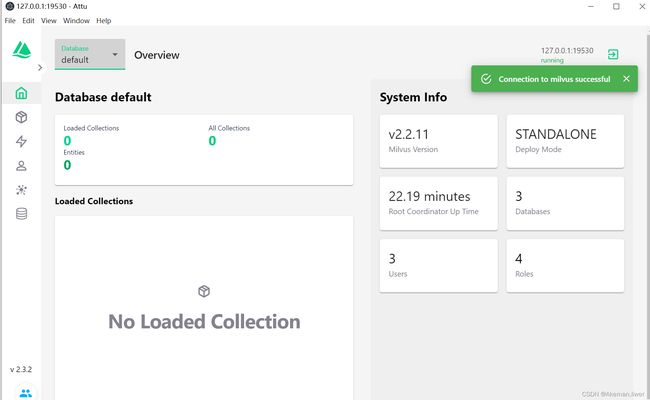
milvus有默认数据库default,链接成功页面如下:
Tips:
milvus支持两个端口:
Milvus supports two ports, port 19530 and port 9091:
Port 19530 is for gRPC and RESTful API. It is the default port when
you connect to a Milvus server with different Milvus SDKs or HTTP clients.
Port 9091 is for metrics collection, pprof profiling, and health probes
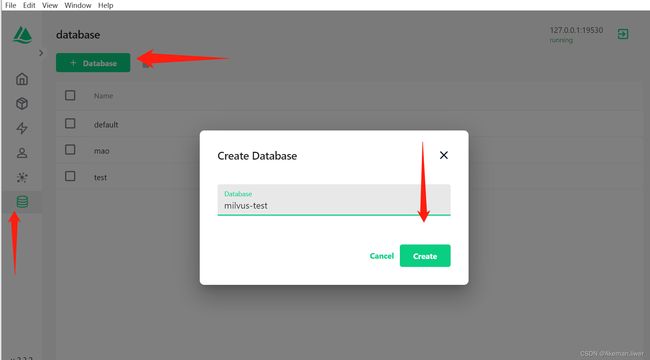
within Kubernetes. It serves as a management port.3.2、库/角色/集合
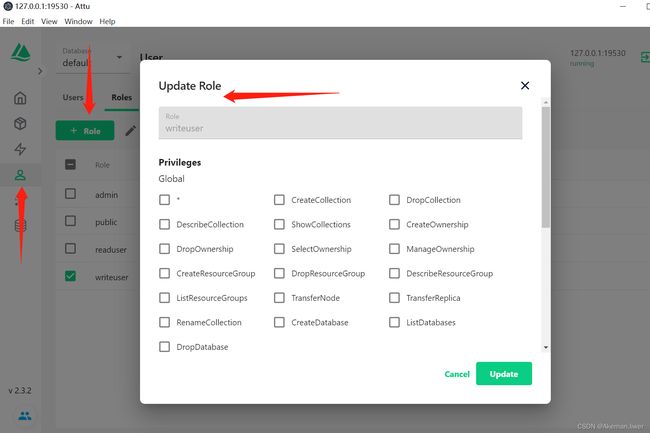
可以创建其他数据库,同时创建不同的角色(默认有root和public角色),如读写角色:
二、Milvus数据类型
1、主键字段类型:
INT64
VARCHAR
创建集合必须包含一个主键字段和向量字段,主键字段仅支持INT64和VarChar
2、向量字段类型:
Binary Vector
Float Vector
3、其他字段类型:
Int8
Int16
Int32
Float
Double
Boolean
VarChar
JSON
Tips:
其他参数:
Enable Dynamic Schema:支持动态模式:在支持动态模式情况下,Milvus可以插入Schema中未定义的数据;如果不支持动态模式,Milvus插入数据必须和Schema中定义的数据结构一致。
Consistency:用于指定Milvus一致性方案。Milvus一致性有四个级别:
| 一致性级别 |
说明 |
| Strong |
强一致性,最高级别一致性,但对应延迟会增加,适用于金融交易系统等。 |
| Boluned staleness |
有界一致性,部分时间点不一致但全局一致。 |
| Session |
会话级别,会话期间读写一致。 |
| Eventually |
最低级别的一致性要求,以“最终一致性”为前提。 |
三、Java&Milvus
1、连接milvus:
1.1 引入pom依赖:
    io.milvus
    milvus-sdk-java
    2.3.3
1.2 链接测试:
ConnectParam connectParam = connectParam = ConnectParam.newBuilder()
            .withHost("127.0.0.1")
            .withPort(19530)
            .withAuthorization("root", "Milvus")
            .withDatabaseName("default")
            .build();
MilvusServiceClient milvusClient = null;
try {
    milvusClient = new MilvusServiceClient(connectParam);
    R response = milvusClient.checkHealth();
    if (response != null && response.getStatus() != null && 0 == response.getStatus()) {
        return  true;
    }
} catch (Exception e) {
    log.error("Milvus testConnect error, e={}", e);
} finally {
    if (milvusClient != null) {
        milvusClient.close();
    }
}
Tips:
response.status参见io.milvus.param.R.class:
public enum Status {
    Success(0),
    UnexpectedError(1),
    ConnectFailed(2),
    PermissionDenied(3),
    CollectionNotExists(4),
    IllegalArgument(5),
    IllegalDimension(7),
    IllegalIndexType(8),
    IllegalCollectionName(9),
    IllegalTOPK(10),
    IllegalRowRecord(11),
    IllegalVectorID(12),
    IllegalSearchResult(13),
    FileNotFound(14),
    MetaFailed(15),
    ......
    IllegalResponse(-6);
}
2、创建集合
//代码引用自官方文档
FieldType fieldType1 = FieldType.newBuilder()
        .withName("book_id")
        .withDataType(DataType.Int64)
        .withPrimaryKey(true)
        .withAutoID(false)
        .build();
FieldType fieldType2 = FieldType.newBuilder()
        .withName("word_count")
        .withDataType(DataType.Int64)
        .build();
FieldType fieldType3 = FieldType.newBuilder()
        .withName("book_intro")
        .withDataType(DataType.FloatVector)
        .withDimension(2)
        .build();
CreateCollectionParam createCollectionReq = CreateCollectionParam.newBuilder()
        .withCollectionName("book")
        .withDescription("Test book search")
        .withShardsNum(2)
        .addFieldType(fieldType1)
        .addFieldType(fieldType2)
        .addFieldType(fieldType3)
        .withEnableDynamicField(true)
        .build();
tips:
一个集合包含至少一个分区,创建分区时,milvus会创建一个默认分区,名为:_default