Day12 qt QMianWindow,资源文件,对话框,布局方式,常用ui控件
QMianWindow
概述
QMainWindow 是一个为用户提供主窗口程序的类,包含一个菜单栏( menu bar )、多
个工具栏 (tool bars) 、多个铆接部件 (dock widgets) 、一个状态栏 (status bar) 及
一个中心部件 (central widget)
许多应用程序的基础,如文本编辑器,图片编辑器等。
菜单栏
创建菜单栏:
#include
QMenuBar --> QMenuBar(QWidget *parent = Q_NULLPTR)
添加菜单栏:
QMainWindow --> void setMenuBar(QMenuBar *menuBar)
创建菜单:
#include
QMenu --> QMenu(const QString &title, QWidget *parent = Q_NULLPTR)
添加菜单:
QMenuBar --> QAction *addMenu(QMenu *menu);
QMenu --> QAction *addMenu(QMenu *menu);
创建菜单项:
#include
QAction --> QAction(const QString &text, QObject *parent = nullptr)
添加菜单项:
QMenu --> addAction(const QAction *action)
添加分割线
QMenu->addSeparator()
设置快捷方式
QAction --> setShortcut(tr(" 快捷键 "));
QAction --> setShortcut(QKeySequence( 键 1+ 键 2));
如 :
qa --> setShortcut(tr("ctrl+n"));
qa -> setShortcut(QKeySequence(Qt::CTRL+Qt::Key_N));
QAction 的信号
void changed()
void hovered()
void toggled(bool checked)
void triggered(bool checked = false) 触发【推荐】
工具栏
创建工具栏:
#include
QToolBar --> QToolBar(QWidget *parent = Q_NULLPTR)
添加工具栏:
QMainWindow -->
void addToolBar(QToolBar *toolbar)
void addToolBar(Qt::ToolBarArea area, QToolBar *toolbar)
Qt::LeftToolBarArea 左边显示
Qt::RightToolBarArea 右边显示
Qt::TopToolBarArea 上边显示
Qt::BottomToolBarArea 下边显示
设置位置
setAllowedAreas(Qt::LeftToolBarArea | Qt::RightToolBarArea )
设置可移动性
setMoveable(false) // 工具条不可移动 , 只能停靠在初始化的位置上
状态栏
创建状态栏:
QStatusBar --> QStatusBar(QWidget *parent = Q_NULLPTR);
将控件添加到左边栏
void addWidget(QWidget *widget, int stretch = 0)
将控件添加到右边栏
void addPermanentWidget(QWidget *widget, int stretch = 0)
添加状态栏:
QMainWindow --> void setStatusBar(QStatusBar *statusbar)
铆接部件
创建铆接部件:
QDockWidget -->QDockWidget(const QString &title, QWidget *parent =
Q_NULLPTR)
添加铆接部件:
QMainWindow -->void addDockWidget(Qt::DockWidgetArea area,
QDockWidget* dockwidget)
Qt::LeftDockWidgetArea 左边
Qt::RightDockWidgetArea 右边
Qt::TopDockWidgetArea 上边
Qt::BottomDockWidgetArea 下边
中心控件
// 创建文本编辑控件
QTextEdit * userName = new QTextEdit(this);
userName->setText(" 文本编辑 ");
// 添加中心控件
setCentralWidget(userName);
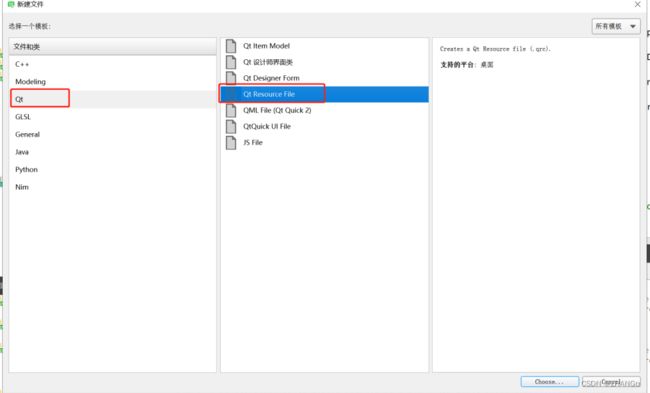
资源文件
步骤 1: 创建资源管理文件夹
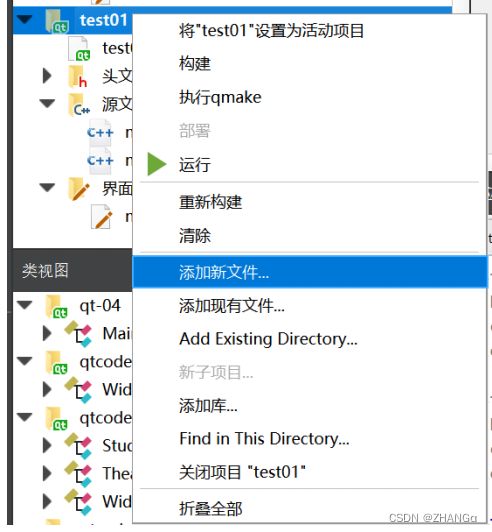

步骤2:添加前缀

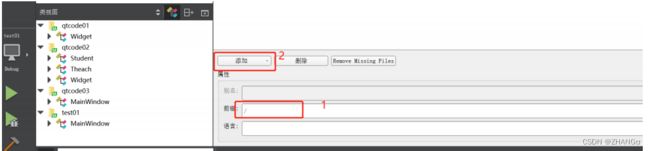
步骤3:添加文件
1, 创建 image 文件夹
2, 将所需图片资源存储到该文件夹中
3, 将该文件夹拷贝到项目下
4, 先点击添加 , 选择添加文件
注意 : 添加完文件或修改别名之后,需要保存( Ctrl+S )
别名

【注意】资源有别名后原资源路径无法访问该资源。
使用
QPixmap pix;
pix.load(":/image/up.png");
ui->label->setPixmap(pix);
this->setWindowIcon(QIcon(":/image/Sunny.jpg"));
注意 : 如果资源有别名直接使用 , 如 Sunny.jpg 的别名为 s 时 , 直接使用别名 , 如下
this->setWindowIcon(QIcon(":/s"));
对话框
分类
对话框分为模态对话框和非模态对话框。
模态对话框,就是会阻塞同一应用程序中其它窗口的输入。
是非模态对话框,例如查找对话框,我们可以在显示着查找对话 框的同时,继续对记事本的内进行编辑
使用 QDialog::exec() 实现应用程序级别的模态对话框
使用 QDialog::open() 实现窗口级别的模态对话框
使用 QDialog::show() 实现非模态对话框
头文件
#include
基本对话框
对应类 :QMessageDialog
示例1:
QPushButton * btn01 = new QPushButton ( " 消息对话框 : 提示框 " , this );
connect ( btn01 , QPushButton::clicked ,[ & ](){
QMessageBox::about ( this , " 关于 " , "QT5 之消息对话框 : 提示框 " );
});
示例2:
QPushButton * btn02 = new QPushButton ( " 消息对话框 : 警告框 " , this );
btn02 -> move ( 0 , 50 );
connect ( btn02 , QPushButton::clicked ,[ & ](){
QMessageBox::warning ( this , " 关于 " , "QT5 之消息对话框 : 警告框 " );
});
示例3:
QPushButton * btn03 = new QPushButton ( " 消息对话框 : 错误框 " , this );
btn03 -> move ( 0 , 100 );
connect ( btn03 , QPushButton::clicked ,[ & ](){
QMessageBox::critical ( this , " 关于 " , "QT5 之消息对话框 : 错误框 " );
});
示例4:
QPushButton * btn04 = new QPushButton ( " 消息对话框 : 消息框 " , this );
btn04 -> move ( 0 , 150 );
connect ( btn04 , QPushButton::clicked ,[ & ](){
QMessageBox::information ( this , " 关于 " , "QT5 之消息对话框 : 消息框 " );
});
示例5:
QPushButton * btn05 = new QPushButton ( " 消息对话框 : 选择框 " , this );
btn05 -> move ( 0 , 200 );
connect ( btn05 , QPushButton::clicked ,[ & ](){
QMessageBox::StandardButton sta ;
sta = QMessageBox::question ( this , " 问答 " , " 消息对话框你学会了吗 ?" );
if ( sta == QMessageBox::Yes )
{
qDebug () << " 学会了 " << endl ;
}
else
{
qDebug () << " 没学会 " << endl ;
}
});
文件对话框
头文件
#include
示例:
QPushButton * btn06 = new QPushButton ( " 文件对话框 " , this );
btn06 -> move ( 0 , 250 );
connect ( btn06 , QPushButton::clicked ,[ & ](){
QString filename = QFileDialog::getOpenFileName ( this , " 文
件 " , "D:/" , "*.cpp" );
qDebug () << filename << endl ;
});
颜色对话框
头文件
#include
示例:


QPushButton * btn07 = new QPushButton ( " 颜色对话框 " , this );
btn07 -> move ( 0 , 300 );
connect ( btn07 , QPushButton::clicked ,[ & ](){
QColor color = QColorDialog::getColor ( Qt::white , this , " 颜色 " );
qDebug () << color . red () << " " << color . green () << " " << color . blue () << endl ;
});
字体对话框
头文件
#include
示例:

QPushButton *btn08 = new QPushButton(" 字体对话框 ",this);
btn08->move(0,350);
connect(btn08, QPushButton::clicked,[&](){
bool yes = true;
QFont font = QFontDialog::getFont(&yes,QFont(" 宋体 "),this," 字体 ");
qDebug() << endl << font.family()<< endl;
qDebug() << font.pointSize() << endl;
});
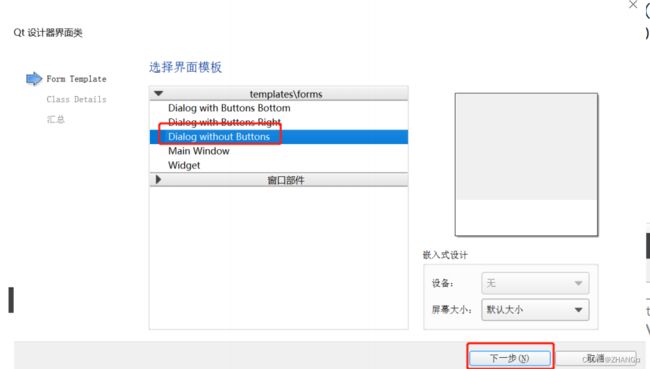
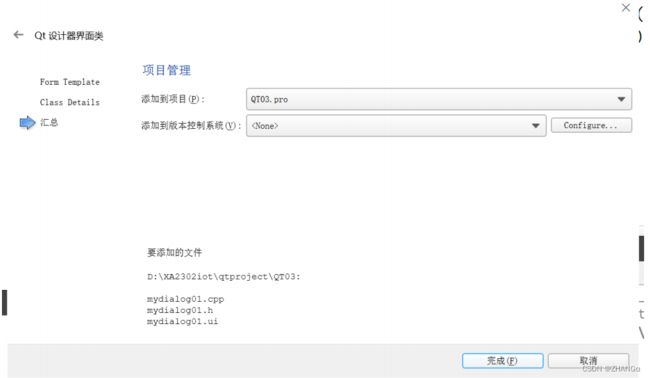
自定义对话框
创建

使用
1, 导入头文件
2, 使用
QPushButton * btn09 = new QPushButton ( " 自定义对话框 " , this );
btn09 -> move ( 0 , 400 );
connect ( btn09 , QPushButton::clicked ,[ & ](){
MyDialog01 * dialog = new MyDialog01 ( this );
dialog -> setWindowTitle ( " 自定义对话框 " );
// 模态对话框
//dialog->exec();
// 非模态对话框
dialog -> show ();
});
布局方式
概述
Qt 提供了两种组件定位机制:绝对定位和布局定位
1 ) 绝对定位: 是一种最原始的定位方法,给出这个组件的坐标和长宽值。
2 ) 布局定位: 只要把组件放入某一种布局,布局由专门的布局管理器进行管理,当
需要调整大小或者位置的时候, Qt 使用对应的布局管理器进行调整。
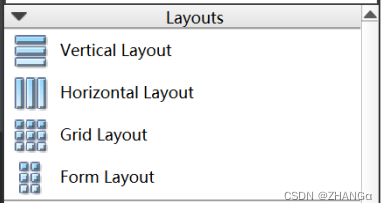
Qt 提供的布局中以下三种是我们最常用的:
QHBoxLayout :按照水平方向从左到右布局;
QVBoxLayout :按照竖直方向从上到下布局;
QGridLayout :在一个网格中进行布局,类似于 HTML 的 table ;
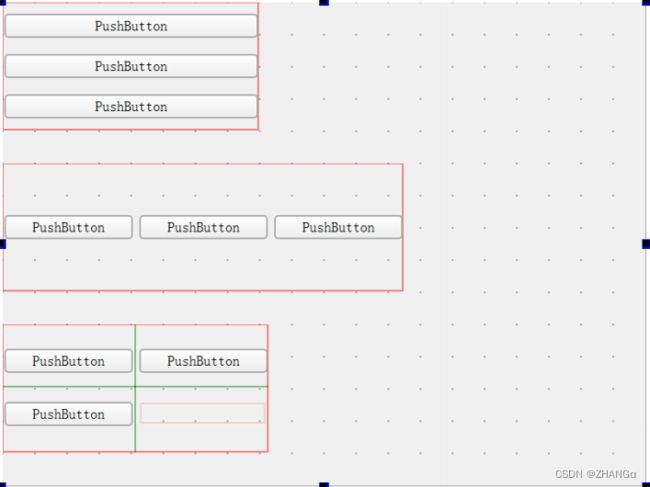
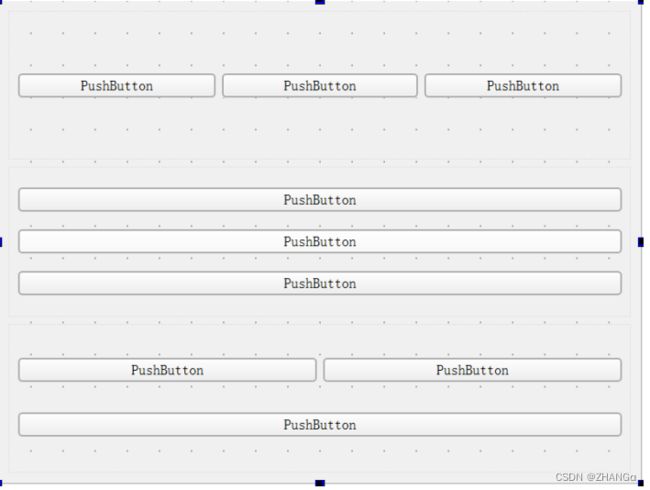
系统提供的布局控件
以上使用不灵活
利用 widget 做布局
常用UI控件
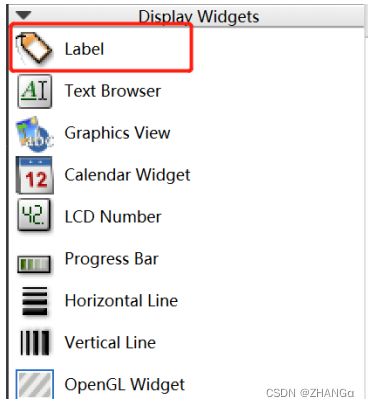
QLabel 标签控件
语法
setText 设置文本
text 获取文本
setPixmap 显示图片
setMovie 显示动画
示例1
// 设置文本
ui->test01->setText(" 德玛西亚 ");
connect(ui->btn01,QPushButton::clicked,[&](){
QString str;
// 获取文本
str = ui->test01->text();
qDebug() << str << endl;
});
示例2
// 设置图片
ui->test01->setPixmap(QPixmap(":/hd"));
ui->test01->setPixmap(QPixmap(":/image/Edit.png"));
示例3
// 设置动画
QMovie *movie = new QMovie(":/image/mario.gif");
ui->test01->setMovie(movie);
// 开始播放
movie->start();
// 停止播放
movie->stop();
QLineEdit 标签控件
语法
QString text() const
void setText(const QString &)
void setEchoMode(EchoMode mode)
QLineEdit::Normal 模式显示方式,按照输入的内容显示。
QLineEdit::NoEcho 不显示任何内容,此模式下无法看到用户的输入。
QLineEdit::Password 密码模式,输入的字符会根据平台转换为特殊字符。
QLineEdit::PasswordEchoOnEdit 编辑时显示字符否则显示字符作为密
void setTextMargins(int left, int top, int right, int bottom)
示例
ui->lineEdit->setText("hello world");
ui->lineEdit->setEchoMode(QLineEdit::Password);
ui->lineEdit->setTextMargins(20,50,20,10);
connect(ui->btn,QPushButton::clicked,[&](){
QString str;
str = ui->lineEdit->text();
qDebug() << str.toUtf8().data() << endl;
});
单选框
示例
代码
// 头文件中声明性别与年龄
private :
Ui::Widget * ui ;
QString sex ;
QString hun ;
// 源文件
connect ( ui -> sexm , QPushButton::clicked ,[ & ](){
sex = ui -> sexm -> text ();
qDebug () << " 性别 :" << sex . toUtf8 (). data () << endl ;
});
connect ( ui -> sexw , QPushButton::clicked ,[ & ](){
sex = ui -> sexw -> text ();
qDebug () << " 性别 :" << sex . toUtf8 (). data () << endl ;
});
connect ( ui -> hun1 , QPushButton::clicked ,[ & ](){
hun = ui -> hun1 -> text ();
qDebug () << " 婚否 :" << hun . toUtf8 (). data () << endl ;
});
connect ( ui -> hun2 , QPushButton::clicked ,[ & ](){
hun = ui -> hun2 -> text ();
qDebug () << " 婚否 :" << hun . toUtf8 (). data () << endl ;
});
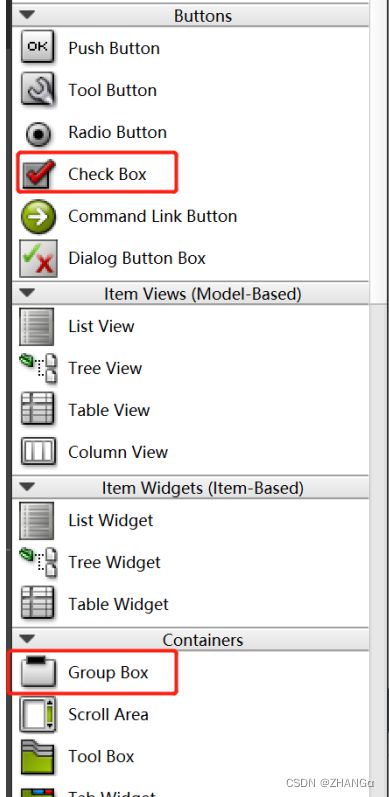
多选框
示例
代码
// 头文件
// 存储多选选中内容的容器
QStringList list;
// 源文件,在 UI 文件中点击 CheckBox, 右击转到槽
void Widget::on_checkBox1_stateChanged(int arg1)
{
if(arg1 == 2){
list.append(ui->checkBox1->text());
}
else
{
list.removeOne(ui->checkBox1->text());
}
for(int i = 0; i < list.size(); i++)
{
qDebug() << list.at(i) << endl;
}
}
void Widget::on_checkBox2_stateChanged(int arg1)
{
if(arg1 == 2){
list.append(ui->checkBox2->text());
}
else
{
list.removeOne(ui->checkBox2->text());
}
for(int i = 0; i < list.size(); i++)
{
qDebug() << list.at(i) << endl;
}
}
void Widget::on_checkBox3_stateChanged(int arg1)
{
if(arg1 == 2){
list.append(ui->checkBox3->text());
}
else
{
list.removeOne(ui->checkBox3->text());
}
for(int i = 0; i < list.size(); i++)
{
qDebug() << list.at(i) << endl;
}
}
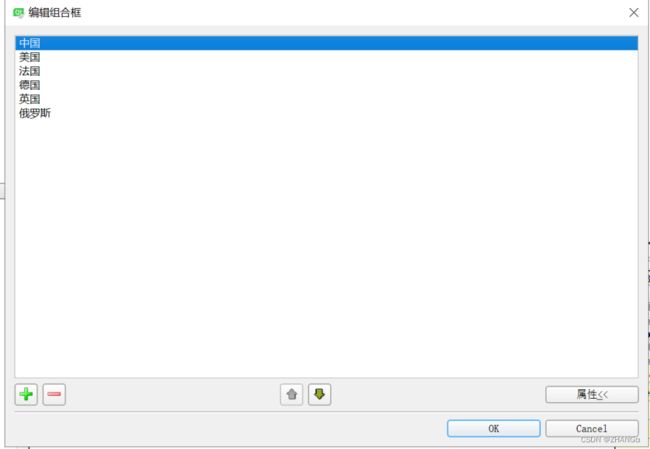
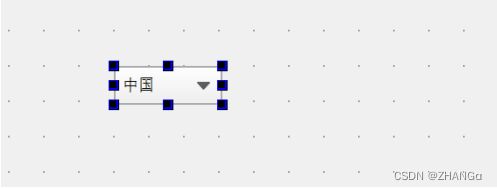
下拉列表
示例:

代码:
// 设置当前选中的位置
ui->comboBox->setCurrentIndex(2);
// 当选中发送改变时调用
void Widget::on_comboBox_currentIndexChanged(const QString &arg1)
{
qDebug() << arg1 << endl;
}