使用vuepress-theme-reco搭建自己的博客
使用vuepress-theme-reco搭建自己的博客
vuepress-theme-reco是VuePress的一个主题,大家可以参考VuePress和其他主题,搭建你自己风格的主题,这篇主要讲解vuepress-theme-reco主题的博客。
VuePress是静态网页生成器,通过它,可以迅速的将我们的Markdown笔记变成网页,方便我们翻阅,查找。
一、初始化项目
1、引入vuepress-theme-reco主题
npm install vuepress-theme-reco --save-dev
2、使用官方的模板初始化项目
theme-cli init blogs
按要求输入内容
将在你的文件夹下生成你项目名的文件夹,我这里是blog.
3、运行
进到文件夹内,使用cmd执行
npm install
npm run dev
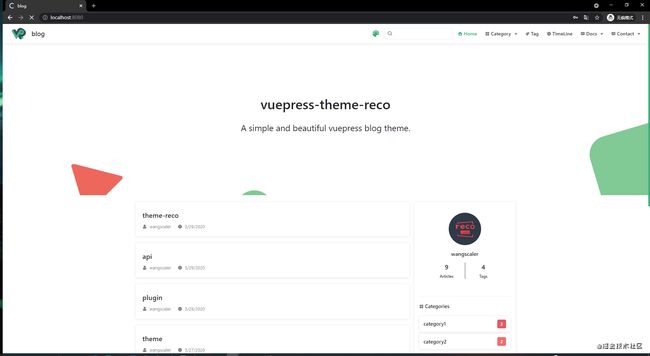
至此博客已经可以正常使用了,但是我们打开官方的案例,往往比我们现在的效果要好,我们需要优化的继续往下看。
二、优化页面
1、官方的功能
像评论、时间线、域名的配置、多语言、暗色适配、侧边栏、文档的摘要…官方写的已经很详细,这里就不再介绍,按照官方文档配置即可。如果有疑问,可以在下面评论,咨询我。
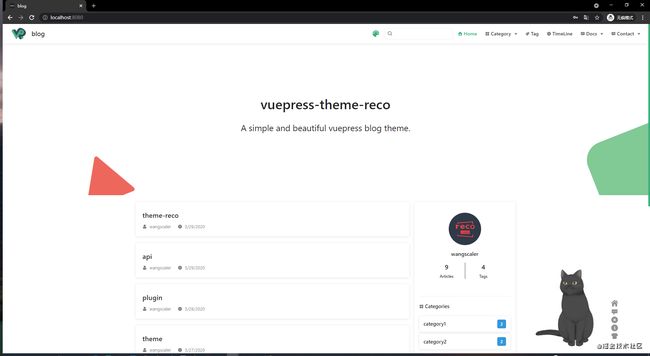
2、看板娘
-
引入依赖:
npm i @vuepress-reco/vuepress-plugin-kan-ban-niang -
配置
在config.js下的module.exports加入如下代码,可参考npm:
plugins: [ [ '@vuepress-reco/vuepress-plugin-kan-ban-niang',{ theme: [ 'miku', 'whiteCat', 'haru1', 'haru2', 'haruto', 'koharu', 'izumi', 'shizuku', 'wanko', 'blackCat', 'z16' ], clean: false, messages: { welcome: '欢迎来到我的博客', home: '心里的花,我想要带你回家。', theme: '好吧,希望你能喜欢我的其他小伙伴。', close: '你不喜欢我了吗?痴痴地望着你。' }, messageStyle: { right: '68px', bottom: '290px' }, width: 250, height: 320 } ], ], -
效果图
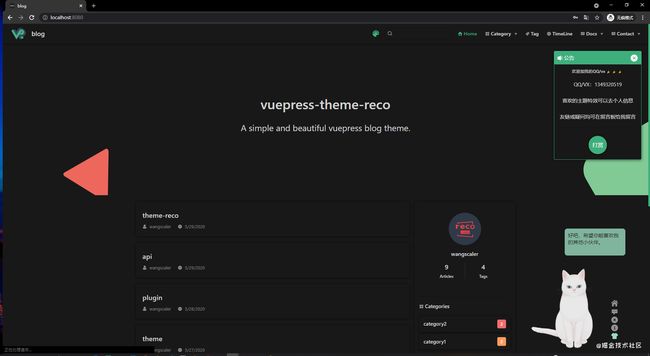
3、公告
-
安装依赖:
npm i @vuepress-reco/vuepress-plugin-bulletin-popover -
修改配置:在config.js下的module.exports的plugin下加入以下代码:
['@vuepress-reco/vuepress-plugin-bulletin-popover', {
      title: '公告',
      body: [
        {
          type: 'title',
          content: '欢迎加我的QQ/vx ',
          style: 'text-aligin: center;',
        },
        {
          type: 'text',
          content: 'QQ/VX:1349320519',
          style: 'text-align: center;'
        },
        {
          type: 'text',
          content: '喜欢的主题特效可以去个人信息',
          style: 'text-align: center;'
        },
        {
          type: 'text',
          content: '友链或疑问均可在留言板给我留言',
          style: 'text-align: center;'
        }
      ],
      footer: [
        {
          type: 'button',
          text: '打赏',
          link: '/blog/donate'
        },
      ]
    }],
  ],
注意和上一个插件直接有逗号间隔,上述的打赏对应的超链接/blog/donate,你可以在这里定义你自己的打赏页面。
-
效果图
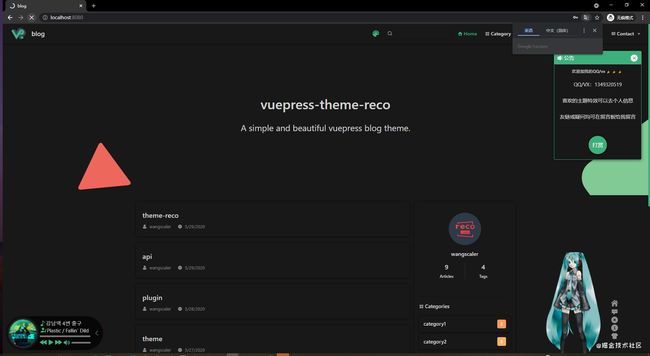
4、音乐播放器
-
安装依赖:
npm i @vuepress-reco/vuepress-plugin-bgm-player -
修改配置:在config.js下的module.exports的plugin下加入以下代码,更多配置参考npm:
[ "@vuepress-reco/vuepress-plugin-bgm-player",{ audios: [ // 本地文件示例 // { // name: '장가갈 수 있을까', // artist: '咖啡少年', // url: '/bgm/1.mp3', // cover: '/bgm/1.jpg' // }, // 网络文件示例 { name: '강남역 4번 출구', artist: 'Plastic / Fallin` Dild', url: 'https://assets.smallsunnyfox.com/music/2.mp3', cover: 'https://assets.smallsunnyfox.com/music/2.jpg' }, { name: '用胳膊当枕头', artist: '최낙타', url: 'https://assets.smallsunnyfox.com/music/3.mp3', cover: 'https://assets.smallsunnyfox.com/music/3.jpg' } ] } ], -
效果图
5、鼠标点击特效
-
安装依赖:
npm i vuepress-plugin-cursor-effects -
修改配置:在config.js下的module.exports的plugin下加入以下代码,更多配置参考npm:
[ "vuepress-plugin-cursor-effects", { size: 2, // size of the particle, default: 2 shape: 'circle', // shape of the particle, default: 'star' zIndex: 999999999 // z-index property of the canvas, default: 999999999 } ], -
效果图
6、首页背景整屏显示
-
修改首页README.md
在根路径下
# 原来的配置内容
# heroImage: /hero.png
# heroImageStyle: {
#   maxWidth: '600px',
#   width: '100%',
#   display: block,
#   margin: '9rem auto 2rem',
#   background: '#fff',
#   borderRadius: '1rem',
# }
bgImageStyle: {
  height: '450px'
}
##############################
#修改之后
heroImageStyle: {
  maxWidth: '600px',
  width: '100%',
  display: block,
  margin: '9rem auto 2rem',
  background: '#fff',
  borderRadius: '1rem',
}
bgImage: back1.gif
bgImageStyle: {
  height: '1000px'
}
back1.gif文件放在.vuepress下的public下即可,自己找个好看的动图吧。
-
效果图
7、首页气泡
-
安装依赖:
npm install vue-canvas-effect --save -
修改源码
以前的在node_moudles/vuepress-theme-reco/components/Homeblog.vue,现在的在node_moudles/vuepress-theme-reco/components/HomeBlog/index.vue
在methods方法上加入
  mounted (){
    import('vue-canvas-effect/src/components/bubbles').then(module => {
      this.bubbles=module.default
    })
    this.recoShow = true
    this._setPage(this._getStoragePage())
    },
在27行加入
<component v-if="bubbles" :is="bubbles" :options="options">component>在components所在行下一行加入
  data () {
    return {
      recoShow: false,
      currentPage: 1,
      tags: [],
      bubbles: null
    }
  },
完整的文件内容如下
<template> <div class="home-blog"> <div class="hero" :style="{ ...bgImageStyle }"> <div> <ModuleTransition> <img class="hero-img" v-if="recoShowModule && $frontmatter.heroImage" :style="heroImageStyle || {}" :src="$withBase($frontmatter.heroImage)" alt="hero" /> ModuleTransition> <ModuleTransition delay="0.04"> <h1 v-if="recoShowModule && $frontmatter.heroText !== null"> {{ $frontmatter.heroText || $title || 'vuePress-theme-reco' }} h1> ModuleTransition> <ModuleTransition delay="0.08"> <p v-if="recoShowModule && $frontmatter.tagline !== null" class="description"> {{ $frontmatter.tagline || $description || 'Welcome to your vuePress-theme-reco site' }} p> ModuleTransition> div> <component v-if="bubbles" :is="bubbles" :options="options">component> div> <ModuleTransition delay="0.16"> <div v-show="recoShowModule" class="home-blog-wrapper"> <div class="blog-list"> <note-abstract :data="$recoPosts" @paginationChange="paginationChange" /> div> <div class="info-wrapper"> <PersonalInfo/> <h4><reco-icon icon="reco-category" /> {{$recoLocales.category}}h4> <ul class="category-wrapper"> <li class="category-item" v-for="(item, index) in this.$categories.list" :key="index"> <router-link :to="item.path"> <span class="category-name">{{ item.name }}span> <span class="post-num" :style="{ 'backgroundColor': getOneColor() }">{{ item.pages.length }}span> router-link> li> ul> <hr> <h4 v-if="$tags.list.length !== 0"><reco-icon icon="reco-tag" /> {{$recoLocales.tag}}h4> <TagList @getCurrentTag="getPagesByTags" /> <h4 v-if="$themeConfig.friendLink && $themeConfig.friendLink.length !== 0"><reco-icon icon="reco-friend" /> {{$recoLocales.friendLink}}h4> <FriendLink /> div> div> ModuleTransition> <ModuleTransition delay="0.24"> <Content v-show="recoShowModule" class="home-center" custom/> ModuleTransition> div> template> <script> import { defineComponent, toRefs, reactive, computed, getCurrentInstance, onMounted } from 'vue-demi' import TagList from '@theme/components/TagList' import FriendLink from '@theme/components/FriendLink' import NoteAbstract from '@theme/components/NoteAbstract' import { ModuleTransition, RecoIcon } from '@vuepress-reco/core/lib/components' import PersonalInfo from '@theme/components/PersonalInfo' import { getOneColor } from '@theme/helpers/other' export default defineComponent({ components: { NoteAbstract, TagList, FriendLink, ModuleTransition, PersonalInfo, RecoIcon }, data () { return { recoShow: false, currentPage: 1, tags: [], bubbles: null } }, setup (props, ctx) { const instance = getCurrentInstance().proxy const state = reactive({ recoShow: false, heroHeight: 0 }) const recoShowModule = computed(() => instance && instance.$parent.recoShowModule) const heroImageStyle = computed(() => instance.$frontmatter.heroImageStyle || {}) const bgImageStyle = computed(() => { const url = instance.$frontmatter.bgImage ? instance.$withBase(instance.$frontmatter.bgImage) : require('../../images/bg.svg') const initBgImageStyle = { textAlign: 'center', overflow: 'hidden', background: `url(${url}) center/cover no-repeat` } const { bgImageStyle } = instance.$frontmatter return bgImageStyle ? { ...initBgImageStyle, ...bgImageStyle } : initBgImageStyle }) onMounted(() => { state.heroHeight = document.querySelector('.hero').clientHeight state.recoShow = true }) return { recoShowModule, heroImageStyle, bgImageStyle, ...toRefs(state), getOneColor } }, mounted (){ import('vue-canvas-effect/src/components/bubbles').then(module => { this.bubbles=module.default }) this.recoShow = true this._setPage(this._getStoragePage()) }, methods: { paginationChange (page) { setTimeout(() => { window.scrollTo(0, this.heroHeight) }, 100) }, getPagesByTags (tagInfo) { this.$router.push({ path: tagInfo.path }) } } }) script> <style lang="stylus"> .home-blog { padding: 0; margin: 0px auto; .hero { margin $navbarHeight auto 0 position relative box-sizing border-box padding 0 20px height 100vh display flex align-items center justify-content center .hero-img { max-width: 300px; margin: 0 auto 1.5rem } h1 { display: block; margin:0 auto 1.8rem; font-size: 2.5rem; } .description { margin: 1.8rem auto; font-size: 1.6rem; line-height: 1.3; } } .home-blog-wrapper { display flex align-items: flex-start; margin 20px auto 0 padding 0 20px max-width $homePageWidth .blog-list { flex auto width 0 .abstract-wrapper { .abstract-item:last-child { margin-bottom: 0px; } } } .info-wrapper { position -webkit-sticky; position sticky; top 70px overflow hidden transition all .3s margin-left 15px flex 0 0 300px height auto box-shadow var(--box-shadow) border-radius $borderRadius box-sizing border-box padding 0 15px background var(--background-color) &:hover { box-shadow var(--box-shadow-hover) } h4 { color var(--text-color) } .category-wrapper { list-style none padding-left 0 .category-item { margin-bottom .4rem padding: .4rem .8rem; transition: all .5s border-radius $borderRadius box-shadow var(--box-shadow) background-color var(--background-color) &:hover { transform scale(1.04) a { color $accentColor } } a { display flex justify-content: space-between align-items: center color var(--text-color) .post-num { width 1.6rem; height 1.6rem text-align center line-height 1.6rem border-radius $borderRadius background #eee font-size 13px color #fff } } } } } } } @media (max-width: $MQMobile) { .home-blog { .hero { height 450px img { max-height: 210px; margin: 2rem auto 1.2rem; } h1 { margin: 0 auto 1.8rem ; font-size: 2rem; } .description { font-size: 1.2rem; } .action-button { font-size: 1rem; padding: 0.6rem 1.2rem; } } .home-blog-wrapper { display block!important .blog-list { width auto } .info-wrapper { // display none!important margin-left 0 .personal-info-wrapper { display none } } } } } @media (max-width: $MQMobileNarrow) { .home-blog { .hero { height 450px img { max-height: 210px; margin: 2rem auto 1.2rem; } h1 { margin: 0 auto 1.8rem ; font-size: 2rem; } h1, .description, .action { // margin: 1.2rem auto; } .description { font-size: 1.2rem; } .action-button { font-size: 1rem; padding: 0.6rem 1.2rem; } } .home-blog-wrapper { display block!important .blog-list { width auto } .info-wrapper { // display none!important margin-left 0 .personal-info-wrapper { display none } } } } } style> -
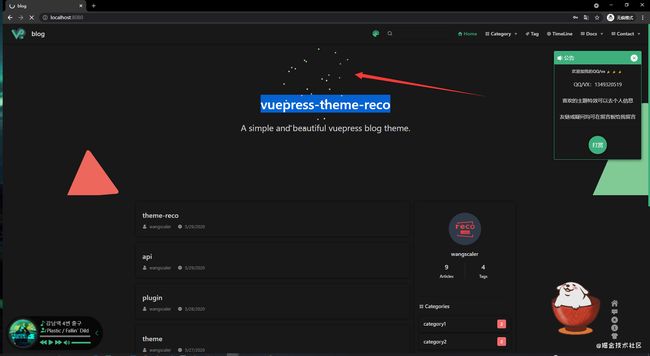
效果图
8、向下跳转
-
修改文件
在首页README.md下加入如下代码
<style> .anchor-down { display: block; margin: 12rem auto 0; bottom: 45px; width: 20px; height: 20px; font-size: 34px; text-align: center; animation: bounce-in 5s 3s infinite; position: absolute; left: 50%; bottom: 30%; margin-left: -10px; cursor: pointer; } @-webkit-keyframes bounce-in{ 0%{transform:translateY(0)} 20%{transform:translateY(0)} 50%{transform:translateY(-20px)} 80%{transform:translateY(0)} to{transform:translateY(0)} } .anchor-down::before { content: ""; width: 20px; height: 20px; display: block; border-right: 3px solid #fff; border-top: 3px solid #fff; transform: rotate(135deg); position: absolute; bottom: 10px; } .anchor-down::after { content: ""; width: 20px; height: 20px; display: block; border-right: 3px solid #fff; border-top: 3px solid #fff; transform: rotate(135deg); } </style> <script> export default { mounted () { const ifJanchor = document.getElementById("JanchorDown"); ifJanchor && ifJanchor.parentNode.removeChild(ifJanchor); let a = document.createElement('a'); a.id = 'JanchorDown'; a.className = 'anchor-down'; document.getElementsByClassName('hero')[0].append(a); let targetA = document.getElementById("JanchorDown"); targetA.addEventListener('click', e => { // 添加点击事件 this.scrollFn(); }) }, methods: { scrollFn() { const windowH = document.getElementsByClassName('hero')[0].clientHeight; // 获取窗口高度 document.documentElement.scrollTop = windowH; // 滚动条滚动到指定位置 } } } </script> -
效果图
9、彩带背景
-
安装依赖:
npm i vuepress-plugin-ribbon-animation -
修改config.js下的plugins,可参考npm
["ribbon-animation", { size: 90, // 默认数据 opacity: 0.3, // 透明度 zIndex: -1, // 层级 opt: { // 色带HSL饱和度 colorSaturation: "80%", // 色带HSL亮度量 colorBrightness: "60%", // 带状颜色不透明度 colorAlpha: 0.65, // 在HSL颜色空间中循环显示颜色的速度有多快 colorCycleSpeed: 6, // 从哪一侧开始Y轴 (top|min, middle|center, bottom|max, random) verticalPosition: "center", // 到达屏幕另一侧的速度有多快 horizontalSpeed: 200, // 在任何给定时间,屏幕上会保留多少条带 ribbonCount: 2, // 添加笔划以及色带填充颜色 strokeSize: 0, // 通过页面滚动上的因子垂直移动色带 parallaxAmount: -0.5, // 随着时间的推移,为每个功能区添加动画效果 animateSections: true }, ribbonShow: false, // 点击彩带 true显示 false为不显示 ribbonAnimationShow: true // 滑动彩带 }] -
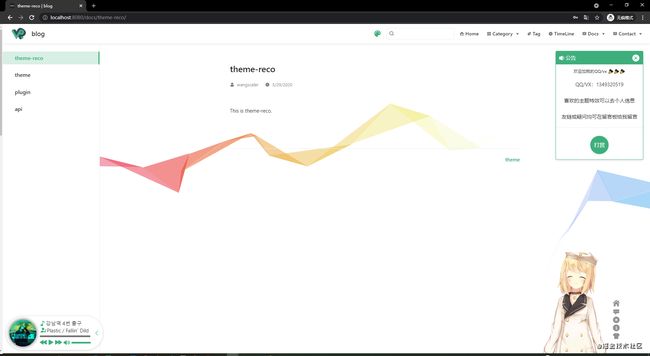
效果图
10、背景图
-
修改文件
在首页README.md下的style里设置body的背景图片,完成第8条的向下跳转,写入的style。
body{ background-image: url(背景图的url); } -
背景图
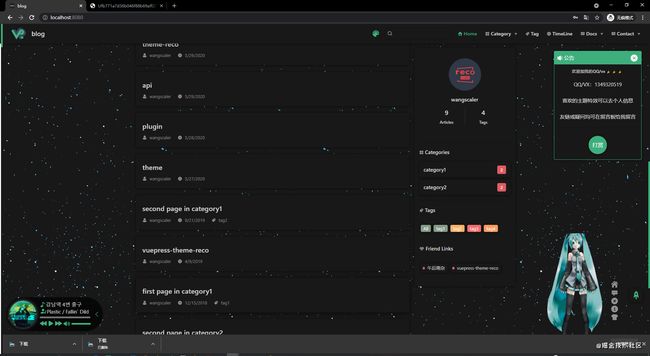
- 效果图如下
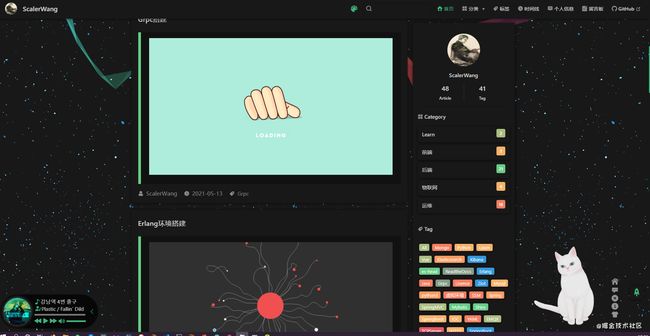
三、最终的效果图
如果你在搭建过程中遇到问题,就在下方留言联系我或者访问我的博客获取我的联系方式。也可以在在线聊天室大家一块交流。
写在最后
- [1] 微信公众号: 码农share
- [2] 掘金
- [3]博客
- [4]在线聊天室

