SkyWalking 9.0.0在SpingBoot和SpringCloud中的应用
一、SkyWalking介绍
SkyWalking 是一个开源的可观测平台,用于收集、分析、聚合和可视化来自服务和云原生基础设施的数据。SkyWalking 提供了一种简单的方式来清晰地观测分布式系统,即使是横跨多个云平台。它是一种现代 APM(application performance monitor),专为云原生、基于容器的分布式系统而设计。
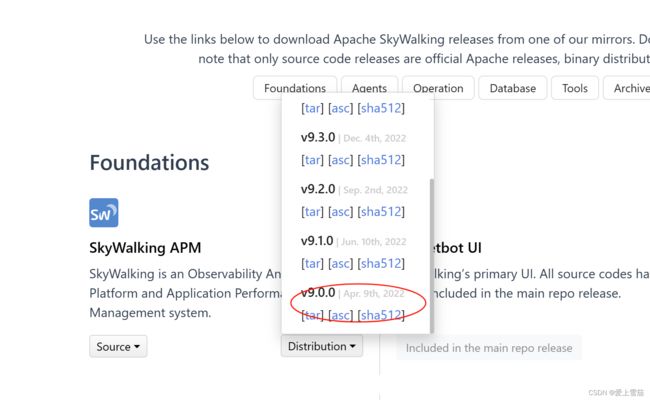
二、SkyWalking下载
Downloads | Apache SkyWalking
这里选择SkyWalking 9.0.0
三、SkyWalking修改配置
3.1、application.yml
storage:
  selector: ${SW_STORAGE:mysql}
  elasticsearch:
    namespace: ${SW_NAMESPACE:""}
    clusterNodes: ${SW_STORAGE_ES_CLUSTER_NODES:localhost:9200}
    protocol: ${SW_STORAGE_ES_HTTP_PROTOCOL:"http"}
    connectTimeout: ${SW_STORAGE_ES_CONNECT_TIMEOUT:3000}
    socketTimeout: ${SW_STORAGE_ES_SOCKET_TIMEOUT:30000}
    responseTimeout: ${SW_STORAGE_ES_RESPONSE_TIMEOUT:15000}
    numHttpClientThread: ${SW_STORAGE_ES_NUM_HTTP_CLIENT_THREAD:0}
    user: ${SW_ES_USER:""}
    password: ${SW_ES_PASSWORD:""}
    trustStorePath: ${SW_STORAGE_ES_SSL_JKS_PATH:""}
    trustStorePass: ${SW_STORAGE_ES_SSL_JKS_PASS:""}
    secretsManagementFile: ${SW_ES_SECRETS_MANAGEMENT_FILE:""} # Secrets management file in the properties format includes the username, password, which are managed by 3rd party tool.
    dayStep: ${SW_STORAGE_DAY_STEP:1} # Represent the number of days in the one minute/hour/day index.
    indexShardsNumber: ${SW_STORAGE_ES_INDEX_SHARDS_NUMBER:1} # Shard number of new indexes
    indexReplicasNumber: ${SW_STORAGE_ES_INDEX_REPLICAS_NUMBER:1} # Replicas number of new indexes
    # Super data set has been defined in the codes, such as trace segments.The following 3 config would be improve es performance when storage super size data in es.
    superDatasetDayStep: ${SW_SUPERDATASET_STORAGE_DAY_STEP:-1} # Represent the number of days in the super size dataset record index, the default value is the same as dayStep when the value is less than 0
    superDatasetIndexShardsFactor: ${SW_STORAGE_ES_SUPER_DATASET_INDEX_SHARDS_FACTOR:5} #  This factor provides more shards for the super data set, shards number = indexShardsNumber * superDatasetIndexShardsFactor. Also, this factor effects Zipkin and Jaeger traces.
    superDatasetIndexReplicasNumber: ${SW_STORAGE_ES_SUPER_DATASET_INDEX_REPLICAS_NUMBER:0} # Represent the replicas number in the super size dataset record index, the default value is 0.
    indexTemplateOrder: ${SW_STORAGE_ES_INDEX_TEMPLATE_ORDER:0} # the order of index template
    bulkActions: ${SW_STORAGE_ES_BULK_ACTIONS:5000} # Execute the async bulk record data every ${SW_STORAGE_ES_BULK_ACTIONS} requests
    # flush the bulk every 10 seconds whatever the number of requests
    # INT(flushInterval * 2/3) would be used for index refresh period.
    flushInterval: ${SW_STORAGE_ES_FLUSH_INTERVAL:15}
    concurrentRequests: ${SW_STORAGE_ES_CONCURRENT_REQUESTS:2} # the number of concurrent requests
    resultWindowMaxSize: ${SW_STORAGE_ES_QUERY_MAX_WINDOW_SIZE:10000}
    metadataQueryMaxSize: ${SW_STORAGE_ES_QUERY_MAX_SIZE:10000}
    scrollingBatchSize: ${SW_STORAGE_ES_SCROLLING_BATCH_SIZE:5000}
    segmentQueryMaxSize: ${SW_STORAGE_ES_QUERY_SEGMENT_SIZE:200}
    profileTaskQueryMaxSize: ${SW_STORAGE_ES_QUERY_PROFILE_TASK_SIZE:200}
    oapAnalyzer: ${SW_STORAGE_ES_OAP_ANALYZER:"{\"analyzer\":{\"oap_analyzer\":{\"type\":\"stop\"}}}"} # the oap analyzer.
    oapLogAnalyzer: ${SW_STORAGE_ES_OAP_LOG_ANALYZER:"{\"analyzer\":{\"oap_log_analyzer\":{\"type\":\"standard\"}}}"} # the oap log analyzer. It could be customized by the ES analyzer configuration to support more language log formats, such as Chinese log, Japanese log and etc.
    advanced: ${SW_STORAGE_ES_ADVANCED:""}
  h2:
    driver: ${SW_STORAGE_H2_DRIVER:org.h2.jdbcx.JdbcDataSource}
    url: ${SW_STORAGE_H2_URL:jdbc:h2:mem:skywalking-oap-db;DB_CLOSE_DELAY=-1}
    user: ${SW_STORAGE_H2_USER:sa}
    metadataQueryMaxSize: ${SW_STORAGE_H2_QUERY_MAX_SIZE:5000}
    maxSizeOfArrayColumn: ${SW_STORAGE_MAX_SIZE_OF_ARRAY_COLUMN:20}
    numOfSearchableValuesPerTag: ${SW_STORAGE_NUM_OF_SEARCHABLE_VALUES_PER_TAG:2}
    maxSizeOfBatchSql: ${SW_STORAGE_MAX_SIZE_OF_BATCH_SQL:100}
    asyncBatchPersistentPoolSize: ${SW_STORAGE_ASYNC_BATCH_PERSISTENT_POOL_SIZE:1}
  mysql:
    properties:
      jdbcUrl: ${SW_JDBC_URL:"jdbc:mysql://localhost:3306/swtest?rewriteBatchedStatements=true"}
      dataSource.user: ${SW_DATA_SOURCE_USER:root}
      dataSource.password: ${SW_DATA_SOURCE_PASSWORD:123456}
      dataSource.cachePrepStmts: ${SW_DATA_SOURCE_CACHE_PREP_STMTS:true}
      dataSource.prepStmtCacheSize: ${SW_DATA_SOURCE_PREP_STMT_CACHE_SQL_SIZE:250}
      dataSource.prepStmtCacheSqlLimit: ${SW_DATA_SOURCE_PREP_STMT_CACHE_SQL_LIMIT:2048}
      dataSource.useServerPrepStmts: ${SW_DATA_SOURCE_USE_SERVER_PREP_STMTS:true}
    metadataQueryMaxSize: ${SW_STORAGE_MYSQL_QUERY_MAX_SIZE:5000}
    maxSizeOfArrayColumn: ${SW_STORAGE_MAX_SIZE_OF_ARRAY_COLUMN:20}
    numOfSearchableValuesPerTag: ${SW_STORAGE_NUM_OF_SEARCHABLE_VALUES_PER_TAG:2}
    maxSizeOfBatchSql: ${SW_STORAGE_MAX_SIZE_OF_BATCH_SQL:2000}
    asyncBatchPersistentPoolSize: ${SW_STORAGE_ASYNC_BATCH_PERSISTENT_POOL_SIZE:4}
这里采用的是mysql数据库,也可以选择其他数据库,需要拷贝对应的驱动进去,例如mysql,就拷贝mysql-connector-j-8.0.33.jar到apache-skywalking-apm-bin\oap-libs目录中。
3.2、修改webapp.yml
server:
  port: 9090

spring:
  cloud:
    gateway:
      routes:
        - id: oap-route
          uri: lb://oap-service
          predicates:
            - Path=/graphql/**
    discovery:
      client:
        simple:
          instances:
            oap-service:
              - uri: http://127.0.0.1:12800
            # - uri: http://:
            # - uri: http://:

  mvc:
    throw-exception-if-no-handler-found: true

  web:
    resources:
      add-mappings: true

management:
  server:
    base-path: /manage
3.3、启动skywalking
进入bin下面,直接启动startup.bat
http://127.0.0.1:9090四、SkyWalking在springboot中的应用
4.1、引入对应的jar包
			org.apache.skywalking
			apm-toolkit-trace
			9.0.0


			org.apache.skywalking
			apm-toolkit-logback-1.x
			9.0.0
4.2、修改logback-spring.xml配置文件
					%d{yyyy-MM-dd HH:mm:ss.SSS}  [%thread] %-5level %logger{36} - %msg%n


					%d{yyyy-MM-dd HH:mm:ss.SSS} [%X{tid}] [%thread] %-5level %logger{36} -%msg%n


			0
			1024
			true


					%d{yyyy-MM-dd HH:mm:ss.SSS} [%X{tid}] [%thread] %-5level %logger{36} -%msg%n


			0
			1024
			true
4.3、增加agent
-javaagent:D:\workspace\apache-skywalking-java-agent-9.0.0\skywalking-agent\skywalking-agent.jar -DSW_AGENT_NAME=group -DSW_AGENT_NAME=skywalking-bigdata-system -DSW_AGENT_COLLECTOR_BACKEND_SERVICES=127.0.0.1:118004.4、修改application.yml
spring:
  application:
    name: demobigdata
  profiles:
    active: mybatis,skywalking


logging:
  config: classpath:logback-spring.xml
4.5、启动springboot服务
直接启动Application
五、SkyWalking在springcloud的应用
5.1、在gateway中的配置
5.1.1、引入jar包
			org.apache.skywalking
			apm-toolkit-trace
			9.0.0


			org.apache.skywalking
			apm-toolkit-logback-1.x
			9.0.0
5.1.2、修改日志配置
					%d{yyyy-MM-dd HH:mm:ss.SSS}  [%thread] %-5level %logger{36} - %msg%n


					%d{yyyy-MM-dd HH:mm:ss.SSS} [%X{tid}] [%thread] %-5level %logger{36} -%msg%n


			0
			1024
			true


					%d{yyyy-MM-dd HH:mm:ss.SSS} [%X{tid}] [%thread] %-5level %logger{36} -%msg%n


			0
			1024
			true
5.1.3、修改application.yml
spring:
  application:
    name:  gateway-consumer
  profiles:
    active: dubbo,ext,skywalking
logging:
config: classpath:logback-spring.xml5.1.4、增加agent
-javaagent:D:\workspace\apache-skywalking-java-agent-9.0.0\skywalking-agent\skywalking-agent.jar -DSW_AGENT_NAME=group -DSW_AGENT_NAME=skywalking-gateway-system -DSW_AGENT_COLLECTOR_BACKEND_SERVICES=127.0.0.1:118005.1.5、启动网关
GatewayApplication5.2、在user原则服务中的配置
5.2.1、引入jar包
			org.apache.skywalking
			apm-toolkit-trace
			9.0.0


			org.apache.skywalking
			apm-toolkit-logback-1.x
			9.0.0
5.2.2、修改日志配置
					%d{yyyy-MM-dd HH:mm:ss.SSS}  [%thread] %-5level %logger{36} - %msg%n


					%d{yyyy-MM-dd HH:mm:ss.SSS} [%X{tid}] [%thread] %-5level %logger{36} -%msg%n


			0
			1024
			true


					%d{yyyy-MM-dd HH:mm:ss.SSS} [%X{tid}] [%thread] %-5level %logger{36} -%msg%n


			0
			1024
			true
5.2.3、修改application.yml
spring:
  application:
    name: users-provider
  profiles:
    active: dev,mybatis,skywalking
logging:
config: classpath:logback-spring.xml5.2.4、增加agent
-javaagent:D:\workspace\apache-skywalking-java-agent-9.0.0\skywalking-agent\skywalking-agent.jar -DSW_AGENT_NAME=group -DSW_AGENT_NAME=skywalking-users-system -DSW_AGENT_COLLECTOR_BACKEND_SERVICES=127.0.0.1:118005.2.5、启动原子服务
UsersApplication5.3、因为采用的是微服框架,需要启动服务治理框架nacos
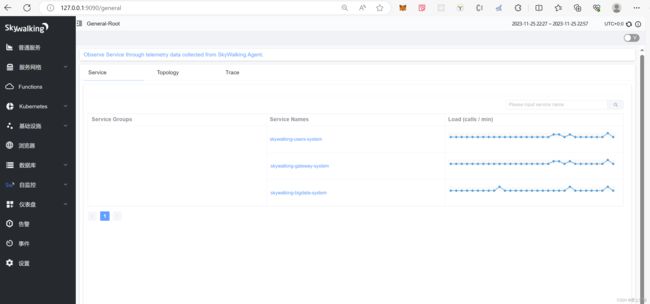
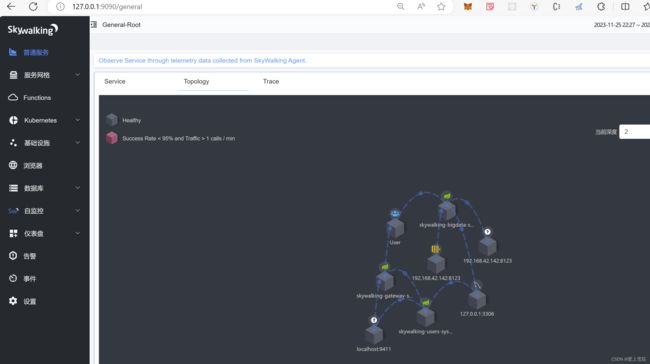
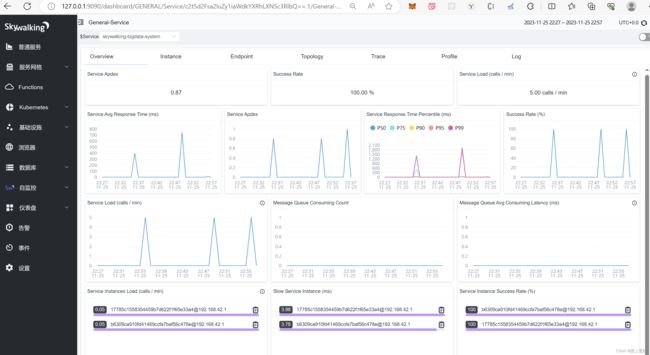
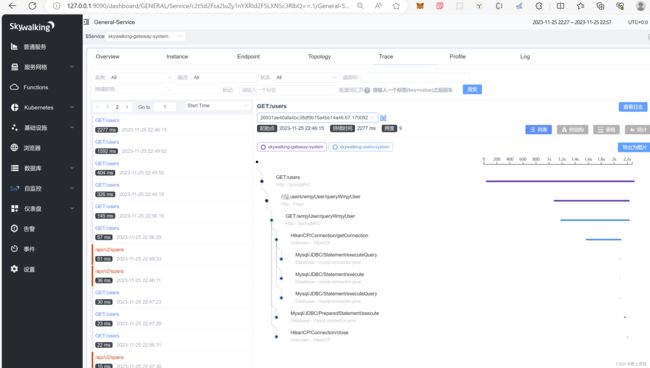
六、SkyWalking服务界面
这样skywalking就启动了,里面的细节可以值得深入的研究,也可以去研究下源代码
