(使用vite搭建vue3项目(vite + vue3 + vue router + pinia + element plus))
使用vite搭建vue3项目(vite + vue3 + vue router + pinia + element plus)
- 初始化项目
- 安装依赖,运行项目
- 初始配置
初始化项目
1.需要在创建项目的位置cmd目录下执行

2. npm init vite@latest 回车
npm init vite@latest
3.填上自己的项目名称 回车

4.选择vue 回车
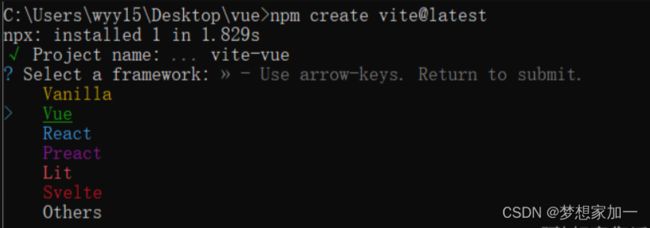
5.选择TypeScript回车

6.项目创建完成

或者一步到位通过附加的命令行选项直接指定项目名称和你想要使用的模板(根据自己npm版本来选择不同的命令行)
# npm 6.x
npm create vite@latest vite-vue --template vue-ts

# npm 7+, extra double-dash is needed:
npm create vite@latest vite-vue -- --template vue-ts

安装依赖,运行项目
1.用你的软件打开创建的项目,在终端进入项目
cd vite-vue

2.安装默认依赖
npm install
3.运行项目
npm run dev

初始配置
1.更改http://localhost:3000/到8080与Network路由访问(server对象为新增,其余的都是源代码)
修改vite.config.ts配置文件代码
import { defineConfig } from 'vite'
import vue from '@vitejs/plugin-vue'

// https://vitejs.dev/config/
export default defineConfig({
  plugins: [vue()],
  server:{
    host:'0.0.0.0',//解决vite use--host to expose
    port:8080,
    open:true
  }
})
2.配置vite别名
vue开发过程中,在引入文件时,习惯使用 @ 代替 src,vite 默认是不识别的,所以需要配置
(1)
npm install @types/node --save-dev
(2)修改vite.config.ts配置文件代码,(resolve对象为新增,其余都是源代码)
import { defineConfig } from 'vite'
import vue from '@vitejs/plugin-vue'
import { resolve } from 'path'

// https://vitejs.dev/config/
export default defineConfig({
  plugins: [vue()],
  server:{
    host:'0.0.0.0',//解决vite use--host to expose
    port:8080,
    open:true
  },
  resolve:{
    alias:[
      {
        find:'@',
        replacement:resolve(__dirname,'src')
      }
    ]
  }
})
3)在tsconfig.json 文件中添加配置
{
  "compilerOptions": {
    "target": "ESNext",
    "useDefineForClassFields": true,
    "module": "ESNext",
    "moduleResolution": "Node",
    "strict": true,
    "jsx": "preserve",
    "resolveJsonModule": true,
    "isolatedModules": true,
    "esModuleInterop": true,
    "lib": ["ESNext", "DOM"],
    "skipLibCheck": true,
    "noEmit": true,
 // 添加的配置开始
    "baseUrl": ".",
    "paths": {
      "@/*":[
        "src/*"
      ]
    }
//添加的配置结束
  },
  "include": ["src/**/*.ts", "src/**/*.d.ts", "src/**/*.tsx", "src/**/*.vue"],
  "references": [{ "path": "./tsconfig.node.json" }]
}
3.安装路由
npm install vue-router@4
(1)在src目录下新建router文件夹,在router里创建index.ts文件

(2)在index.ts里面配置路由
import { createRouter, createWebHistory, RouteRecordRaw } from 'vue-router'

const routes: Array<RouteRecordRaw> = [
    {
        path: '/',
        name: 'home',
        component:()=>import('../view/home.vue'),
   //我事先在src下面创建了一个view文件夹,在view文件下面创建了home.vue文件
    }
]

const router = createRouter({
    history: createWebHistory(),
    routes
})

export default router
(3)在main.ts中导入挂载路由
import { createApp } from 'vue'
import './style.css'
import App from './App.vue'
import router from "./router";

createApp(App).use(router).mount('#app')
(4)修改App.vue管理路由
<script setup lang="ts">
</script>
<template>
  <router-view></router-view>
</template>

<style>
</style>
npm install -D sass
<template>
  <div class="app">
    <div class="box">
      首页
    </div>
  </div>
</template>

<script lang="ts" setup>

</script>

<style lang="scss" scoped>
.app {
  .box {
    color: #747bff;
  }
}
</style>
5.引入element-plus
npm install element-plus --save
(1)在main.ts引入
import { createApp } from 'vue'
import './style.css'
import App from './App.vue'
import router from "./router";
import ElementPlus from 'element-plus'
import 'element-plus/dist/index.css'

createApp(App).use(router).use(ElementPlus).mount('#app')
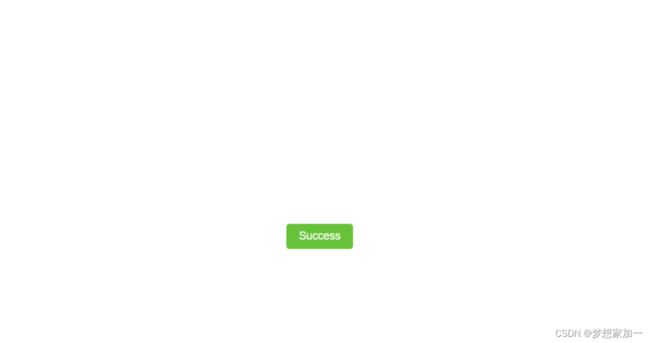
(2)使用
<template>
  <div class="app">
   <el-button type="success">Success</el-button>
  </div>
</template>

<script lang="ts" setup>

</script>

<style lang="scss" scoped>
</style>
(3)效果
6.安装pinia
npm install pinia
(1)在main.ts引入
import { createApp } from 'vue'
import './style.css'
import App from './App.vue'
import router from "./router";
import ElementPlus from 'element-plus'
import 'element-plus/dist/index.css'
import { createPinia } from "pinia";
const pinia = createPinia();

createApp(App).use(router).use(ElementPlus).use(pinia).mount('#app')
以上步骤便完成了vue3项目 vite + vue3 + vue router + pinia + element plus