5. 利用fabric-gateway-java连接并调用fabric链码
系列文章目录
- Fabric2.2在Linux上的部署记录
- Fabric2.2测试网络(test-network)的使用记录
- 用go编写简单的fabric链码
- 将fabric链码部署到测试网络的记录
- 利用fabric-gateway-java连接并调用fabric链码
文章目录
- 系列文章目录
- 前言
- 一、fabric-gateway是什么?
- 二、fabric-gateway使用流程
- 三、具体步骤
-
- 0 测试环境
- 1 配置依赖
- 2 配置connection.json文件
- 3 配置fabric.config.properties文件
- 4 连接并调用链码
- 总结
前言
上一篇文章中记录了自定义链码的部署过程,并利用cli进行了调用。本文尝试利用fabric-gateway-java对链码进行调用。
一、fabric-gateway是什么?
根据官方文档的描述,fabric-gateway是提供给应用与fabric网络交互的SDK,用java来实现。fabric-gateway提供了简单的API,可以用最少的代码实现与链码的交互。
二、fabric-gateway使用流程
- 配置钱包
- 配置gateway
- 获取网络
- 获取合约
- 调用合约
三、具体步骤
0 测试环境
| 版本 | |
|---|---|
| fabric | 2.2 |
| fabric-gateway-java | 2.2 |
| java | 8 |
| platform | centos7.6 |
1 配置依赖
        <dependency>
            <groupId>org.hyperledger.fabric-sdk-javagroupId>
            <artifactId>fabric-sdk-javaartifactId>
            <version>1.4.7version>
        dependency>

        <dependency>
            <groupId>org.hyperledger.fabricgroupId>
            <artifactId>fabric-gateway-javaartifactId>
            <version>2.2.0version>
        dependency>
2 配置connection.json文件
{
  "name": "basic-network",
  "version": "1.0.0",
  "dependencies": {
  },
  "client": {
    "organization": "Org1",
    "connection": {
      "timeout": {
        "peer": {
          "endorser": "300"
        },
        "orderer": "300"
      }
    }
  },
  "channels": {
    "mychannel": {
      "orderers": [
        "orderer.example.com"
      ],
      "peers": {
        "peer0.org1.example.com": {
          "endorsingPeer": true,
          "chaincodeQuery": true,
          "ledgerQuery": true,
          "eventSource": true
        },
        "peer0.org2.example.com": {
          "endorsingPeer": true,
          "chaincodeQuery": true,
          "ledgerQuery": true,
          "eventSource": true
        }
      }
    }
  },
  "organizations": {
    "Org1": {
      "mspid": "Org1MSP",
      "peers": [
        "peer0.org1.example.com"
      ],
      "certificateAuthorities": [
        "ca-org1"
      ],
      "adminPrivateKeyPEM": {
        "path": "src/main/resources/crypto-config/peerOrganizations/org1.example.com/users/[email protected]/msp/keystore/priv_sk"
      },
      "signedCertPEM": {
        "path": "src/main/resources/crypto-config/peerOrganizations/org1.example.com/users/[email protected]/msp/signcerts/[email protected]"
      }
    },
    "Org2": {
      "mspid": "Org2MSP",
      "peers": [
        "peer0.org2.example.com"
      ],
      "certificateAuthorities": [
        "ca-org2"
      ],
      "adminPrivateKeyPEM": {
        "path": "src/main/resources/crypto-config/peerOrganizations/org2.example.com/users/[email protected]/msp/keystore/priv_sk"
      },
      "signedCertPEM": {
        "path": "src/main/resources/crypto-config/peerOrganizations/org2.example.com/users/[email protected]/msp/signcerts/[email protected]"
      }
    }
  },
  "orderers": {
    "orderer.example.com": {
      "url": "grpcs://192.168.56.101:7050",
      "mspid": "OrdererMSP",
      "grpcOptions": {
        "ssl-target-name-override": "orderer.example.com",
        "hostnameOverride": "orderer.example.com"
      },
      "tlsCACerts": {
        "path": "src/main/resources/crypto-config/ordererOrganizations/example.com/orderers/orderer.example.com/tls/ca.crt"
      },
      "adminPrivateKeyPEM": {
        "path": "src/main/resources/crypto-config/ordererOrganizations/example.com/users/[email protected]/msp/keystore/priv_sk"
      },
      "signedCertPEM": {
        "path": "src/main/resources/crypto-config/ordererOrganizations/example.com/users/[email protected]/msp/signcerts/[email protected]"
      }
    }
  },
  "peers": {
    "peer0.org1.example.com": {
      "url": "grpcs://192.168.56.101:7051",
      "grpcOptions": {
        "ssl-target-name-override": "peer0.org1.example.com",
        "hostnameOverride": "peer0.org1.example.com",
        "request-timeout": 120001
      },
      "tlsCACerts": {
        "path": "src/main/resources/crypto-config/peerOrganizations/org1.example.com/peers/peer0.org1.example.com/tls/ca.crt"
      }
    },
    "peer0.org2.example.com": {
      "url": "grpcs://192.168.56.101:9051",
      "grpcOptions": {
        "ssl-target-name-override": "peer0.org2.example.com",
        "hostnameOverride": "peer0.org2.example.com",
        "request-timeout": 120001
      },
      "tlsCACerts": {
        "path": "src/main/resources/crypto-config/peerOrganizations/org2.example.com/peers/peer0.org2.example.com/tls/ca.crt"
      }
    }
  },
  "certificateAuthorities": {
    "ca-org1": {
      "url": "https://192.168.56.101:7054",
      "grpcOptions": {
        "verify": true
      },
      "tlsCACerts": {
        "path": "src/main/resources/crypto-config/peerOrganizations/org1.example.com/ca/ca.org1.example.com-cert.pem"
      },
      "registrar": [
        {
          "enrollId": "admin",
          "enrollSecret": "adminpw"
        }
      ]
    },
    "ca-org2": {
      "url": "https://192.168.56.101:8054",
      "grpcOptions": {
        "verify": true
      },
      "tlsCACerts": {
        "path": "src/main/resources/crypto-config/peerOrganizations/org2.example.com/ca/ca.org2.example.com-cert.pem"
      },
      "registrar": [
        {
          "enrollId": "admin",
          "enrollSecret": "adminpw"
        }
      ]
    }
  }
}
注意:自行更换部署链码的ip,以及各个证书和私钥路径。
笔者的配置文件结构如下图所示:
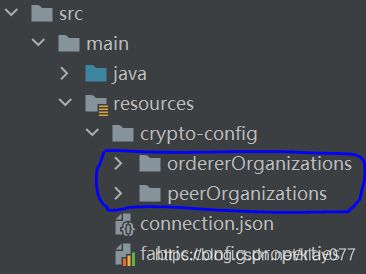
其中,图中圈起来的文件为节点的配置文件,在链码部署后,用部署链码生成的同名文件进行替换,用于获取节点的认证信息。
3 配置fabric.config.properties文件
# 网络配置文件路径
networkConfigPath = src/main/resources/connection.json
# 用户证书路径
certificatePath = src/main/resources/crypto-config/peerOrganizations/org1.example.com/users/[email protected]/msp/signcerts/[email protected]
# 用户私钥路径
privateKeyPath = src/main/resources/crypto-config/peerOrganizations/org1.example.com/users/[email protected]/msp/keystore/priv_sk

# 通道名字
channelName = mychannel

# 链码名字
contractName = hello
注意自行更换通道名字和链码名字。
4 连接并调用链码
public class SdkDemo {

    public static void main(String[] args) {
        try {
            //获取相应参数
            Properties properties = new Properties();
            InputStream inputStream = SdkDemo.class.getResourceAsStream("/fabric.config.properties");
            properties.load(inputStream);

            String networkConfigPath = properties.getProperty("networkConfigPath");
            String channelName = properties.getProperty("channelName");
            String contractName = properties.getProperty("contractName");
            //使用org1中的user1初始化一个网关wallet账户用于连接网络
            String certificatePath = properties.getProperty("certificatePath");
            X509Certificate certificate = readX509Certificate(Paths.get(certificatePath));

            String privateKeyPath = properties.getProperty("privateKeyPath");
            PrivateKey privateKey = getPrivateKey(Paths.get(privateKeyPath));

            Wallet wallet = Wallets.newInMemoryWallet();
            wallet.put("user1",Identities.newX509Identity("Org1MSP",certificate,privateKey));

            //根据connection.json 获取Fabric网络连接对象
            Gateway.Builder builder = Gateway.createBuilder()
                    .identity(wallet, "user1")
                    .networkConfig(Paths.get(networkConfigPath));
            //连接网关
            Gateway gateway = builder.connect();
            //获取通道
            Network network = gateway.getNetwork(channelName);
            //获取合约对象
            Contract contract = network.getContract(contractName);
            //查询现有资产
            //注意更换调用链码的具体函数
            byte[] queryAllAssets = contract.evaluateTransaction("GetAllAssets");
            System.out.println("所有资产:"+new String(queryAllAssets, StandardCharsets.UTF_8));

            // 增加新的资产
            byte[] invokeResult = contract.createTransaction("CreateAsset")
                    .setEndorsingPeers(network.getChannel().getPeers(EnumSet.of(Peer.PeerRole.ENDORSING_PEER)))
                    .submit("asset5", "LaoWang", "666");
            System.out.println(new String(invokeResult, StandardCharsets.UTF_8));

            //查询更新后的资产
            byte[] queryAllAssetsAfter = contract.evaluateTransaction("GetAllAssets");
            System.out.println("更新资产:"+new String(queryAllAssetsAfter, StandardCharsets.UTF_8));

        } catch (Exception e) {
            e.printStackTrace();
        }

    }

    private static X509Certificate readX509Certificate(final Path certificatePath) throws IOException, CertificateException {
        try (Reader certificateReader = Files.newBufferedReader(certificatePath, StandardCharsets.UTF_8)) {
            return Identities.readX509Certificate(certificateReader);
        }
    }

    private static PrivateKey getPrivateKey(final Path privateKeyPath) throws IOException, InvalidKeyException {
        try (Reader privateKeyReader = Files.newBufferedReader(privateKeyPath, StandardCharsets.UTF_8)) {
            return Identities.readPrivateKey(privateKeyReader);
        }
    }
}
到此步,应该可以成功利用gateway调用fabric链码,注意实际操作时应先启动网络并更换项目里的节点配置文件ordererOrganizations和peerOrganizations。
总结
在这篇文章中,记录了利用fabric-gateway-java调用部署好的fabric链码的过程,gateway提供的调用方法较为简单,详细的内容可参考官方文档。以上内容如有不正,请多多指教。