midwayjs从零开始创建项目,连接mikro-orm框架(必须有java的springboot基础)
前言:
我一直都是用java的springboot开发项目,然后进来新公司之后,公司的后端是用node.js,然后框架用的是 midwayjs ,然后网上的资料比较少,在此特地记录一波
文档:
1.官方文档:介绍 | Midway
2.controller的参数传递以接参:路由和控制器 | Midway
1.创建项目
先创建一个空文件夹,然后在文件夹里面执行cmd命令:
npm init midway@latest -y然后一直按回车,就可以得到这个以下项目:
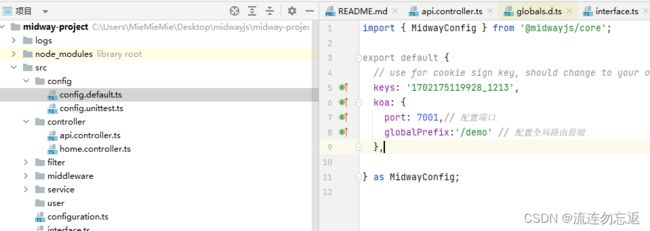
2.项目情况:
配置端口号,以及全局路由前缀:
然后运行:npm run dev 来执行项目

3.连接数据库(MikroORM)
1.在这里我使用的是 MikroORM 来连接数据库的
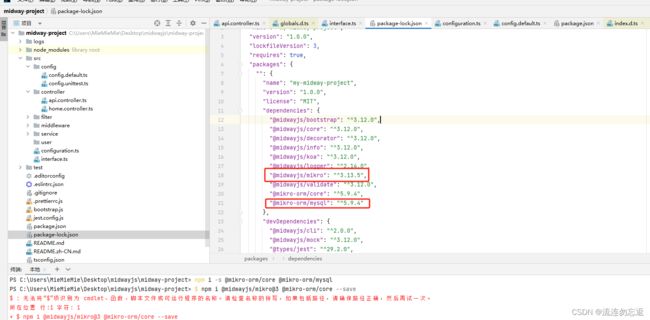
首先在终端执行以下命令,下载MikroORM和mysql的依赖:npm i -s @mikro-orm/core @mikro-orm/mysql npm i @midwayjs/mikro@3 @mikro-orm/core --save执行完毕之后,在 package.json 文件里面的 dependencies 值就会多出这两个值:
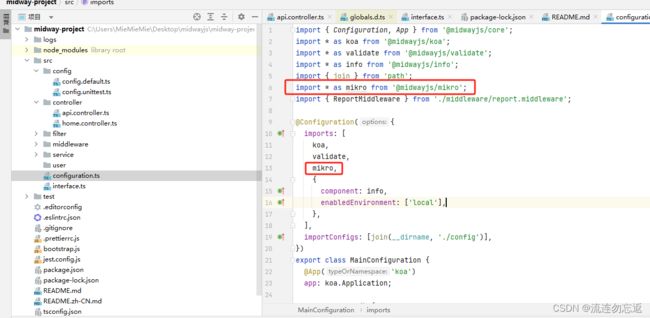
然后在 configuration.ts 这个文件里面,导入 MikroORM:
导入代码:import * as mikro from '@midwayjs/mikro';
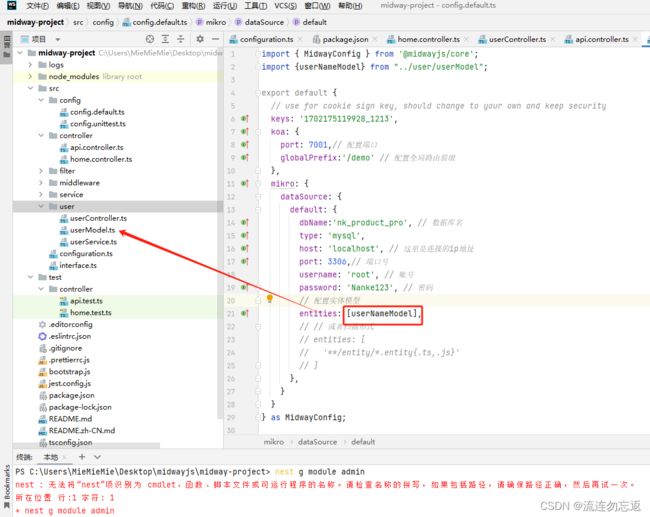
然后在 config.default.ts 文件里面添加mikro的数据源:
代码:mikro: { dataSource: { default: { dbName:'nk_product_pro', // 数据库名 type: 'mysql', host: 'localhost', // 这里是连接的ip地址 port: 3306,// 端口号 username: 'root', // 账号 password: '***', // 密码 // 配置实体模型 entities: [userNameModel], // // 或者扫描形式 // entities: [ // '**/entity/*.entity{.ts,.js}' // ] }, } }其中的 userNameModel :
userNameController:import { Inject, Controller, Get } from '@midwayjs/core'; import {userNameService} from "./userService"; @Controller('/userName') export class userNameController { @Inject() userNameService: userNameService; @Get('/userName') async userName() { console.log('进入方法'); await this.userNameService.getUserName(); return { success: true, message: 'OK', data: '进入userName方法' }; } }userModel.ts:
import {Entity, PrimaryKey, Property} from "@mikro-orm/core";


@Entity({ tableName: 'test_user', schema: 'nk_product_pro' })
// 这里的 tableName 指定的是表名  schema: 是数据库名
export class userNameModel {

  @PrimaryKey()
  @Property()
  id: number;

  @Property()
  title:string;

}
userService.ts:
import {Provide} from "@midwayjs/core"; import {InjectRepository} from "@midwayjs/mikro"; import {EntityRepository} from "@mikro-orm/mysql"; import {userNameModel} from "./userModel"; @Provide() export class userNameService{ @InjectRepository(userNameModel) // 这个就类似java的 mapper private readonly chatRoomRepo: EntityRepositoryasync getUserName() { console.log(await this.chatRoomRepo.findAll()); console.log('获取成功'); } }

4.常见mysql的查询,插入,删除,原生插入
import {Provide} from "@midwayjs/core"; import {InjectEntityManager, InjectRepository} from "@midwayjs/mikro"; import {userNameModel} from "./userModel"; import { EntityManager, EntityRepository } from '@mikro-orm/mysql'; // 需要使用数据库驱动对应的类来执行操作 // @ts-ignore @Provide() export class userNameService{ @InjectRepository(userNameModel) // 这个就类似java的 mapper private readonly chatRoomRepo: EntityRepository@InjectEntityManager() em: EntityManager; async getUserName() { console.log(await this.chatRoomRepo.findAll()); // 查询 // await this.chatRoomRepo.find( // { // id: 1, 这个是查询id字段的值 等于 1 // paixu2: 1, // title: { $like: '%' }, // 模糊查询 // paixu: { $gt: 1 }, // 大于 1 // id: { $in: [1, 2] }, // 数据库的in查询 // }, // { // orderBy: { paixu: QueryOrder.desc, paixu2: QueryOrder.desc }, // 按照某个字段进行排序,例如:先对 paixu 这字段进行降序,在 paixu 这个值一致的情况下,再进行降序 // limit: 1, //获取多少条数据 // }, // ); // 插入 // const model = new userNameModel(); // // model.title = '哈哈,你好呀'; // // 单条插入 // this.chatRoomRepo.nativeInsert(model); // 修改 // this.chatRoomRepo.nativeUpdate({ // id: 1 // },{ // title:'你好呀' // }) // // 上面的修改sql会变成:update "nk_product_pro"."test_user" set "title" = '你好呀' where "id" = 1 // // 删除 // this.chatRoomRepo.nativeDelete({ // id : 1, // title: '你好呀' // }) // // 以上的删除语句:delete from "nk_product_pro"."test_user" where "id" = 1 and "title" = '你好呀' console.log(this.em) // 这个是直接使用原生sql的方式,在遇到比较复杂,或者进行连表查询的时候,推荐使用这种方式 const ctionEm = this.em.getConnection(); const ret = await ctionEm.execute("select * from nk_product_pro.test_user"); console.log(ret) } }
5.postgresql数据库的批量插入,修改,连表查询
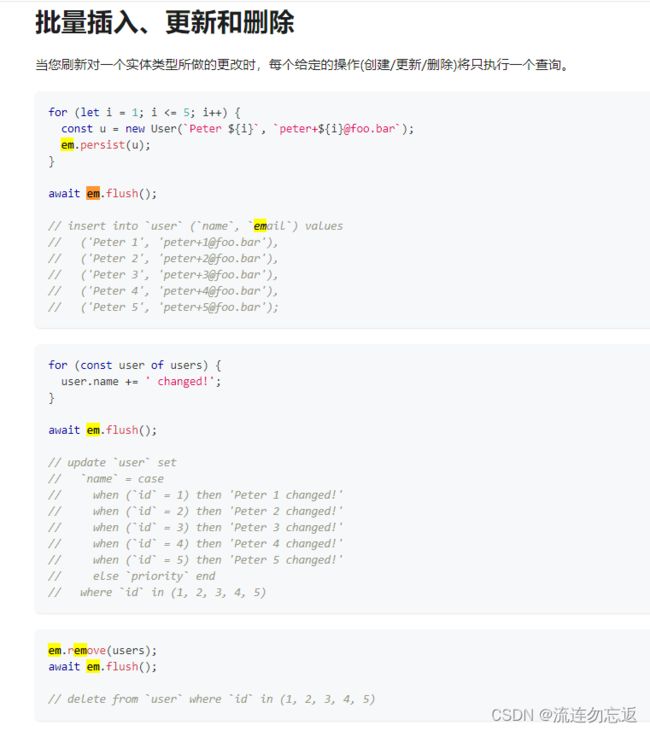
- 批量插入,修改
红色的表示插入,蓝色的表示修改,一开始的时候,我知道使用 persist 方法把要新增的数据插入,但是这个修改,我并不理解,我只是for循环改变了值,为什么在执行
await this.em.flush(); 方法之后,会把我这个的pools数组的值也一起修改?经过测试,mikro这个框架会自动把:由orm框架查询出来的数据,如果这个数据在执行 await this.em.flush(); 方法前,数据有变动(如果查询出来,没有重新赋值,或者赋的值跟原本的值是一样的,那是不会进行修改的),他会自动根据id来修改,如果你不想让他更新,那可以让 flush 方法在修改值之前执行
执行 await this.em.flush(); 会自动开启事务
- 连表查询
import { EntityManager } from '@mikro-orm/postgresql';EntityManager 要导对,要不然会没有相对应的方法
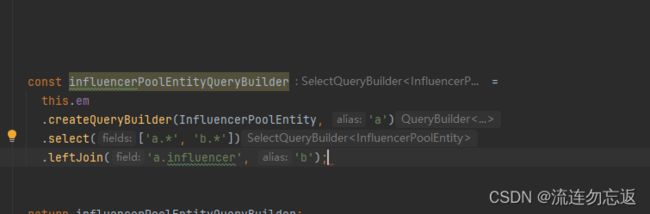
这个是主要的连表方法,
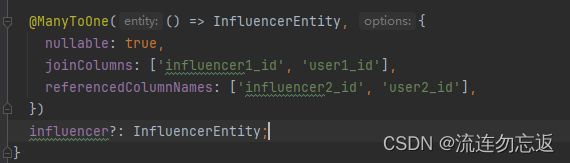
createQueryBuilder(InfluencerPoolEntity, 'a')
// 这个说的是,连接查询的时候,主表的是 InfluencerPoolEntity ,然后起个别名叫 a
.leftJoin('a.influencer', 'b'); 这个是左连接 a表里面的一个 influencer 属性,起一个别名叫 b@ManyToOne(() => InfluencerEntity, { nullable: true }) influencer?: InfluencerEntity; 这两行代码是 InfluencerPoolEntity 类里面的,然后这个类里面有个 influencer 属性,也就是a.influencer 的 influencer 的这个值,可以看到 influencer 是 InfluencerEntity类型的,然后在查询的时候,orm会自动把 influencer 加多 ‘_id’ 然后 ‘on’ 会等于 InfluencerEntity 这个实体的表id 也就是以下的代码: select "a".*, "b".* from "ecross"."influencer_pool" as "a" left join "ecross"."influencer" as "b" on "a"."influencer_id" = "b"."id"还可以这样:
对应的sql语句:
select "a".*, "b".* from "ecross"."influencer_pool" as "a" left join "ecross"."influencer" as "b" on "a"."influencer1_id" = "b"."influencer2_id" and "a"."user1_id" = "b"."user2_id"
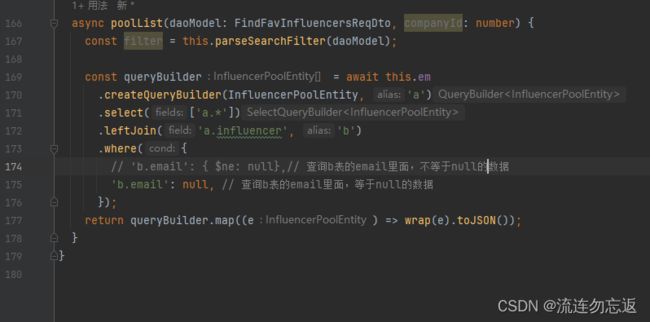
- 查询null跟不为null的数据