创建KVM虚拟机公共镜像
手动配置kvm教程:
https://blog.csdn.net/nvd11/article/details/127435990
但是毕竟每次创建新的虚拟机时,还要装一次系统比较麻烦。 打算做个公共的ubuntu镜像出来。
目标:
| No | DESC | cpu数 | 内存 |
|---|---|---|---|
| 第一步 | 创建虚拟机vm1 | 2 | 8g |
| 第二步 | 创建虚拟机镜像文件 ub_2204_com.qcow2 | 2 | 8g |
| 第三步 | 利用 第二步的镜像文件 创建虚拟机vm2 | 1 | 4g |
第一步, 创建虚拟机vm1
1. 1 创建虚拟硬盘磁盘文件vm1.qcow2
gateman@MoreFine-S500:/link_home/vmdisks$ qemu-img create -f qcow2 vm1.qcow2 50G
Formatting 'vm1.qcow2', fmt=qcow2 size=53687091200 cluster_size=65536 lazy_refcounts=off refcount_bits=16
由于qcow2 文件大小会动态增长, 初始只有几百kb, 设大点没关系
1.2 准备vm1.xml
<domain type='kvm'>  //如果是Xen,则type=‘xen’
  <name>vm1name> //虚拟机名称,同一物理机唯一
  <uuid>034a0980-b118-437d-9612-7fede1ccc738uuid>  //同一物理机唯一,可用uuidgen生成
  <memory>8096000memory>
  <currentMemory>8096000currentMemory>  //memory这两个值最好设成一样
  <vcpu>2vcpu>            //虚拟机可使用的cpu个数,查看物理机可用CPU个数:cat /proc/cpuinfo |grep processor | wc -l
  <os>
   <type arch='x86_64' machine='ubuntu'>hvmtype> //arch指出系统架构类型,machine 则是机器类型,查看机器类型:qemu-system-x86_64 -M ?
   <boot dev='cdrom'/>  //启动介质,第一次需要装系统可以选择cdrom光盘启动
   <bootmenu enable='yes'/>  //表示启动按F12进入启动菜单
  os>
  <features>
   <acpi/>  //Advanced Configuration and Power Interface,高级配置与电源接口
   <apic/>  //Advanced Programmable Interrupt Controller,高级可编程中断控制器
   <pae/>   //Physical Address Extension,物理地址扩展
  features>
  <clock offset='localtime'/>  //虚拟机时钟设置,这里表示本地本机时间
  <on_poweroff>destroyon_poweroff>  //突发事件动作
  <on_reboot>restarton_reboot>
  <on_crash>restarton_crash>
  <devices>   //设备配置/
   <emulator>/usr/bin/kvmemulator> //如果是Xen则是/usr/lib/xen/binqemu-dm
   <disk type='file' device='disk'> //硬盘
      <driver name='qemu' type='qcow2'/>
      <source file='/link_home/vmdisks/vm1.qcow2'/>
      <target dev='vda' bus='virtio'/>  // if windows must ide   else virtio
   disk>
   <disk type='file' device='cdrom'>//光盘
      <driver name='qemu' type='raw'/>
      <source file='/link_home/isos/ubuntu-22.04.1-live-server-amd64.iso'/>
      <target dev='hdc' bus='ide'/>
      <readonly/>
   disk>
   /* 利用Linux网桥连接网络 */
   <interface type='bridge'>
      <mac address='24:85:52:42:b7:4d'/>
      <source bridge='br0'/>  //配置的网桥网卡名称
      <target dev='vnet0'/>     //同一网桥下相同
      <alias name='net0'/>      //别名,同一网桥下相同
   interface>

  <graphics type='vnc' port='5901' autoport='yes' listen='0.0.0.0' keymap='en-us'>  //配置vnc,windows下可以使用vncviewer登录,获取vnc端口号:virsh vncdisplay vm0
   <listen type='address' address='0.0.0.0'/>
  graphics>
  devices>
domain>
1.3 启动vm1
virsh define vm1.xml
virsh start vm1
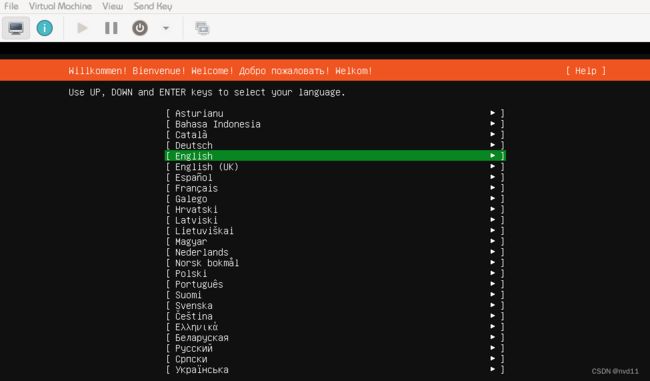
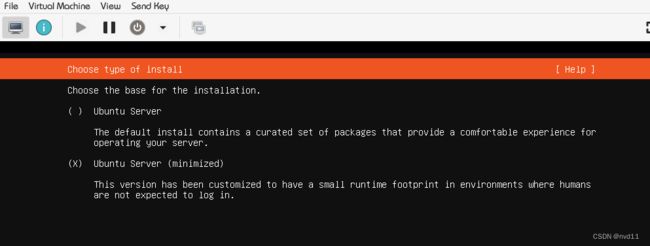
1.4 安装 系统
检查网卡能不能被正确分配同网段的ip, 如果分配失败则要检查宿主机的桥接网卡配置
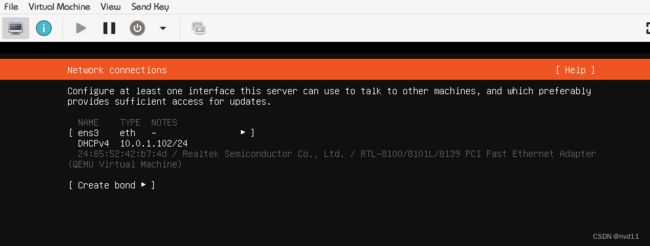
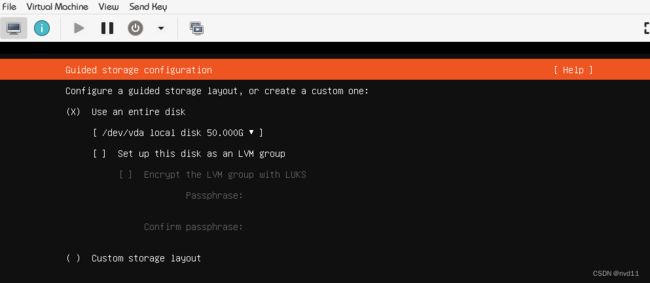
这里选整块硬盘, 以后不用再加多块
ssh 服务怎么可以没有

1.5 配置系统
安装完后, 还是需要配置系统的
1.5.1 安装vi
最小镜像连vi都没有…
sudo apt-get install vim
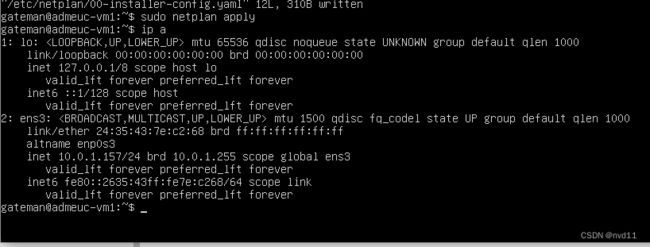
1.5.2 设置静态dhcp ip
方便以后管理, 当然每次创建虚拟机都要改下1个新的ip
gateman@admeuc-vm1:/etc/netplan$ cat 00-installer-config.yaml
# This is the network config written by 'subiquity'
network:
  ethernets:
    ens3:
      dhcp4: false
      addresses: [10.0.1.156/24] # ip地址
      routes:
        - to: default
          via: 10.0.1.1           # 路由其地址
      nameservers:
        addresses: [119.29.29.29, 8.8.8.8]
  version: 2
sudo netplan apply
1.5.3 换成网易镜像源
gateman@admeuc-vm1:~$ cat /etc/apt/sources.list
deb http://mirrors.163.com/ubuntu/ jammy main restricted universe multiverse
deb http://mirrors.163.com/ubuntu/ jammy-security main restricted universe multiverse
deb http://mirrors.163.com/ubuntu/ jammy-updates main restricted universe multiverse
deb http://mirrors.163.com/ubuntu/ jammy-backports main restricted universe multiverse
gateman@admeuc-vm1:~$ sudo apt-get update
第二步, 创建虚拟机镜像
2.1 进入虚拟机vmdisk 目录
复制一份新的qcow2 虚拟磁盘文件
gateman@MoreFine-S500:/link_home/vmdisks$ cp vm1.qcow2 ub_2204.qcow2
gateman@MoreFine-S500:/link_home/vmdisks$ ls -lh
total 21G
-rw-r--r-- 1 gateman      gateman 6.9G Nov 25 02:00 ub_2204.qcow2
-rw-r--r-- 1 libvirt-qemu kvm      20G Nov 25 02:00 vm0.img
-rw-r--r-- 1 root         root    6.9G Nov 25 01:57 vm1.qcow2
gateman@MoreFine-S500:/link_home/vmdisks$ qemu-img info ub_2204.qcow2
image: ub_2204.qcow2
file format: qcow2
virtual size: 50 GiB (53687091200 bytes)
disk size: 6.86 GiB
cluster_size: 65536
Format specific information:
    compat: 1.1
    lazy refcounts: false
    refcount bits: 16
    corrupt: false
可见最小化安装都用了6.9G, 怎么跟centos 比干净。。
2.2 压缩镜像
注意这个命令需要读取一些内核信息,所以必须用root来执行
gateman@MoreFine-S500:/link_home/vmdisks$ sudo virt-sparsify --compress ub_2204.qcow2 ub_2204_com.qcow2
[   0.0] Create overlay file in /tmp to protect source disk
[   0.0] Examine source disk
[   5.5] Fill free space in /dev/sda2 with zero
 100% ⟦▒▒▒▒▒▒▒▒▒▒▒▒▒▒▒▒▒▒▒▒▒▒▒▒▒▒▒▒▒▒▒▒▒▒▒▒▒▒▒▒▒▒▒▒▒▒▒▒▒▒▒▒▒▒▒▒▒▒▒▒▒▒▒▒▒▒▒▒▒▒▒▒▒▒▒▒▒▒▒▒▒▒▒▒▒▒▒▒▒▒▒▒▒▒▒▒▒▒▒▒▒▒▒▒▒▒▒▒▒▒▒▒▒▒▒▒▒▒▒▒▒▒▒▒▒▒▒▒▒▒▒▒▒▒▒▒▒▒▒▒▒▒▒▒▒▒▒▒▒▒▒▒▒▒▒▒▒▒▒▒▒▒▒▒▒▒▒▒▒▒▒▒▒▒▒▒▒▒▒▒▒▒▒▒▒▒▒▒▒▒⟧ 00:00
[  33.2] Copy to destination and make sparse

[ 224.3] Sparsify operation completed with no errors.
virt-sparsify: Before deleting the old disk, carefully check that the
target disk boots and works correctly.

gateman@MoreFine-S500:/link_home/vmdisks$ ls -lh
total 22G
-rw-r--r-- 1 root         root    1.1G Nov 25 02:20 ub_2204_com.qcow2
-rw-r--r-- 1 gateman      gateman 6.9G Nov 25 02:00 ub_2204.qcow2
-rw-r--r-- 1 libvirt-qemu kvm      20G Nov 25 02:21 vm0.img
-rw-r--r-- 1 root         root    6.9G Nov 25 01:57 vm1.qcow2
gateman@MoreFine-S500:/link_home/vmdisks$
压缩后我们得到1个1G多的镜像文件, 就是我们想要的所谓干净的系统镜像了。
第三步, 基于镜像创建虚拟机vm2
3.1 基于镜像创建1个新的硬盘文件
cp ub_2204_com.qcow2 vm2.qcow2
3.2 基于vm1.xml 创建 vm2.xml
同样, 我们需要
改内存
改名
改uuid
改硬盘文件位置
注释掉光驱启动项
改掉mac
gateman@MoreFine-S500:/link_home/kvmxmls$ virsh define vm2.xml
Domain vm2 defined from vm2.xml

gateman@MoreFine-S500:/link_home/kvmxmls$ cat vm2.xml
<domain type='kvm'>  //如果是Xen,则type=‘xen’
  <name>vm2</name> //虚拟机名称,同一物理机唯一
  <uuid>2d3be0e2-0441-49e8-a9e0-5147c8c2ec2a</uuid>  //同一物理机唯一,可用uuidgen生成
  <memory>4096000</memory>
  <currentMemory>4096000</currentMemory>  //memory这两个值最好设成一样
  <vcpu>1</vcpu>            //虚拟机可使用的cpu个数,查看物理机可用CPU个数:cat /proc/cpuinfo |grep processor | wc -l
  <os>
   <type arch='x86_64' machine='ubuntu'>hvm</type> //arch指出系统架构类型,machine 则是机器类型,查看机器类型:qemu-system-x86_64 -M ?
   <bootmenu enable='yes'/>  //表示启动按F12进入启动菜单
  </os>
  <features>
   <acpi/>  //Advanced Configuration and Power Interface,高级配置与电源接口
   <apic/>  //Advanced Programmable Interrupt Controller,高级可编程中断控制器
   <pae/>   //Physical Address Extension,物理地址扩展
  </features>
  <clock offset='localtime'/>  //虚拟机时钟设置,这里表示本地本机时间
  <on_poweroff>destroy</on_poweroff>  //突发事件动作
  <on_reboot>restart</on_reboot>
  <on_crash>restart</on_crash>
  <devices>   //设备配置/
   <emulator>/usr/bin/kvm</emulator> //如果是Xen则是/usr/lib/xen/binqemu-dm
   <disk type='file' device='disk'> //硬盘
      <driver name='qemu' type='qcow2'/>
      <source file='/link_home/vmdisks/vm2.qcow2'/>
      <target dev='vda' bus='virtio'/>  // if windows must ide   else virtio
   </disk>
   <disk type='file' device='cdrom'>//光盘
      <driver name='qemu' type='raw'/>
      <source file='/link_home/isos/ubuntu-22.04.1-live-server-amd64.iso'/>
      <target dev='hdc' bus='ide'/>
      <readonly/>
   </disk>
   /* 利用Linux网桥连接网络 */
   <interface type='bridge'>
      <mac address='24:35:43:7e:c2:68'/>
      <source bridge='br0'/>  //配置的网桥网卡名称
      <target dev='vnet0'/>     //同一网桥下相同
      <alias name='net0'/>      //别名,同一网桥下相同
   </interface>
    <graphics type='vnc' port='5901' autoport='yes' listen='0.0.0.0' keymap='en-us'>  //配置vnc,windows下可以使用vncviewer登录,获取vnc端口号:virsh vncdisplay vm0
        <listen type='address' address='0.0.0.0'/>
  </graphics>

  </devices>
</domain>
3.3 启动vm2,改掉dhcp的网卡地址
3.4 改掉hostname
sudo hostnamectl set-hostname amdeuc-vm2
到这里大功告成
呵呵
其实上面3步无非是为了快速创建ubuntu虚拟机, 其实可以用1个命令代替
例如我想基于vm2 创建 同样的虚拟机vm3
virt-clone --original=vm2 \
               --name=vm3 \
               --file=/link_home/vmdisks/vm3.qcow2
只不过还是要自己去改掉hostname和 静态ip
至于为什么上面搞这么复杂。。 只是因为创建的公共镜像可以share~
