yolov5-face模型训练以及测试
个人学习笔记,对yolov5-face模型进行训练以及修改test.py输出关键点信息txt,有错误欢迎纠正
目录
前言
一、克隆yolov5-face到本地
二、下载数据集
三、widerface 数据集转换为 yolo格式的数据集
四、模型训练
五、模型测试
1. detect_face.py
2.test.py
总结
前言
主要记录如何用widerface数据集训练yolov5-face以及如何进行测试(带关键点信息保存),用于个人笔记,欢迎纠正以及交流。
一、克隆yolov5-face到本地
git clone https://github.com/deepcam-cn/yolov5-face.git二、下载数据集
数据集下载地址:
http://shuoyang1213.me/WIDERFACE/
分别下载train,val,tests数据集,
注意,这里只是images,训练集还需要对应的labels。labels下载地址:https://drive.google.com/file/d/1tU_IjyOwGQfGNUvZGwWWM4SwxKp2PUQ8/view
整理放在yolov5/data/widerface/目录下(没有的创建),widerface目录结构如下

test,train,val内目录结构分别包含labels,images目录(分别是下载的数据集及其标签),这里拿train举例。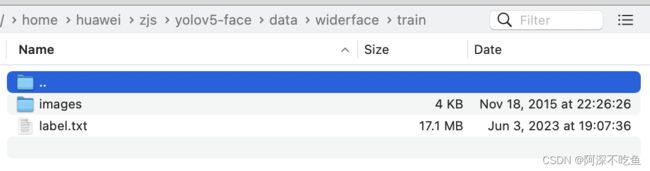
三、widerface 数据集转换为 yolo格式的数据集
widerface目录下的数据集格式是widerface格式,需要将其转化为yolo格式。先在data目录下创建widerfaceyolo,并创建相应的train,val,test目录(和widerface一致)存放yolo格式数据集
数据集格式转换利用需要运行 /yolov5-face/data/train2yolo.py 以及 val2yolo.py,直接运行会出错,需要编辑代码,先对代码改部分进行注释,并修改其中的路径为你自己的路径(如何和我之前一样,那么src为widerface/train,dst为widerfaceyolo/train),train2yolo.py修改示例如下,val2yolo.py类似,也要注释以及修改路径。
运行train2yolo.py 和val2yolo.py
python train2yolo.py val2yolo.py
然后就会在widerfaceyolo/train/val目录下同时得到图片以及相应的label,均在同一个目录下,你需要编写简单代码将images和label分类,示例代码如下
import os
import shutil

# 当前目录,根据个人情况修改
current_dir = "/home/huawei/zjs/yolov5-face/data/widerfaceyolo/val"

# 目录下的所有文件
files = os.listdir(current_dir)

# labels路径
labels_dir = os.path.join(current_dir, 'labels')
#images路径
images_dir = os.path.join(current_dir, 'images')

# 移动所有.txt文件到标签目录
for file in files:
    if file.endswith('.txt'):#labels移动
        src_path = os.path.join(current_dir, file)
        dst_path = os.path.join(labels_dir, file)
        shutil.move(src_path, dst_path)
    elif file.endswith('.jpg'):#images移动
        src_path = os.path.join(current_dir,file)
        dst_path = os.path.join(images_dir,file)
        shutil.move(src_path,dst_path)
最终整理效果

四、模型训练
先修改widerface.yaml,把bash注释,train,val修改为你的训练集和测试集路径(绝对路径)

然后运行 train.py进行训练
python train.py
报错1:会出现np.int报错,这是numpy版本问题,将报错地方修改为np.int32或者np.int64即可(哪里出错找到相应的地方改)
报错2: RuntimeError: result type Float can't be cast to the desired output type long int 参考文章https://blog.csdn.net/Thebest_jack/article/details/125649451
报错3: anaconda环境中libstdc++缺少版本3.4.29,这个上stackoverflow 可以直接定点搜到,或者知乎(我搜大到的解决方案),csdn。
报错4:依稀的记得是torch源码中函数make_histor...(不太记得名字),np.float不能转成np.int 好像是torch/utils中一处源码出错,可以上stackoverflow搜索,解决方案是删除出错代码的后半部分,最好是搜搜。
然后就能运行了
五、模型测试
1. detect_face.py
运行detect_face.py
python detect_face.py --weights xxx.pt --source /xxx/dataset --save-img这个和yolov5的detect.py类似,将上述指令中的权重文件,数据集路径替换成自己的即可,运行结果保存在run/detcet/exp*目录下。
但是这种运行方法,只有img(包含关键点和检测框以及label),没有txt文件生成。
2.test.py
运行test.py运行不了,Debug也不行,也不会修改,我是弱鸡。
但是我会搜哈哈哈,我需要txt文件,并包含关键点位置信息,上网搜到文章,参考:https://blog.csdn.net/m0_57175342/article/details/124502951
用它替换test.py 并运行
注意,其中代码需要自己修改的地方为第一个和最后一个,即weights和dataset-folder,修改为自己的权重和数据集即可,(也可以在终端指明)
python test.py [--weights xxx.py --dataset_folder xx/xx/x/] //【】包围部分可选但是参考文章的代码只包含三个检测点信息,而我的模型输出为5个关键点位置坐标,需要修改代码。我修改后的代码如下。
import argparse
import glob
import time
from pathlib import Path

import os
import cv2
import torch
import torch.backends.cudnn as cudnn
from numpy import random
import numpy as np
from models.experimental import attempt_load
from utils.datasets import letterbox
from utils.general import check_img_size, check_requirements, non_max_suppression_face, apply_classifier, \
    scale_coords, xyxy2xywh, strip_optimizer, set_logging, increment_path
from utils.plots import plot_one_box
from utils.torch_utils import select_device, load_classifier, time_synchronized
from tqdm import tqdm

def dynamic_resize(shape, stride=64):
    max_size = max(shape[0], shape[1])
    if max_size % stride != 0:
        max_size = (int(max_size / stride) + 1) * stride
    return max_size

def scale_coords_landmarks(img1_shape, coords, img0_shape, ratio_pad=None):
    # Rescale coords (xyxy) from img1_shape to img0_shape
    if ratio_pad is None:  # calculate from img0_shape
        gain = min(img1_shape[0] / img0_shape[0], img1_shape[1] / img0_shape[1])  # gain  = old / new
        pad = (img1_shape[1] - img0_shape[1] * gain) / 2, (img1_shape[0] - img0_shape[0] * gain) / 2  # wh padding
    else:
        gain = ratio_pad[0][0]
        pad = ratio_pad[1]

    coords[:, [0, 2, 4]] -= pad[0]  # x padding
    coords[:, [1, 3, 5]] -= pad[1]  # y padding
    coords[:, :10] /= gain
    print("shape0:",coords.shape[0])
    print("shape1:",coords.shape[1])

    #clip_coords(coords, img0_shape)
    coords[:, 0].clamp_(0, img0_shape[1])  # x1
    coords[:, 1].clamp_(0, img0_shape[0])  # y1
    coords[:, 2].clamp_(0, img0_shape[1])  # x2
    coords[:, 3].clamp_(0, img0_shape[0])  # y2
    coords[:, 4].clamp_(0, img0_shape[1])  # x3
    coords[:, 5].clamp_(0, img0_shape[0])  # y3
    coords[:, 6].clamp_(0, img0_shape[1])  # x4
    coords[:, 7].clamp_(0, img0_shape[0])  # y4
    coords[:, 8].clamp_(0, img0_shape[1])  # x5
    coords[:, 9].clamp_(0, img0_shape[0])  # y5
    return coords

def show_results(img, xywh, conf, landmarks):
    h,w,c = img.shape
    tl = 1 or round(0.002 * (h + w) / 2) + 1  # line/font thickness
    x1 = int(xywh[0] * w - 0.5 * xywh[2] * w)
    y1 = int(xywh[1] * h - 0.5 * xywh[3] * h)
    x2 = int(xywh[0] * w + 0.5 * xywh[2] * w)
    y2 = int(xywh[1] * h + 0.5 * xywh[3] * h)
    cv2.rectangle(img, (x1,y1), (x2, y2), (193,193,255), thickness=tl, lineType=cv2.LINE_AA)

    clors = [(255,255,255),(0,255,255),(0,255,0),(255,0,255),(255,255,0)]

    for i in range(5):
        point_x = int(landmarks[2 * i] * w)
        point_y = int(landmarks[2 * i + 1] * h)
        cv2.circle(img, (point_x, point_y), tl+2, clors[i], -1)

    tf = max(tl - 1, 1)  # font thickness
    label = 'face' + ': ' + str(conf)[:5]
    cv2.putText(img, label, (x1, y1 - 2), 0, tl / 3, [225, 255, 255], thickness=tf, lineType=cv2.LINE_AA)
    return img

def detect(model, img0):
    stride = int(model.stride.max())  # model stride
    imgsz = opt.img_size
    if imgsz <= 0:                    # original size
        imgsz = dynamic_resize(img0.shape)
    imgsz = check_img_size(imgsz, s=64)  # check img_size
    img = letterbox(img0, imgsz)[0]
    # Convert
    img = img[:, :, ::-1].transpose(2, 0, 1)  # BGR to RGB, to 3x416x416
    img = np.ascontiguousarray(img)
    img = torch.from_numpy(img).to(device)
    img = img.float()  # uint8 to fp16/32
    img /= 255.0  # 0 - 255 to 0.0 - 1.0
    if img.ndimension() == 3:
        img = img.unsqueeze(0)

    # Inference
    pred = model(img, augment=opt.augment)[0]
    # Apply NMS
    pred = non_max_suppression_face(pred, opt.conf_thres, opt.iou_thres)[0]
    print("\npred:\n",pred)
    gn = torch.tensor(img0.shape)[[1, 0, 1, 0,]].to(device)  # normalization gain whwh
    gn_lks = torch.tensor(img0.shape)[[1, 0, 1, 0, 1, 0, 1, 0, 1, 0]].to(device)  # normalization gain landmarks
    boxes = []
    h, w, c = img0.shape
    if pred is not None:
        # print("\npred_shape:\n",pred.shape)
        # print("\nimg_shape\n",img.shape)
        # print("\npred_shape:\n",pred.shape)
        pred[:, :4] = scale_coords(img.shape[2:], pred[:, :4], img0.shape).round()
        pred[:, 5:15] = scale_coords_landmarks(img.shape[2:], pred[:, 5:15], img0.shape).round()
        '''
        pred[:, :4] = scale_coords(img.shape[2:], pred[:, :4], img0.shape).round()
        pred[:, 5:11] = scale_coords_landmarks(img.shape[2:], pred[:, 5:11], img0.shape).round()
        for j in range(pred.size()[0]):
            xywh = (xyxy2xywh(pred[j, :4].view(1, 4)) / gn).view(-1)
            xywh = xywh.data.cpu().numpy()
            conf = pred[j, 4].cpu().numpy()
            landmarks = (pred[j, 5:11].view(1, 6) / gn_lks).view(-1).tolist()
            class_num = pred[j, 11].cpu().numpy()
            x1 = int(xywh[0] * w - 0.5 * xywh[2] * w)
            y1 = int(xywh[1] * h - 0.5 * xywh[3] * h)
            x2 = int(xywh[0] * w + 0.5 * xywh[2] * w)
            y2 = int(xywh[1] * h + 0.5 * xywh[3] * h)
        '''
        # print("\npred_shape2:\n",pred.shape)
        for j in range(pred.size()[0]):
            xywh = (xyxy2xywh(pred[j, :4].view(1, 4)) / gn).view(-1)
            xywh = xywh.data.cpu().numpy()
            conf = pred[j, 4].cpu().numpy()
            landmarks = (pred[j, 5:15].view(1, 10) / gn_lks).view(-1).tolist()
            class_num = pred[j, 15].cpu().numpy()
            x1 = int(xywh[0] * w - 0.5 * xywh[2] * w)
            y1 = int(xywh[1] * h - 0.5 * xywh[3] * h)
            x2 = int(xywh[0] * w + 0.5 * xywh[2] * w)
            y2 = int(xywh[1] * h + 0.5 * xywh[3] * h)
            boxes.append([xywh[0], xywh[1], xywh[2], xywh[3],landmarks[0],landmarks[1],landmarks[2],landmarks[3],landmarks[4],landmarks[5],landmarks[6],
                           landmarks[7],landmarks[8],landmarks[9],class_num,conf])
#            boxes.append([xywh[0], xywh[1], xywh[2], xywh[3], landmarks[0], landmarks[1], landmarks[2], landmarks[3],
#                          landmarks[4], landmarks[5], class_num, conf])
    return boxes


if __name__ == '__main__':
    parser = argparse.ArgumentParser()
    parser.add_argument('--weights', nargs='+', type=str, default='runs/train/exp27/weights/best.pt', help='model.pt path(s)')
    parser.add_argument('--img-size', type=int, default=640, help='inference size (pixels)')
    parser.add_argument('--conf-thres', type=float, default=0.02, help='object confidence threshold')
    parser.add_argument('--iou-thres', type=float, default=0.5, help='IOU threshold for NMS')
    parser.add_argument('--device', default='0', help='cuda device, i.e. 0 or 0,1,2,3 or cpu')
    parser.add_argument('--agnostic-nms', action='store_true', help='class-agnostic NMS')
    parser.add_argument('--augment', action='store_true', help='augmented inference')
    parser.add_argument('--update', action='store_true', help='update all models')
    parser.add_argument('--classes', nargs='+', type=int, help='filter by class: --class 0, or --class 0 2 3')
    parser.add_argument('--project', default='runs/detect', help='save results to project/name')
    parser.add_argument('--name', default='exp', help='save results to project/name')
    parser.add_argument('--exist-ok', action='store_true', help='existing project/name ok, do not increment')
    parser.add_argument('--save_folder', default='runs/detect/', type=str, help='Dir to save txt results')
    # parser.add_argument('--dataset_folder', default='../WiderFace/val/images/', type=str, help='dataset path')
    parser.add_argument('--dataset_folder', default='./images', type=str, help='dataset path')
    # parser.add_argument('--folder_pict', default='/yolov5-face/data/widerface/val/wider_val.txt', type=str, help='folder_pict')
    # parser.add_argument('--folder_pict', default='widerface/val/wider_val.txt', type=str,help='folder_pict')
    opt = parser.parse_args()
    print(opt)

    # changhy : read folder_pict
    # pict_folder = {}
    # with open(opt.folder_pict, 'r') as f:
    #     lines = f.readlines()
    #     for line in lines:
    #         line = line.strip().split('/')
    #         pict_folder[line[-1]] = line[-2]

    # Load model
    device = select_device(opt.device)
    model = attempt_load(opt.weights, map_location=device)  # load FP32 model
    with torch.no_grad():
        # testing dataset
        testset_folder = opt.dataset_folder

        for image_path in tqdm(glob.glob(os.path.join(testset_folder, '*'))):
            # print('haha')
            # print(tqdm(glob.glob(os.path.join(testset_folder, '*'))))
            # print(image_path)
            # print(image_path.endswith('.txt'))
            if image_path.endswith('.txt'):
                continue
            img0 = cv2.imread(image_path)  # BGR
            h, w, c = img0.shape
            if img0 is None:
                print(f'ignore : {image_path}')
                continue
            boxes = detect(model, img0)
            # print(boxes)
            # --------------------------------------------------------------------
            image_name = os.path.basename(image_path)   #返回path最后的文件名
            # print(image_name)
            txt_name = os.path.splitext(image_name)[0] + ".txt"
            save_img_name = os.path.join(opt.save_folder, image_name)
            # print(txt_name)
            # save_name = os.path.join(opt.save_folder, pict_folder[image_name], txt_name)
            save_txt_name = os.path.join(opt.save_folder, txt_name)
            # print(save_name)
            dirname = os.path.dirname(save_txt_name)
            if not os.path.isdir(dirname):
                os.makedirs(dirname)
            with open(save_txt_name, "w") as fd:
                file_name = os.path.basename(save_txt_name)[:-4] + "\n"
                bboxs_num = str(len(boxes)) + "\n"
                # print(len(boxes))
                fd.write(file_name)
                fd.write(bboxs_num)
                for box in boxes:
                    fd.write(str(box) + "\n")
            for box in boxes:
                # print("\nbox_len:\n",len(box))
                xywh = [box[0], box[1], box[2], box[3]]
                landmark = [box[4], box[5], box[6], box[7], box[8], box[9], box[10], box[11], box[12], box[13]]
#                landmark = [box[4], box[5], box[6], box[7], box[8], box[9]]
                conf = box[15]
                img0 = show_results(img0, xywh, conf, landmark)
            cv2.imwrite(save_img_name,img0)
        print('done.')
这样,模型就可以对图片进行预测并输出txt文件。
总结
这就是我运行这个模型的过程,有错误欢迎纠正,感谢!