Spring Cloud + Spring Cloud Alibaba 第三天
父工程 pom 文件中 dependencyManagement 和 dependencies 的区别
在上一篇文章中,我们创建完成了父工程,同时也编写了父工程的 pom 文件,有一点需要注意的是,父工程的 pom 文件中,引用使用的关键词为 dependencyManagement 而不是 dependencies ,那么他们有什么区别呢?
dependencyManagement
一般用在父模块,子模块继承之后:锁定版本 + 子模块不用写 groupid 和 version。
元素能让所有在子项目中引用一个依赖而不用显示的列出版本号,因为 maven 会沿着父子层次向上走,直到找到一个拥有 dependencyManagement 元素的项目,然后他就会使用这个 dependencyManagement 元素中指定的版本号,它只是声明依赖,并不实际引入 jar 包,需要在子类中显示的引用,子项目中写了该依赖项,并且没有指定版本号,才会从父项目中继承,若子项目指定版本号,则根据子项目的单独引用。
dependencies
实际进行引用
支付模块构建
本次示例演示的是消费-支付系统,系统的调用关系如下:
我们先来构建支付模块,端口号为 8001
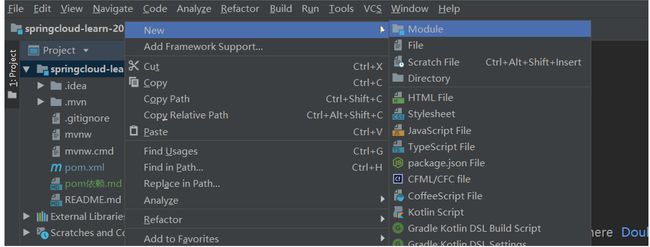
创建 module ,cloud-provider-payment8001
首先创建子模块的 module
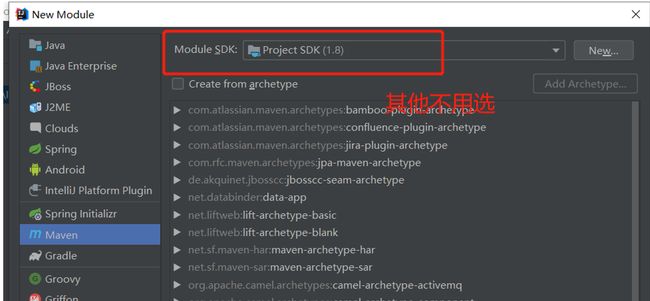
选择 maven 项目
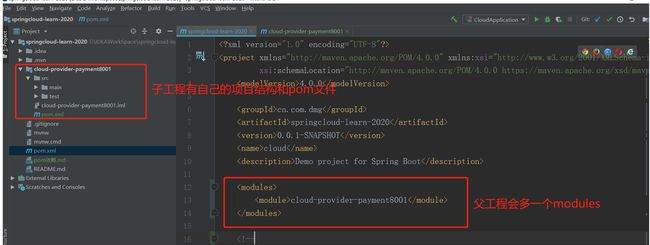
设置项目名称
构建完成
修改 pom 文件
当项目构建完成之后,需要修改 pom 文件,加入需要使用的依赖。
        cn.com.dmg
        cloud-api-commons
        ${project.version}


        org.springframework.cloud
        spring-cloud-starter-zipkin


        org.springframework.boot
        spring-boot-starter-web


        org.springframework.boot
        spring-boot-starter-actuator


        org.springframework.cloud
        spring-cloud-starter-netflix-eureka-client


        org.springframework.boot
        spring-boot-starter-test
        test


        org.mybatis.spring.boot
        mybatis-spring-boot-starter


        com.alibaba
        druid-spring-boot-starter


        mysql
        mysql-connector-java


        org.springframework.boot
        spring-boot-starter-jdbc


        org.springframework.boot
        spring-boot-devtools
        runtime
        true


        org.projectlombok
        lombok
        true
编写 yml 配置文件
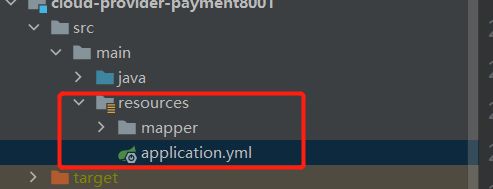
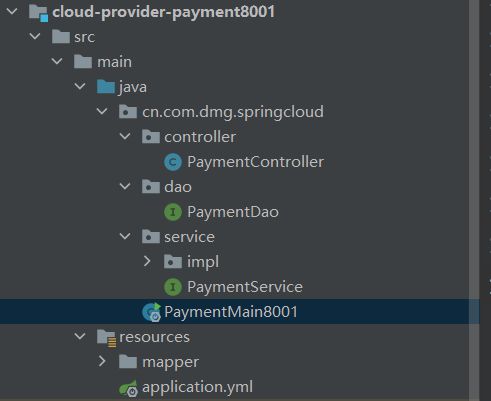
yml 文件在这个位置(自己创建一个):
主要配置一下端口号
服务名称
数据库连接信息等
server:
  port: 8001

spring:
  application:
    name: cloud-payment-service
  datasource:
    type: com.alibaba.druid.pool.DruidDataSource
    driver-class-name: org.gjt.mm.mysql.Driver
    url: jdbc:mysql://localhost:3306/db2019?useUnicode=true&characterEncoding=utf-8&useSSL=false
    username: root
    password: 123456

mybatis:
  mapperLocations: classpath:mapper/*.xml
  type-aliases-package: com.atguigu.springcloud.entities
编写主启动类
package cn.com.dmg.springcloud;

import org.springframework.boot.SpringApplication;
import org.springframework.boot.autoconfigure.SpringBootApplication;
import org.springframework.cloud.client.discovery.EnableDiscoveryClient;
import org.springframework.cloud.netflix.eureka.EnableEurekaClient;

@SpringBootApplication
@EnableEurekaClient
@EnableDiscoveryClient
public class PaymentMain8001 {
    public static void main(String[] args) {
        SpringApplication.run(PaymentMain8001.class,args);
    }

}
编写业务类
1.需要先创建数据库表
CREATE TABLE payment (
 id BIGINT(20) NOT NULL AUTO_INCREMENT COMMENT ID,
 'serial' VARCHAR(200) DEFAULT,
 PRIMARY KEY(id)
) ENGINE=INNODB AUTO_INCREMENT=1 DEFAULT CHARSET=utf8
2.需要创建实体类,controller service dao等代码
因为这里都是写代码,没什么好说的,我就不占用篇幅了,相关代码我已经上传到 GitHub 和 码云 上了,可以去上面直接拷贝
GitHub地址
码云地址
启动测试
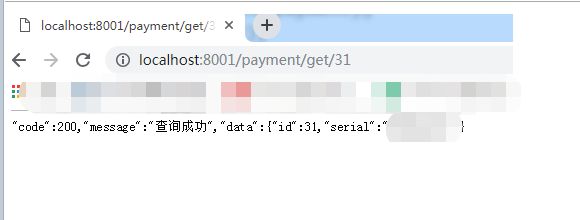
将项目启动之后,进行测试,访问地址:http://localhost:8001/payment/get/1 最后一位为数据库中的主键 id
见到如下页面即为访问成功。
热部署
为了方便我们平时的开发,我们可以将项目修改为热部署,生产环境要关闭热部署!
在项目中添加如下依赖
    org.springframework.boot
    spring-boot-devtools
    runtime
    true
在父工程中添加如下依赖
    springcloud-learn-2020


            org.springframework.boot
            spring-boot-maven-plugin

                true
                true
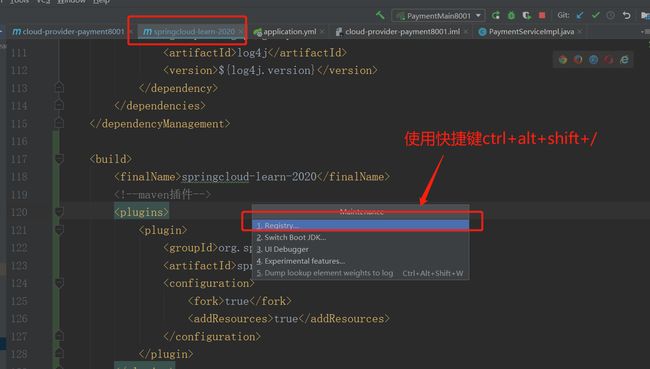
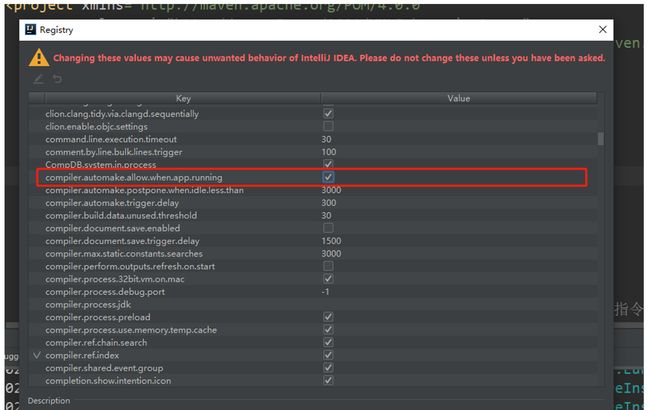
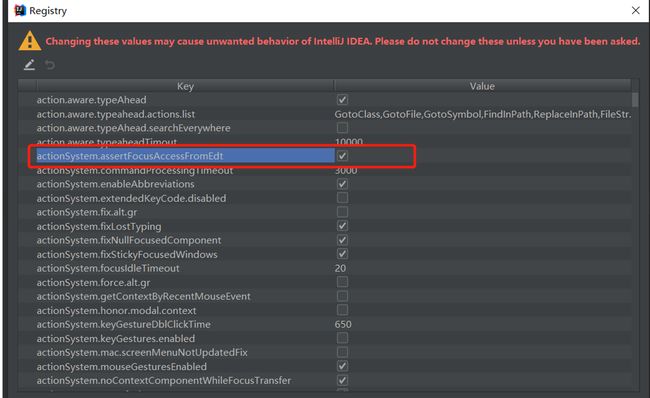
Enable actomatic build
Update the value of
在父工程的pom文件处
重启 idea 即可生效
至此我们第一个子工程就已经创建完成,第一次创建没有运行成功也不要着急,可以参考源代码多看看,一定没有问题的。
GitHub地址
码云地址
[外链图片转存中…(img-X8FmsRFU-1641979301495)]
重启 idea 即可生效
至此我们第一个子工程就已经创建完成,第一次创建没有运行成功也不要着急,可以参考源代码多看看,一定没有问题的。
GitHub地址
码云地址

