Kitsu 部署指南
Kitsu 部署指南
kitsu官网CGWire | Kitsu
项目库地址GitHub - cgwire/kitsu: Collaboration Platform for Animation and VFX Productions
说明文档地址Kitsu Documentation
参考文档搭建CGWire | 凌云的个人博客
部署文档Kitsu API Documentation
Install
Pre-requisites前置要求
The installation requires:
- Ubuntu (version >= 20.04)
- Python (version >= 3.6)
- An up and running Postgres instance (version >= 9.2)
- An up and running Redis server instance (version >= 2.0)
- A Nginx instance
Setup
Dependencies安装软件依赖
First let's install third parties software:
sudo apt-get update
sudo apt-get install postgresql postgresql-client postgresql-server-dev-all
sudo apt-get install redis-server
sudo apt-get install python3 python3-pip
sudo apt-get install git
sudo apt-get install nginx
sudo apt-get install ffmpeg
NB: We recommend to install postgres in a separate machine.
Get sources获取资源
Create zou user:创建一个zou用户
sudo useradd --home /opt/zou zou
sudo mkdir /opt/zou
sudo chown zou: /opt/zou
sudo mkdir /opt/zou/backups
sudo chown zou: /opt/zou/backups
Install Zou and its dependencies:安装zou和其依赖
sudo apt install python3-virtualenv
cd /opt/zou
sudo virtualenv zouenv
sudo /opt/zou/zouenv/bin/pip3 install zou
sudo chown -R zou:www-data .
Create a folder to store the previews:创建存储预览的文件夹
sudo mkdir /opt/zou/previews
sudo chown -R zou:www-data /opt/zou
Create a folder to store the temp files:创建临时存储目录
sudo mkdir /opt/zou/tmp
sudo chown -R zou:www-data /opt/zou/tmp
Prepare database安装Postgres数据库
Create Zou database in postgres:在postgres中创建Zou数据库
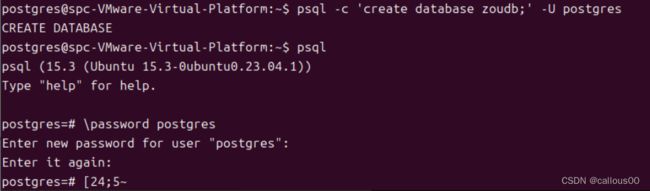
sudo su -l postgres
psql -c 'create database zoudb;' -U postgres
Set a password for your postgres user. 为postgres用户设置密码
For that start the Postgres CLI:这里会进入postgres的交互模式
psqlThen set the password.
psql (9.4.12)
Type "help" for help.
# 输入下面命令进行密码创建
postgres=# \password postgres
Enter new password:
Enter it again:
# 设置完成密码,退出交互模式
\q
exit
Then exit from the postgres client console.
Alternatively, if you want to set the password avoiding interactive prompts use :如果不想使用交互式创建密码,可以用下面的方式。
psql -U postgres -d postgres -c "alter user postgres with password 'mysecretpassword';"如果已经创建了密码,跳过此步骤。
Finally, create database tables (it is required to leave the posgres console and to activate the Zou virtual environment):
最后,创建数据库表。
这里需注意已经退出了psql交互模式,并在zou虚拟环境下。
# Run it in your bash console.
sudo -u zou DB_PASSWORD=yourdbpassword /opt/zou/zouenv/bin/zou init-db
NB: You can specify a custom username and database. See the configuration section.
Prepare the key value store准备键值存储
Currently Redis require no extra configuration.
To remove warnings in Redis logs and improve background saving success rate, you can add this to /etc/sysctl.conf:
vm.overcommit_memory = 1
具体添加方式:
echo 'vm.overcommit_memory = 1' | sudo tee -a /etc/sysctl.confIf you want to do performance tuning, have a look at this article.
Configure Gunicorn配置Gunicorn
Configure main API server
First, create configuration folder:创建配置文件夹
We need to run the application through gunicorn, a WSGI server that will run zou as a daemon. Let's write the gunicorn configuration:
需要通过Gunicorn运行该应用程序,Gunicorn是将zou作为守护程序运行的WSGI服务器。
创建Gunicorn配置文件
路径: /etc/zou/gunicorn.conf
Path: /etc/zou/gunicorn.conf
sudo mkdir /etc/zou
sudo nano gunicorn.conf
##在图形编辑器中写入内容
##保存更改:按下Ctrl + O(字母"O",不是数字零),然后按回车键保存更改。
##退出编辑器:按下Ctrl + X退出nano编辑器
写入以下内容
accesslog = "/opt/zou/logs/gunicorn_access.log"
errorlog = "/opt/zou/logs/gunicorn_error.log"
workers = 3
worker_class = "gevent"
Let's create the log folder:创建日志文件夹
sudo mkdir /opt/zou/logs
sudo chown zou: /opt/zou/logs
Then we daemonize the gunicorn process via Systemd. For that we add a new file that will add a new daemon to be managed by Systemd:
创建进程守护的配置文件
Path: /etc/systemd/system/zou.service
sudo nano /etc/systemd/system/zou.servicePlease note that environment variables are positioned here. DB_PASSWORD must be set with your database password. SECRET_KEY must be generated randomly (use pwgen 16 command for that).
这里需要修改DB_PASSWORD和SECRET_KEY。
数据库的密码是之前设置的,而SECRET_KEY可以用pwgen来随机生成。
写入以下内容
[Unit]
Description=Gunicorn instance to serve the Zou API
After=network.target

[Service]
User=zou
Group=www-data
WorkingDirectory=/opt/zou
# Append DB_USERNAME=username DB_HOST=server when default values aren't used
# ffmpeg must be in PATH
Environment="DB_PASSWORD=yourdbpassword"
Environment="SECRET_KEY=yourrandomsecretkey"
Environment="PATH=/opt/zou/zouenv/bin:/usr/bin"
Environment="PREVIEW_FOLDER=/opt/zou/previews"
Environment="TMP_DIR=/opt/zou/tmp"
ExecStart=/opt/zou/zouenv/bin/gunicorn  -c /etc/zou/gunicorn.conf -b 127.0.0.1:5000 zou.app:app

[Install]
WantedBy=multi-user.target
Configure Events Stream API server创建事件流API服务器配置
Let's write the gunicorn configuration:
Path: /etc/zou/gunicorn-events.conf
写入以下内容
accesslog = "/opt/zou/logs/gunicorn_events_access.log"
errorlog = "/opt/zou/logs/gunicorn_events_error.log"
workers = 1
worker_class = "geventwebsocket.gunicorn.workers.GeventWebSocketWorker"
Then we daemonize the gunicorn process via Systemd:通过Systemd来守护事件流API服务进程
Path: /etc/systemd/system/zou-events.service
写入以下内容
[Unit]
Description=Gunicorn instance to serve the Zou Events API
After=network.target

[Service]
User=zou
Group=www-data
WorkingDirectory=/opt/zou
# Append DB_USERNAME=username DB_HOST=server when default values aren't used
Environment="PATH=/opt/zou/zouenv/bin"
Environment="SECRET_KEY=yourrandomsecretkey" # Same one than zou.service
ExecStart=/opt/zou/zouenv/bin/gunicorn -c /etc/zou/gunicorn-events.conf -b 127.0.0.1:5001 zou.event_stream:app

[Install]
WantedBy=multi-user.target
Configure Nginx配置Nginx
Finally we serve the API through a Nginx server. For that, add this configuration file to Nginx to redirect the traffic to the Gunicorn servers:
配置文件路径Path: /etc/nginx/sites-available/zou
写入
server {
    listen 80;
    server_name server_domain_or_IP;

    location /api {
        proxy_set_header Host $host;
        proxy_set_header X-Real-IP $remote_addr;
        proxy_pass http://localhost:5000/;
        client_max_body_size 500M;
        proxy_connect_timeout 600s;
        proxy_send_timeout 600s;
        proxy_read_timeout 600s;
        send_timeout 600s;
    }

    location /socket.io {
        proxy_http_version 1.1;
        proxy_set_header Host $host;
        proxy_set_header X-Real-IP $remote_addr;
        proxy_set_header Upgrade $http_upgrade;
        proxy_set_header Connection "Upgrade";
        proxy_pass http://localhost:5001;
    }
}
NB: We use the 80 port here to make this documentation simpler but the 443 port and https connection are highly recommended.
Finally, make sure that default configuration is removed:
删除默认配置
sudo rm /etc/nginx/sites-enabled/default
We enable that Nginx configuration with this command:
创建文件链接
sudo ln -s /etc/nginx/sites-available/zou /etc/nginx/sites-enabled
Finally we can start our daemon and restart Nginx:重启所有服务
sudo systemctl enable zou
sudo systemctl enable zou-events
sudo systemctl start zou
sudo systemctl start zou-events
sudo systemctl restart nginx
# 删除默认配置
sudo rm /etc/nginx/sites-enabled/default

# 创建文件链接
sudo ln -s /etc/nginx/sites-available/zou /etc/nginx/sites-enabled

# 重启nginx
sudo service zou start
sudo service zou-events start
sudo service nginx restartUpdate更新所有包
Update package
First, you have to upgrade the zou package:更新zou软件包
cd /opt/zou
sudo /opt/zou/zouenv/bin/pip3 install --upgrade zou
Update database schema更新数据路架构
Then, you need to upgrade the database schema:
# 这里输入数据库的密码
sudo -u zou DB_PASSWORD=yourdbpassword /opt/zou/zouenv/bin/zou upgrade-db
#退出当前环境
deactivate
Restart the Zou service重启zou服务
Finally, restart the Zou service:
sudo chown -R zou:www-data .
sudo systemctl restart zou
sudo systemctl restart zou-events
Deploying Kitsu部署Kitsu
Kitsu is a javascript UI that allows to manage Zou data from the browser.
Deploying Kitsu requires to retrieve the built version. For that let's grab it from Github:
cd /opt/
sudo git clone -b build https://github.com/cgwire/kitsu
cd kitsu
sudo git checkout build
sudo chown -R zou:www-data /opt/kitsu
Then we need to adapt the Nginx configuration to allow it to serve it properly:部署完成后需要更新nginx的配置
server {
    listen 80;
    server_name server_domain_or_IP;

    location /api {
        proxy_set_header X-Real-IP $remote_addr;
        proxy_set_header Host $host;
        proxy_pass http://localhost:5000/;
    }

    location /socket.io {
        proxy_http_version 1.1;
        proxy_set_header Host $host;
        proxy_set_header X-Real-IP $remote_addr;
        proxy_set_header Upgrade $http_upgrade;
        proxy_set_header Connection "Upgrade";
        proxy_pass http://localhost:5001;
    }

    location / {
        autoindex on;
        root  /opt/kitsu/dist;
        try_files $uri $uri/ /index.html;

    }
}
Restart your Nginx server:重启nginx服务
sudo systemctl restart nginx到这一步就可以访问自己的ip或者域名来使用cgwire了。
当然,在此之前需要一个管理员账户来登陆cgwire。
创建cgwire管理员账户
# 首先进入zou环境
cd /opt/zou
. zouenv/bin/activate

# 创建管理员账户 create_admin后的参数 为自己的密码和登陆邮箱
DB_PASSWORD=123 zou create_admin --password PASSWORD EMAIL

# 初始化数据
DB_PASSWORD=yourdbpassword zou init-data
如果发现提示api错误
返回到update的地方重启一下