dockerdesktop 制作asp.net core webapi镜像-连接sqlserver数据库容器
1.使用visual studio 创建 asp.net core webapi项目

选择启用docker 会生成Dockerfile文件
2.使用efcore连接数据库,安装efcore的包
  <ItemGroup>
    <PackageReference Include="Microsoft.VisualStudio.Azure.Containers.Tools.Targets" Version="1.18.1" />
    <PackageReference Include="Swashbuckle.AspNetCore" Version="6.2.3" />
    <PackageReference Include="Microsoft.EntityFrameworkCore.SqlServer" Version="6.0.10" />
    <PackageReference Include="Microsoft.EntityFrameworkCore.Tools" Version="6.0.0">
      <PrivateAssets>all</PrivateAssets>
      <IncludeAssets>runtime; build; native; contentfiles; analyzers; buildtransitive</IncludeAssets>
    </PackageReference>

  </ItemGroup>
3.实体类和数据库对应
using Microsoft.EntityFrameworkCore;
using System.ComponentModel.DataAnnotations;

namespace WebApplication4
{
    public class Inventory
    {
        [Key]
        public int id { get; set; }

        public string name { get; set; }
        public int quantity { get; set; }
    }
}
4.配置数据库连接字符串
//Data Source用的是容器里面的数据库容器名,这里需要容器之间通讯
{
  "Logging": {
    "LogLevel": {
      "Default": "Information",
      "Microsoft.AspNetCore": "Warning"
    }
  },
  "AllowedHosts": "*",
  "ConnectionStrings": {
    "DefaultConnection": "Data Source=sql-server2022;Database=TestDB;User Id=SA;Password=123456;"
  }
}
5.创建数据库上下文
using Microsoft.EntityFrameworkCore;

namespace WebApplication4
{
    public class AppDbContext : DbContext
    {
        public AppDbContext(DbContextOptions<AppDbContext> options)
            : base(options)
        {
        }

        protected override void OnConfiguring(DbContextOptionsBuilder optionsBuilder)
        {
            //optionsBuilder.UseSqlServer("server=localhost,1400;uid=SA;pwd=peng@123;database=TestDB");
        }

        public DbSet<Inventory> Inventory { get; set; }
    }
}
6.业务代码
namespace WebApplication4
{
    public interface Iservice
    {
        void add(Inventory inventory);

        void remove(int id);

        List<Inventory> Getlsit();
    }
}
namespace WebApplication4
{
    public class service : Iservice
    {
        private readonly AppDbContext _context;

        public service(AppDbContext context)
        {
            _context = context;
        }

        public void add(Inventory inventory)
        {
            _context.Inventory.Add(inventory);
            _context.SaveChanges();
        }

        public List<Inventory> Getlsit()
        {
            return _context.Inventory.ToList();
        }

        public void remove(int id)
        {
            var ENRTY = _context.Inventory.FirstOrDefault(p => p.id == id);
            _context.Inventory.Remove(ENRTY);
            _context.SaveChanges();
        }
    }
}
7.注入服务
using Microsoft.EntityFrameworkCore;

namespace WebApplication4
{
    public class Program
    {
        public static void Main(string[] args)
        {
            var builder = WebApplication.CreateBuilder(args);

            // Add services to the container.

            builder.Services.AddControllers();
            // Learn more about configuring Swagger/OpenAPI at https://aka.ms/aspnetcore/swashbuckle
            builder.Services.AddEndpointsApiExplorer();
            builder.Services.AddScoped<Iservice, service>();
            builder.Services.AddDbContext<AppDbContext>(options =>
             options.UseSqlServer(builder.Configuration.GetConnectionString("DefaultConnection")));
            builder.Services.AddSwaggerGen();

            var app = builder.Build();
             //注释可以在生产环境看到swagger页面
            // Configure the HTTP request pipeline.
            //if (app.Environment.IsDevelopment())
            //{
            app.UseSwagger();
            app.UseSwaggerUI();
            //}

            app.UseAuthorization();

            app.MapControllers();

            app.Run();
        }
    }
}
8.contrllor代码
using Microsoft.AspNetCore.Http;
using Microsoft.AspNetCore.Mvc;

namespace WebApplication4.Controllers
{
    [Route("api/[controller]")]
    [ApiController]
    public class InveryController : ControllerBase
    {
        private readonly Iservice iservice;

        public InveryController(Iservice iservice)
        {
            this.iservice = iservice;
        }

        [HttpGet]
        public IActionResult Getlist()
        {
            return new JsonResult(iservice.Getlsit());
        }

        [HttpPost]
        public IActionResult Add([FromBody] Inventory inventory)
        {
            iservice.add(inventory);
            return Ok("add success");
        }

        [HttpDelete("{id}")]
        public IActionResult delete(int id)
        {
            iservice.remove(id);
            return Ok("remove success");
        }
    }
}
#获取asp.net6的镜像
FROM mcr.microsoft.com/dotnet/aspnet:6.0 AS base
#创建工作目录
WORKDIR /app
#复制当前目录到工作目录
ADD . /app
#开放端口
EXPOSE 5999
CMD ["--urls","http://0.0.0.0:5999"]
#设置环境变量
ENTRYPOINT ["dotnet", "WebApplication4.dll"]
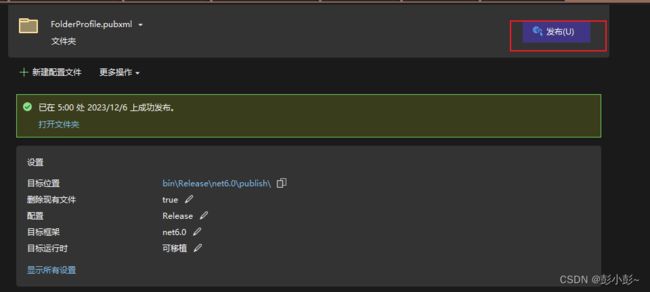
10.发布项目

11.切换到发布文件目录 终端打开

12.添加网络(不添加容器间无法通讯)
 docker network create mynetwork
 #sql-server2022(数据库容器)
  docker network connect mynetwork   sql-server2022
13.构建镜像
docker build -t webapplication4 -f ./Dockerfile .
13.运行容器(把容器加到添加的网络里)
-d 后台运行
–name 容器的名字
-p 端口映射
–network 网桥名称
webapplication4 镜像的名称
docker run -d --name webapiTest -p 5999:5999 --network=mynetwork webapplication4
14.查看运气是否运行
docker ps

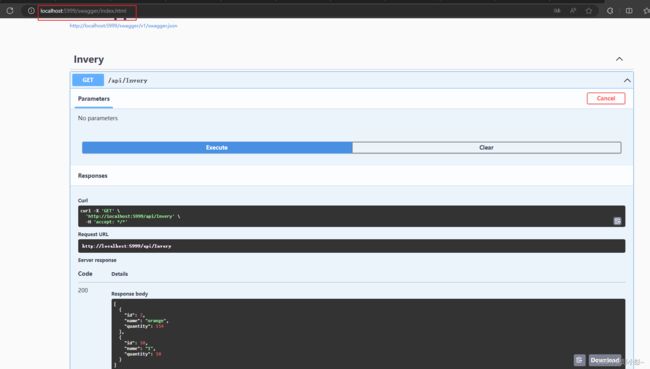
15.在浏览器里运行(点击进入浏览器)
![]()
在网址里加上 /swagger/index.html

就可以访问数据了。
注意:如果访问的数据库不在docker容器里面就直接写ip地址就行,如果做了端口映射,数据库连接要127.0.0.1,1434 这样的形式。
end…

