chineseocr项目不使用web推理-docker容器化
整个流程介绍
- 拉取 ufoym/deepo 镜像 -- 因为包含了主流深度学习框架,镜像4G出头。
- 拉取 chineseocr 项目代码。
- 修改代码,不使用web,增加命令行传入图片路径的功能
- 打包成docker镜像。
开始
拉取 ufoym/deepo 镜像 :cpu版本为例
docker hub地址:(好像需要梯子)
https://hub.docker.com/r/ufoym/deepo
docker pull ufoym/deepo:cpu拉取 chineseocr 项目代码
项目:https://github.com/chineseocr/chineseocr
git clone https://github.com/chineseocr/chineseocr.git修改代码,不使用web,增加命令行传入图片路径的功能
先 run 一个容器:
docker run -itd -v /home/wind/winds/ocr/chineseocr-app:/data --name ocr ufoym/deepo:cpu
进入容器开发:
docker exec -it ocr /bin/bash安装一些库:
ps. 把web注释掉
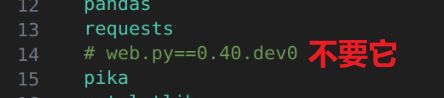
pip3 install -i https://pypi.tuna.tsinghua.edu.cn/simple -r requirements.txt把官方的 test.ipynb 文件改为 .py 文件,使用argparse解析命令行输入的命令:
下面代码保存为 run.py 文件:
import os
import json
import time
from config import *
from application import trainTicket,idcard
import argparse
if __name__ == "__main__":
parser = argparse.ArgumentParser()
parser.add_argument('--img_path','-img_path', type=str, default='test.jpeg')
args = parser.parse_args()
if yoloTextFlag =='keras' or AngleModelFlag=='tf' or ocrFlag=='keras':
os.environ["CUDA_VISIBLE_DEVICES"] = ''
if yoloTextFlag=='opencv':
scale,maxScale = IMGSIZE
from text.opencv_dnn_detect import text_detect
elif yoloTextFlag=='darknet':
scale,maxScale = IMGSIZE
from text.darknet_detect import text_detect
elif yoloTextFlag=='keras':
scale,maxScale = IMGSIZE[0],2048
from text.keras_detect import text_detect
else:
print( "err,text engine in keras\opencv\darknet")
from text.opencv_dnn_detect import angle_detect
from crnn.keys import alphabetChinese,alphabetEnglish
if ocrFlag=='keras':
from crnn.network_keras import CRNN
if chineseModel:
alphabet = alphabetChinese
if LSTMFLAG:
ocrModel = ocrModelKerasLstm
else:
ocrModel = ocrModelKerasDense
else:
ocrModel = ocrModelKerasEng
alphabet = alphabetEnglish
LSTMFLAG = True
elif ocrFlag=='torch':
from crnn.network_torch import CRNN
if chineseModel:
alphabet = alphabetChinese
if LSTMFLAG:
ocrModel = ocrModelTorchLstm
else:
ocrModel = ocrModelTorchDense
else:
ocrModel = ocrModelTorchEng
alphabet = alphabetEnglish
LSTMFLAG = True
elif ocrFlag=='opencv':
from crnn.network_dnn import CRNN
ocrModel = ocrModelOpencv
alphabet = alphabetChinese
else:
print( "err,ocr engine in keras\opencv\darknet")
nclass = len(alphabet)+1
if ocrFlag=='opencv':
crnn = CRNN(alphabet=alphabet)
else:
crnn = CRNN( 32, 1, nclass, 256, leakyRelu=False,lstmFlag=LSTMFLAG,GPU=GPU,alphabet=alphabet)
if os.path.exists(ocrModel):
crnn.load_weights(ocrModel)
else:
print("download model or tranform model with tools!")
ocr = crnn.predict_job
from main import TextOcrModel
model = TextOcrModel(ocr,text_detect,angle_detect)
import cv2
import time
p = args.img_path
img = cv2.imread(p)
h,w = img.shape[:2]
timeTake = time.time()
scale=608
maxScale=2048
result,angle= model.model(img,
detectAngle=True,##是否进行文字方向检测
scale=scale,
maxScale=maxScale,
MAX_HORIZONTAL_GAP=80,##字符之间的最大间隔,用于文本行的合并
MIN_V_OVERLAPS=0.6,
MIN_SIZE_SIM=0.6,
TEXT_PROPOSALS_MIN_SCORE=0.1,
TEXT_PROPOSALS_NMS_THRESH=0.7,
TEXT_LINE_NMS_THRESH = 0.9,##文本行之间测iou值
LINE_MIN_SCORE=0.1,
leftAdjustAlph=0,##对检测的文本行进行向左延伸
rightAdjustAlph=0.1,##对检测的文本行进行向右延伸
)
timeTake = time.time()-timeTake
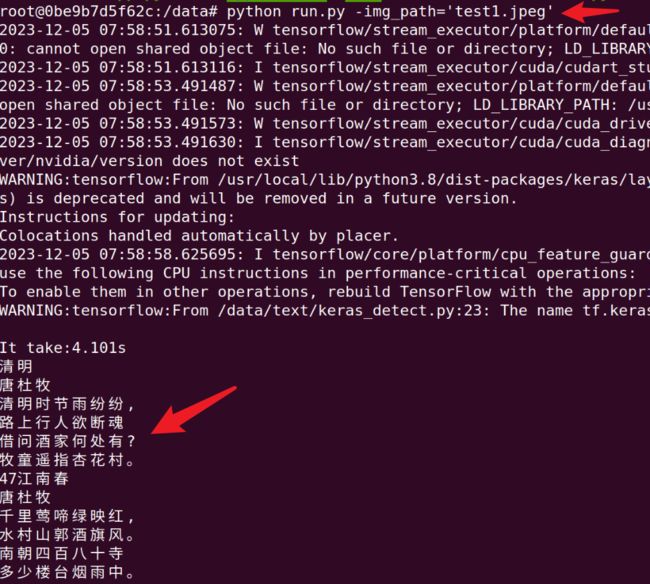
print('It take:{:.3f}s'.format(timeTake))
for line in result:
print(line['text'])
ps. 因为TensorFlow版本的问题,会出现2-3和错误,下面列出可能遇到的错误和解决办法:
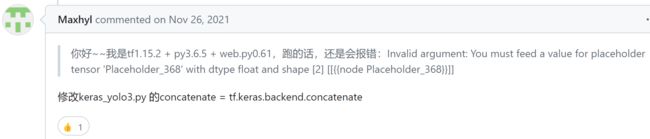
报错1:tensorflow.python.framework.errors_impl.InvalidArgumentError: You must feed a value for placeholder tensor 'Placeholder_367' with dtype float and shape [2]
[[{{node Placeholder_367}}]] -- 就是这类Placeholder_xxx的问题
解决1:https://github.com/chineseocr/chineseocr/issues/496:
报错2:AttributeError: module ‘keras.backend‘ has no attribute 'get_session'
解决2:AttributeError: module ‘keras.backend‘ has no attribute ‘get_session‘ 问题解决_叶庭云的博客-CSDN博客
报错3:ValueError: Subshape must have computed start >= end since stride is negative, but is 0 and 2 (computed from start 0 and end 9223372036854775807 over shape with rank 2 and stride-1)
解决3:Tensorflow v1到v2版本兼容指南 - 知乎
最后,成功:
打包成docker镜像
在宿主机打开终端,把宿主机的文件复制到容器:
cd /home/wind/winds/ocr
docker cp chineseocr-app 容器id:/data/
docker commit -m 'cpu inference' -a 'hongrun' 容器id ocr:cpu以上。
附注:有一个轻量化的 chineseocr 项目,叫做 chineseocr_lite,这个也可以打包成镜像,但好像封装的有点死,不容易改动(比如不想用web),所以就抛弃它。
chineseocr_lite 项目:
https://github.com/DayBreak-u/chineseocr_lite/tree/master