ESP32-CAM + micropython学习笔记
ESP32-CAM + micropython学习笔记
×:还没做,但是存在的功能
√:已做
文章目录
- ESP32-CAM + micropython学习笔记
-
- micropython
- esp32-cam硬件配置
- webrepl | √
- 外置PSRAM | ×
- SD卡 | √
- 热点+WiFi | √
-
- 连接WiFi
- 开启热点
- 网络编程 | ...
- 服务器 | √
- 蓝牙 | √
- 摄像头 | ×
- 多线程 | √
-
- 创建线程
- 线程同步
- esp32与外设
-
- SSD1306 | √
- SR04 | √
- esp32与微信小程序(局域网) | √
- 连接贝壳互联
-
- 1. 设备->用户 | 图表方式实时查看传感器数据
- 自建模块 | √
micropython
micropython简称mpy,是python的片上版本
MicroPython是在ESP-IDF之上实现的,Espressif是ESP32开发框架。
这是一个基于FreeRTOS的系统。
| Arduino | AT | micropython |
|---|---|---|
| - | ESP-IDF | - |
(Arduino和AT也都是基于ESP-IDF的)
其库名一般会在原来python的名字前加一个u以区别,比如pip->upip
mpy的启动顺序:
_boot.py【不可见】
boot.py【由系统创建,可见,但不建议修改】
main.py【由用户创建,开机自动运行的代码放这】
固件版本:micropython1.14
固件下载地址:https://micropython.org/download/
micropython1.14文档:http://docs.micropython.org/en/v1.14/
esp32-cam硬件配置
| <<引脚说明>> |
|---|
主频支持 80 MHz、160 MHz和 240MHz。micropython默认设置160MHz。
支持蓝牙,wifi,AP,内存卡
支持ov2640,ov7260摄像头
更多相关信息查看安信可,ESP32-S模组【非乐鑫模组】
webrepl | √
repl:交互式解释器
webrepl:无线的repl开启后可以传文件,与micropython交互
开这个的教程有很多,可以直接点这个https://www.jianshu.com/p/c2ddd4fd05be
| webrepl PC离线版 |
|---|
【原版的显示有点问题,这是我改动过的版本】
链接:https://pan.baidu.com/s/1Ai7UAa8_k_KAX2-dDl4QWg
提取码:8ud1
外置PSRAM | ×
PSRAM:伪SRAM,如果要使用的话对芯片别的功能会产生一些影响
暂时不需要,略
SD卡 | √
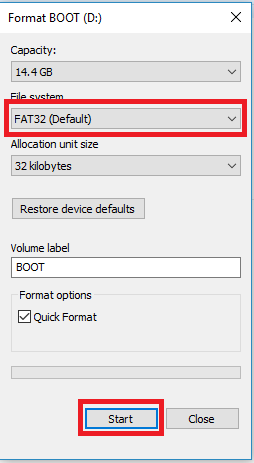
SD卡驱动模式有两种,一是SPI,二是SD
ESP32-CAM上自带的是SD模式
SD BUS
物理层定义:
D0-D3 数据传送
CMD 进行CMD 和Respons 【工作状态】
CLK 时钟信号线了
VDD VSS 电源和地参考:https://blog.csdn.net/zqixiao_09/article/details/51039378
加载内存卡
import machine, os

sd = machine.SDCard(slot=1)  # esp32-cam使用存储卡是卡槽1
os.mount(sd, "/sd")  		# 安装
os.listdir('/sd')   		# 查看SD卡目录
os.umount('/sd')     		# 弹出
micropython os模块介绍
https://blog.csdn.net/gene8888/article/details/89599910
热点+WiFi | √
连接WiFi
import network
import time
import machine
ssid='RUNOOB'
password='123456789'
wlan=network.WLAN(network.STA_IF)
wlan.active(True)
wlan.connect(ssid,password)
i=0
led=machine.Pin(4,machine.Pin.OUT)
led.value(0)
while(wlan.ifconfig()[0]=='0.0.0.0' and i < 30):
    i=i+1
    time.sleep(0.5)
    if(wlan.ifconfig()[0]=='0.0.0.0'):
        print('connect Wifi False!')
    else:
        print('connect Wifi True!')# 连接成功则点亮小灯
        print(wlan.ifconfig())
        led.value(1)
        time.sleep(0.5)
        led.value(0)
开启热点
网络编程 | …
有空再写
服务器 | √
先安装所需的库文件
import upip
upip.install('picoweb')
# 来自picoweb官方的例程
#
# This is a picoweb example showing a centralized web page route
# specification (classical Django style).
#
import ure as re
import picoweb

def index(req, resp):
    # You can construct an HTTP response completely yourself, having
    # a full control of headers sent...
    # HTTP响应头
    yield from resp.awrite("HTTP/1.0 200 OK\r\n")
    yield from resp.awrite("Content-Type: text/html\r\n")
    yield from resp.awrite("\r\n")
    yield from resp.awrite("I can show you a table of squares.
")
    yield from resp.awrite("Or my source.")

def squares(req, resp):
    # Or can use a convenience function start_response() (see its source for
    # extra params it takes).
    # 发送后台渲染好的模板,依赖utemplate库
    # 我没试成功,utemplate库出了点问题,错误OSError: [Errno 2] ENOENT
    yield from picoweb.start_response(resp)
    yield from app.render_template(resp, "squares.tpl", (req,))


def hello(req, resp):
    yield from picoweb.start_response(resp)
    # Here's how you extract matched groups from a regex URI match
    yield from resp.awrite("Hello " + req.url_match.group(1))

# 路由表
ROUTES = [
    # You can specify exact URI string matches...
    ("/", index),
    ("/squares", squares),
    ("/file", lambda req, resp: (yield from app.sendfile(resp, "example_webapp.py"))),
    # ... or match using a regex, the match result available as req.url_match
    # for match group extraction in your view.
    (re.compile("^/iam/(.+)"), hello),
]
# 还可以使用这种形式
@app.route("/test")
def test(req, resp):
    yield from picoweb.start_response(resp)
    yield from resp.awrite("This is webapp #1")

import ulogging as logging
logging.basicConfig(level=logging.INFO)
#logging.basicConfig(level=logging.DEBUG)

app = picoweb.WebApp(None, ROUTES)
# debug values:
# -1 disable all logging
# 0 (False) normal logging: requests and errors
# 1 (True) debug logging
# 2 extra debug logging
app.run(host='0.0.0.0', port=80, debug=1)
更多例子:https://github.com/pfalcon/picoweb/tree/master/examples
如果上面的例子调通比较难,试试我这个简单的
import ure as re
import picoweb
def index(req, resp):
# 用来方便的生成响应头
yield from picoweb.start_response(resp)
# 网页内容
yield from resp.awrite("""
Hello World!
Yes, you did it.
""")
def hello(req, resp):
yield from picoweb.start_response(resp)
yield from resp.awrite("Hello, balbala...
")
# 路由表
ROUTES = [
("/", index),
("/hello", hello),
]
# 日志
import ulogging as logging
logging.basicConfig(level=logging.INFO)
# 启动服务器
app = picoweb.WebApp(None, ROUTES)
app.run(host='0.0.0.0', port=80, debug=True)
蓝牙 | √
参考文章:https://blog.csdn.net/jd3096/article/details/121945129
官方的蓝牙模块还在开发中,没那么好用,以下代码来自上面的文章【2022.01】
BLE.py
import bluetooth
import struct
import time
from micropython import const
#ble常量设置,不用动
_IRQ_CENTRAL_CONNECT = const(1)
_IRQ_CENTRAL_DISCONNECT = const(2)
_IRQ_GATTS_WRITE = const(3)

_FLAG_READ = const(0x0002)
_FLAG_WRITE_NO_RESPONSE = const(0x0004)
_FLAG_WRITE = const(0x0008)
_FLAG_NOTIFY = const(0x0010)

_ADV_TYPE_FLAGS = const(0x01)
_ADV_TYPE_NAME = const(0x09)
_ADV_TYPE_UUID16_COMPLETE = const(0x3)
_ADV_TYPE_UUID32_COMPLETE = const(0x5)
_ADV_TYPE_UUID128_COMPLETE = const(0x7)
_ADV_TYPE_UUID16_MORE = const(0x2)
_ADV_TYPE_UUID32_MORE = const(0x4)
_ADV_TYPE_UUID128_MORE = const(0x6)
_ADV_TYPE_APPEARANCE = const(0x19)
#服务注册部分
_UART_UUID = bluetooth.UUID("6E400001-B5A3-F393-E0A9-E50E24DCCA9E")
_UART_TX = (
    bluetooth.UUID("6E400003-B5A3-F393-E0A9-E50E24DCCA9E"),
    _FLAG_READ | _FLAG_NOTIFY,
)
_UART_RX = (
    bluetooth.UUID("6E400002-B5A3-F393-E0A9-E50E24DCCA9E"),
    _FLAG_WRITE | _FLAG_WRITE_NO_RESPONSE,
)
_UART_SERVICE = (
    _UART_UUID,
    (_UART_TX, _UART_RX),
)
#广播函数
def advertising_payload(limited_disc=False, br_edr=False, name=None, services=None, appearance=0):
    payload = bytearray()

    def _append(adv_type, value):
        nonlocal payload
        payload += struct.pack("BB", len(value) + 1, adv_type) + value

    _append(
        _ADV_TYPE_FLAGS,
        struct.pack("B", (0x01 if limited_disc else 0x02) + (0x18 if br_edr else 0x04)),
    )

    if name:
        _append(_ADV_TYPE_NAME, name)

    if services:
        for uuid in services:
            b = bytes(uuid)
            if len(b) == 2:
                _append(_ADV_TYPE_UUID16_COMPLETE, b)
            elif len(b) == 4:
                _append(_ADV_TYPE_UUID32_COMPLETE, b)
            elif len(b) == 16:
                _append(_ADV_TYPE_UUID128_COMPLETE, b)

    if appearance:
        _append(_ADV_TYPE_APPEARANCE, struct.pack(", appearance))

    return payload

#BLE类
class BLESimplePeripheral:
    def __init__(self, ble, name="esp32"):    #ble名称
        self._ble = ble
        self._ble.active(True)
        self._ble.irq(self._irq)
        ((self._handle_tx, self._handle_rx),) = self._ble.gatts_register_services((_UART_SERVICE,))
        self._connections = set()
        self._write_callback = None
        self._payload = advertising_payload(name=name)
        self._advertise()

    def _irq(self, event, data):
        if event == _IRQ_CENTRAL_CONNECT:
            conn_handle, _, _ = data
            print("New connection", conn_handle)
            self._connections.add(conn_handle)
            self._advertise()
        elif event == _IRQ_CENTRAL_DISCONNECT:
            conn_handle, _, _ = data
            print("Disconnected", conn_handle)
            self._connections.remove(conn_handle)
            self._advertise()
        elif event == _IRQ_GATTS_WRITE:
            conn_handle, value_handle = data
            value = self._ble.gatts_read(value_handle)
            if value_handle == self._handle_rx and self._write_callback:
                self._write_callback(value)

    def send(self, data):
        for conn_handle in self._connections:
            self._ble.gatts_write(21, data)

    def notify(self, data):
        for conn_handle in self._connections:
            self._ble.gatts_notify(conn_handle,21,data)

    def is_connected(self):
        return len(self._connections) > 0

    def _advertise(self, interval_us=500000):
        print("Starting advertising")
        self._ble.gap_advertise(interval_us, adv_data=self._payload)

    def on_write(self, callback):
        self._write_callback = callback
BLE_demo.py 蓝牙调试程序,从机
import BLE
import bluetooth
import utime
#新建ble对象
b = bluetooth.BLE()
#导入类
p = BLE.BLESimplePeripheral(b)
#查看mac地址,能正常显示mac地址就是创建广播成功
aa=b.config('mac')
print('mac地址为')
print(aa)
#接受数据函数
def on_rx(v):
    print(v)
    print("Receive_data:", str(v))

p.on_write(on_rx)

while 1:
    if p.is_connected():
        p.notify('ble data form mpy')   #发送数据(以通知形式)
    utime.sleep_ms(300)

#运行之后打开手机ble助手,连接即可,默认id:esp32,可在ble.py中更改
更多例子看:https://github.com/micropython/micropython/tree/master/examples/bluetooth
_
注:esp32只有一个天线,网上搜了一下,关于蓝牙和wifi的说法很多,有说蓝牙和WiFi可以同时打开,但会干扰的。我不清楚,但同时打开确实是没问题的,好不好用就不知道了。
摄像头 | ×
待定
摄像头arduino里有很多现成的库,实现更容易
多线程 | √
参考:_thread库介绍
创建线程
import _thread

def func(arg1:int, arg2:int)->None:
	print(arg1+arg2)

args = (1,2)

_thread.start_new_thread(func, args)
# def start_new_thread(function: Callable[..., Any], args: tuple[Any, ...], kwargs: dict[str, Any] = ...) -> int: ...
# func -> 线程要执行的函数
# args -> 函数必要的参数,格式:(arg1, arg2, ...)
# kwargs -> 使用字典来指定有名参数
# func和args不能为空,当不需要参数时,让args=()
# NOTE: 只有线程执行结束和遇到错误才会停下来
线程同步
只需要一个锁时
import _thread

lock = _thread.allocate_lock()	# 创建一个锁对象
lock.acquire() # 阻塞
...
lock.release() # 释放
创建多个锁时
import _thread

waitflag1 = 1
waitflag2 = 2
lock = _thread.allocate_lock()	# 创建一个锁对象

lock.acquire(1) # 阻塞
...
lock.release(1) # 释放

lock.acquire(2) # 阻塞
...
lock.release(2) # 释放
- 其他:设置阻塞超时,查看锁的状态,中断,查看线程内存占用
esp32与外设
SSD1306 | √
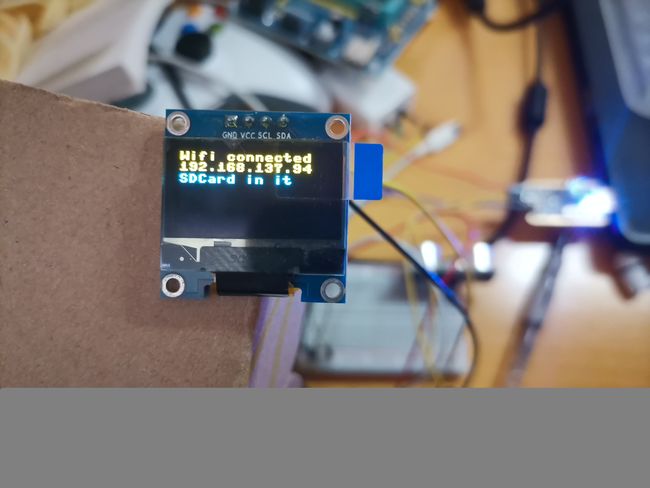
esp32的引脚本身就很少,因此oled我用的是四脚的,即I2C通信方式。
micropython自带的machine模块是包含该通信协议的,可直接调用
# 创建一个i2c对象,接线已在代码中给出
i2c = machine.SoftI2C(scl = machine.Pin(16), sda = machine.Pin(0), freq = 50000)
接下来调用ssd1306模块
from ssd1306 import SSD1306_I2C
oled = SSD1306_I2C(128, 64, i2c)#0.96寸有128x64个像素点
oled.text("Hello World!",0,0)
oled.show()
关于ssd1306库:从github上下的,稍微改进了一下,很容易看懂
https://github.com/adafruit/micropython-adafruit-ssd1306
# MicroPython SSD1306 OLED driver, I2C and SPI interfaces
# 2022年2月27日
import time
import framebuf

# register definitions
SET_CONTRAST        = const(0x81)
SET_ENTIRE_ON       = const(0xa4)
SET_NORM_INV        = const(0xa6)
SET_DISP            = const(0xae)
SET_MEM_ADDR        = const(0x20)
SET_COL_ADDR        = const(0x21)
SET_PAGE_ADDR       = const(0x22)
SET_DISP_START_LINE = const(0x40)
SET_SEG_REMAP       = const(0xa0)
SET_MUX_RATIO       = const(0xa8)
SET_COM_OUT_DIR     = const(0xc0)
SET_DISP_OFFSET     = const(0xd3)
SET_COM_PIN_CFG     = const(0xda)
SET_DISP_CLK_DIV    = const(0xd5)
SET_PRECHARGE       = const(0xd9)
SET_VCOM_DESEL      = const(0xdb)
SET_CHARGE_PUMP     = const(0x8d)


class SSD1306:
    def __init__(self, width, height, external_vcc):
        self.width = width
        self.height = height
        self.external_vcc = external_vcc
        self.pages = self.height // 8
        # Note the subclass must initialize self.framebuf to a framebuffer.
        # This is necessary because the underlying data buffer is different
        # between I2C and SPI implementations (I2C needs an extra byte).
        self.poweron()
        self.init_display()

    def init_display(self):
        for cmd in (
            SET_DISP | 0x00, # off
            # address setting
            SET_MEM_ADDR, 0x00, # horizontal
            # resolution and layout
            SET_DISP_START_LINE | 0x00,
            SET_SEG_REMAP | 0x01, # column addr 127 mapped to SEG0
            SET_MUX_RATIO, self.height - 1,
            SET_COM_OUT_DIR | 0x08, # scan from COM[N] to COM0
            SET_DISP_OFFSET, 0x00,
            SET_COM_PIN_CFG, 0x02 if self.height == 32 else 0x12,
            # timing and driving scheme
            SET_DISP_CLK_DIV, 0x80,
            SET_PRECHARGE, 0x22 if self.external_vcc else 0xf1,
            SET_VCOM_DESEL, 0x30, # 0.83*Vcc
            # display
            SET_CONTRAST, 0xff, # maximum
            SET_ENTIRE_ON, # output follows RAM contents
            SET_NORM_INV, # not inverted
            # charge pump
            SET_CHARGE_PUMP, 0x10 if self.external_vcc else 0x14,
            SET_DISP | 0x01): # on
            self.write_cmd(cmd)
        self.fill(0)
        self.show()

    def poweroff(self):
        self.write_cmd(SET_DISP | 0x00)

    def contrast(self, contrast):
        self.write_cmd(SET_CONTRAST)
        self.write_cmd(contrast)

    def invert(self, invert):
        # 全屏转换
        # invert->bool
        self.write_cmd(SET_NORM_INV | (invert & 1))

    def show(self):
        x0 = 0
        x1 = self.width - 1
        if self.width == 64:
            # displays with width of 64 pixels are shifted by 32
            x0 += 32
            x1 += 32
        self.write_cmd(SET_COL_ADDR)
        self.write_cmd(x0)
        self.write_cmd(x1)
        self.write_cmd(SET_PAGE_ADDR)
        self.write_cmd(0)
        self.write_cmd(self.pages - 1)
        self.write_framebuf()

    def fill(self, col):
        # 全屏填充
        self.framebuf.fill(col)

    def pixel(self, x, y, col):
        # 设置像素点颜色
        self.framebuf.pixel(x, y, col)

    def scroll(self, dx, dy):
        # 屏幕滚动
        self.framebuf.scroll(dx, dy)

    def text(self, string, x, y, col=1):
        self.framebuf.text(string, x, y, col)

    def clear_line(self, row, col=0):
        # 清空某一行的显示
        # row -> 1-8
        self.framebuf.fill_rect(0, row*8-8, 128, 8, col)

class SSD1306_I2C(SSD1306):
    def __init__(self, width, height, i2c, addr=0x3c, external_vcc=False):
        self.i2c = i2c
        self.addr = addr
        self.temp = bytearray(2)
        # Add an extra byte to the data buffer to hold an I2C data/command byte
        # to use hardware-compatible I2C transactions.  A memoryview of the
        # buffer is used to mask this byte from the framebuffer operations
        # (without a major memory hit as memoryview doesn't copy to a separate
        # buffer).
        self.buffer = bytearray(((height // 8) * width) + 1)
        self.buffer[0] = 0x40  # Set first byte of data buffer to Co=0, D/C=1
        self.framebuf = framebuf.FrameBuffer1(memoryview(self.buffer)[1:], width, height)
        super().__init__(width, height, external_vcc)

    def write_cmd(self, cmd):
        self.temp[0] = 0x80 # Co=1, D/C#=0
        self.temp[1] = cmd
        self.i2c.writeto(self.addr, self.temp)

    def write_framebuf(self):
        # Blast out the frame buffer using a single I2C transaction to support
        # hardware I2C interfaces.
        self.i2c.writeto(self.addr, self.buffer)

    def poweron(self):
        pass


class SSD1306_SPI(SSD1306):
    def __init__(self, width, height, spi, dc, res, cs, external_vcc=False):
        self.rate = 10 * 1024 * 1024
        dc.init(dc.OUT, value=0)
        res.init(res.OUT, value=0)
        cs.init(cs.OUT, value=1)
        self.spi = spi
        self.dc = dc
        self.res = res
        self.cs = cs
        self.buffer = bytearray((height // 8) * width)
        self.framebuf = framebuf.FrameBuffer1(self.buffer, width, height)
        super().__init__(width, height, external_vcc)

    def write_cmd(self, cmd):
        self.spi.init(baudrate=self.rate, polarity=0, phase=0)
        self.cs.high()
        self.dc.low()
        self.cs.low()
        self.spi.write(bytearray([cmd]))
        self.cs.high()

    def write_framebuf(self):
        self.spi.init(baudrate=self.rate, polarity=0, phase=0)
        self.cs.high()
        self.dc.high()
        self.cs.low()
        self.spi.write(self.buffer)
        self.cs.high()

    def poweron(self):
        self.res.high()
        time.sleep_ms(1)
        self.res.low()
        time.sleep_ms(10)
        self.res.high()
SR04 | √
SR04超声波模块,无需第三方库
"""
SR04驱动程序
2022年3月2日
"""

from machine import Pin
import time

class _SR04:
    def __init__(self, _trig=1, _echo=3) -> None:
        # Pin1是TXD,Pin3是RXD
        self.trig = Pin(_trig, Pin.OUT)
        self.echo = Pin(_echo, Pin.IN)

    def Measure(self, timeout_us=350):
        # timeout_us:检测的超时时间,亲测350us是不错的选择
        self.trig.on()
        time.sleep_us(10)       # 产生宽度10us的高电平脉冲
        self.trig.off()

        t1 = time.ticks_us()    # 等待开始时间
        t2 = t1                 # 回应开始时间
        while (self.echo.value() == 0) and (time.ticks_diff(t2,t1) < timeout_us):
            t2 = time.ticks_us()

        if (self.echo.value() == 1):    # 收到回应,检测回响信号
            t1 = time.ticks_us()        # 高电平起始时间
            t2 = t1                     # 高电平结束时间
            while (self.echo.value() == 1):
                t2 = time.ticks_us()    #检测到Echo为高电平后,计时等待Echo为低。
            distance_cm = time.ticks_diff(t2,t1)* 34 / 1000 / 2
            return distance_cm
        else: # 检测超时
            return 0
esp32与微信小程序(局域网) | √
esp32与微信小程序(局域网) -1
连接贝壳互联
参考
- 贝壳物联平台通讯协议
- 贝壳物联入门
1. 设备->用户 | 图表方式实时查看传感器数据
- 此为自建模块,仅供参考【2022年3月8日】
在这个例子中,实现的是远程获取传感器参数
需要注意的三个参数:设备ID,APIKEY,接口ID
# 连接贝壳物联 Bigiot.py
# 日期:2022年3月7日
# NOTE:暂未提供关闭线程的办法,也就是说,sendDatas一旦调用,将一直运行下去直到出错
# 只是一个demo,存在很多潜在问题

import socket
import ujson
import _thread
import time

class bigiot:
    def __init__(self, ID:str, K:str) -> None:
        self.host = 'www.bigiot.net'
        self.port = '8181'      # 该端口表示心跳连接由我方发送
        self.connected=False    # 连接状态
        self.ID = ID            # 设备ID
        self.K = K              # 设备APIKEY
        self.maxlen = 1000      # 最大接收长度
        self.thread_list = []   # 线程标识符列表
        self.lock = _thread.allocate_lock()

        self.client = socket.socket(socket.AF_INET,socket.SOCK_STREAM)
        self.client.settimeout(5)
        self.client.connect((self.host, self.port))
        if len(self.client.recv(self.maxlen))>0:
            self.connected=True
            self._keepOnline()  # 保持设备上线状态

    def __del__(self):
        self.client.close()


    def __str__(self) -> str:
        e = {'ID':self.ID, 'APIKEY':self.K, 'port':8181, 'isconnected':self.connected}
        return str(e)


    def login(self)->bool:
        # 设备登陆贝壳物联
        data = {
            'M':"checkin",
            'ID':self.ID,
            'K':self.K,
        }
        rec = self.sendData(data)
        if rec['M']=='checkinok':
            return True
        else:
            return False


    def alter(self, info:str):
        # 发送报警信息
        data = {
            "M":"alert",
            "ID":self.ID,
            "C":info
            }
        rec = self.sendData(data)


    def _keepOnline(self)-> None:
        # 发送心跳包
        self.sendDatas({'M':'beat'}, 40)


    def sendData(self, data:dict, re=True)-> dict:
        # 发送数据
        data = ujson.dumps(data)+'\n'

        self.lock.acquire()
        self.client.send(data.encode())
        if re:
            data = ujson.loads(self.client.recv(self.maxlen))
            self.lock.release()
            return data
        else:
            self.lock.release()
            return {}


    def RTData(self, id1:str, value1)->dict:
        # 发送实时数据套用这个格式
        data = {
            "M": "u",
            "ID": self.ID,
            "V": {id1:value1}
            }
        return data


    def sendDatas(self, dataSource:function or dict, period_s:float)-> None:
        # 定时发送数据
        # NOTE: period_s最小5s,小于5会被贝壳默认为5
        if type(dataSource)!=dict:
            # 发送动态数据
            ident = _thread.start_new_thread(self._fun,(dataSource, period_s))
        else:
            # 发送静态数据
            ident = _thread.start_new_thread(self._dict,(dataSource, period_s))
        self.thread_list.append(ident)

    def _fun(self, dataSource:function, period:float)->None:
        while 1:
            self.sendData(dataSource(), re=False)
            time.sleep(period)
    def _dict(self, dataSource:dict, period:float)->None:
        while 1:
            self.sendData(dataSource, re=False)
            time.sleep(period)


    def threadList(self) -> dict:
        # 查询线程状态
        pass
- Bigiot.py的调用,以超声波传感器sr04为例
Note: 切勿直接复制代码,看懂怎么用就行
from Bigiot import bigiot
dev_ID = "xxx" # 设备ID
APIKEY = "xxx" # APIKEY
bi = bigiot(dev_ID, APIKEY)

sr_id = 'xxx' # 接口ID
def getSr04Data() -> dict:
	return bi.RTData(sr_id, sr.Measure(400)) # 将数据包装一下再返回

if bi.connected:
    if bi.login():
        bi.sendDatas(getSr04Data, 5)# 持续发送数据,数据从getSr04Data中取出,间隔5s发送一次
        print('login sucess')
    else:
        print('login failed')
else:
    print('connect to bigiot failed')
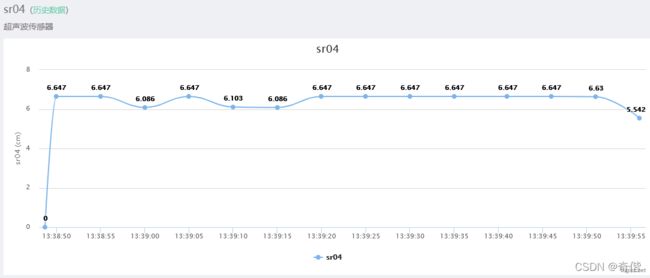
- 实现效果
自建模块 | √
补充一点小东西
import os
import micropython
import machine
# micropython自带的os.rmdir()只能删除空文件夹,不太方便,这补一个删除任意文件夹的
def del_dir(dir_name):
for item in os.listdir(dir_name):
if '.' in item:
os.remove(dir_name+'/'+item)
else:
del_dir(dir_name+'/'+item)
os.rmdir(dir_name)
# 查看一些系统的基本信息
def sys_info(wlan=None):
print('\n')
print('' )
print(machine.freq())
print('\n')
print('' )
if 'sd' in os.listdir('/'):
print(os.statvfs('/sd'))
else:
print('no SDCard!')
print('\n')
print('' )
print(micropython.mem_info())
print('\n')
if wlan is not None:
print('' )
print(wlan.ifconfig())
print('\n')


