使用 SpringBoot + Ckeditor 富文本编辑器、图片上传
一、前言
在一些页面中,进行 发表文章、评论等功能,都要涉及到富文本编辑器,
如 CSDN 的 markdown 编辑器

使用传统的 textarea 标签是远远满足不了需求的,
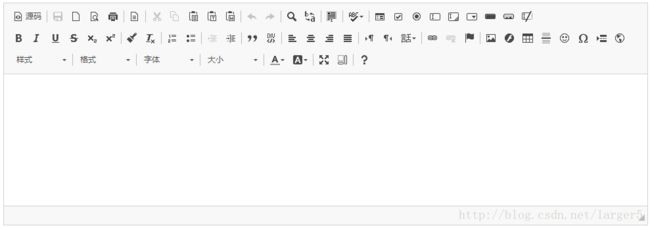
现在流行的富文本编辑器主要有两个,ckeditor 和 百度的 UEditor,
① 前者比较简单,可以先感受一下富文本编辑器。
② 后者功能更加强大,可以单图、多图上传,还可以截图、代码高亮等特性,但是使用起来不太通用、简单。
二、代码示例
下面来个 [文本读写]
1、前端
简单的界面 edit.html
<html>

    <head>
        <meta charset="UTF-8">
        <title>文本编辑器title>

        <script type="text/javascript" src="ckeditor/ckeditor.js">script>
        <script type="text/javascript">
            //替换指定name的textarea为富文本编辑器
            CKEDITOR.replace('edi')
        script>
    head>

    <body>

        <form action="diary/sub" method="post">
            <div>

                <textarea class="ckeditor" name="edi">textarea>
            div>
            <input type="submit" value="提交" />
        form>

    body>

html>
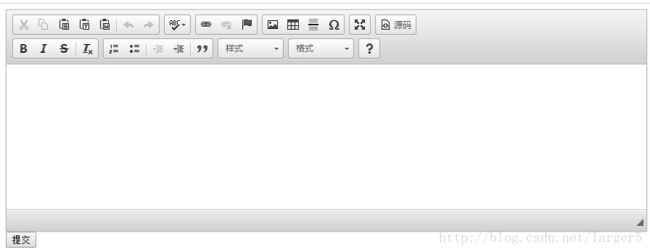
效果如下:
2、后台
由于逻辑比较简单,为了方便,使用 SpringBoot,并且 省略了 service 层
① 实体
package com.cun.bean;

import java.util.Date;

import javax.persistence.Column;
import javax.persistence.Entity;
import javax.persistence.GeneratedValue;
import javax.persistence.Id;
import javax.persistence.Table;

@Table(name = "t_diary")
@Entity
public class Diary {
    public Diary() {
        super();
        // TODO Auto-generated constructor stub
    }

    @Id
    @GeneratedValue
    private Integer diaryId;
    @Column(length=60)
    private String title;
    private String content;
    private Date releaseDate;
    private Integer typeId = -1;

    public Diary(String title, String content, int typeId) {
        super();
        this.title = title;
        this.content = content;
        this.typeId = typeId;
    }

    public Integer getDiaryId() {
        return diaryId;
    }

    public void setDiaryId(Integer diaryId) {
        this.diaryId = diaryId;
    }

    public String getTitle() {
        return title;
    }

    public void setTitle(String title) {
        this.title = title;
    }

    public String getContent() {
        return content;
    }

    public void setContent(String content) {
        this.content = content;
    }

    public Date getReleaseDate() {
        return releaseDate;
    }

    public void setReleaseDate(Date releaseDate) {
        this.releaseDate = releaseDate;
    }

    public Integer getTypeId() {
        return typeId;
    }

    public void setTypeId(Integer typeId) {
        this.typeId = typeId;
    }

}
② dao
package com.cun.dao;

import org.springframework.data.jpa.repository.JpaRepository;

import com.cun.bean.Diary;

public interface DiaryDao extends JpaRepository<Diary, Integer> {

}
③ 控制
package com.cun.controller;

import java.util.Date;

import org.springframework.beans.factory.annotation.Autowired;
import org.springframework.stereotype.Controller;
import org.springframework.web.bind.annotation.PathVariable;
import org.springframework.web.bind.annotation.RequestMapping;
import org.springframework.web.bind.annotation.ResponseBody;

import com.cun.bean.Diary;
import com.cun.dao.DiaryDao;

@Controller
@RequestMapping("/diary")
public class DiaryController {

    @Autowired
    private DiaryDao diaryDao;

    @ResponseBody
    @RequestMapping("/sub")
    public void sub(String edi) {
        Diary diary = new Diary();
        diary.setContent(edi);
        Date date = new Date();
        diary.setReleaseDate(date);
        diaryDao.save(diary);
    }

    @ResponseBody
    @RequestMapping("/get/{id}")
    public String getText(@PathVariable("id") Integer id) {
        return diaryDao.findOne(id).getContent();
    }

}
其他 pom、application 配置,不是重点,省略
三、功能简单演示
1、输入文本
点击提交
2、查看数据库
数据已经存进去了,并且是带有样式标签的
3、显示文本
在浏览器输入链接,这个 RequestMapping 使用 rest 风格
可见浏览器显示的文本,是刚才输入的文本样式
四、ckeditor实现图片上传
图片上传,要使用 ckeditor 完整版,效果图如下

先点击
![]()
则显示如下,可见图片上传默认是关闭的
1、启动图片上传
①修改 image.js
在下面这个地方
![]()
下面设置为开启
![]()
2、配置图片上传请求,
① 修改 config.js,例如按下面这样修改,

CKEDITOR.editorConfig = function( config ) {
      // Define changes to default configuration here. For example:
      // config.language = 'fr';
      // config.uiColor = '#AADC6E';
      //设置自己图片上传的Controller的RequestMapping,注意是配置在函数里边
      config.filebrowserUploadUrl="/edit/ckeditorUpload";

};
②编写 Controller
package com.cun.controller;
import java.io.File;
import org.apache.commons.io.FileUtils;
import org.springframework.stereotype.Controller;
import org.springframework.web.bind.annotation.RequestMapping;
import org.springframework.web.bind.annotation.RequestParam;
import org.springframework.web.bind.annotation.ResponseBody;
import org.springframework.web.multipart.MultipartFile;
@Controller
@RequestMapping("/edit")
public class CkeditorController {
// 注意路径格式,一般为项目路径下的一个文件夹里边,项目发布到linux服务器上又得改了
String imageFilePath = "C://LLLLLLLLLLLLLLLLLLL/20180209/TestCkeditor/src/main/webapp/static/myImage/";
/**
* 进入编辑器页面
* @return
*/
@RequestMapping("/ckeditor")
public String editor() {
return "edit";
}
/**
* 编辑器图片上传实现
* @param file
* @param CKEditorFuncNum
* @return
* @throws Exception
*/
@ResponseBody
@RequestMapping("/ckeditorUpload")
//名字upload是固定的,有兴趣,可以打开浏览器查看元素验证
public String ckeditorUpload(@RequestParam("upload") MultipartFile file, String CKEditorFuncNum) throws Exception {
// 获取文件名
String fileName = file.getOriginalFilename();
// 获取文件的后缀名
String suffixName = fileName.substring(fileName.lastIndexOf("."));
//实际处理肯定是要加上一段唯一的字符串(如现在时间),这里简单加 cun
String newFileName = "cun" + suffixName;
//使用架包 common-io实现图片上传
FileUtils.copyInputStreamToFile(file.getInputStream(), new File(imageFilePath + newFileName));
//实现图片回显,基本上是固定代码,只需改路劲即可
StringBuffer sb = new StringBuffer();
sb.append("");
return sb.toString();
}
}
3、效果
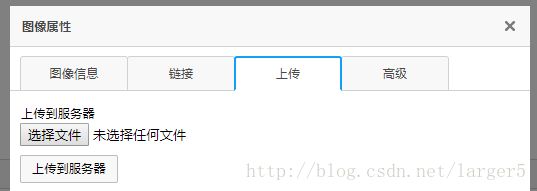
① 打开该富文本编辑器的
![]()
② 选择你要上传的图片,我选择仙剑三一张照片~~

③ 点击上传到服务器,能进入如下的界面,表示成功了

④ 额外,不妨看一下图片有没有上传到设置对应的目录,是有的!

五、小结
1、使用起来还是很简单的,使应用更具有人性化
2、本项目的简单版源代码:https://github.com/larger5/SpringBoot-Ckeditor.git
3、本项目的完整版源代码:https://github.com/larger5/SpringBoot-Ckeditor2.git


