使用MybatisPlus快速进行增删改查
使用MybatisPlus快速进行增删改查
前言:mybatisplus 可以说是对mybatis更好的拓展,一些简单的增删改查的操作已经被作者实现,我们只需引用即可。
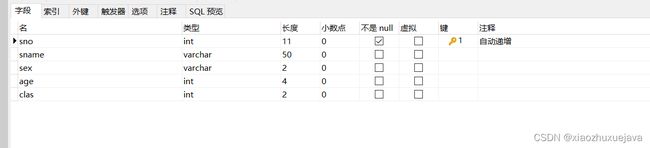
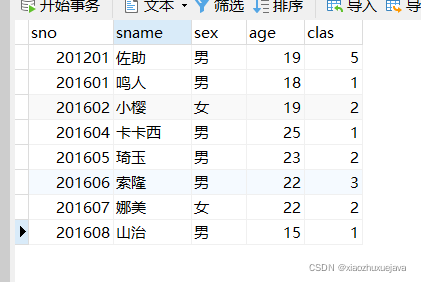
1.数据库建表
这里使用的是MySQL数据库,表名为student
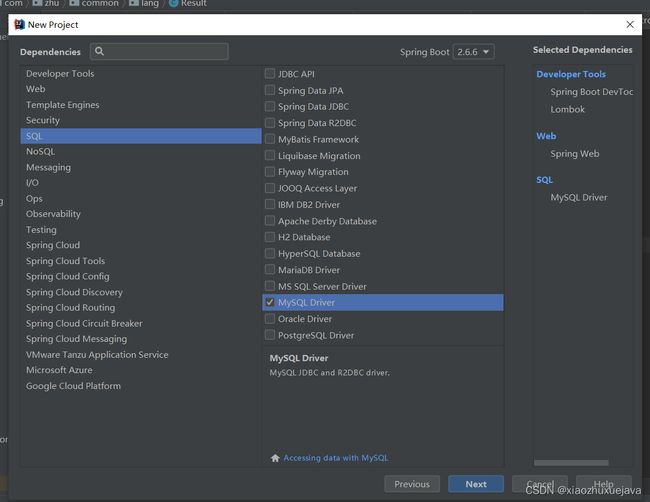
2.新建一个springboot项目
这里使用的idea
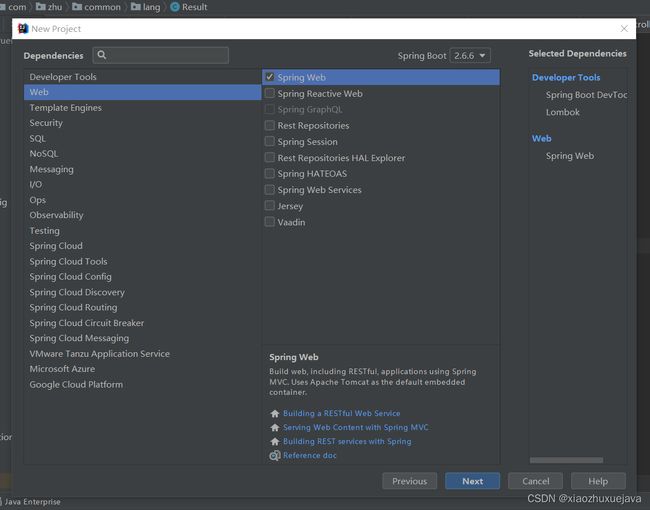
(1)、引入相应的jar包
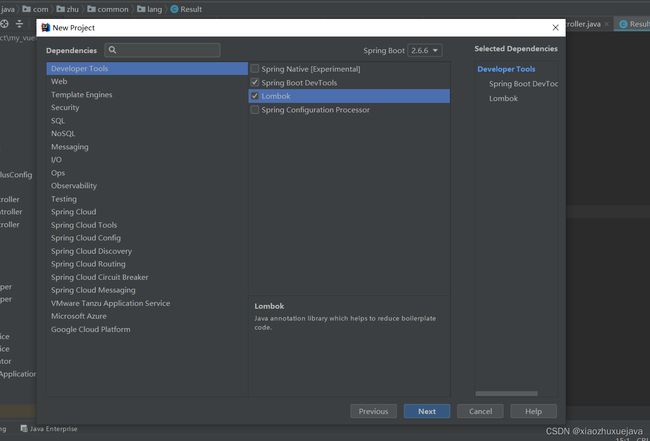
修改一下springboot的版本 最好与此一致,其他版本不确定是否兼容
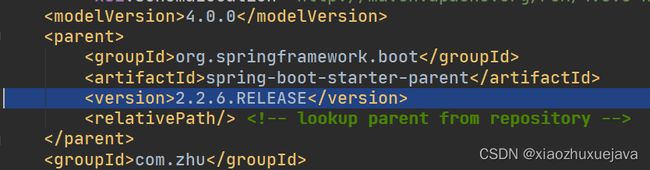
这里如有需要复制时,注意空白格,直接复制可能会报错
    <parent>
        <groupId>org.springframework.bootgroupId>
        <artifactId>spring-boot-starter-parentartifactId>
        <version>2.2.6.RELEASEversion>
        <relativePath/>
    parent>

 <dependencies>
        <dependency>
            <groupId>org.springframework.bootgroupId>
            <artifactId>spring-boot-starter-webartifactId>
        dependency>

        <dependency>
            <groupId>org.springframework.bootgroupId>
            <artifactId>spring-boot-devtoolsartifactId>
            <scope>runtimescope>
            <optional>trueoptional>
        dependency>
        <dependency>
            <groupId>mysqlgroupId>
            <artifactId>mysql-connector-javaartifactId>
            <scope>runtimescope>
        dependency>
        <dependency>
            <groupId>org.projectlombokgroupId>
            <artifactId>lombokartifactId>
            <optional>trueoptional>
        dependency>
        <dependency>
            <groupId>org.springframework.bootgroupId>
            <artifactId>spring-boot-starter-testartifactId>
            <scope>testscope>
        dependency>
    dependencies>
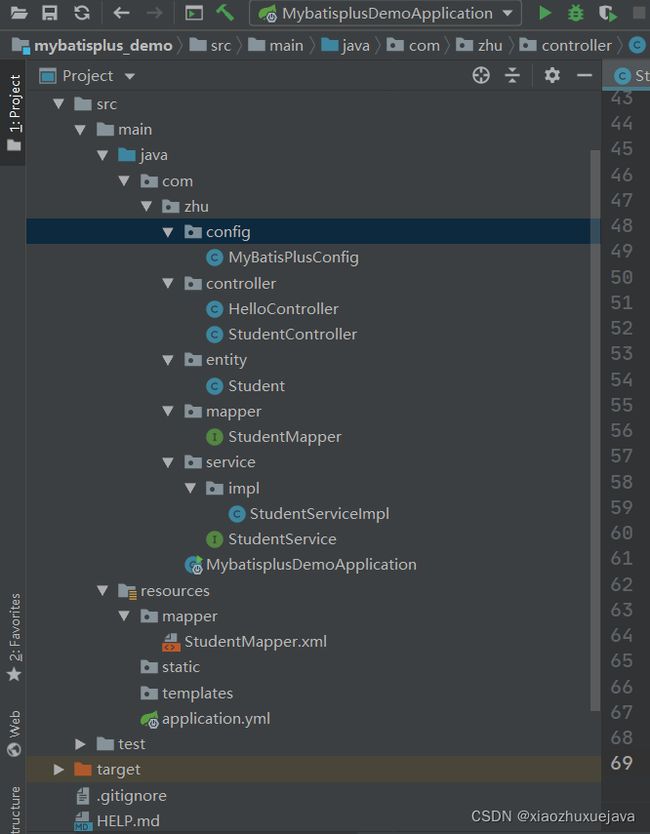
(2)、快速启动项目
在此之前,先看看一看我的项目结构
- 新建一个controller包,在controller包下新建一个HelloController.java
package com.zhu.controller;


import org.springframework.web.bind.annotation.RequestMapping;
import org.springframework.web.bind.annotation.RestController;

@RestController
@RequestMapping("/test")
public class HelloController {

    @RequestMapping("/hello")
    public String hello(){
        return "hello";
    }

}
- springboot启动类,运行main即可
package com.zhu;

import org.springframework.boot.SpringApplication;
import org.springframework.boot.autoconfigure.SpringBootApplication;

@SpringBootApplication
public class MybatisplusDemoApplication {

    public static void main(String[] args) {
        SpringApplication.run(MybatisplusDemoApplication.class, args);
    }

}
- 在浏览器(这里使用的谷歌浏览器)中输入地址: http://localhost:8080/test/hello
至此,一个springboot项目快速启动完成,下面我们需要引入mybatisplus相关依赖
3.springboot结合mybatisplus
(1)、引入mybatisplus以及其他依赖
<dependency>
    <groupId>com.baomidougroupId>
    <artifactId>mybatis-plus-boot-starterartifactId>
    <version>3.2.0version>
dependency>
<dependency>
    <groupId>org.springframework.bootgroupId>
    <artifactId>spring-boot-starter-freemarkerartifactId>
dependency>

<dependency>
    <groupId>mysqlgroupId>
    <artifactId>mysql-connector-javaartifactId>
    <scope>runtimescope>
dependency>
(2)、创建application.yml文件,修改配置
# DataSource Config
spring:
  datasource:
    driver-class-name: com.mysql.cj.jdbc.Driver
    url: jdbc:mysql://localhost:3306/此处为你的数据库名?useUnicode=true&useSSL=false&characterEncoding=utf8&serverTimezone=Asia/Shanghai
    username: 你的数据库用户名
    password: 你的数据库密码
mybatis-plus:
  # xml文件扫描
  mapper-locations: classpath*:/mapper/**Mapper.xml
(3)、创建mybaisplus配置类
package com.zhu.config;


import com.baomidou.mybatisplus.extension.plugins.PaginationInterceptor;

import org.mybatis.spring.annotation.MapperScan;
import org.springframework.context.annotation.Bean;
import org.springframework.context.annotation.Configuration;
import org.springframework.transaction.annotation.EnableTransactionManagement;

@Configuration
@MapperScan("com.zhu.mapper")//mapper接口扫描注解
@EnableTransactionManagement
public class MyBatisPlusConfig {//分页配置,本博客不展示分页操作

    @Bean
    public PaginationInterceptor paginationInterceptor() {
        PaginationInterceptor paginationInterceptor = new PaginationInterceptor();
        return paginationInterceptor;
    }


}
(4)、创建实体类
package com.zhu.entity;

import com.baomidou.mybatisplus.annotation.IdType;
import com.baomidou.mybatisplus.annotation.TableId;
import java.io.Serializable;
import lombok.Data;
import lombok.EqualsAndHashCode;
import lombok.experimental.Accessors;

/**
 *
 *
 *
 *
 * @author xiaozhu
 * @since 2022-04-13
 */
//使用lombok,简化了代码,不用书写set get等方法
@Data
@EqualsAndHashCode(callSuper = false)
@Accessors(chain = true)
public class Student implements Serializable {

    private static final long serialVersionUID = 1L;

    /**
     * 自动递增
     */
    @TableId(value = "sno", type = IdType.AUTO)
    private Integer sno;

    private String sname;

    private String sex;

    private Integer age;

    private Integer clas;


}
(5)、创建mapper接口
package com.zhu.mapper;

import com.zhu.entity.Student;
import com.baomidou.mybatisplus.core.mapper.BaseMapper;

/**
 *
 *  Mapper 接口
 *
 *
 * @author xiaozhu
 * @since 2022-04-13
 */
public interface StudentMapper extends BaseMapper<Student> {

}
(6)、创建service接口及其实现类
package com.zhu.service;

import com.zhu.entity.Student;
import com.baomidou.mybatisplus.extension.service.IService;

/**
 *
 *  服务类
 *
 *
 * @author xiaozhu
 * @since 2022-04-13
 */
public interface StudentService extends IService<Student> {

}
package com.zhu.service.impl;

import com.zhu.entity.Student;
import com.zhu.mapper.StudentMapper;
import com.zhu.service.StudentService;
import com.baomidou.mybatisplus.extension.service.impl.ServiceImpl;
import org.springframework.stereotype.Service;

/**
 *
 *  服务实现类
 *
 *
 * @author xiaozhu
 * @since 2022-04-13
 */
@Service
public class StudentServiceImpl extends ServiceImpl<StudentMapper, Student> implements StudentService {

}
(7)、创建controller
package com.zhu.controller;


import com.zhu.entity.Student;
import com.zhu.service.StudentService;
import org.springframework.beans.factory.annotation.Autowired;
import org.springframework.web.bind.annotation.*;

import java.util.List;

/**
 *
 *  前端控制器
 *
 *
 * @author xiaozhu
 * @since 2022-04-13
 */
@RestController
@RequestMapping("/student")
public class StudentController {

    @Autowired
    private StudentService studentService;


    //返回所有学生
    @GetMapping("/allStudent")
    public List<Student> findAllStudent(){

        return studentService.list();
    }


    //根据学号查询学生
    @GetMapping("/findBySno/{sno}")
    public Student findBySno(@PathVariable("sno") Integer sno){

        return studentService.getById(sno);
    }

    //根据学号删除学生信息(此方法可以使用软件postman进行测试)
    @DeleteMapping("/deleteBySno/{sno}")
    public boolean deleteBySno(@PathVariable("sno") Integer sno){
        return  studentService.removeById(sno);
    }


    //增加一个学生信息(此方法可以使用软件postman进行测试),注意学号自增
    @PostMapping("/add")
    public boolean add(@RequestBody Student student){
        return studentService.save(student);
    }


    //根据学号修改学生信息(此方法可以使用软件postman进行测试),注意学号自增
    @PutMapping("/update")
    public boolean update(@RequestBody Student student){
        return studentService.updateById(student);
    }

}
至此,我们完成了mybatisplus的快速的入门级别的增删改查