多线程(初阶)
多线程
- 认识线程
-
- 概念
-
- 线程是什么
- 线程存在的意义
- 进程和线程的区别
- Java 的线程 和 操作系统线程 的关系
- 创建线程
-
- 方法1 继承 Thread 类
- 方法2 实现 Runnable 接口
- 匿名内部类创建 Thread 子类对象
- 匿名内部类创建 Runnable 子类对象
- lambda 表达式创建 Runnable 子类对象
- Thread 类及常见方法
-
- 启动一个线程-start()
- 中断一个线程
- 等待一个线程-join()
- 获取当前线程引用
- 休眠当前线程
- 线程的状态
-
- 观察线程的所有状态
- 观察线程的状态和转移
- 多线程带来的的风险-线程安全
-
- 观察线程不安全
- 线程安全的概念
- 线程不安全的原因
-
- 修改共享数据
- 原子性
- synchronized 关键字
-
- synchronized 的特性
-
- 互斥
- 可重入
- synchronized 使用示例
-
- 直接修饰普通方法
- 修饰静态方法
- 修饰代码块
- volatile 关键字
-
- volatile 能保证内存可见性
- wait 和 notify
-
- wait()方法
- notify()方法
- wait 和 sleep 的对比
- 多线程案例
-
- 单例模式
-
- 饿汉模式
- 懒汉模式
- 阻塞式队列
-
- 阻塞队列的概念
- 生产者消费者模型
- 标准库中的阻塞队列
- 阻塞队列实现
- 定时器
-
- 定时器的概念
- 标准库中的定时器
- 实现定时器
- 线程池
-
- 线程池的概念
- 标准库中的线程池
- 实现线程池
认识线程
概念
线程是什么
一个线程就是一个 “执行流”. 每个线程之间都可以按照顺讯执行自己的代码. 多个线程之间 “同时” 执行着多份代码;线程是操作系统调度的最小单位
线程存在的意义
线程是实现并发的必要条件
- 单核 CPU 的发展遇到了瓶颈. 要想提高算力, 就需要多核 CPU. 而并发编程能更充分利用多核 CPU 资源
- 有些任务场景需要 “等待 IO”, 为了让等待 IO 的时间能够去做一些其他的工作, 也需要用到并发编程
线程相比进程更加的轻量
- 创建线程比创建进程更快
- 销毁线程比销毁进程更快
- 调度线程比调度进程更快
进程和线程的区别
- 进程是包含线程的. 每个进程至少有一个线程存在,即主线程
- 进程和进程之间不共享内存空间. 同一个进程的线程之间共享同一个内存空间
- 进程是系统分配资源的最小单位,线程是系统调度的最小单位
Java 的线程 和 操作系统线程 的关系
线程是操作系统中的概念. 操作系统内核实现了线程这样的机制, 并且对用户层提供了一些 API 供用户使用;Java 标准库中 Thread 类可以视为是对操作系统提供的 API 进行了进一步的抽象和封装
创建线程
方法1 继承 Thread 类
继承 Thread 来创建一个线程类
class MyThread extends Thread{
    @Override
    public void run() {
        System.out.println("hello world");
    }
}
创建 MyThread 类的实例
Thread t =new MyThread();
调用 start 方法启动线程
t.start();
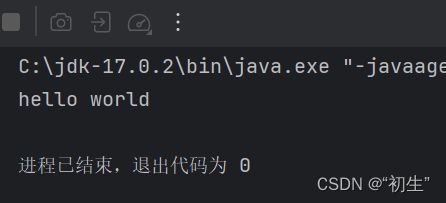
完整代码
class MyThread extends Thread{
    @Override
    public void run() {
        System.out.println("hello world");
    }
}
public class Threaddemo1 {
    public static void main(String[] args) {
        Thread t =new MyThread();
        t.start();
    }
}
方法2 实现 Runnable 接口
实现 Runnable 接口
class MyRunnable implements Runnable{
    @Override
    public void run() {
        System.out.println("hello world");
    }
}
创建 Thread 类实例, 调用 Thread 的构造方法时将 Runnable 对象作为 target 参数
        Runnable runnable=new MyRunnable();
        Thread t=new Thread(runnable);
调用 start 方法
t.start();
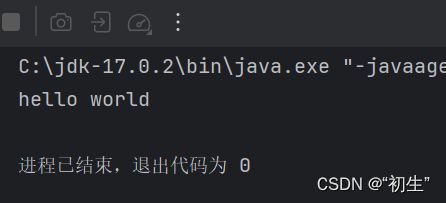
完整代码
class MyRunnable implements Runnable{
    @Override
    public void run() {
        System.out.println("hello world");
    }
}

public class Threaddemo2 {
    public static void main(String[] args) {
        Runnable runnable=new MyRunnable();
        Thread t=new Thread(runnable);
        t.start();
    }
}
匿名内部类创建 Thread 子类对象
public class Threaddemo3 {
    public static void main(String[] args) {
        Thread t=new Thread(){
            @Override
            public void run() {
                System.out.println("hello world");
            }
        };

        t.start();
    }
}
匿名内部类创建 Runnable 子类对象
public class Threaddemo4 {
    public static void main(String[] args) {
        Thread t=new Thread(new Runnable() {
            @Override
            public void run() {
                System.out.println("hello world");
            }
        });

        t.start();
    }
}
lambda 表达式创建 Runnable 子类对象
public class Threaddemo5 {
    public static void main(String[] args) {
        Thread t=new Thread(()->{
            System.out.println("hello world");
        });
        t.start();
    }
}
Thread 类及常见方法
Thread 类是 JVM 用来管理线程的一个类,也就是说,每个线程都有一个唯一的 Thread 对象与之关联
启动一个线程-start()
上面通过覆写 run 方法创建一个线程对象,但线程对象被创建出来并不意味着线程就开始运行
- 覆写 run 方法是提供给线程要做的事情的指令清单
- 线程对象可以认为是把 李四叫过来
- 调用 start() 方法,就是喊一声:”行动起来!“,线程才真正独立去执行

调用 start 方法, 才真的在操作系统的底层创建出一个线程
中断一个线程
中断线程不是立刻执行的,而是通知对应的线程需要进行中断,至于是立刻中断还是之后再中断,取决于当前对应线程
目前常见的有以下两种方式
- 通过共享的标记来进行沟通
- 调用 interrupt() 方法来通知
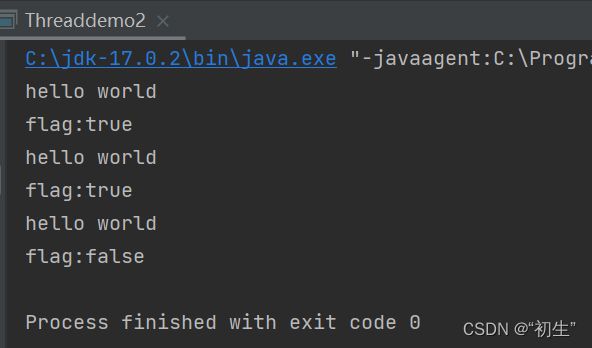
示例-1: 使用自定义的变量来作为标志位
public class Threaddemo2 {
    private static boolean flag=true;
    public static void main(String[] args) throws InterruptedException {
        Thread t=new Thread(()->{
            while(flag){
                try {
                    Thread.sleep(1000);
                } catch (InterruptedException e) {
                    throw new RuntimeException(e);
                }
                System.out.println("hello world");
                System.out.println("flag:"+flag);
            }
        });
        t.start();
        Thread.sleep(3000);
        flag=false;
    }
}
示例-2: 使用 Thread.interrupted() 或Thread.currentThread().isInterrupted() 代替自定义标志位
Thread 内部包含了一个 boolean 类型的变量作为线程是否被中断的标记
使用 thread 对象的 interrupted() 方法通知线程结束
public class Threaddemo3 {
    public static void main(String[] args) throws InterruptedException {
        Thread t=new Thread(()->{
            while(!Thread.currentThread().isInterrupted()){
                System.out.println("hello world");
                try {
                    Thread.sleep(1000);
                } catch (InterruptedException e) {
                    throw new RuntimeException(e);
                }
            }
        });
        t.start();
        Thread.sleep(3000);
        t.interrupt();
    }
}
Thread.currentThread().isInterrupted() 判断指定线程的中断标志被设置,不清除中断标志;Thread.interrupted() 会做两件事:将线程内部的标志位设置为true;如果线程正在休眠,则触发异常,将线程唤醒,正如上述运行结果
等待一个线程-join()
有时,我们需要等待一个线程完成它的工作后,才能进行自己的下一步工作
public class Threaddemo4 {
    public static void main(String[] args) throws InterruptedException {
        Thread t=new Thread(()->{
            for (int i = 0; i < 3; i++) {
                System.out.println("hello world");
                try {
                    Thread.sleep(1000);
                } catch (InterruptedException e) {
                    throw new RuntimeException(e);
                }
            }
        });
        t.start();
        System.out.println("线程join之前");
        t.join(1000);
        System.out.println("线程join之后");
    }
}
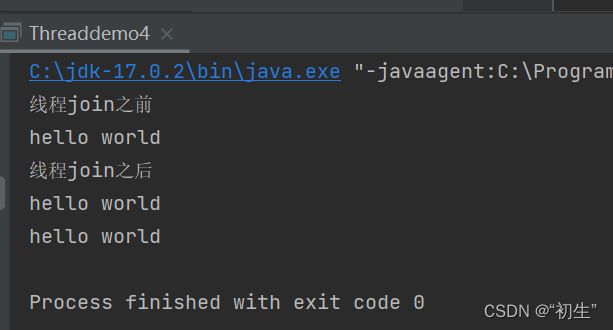
主线程将此线程的等待时间设置为3秒,次线程打印三次之后,两个线程一起结束
获取当前线程引用
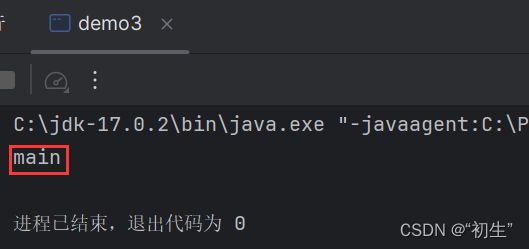
public class demo3 {
    public static void main(String[] args) {
        Thread thread = Thread.currentThread();
        System.out.println(thread.getName());
    }
}
休眠当前线程
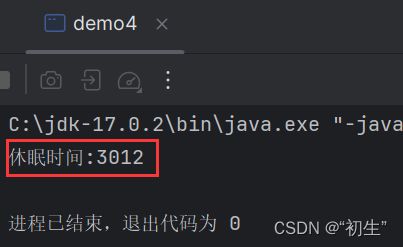
由于线程的调度是不可控的,所以,该方法只能保证实际休眠时间是大于等于参数设置的休眠时间的
public class demo4 {
    public static void main(String[] args) throws InterruptedException {
        long begin=System.currentTimeMillis();
        Thread.sleep(3000);
        long end=System.currentTimeMillis();
        System.out.println("休眠时间:"+(end-begin));
    }
}
线程的状态
观察线程的所有状态
public class demo5 {
    public static void main(String[] args) {
        for (Thread.State state : Thread.State.values()) {
            System.out.println(state);
        }
    }
}
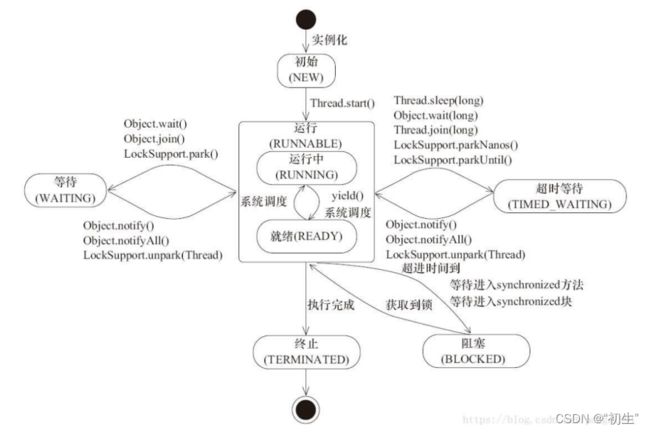
- NEW: 安排了工作, 还未开始行动
- RUNNABLE: 可工作的. 又可以分成正在工作中和即将开始工作
- BLOCKED: 这几个都表示排队等着其他事情
- WAITING: 这几个都表示排队等着其他事情
- TIMED_WAITING: 这几个都表示排队等着其他事情
- TERMINATED: 工作完成
观察线程的状态和转移
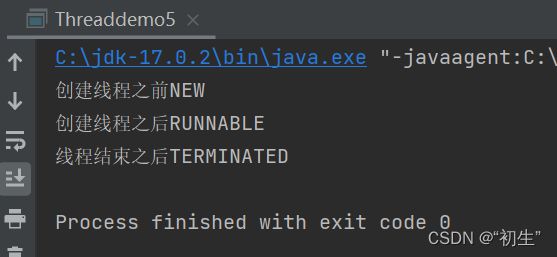
public class Threaddemo5 {
    public static void main(String[] args) throws InterruptedException {
        Thread t=new Thread(()->{
            for (int i = 0; i < 100000; i++) {

            }
        });
        System.out.println("创建线程之前"+t.getState());
        t.start();
        System.out.println("创建线程之后"+t.getState());
        t.join();
        System.out.println("线程结束之后"+t.getState());
    }
}
- BLOCKED 表示等待获取锁, WAITING 和 TIMED_WAITING 表示等待其他线程发来通知
- TIMED_WAITING 线程在等待唤醒,但设置了时限; WAITING 线程在无限等待唤醒
多线程带来的的风险-线程安全
观察线程不安全
class Counter{
    public int count=0;
    public void add(){
        count++;
    }
}
public class demo1 {
    public static void main(String[] args) throws InterruptedException {
        Counter counter=new Counter();
        Thread t1=new Thread(()->{
            for (int i = 0; i < 50000; i++) {
                counter.add();
            }
        });

        Thread t2=new Thread(()->{
            for (int i = 0; i < 50000; i++) {
                counter.add();
            }
        });
        long begin=System.currentTimeMillis();
        t1.start();
        t2.start();

        t1.join();
        t2.join();
        long end=System.currentTimeMillis();
        System.out.println("时间:"+(end-begin));
        System.out.println("count:"+counter.count);
    }
}
两个线程t1,t2同时对变量进行++操作,最终结果却是远远小于预期结果的
线程安全的概念
如果多线程环境下代码运行的结果是符合我们预期的,即在单线程环境应该的结果,则说这个程序是线程安全的
线程不安全的原因
修改共享数据
上面的线程不安全的代码中, 涉及到多个线程针对 counter.count 变量进行修改;此时这个 counter.count 是一个多个线程都能访问到的 “共享数据”
原子性
我们把一段代码想象成一个房间,每个线程就是要进入这个房间的人。如果没有任何机制保证,A进入房间之后,还没有出来;B 是不是也可以进入房间,打断 A 在房间里的隐私。这个就是不具备原子性的
那我们应该如何解决这个问题呢?是不是只要给房间加一把锁,A 进去就把门锁上,其他人是不是就进不来了。这样就保证了这段代码的原子性
有时也把这个现象叫做同步互斥,表示操作是互相排斥的
一条 java 语句不一定是原子的,也不一定只是一条指令
比如刚才我们看到的 n++,其实是由三步操作组成的:
- 从内存把数据读到 CPU
- 进行数据更新
- 把数据写回到 CPU
不保证原子性会给多线程带来什么问题
如果一个线程正在对一个变量操作,中途其他线程插入进来了,如果这个操作被打断了,结果就可能是错误的
synchronized 关键字
synchronized 的特性
互斥
synchronized 会起到互斥效果, 某个线程执行到某个对象的 synchronized 中时, 其他线程如果也执行到同一个对象 synchronized 就会阻塞等待
- 进入 synchronized 修饰的代码块, 相当于 加锁
- 退出 synchronized 修饰的代码块, 相当于 解锁
synchronized用的锁是存在Java对象头里的
理解 “阻塞等待”
针对每一把锁, 操作系统内部都维护了一个等待队列. 当这个锁被某个线程占有的时候, 其他线程尝试进行加锁, 就加不上了, 就会阻塞等待, 一直等到之前的线程解锁之后, 由操作系统唤醒一个新的线程, 再来获取到这个锁
- 上一个线程解锁之后, 下一个线程并不是立即就能获取到锁. 而是要靠操作系统来 “唤醒”. 这也就是操作系统线程调度的一部分工作
- 假设有 A B C 三个线程, 线程 A 先获取到锁, 然后 B 尝试获取锁, 然后 C 再尝试获取锁, 此时 B 和 C 都在阻塞队列中排队等待. 但是当 A 释放锁之后, 虽然 B 比 C 先来的, 但是 B 不一定就能获取到锁, 而是和 C 重新竞争, 并不遵守先来后到的规则
synchronized的底层是使用操作系统的mutex lock实现的
可重入
synchronized 同步块对同一条线程来说是可重入的,不会出现自己把自己锁死的问题
synchronized 使用示例
synchronized 本质上要修改指定对象的 “对象头”. 从使用角度来看,synchronized 也势必要搭配一个具体的对象来使用
直接修饰普通方法
锁的 SynchronizedDemo 对象
public class SynchronizedDemo {
    synchronized public void methond() {
   }
}
修饰静态方法
锁的 SynchronizedDemo 类的对象
public class SynchronizedDemo {
    public synchronized void methond() {
   }
}
修饰代码块
明确指定锁哪个对象
public class SynchronizedDemo {
    public void method() {
        synchronized (this) {

       }
   }
}
volatile 关键字
volatile 能保证内存可见性
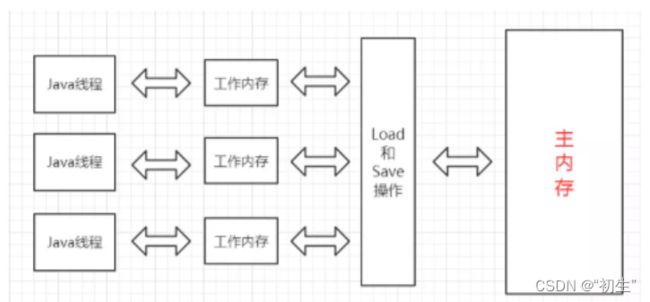
代码在写入 volatile 修饰的变量的时候
- 改变线程工作内存中volatile变量副本的值
- 将改变后的副本的值从工作内存刷新到主内存
代码在读取 volatile 修饰的变量的时候
- 从主内存中读取volatile变量的最新值到线程的工作内存中
- 从工作内存中读取volatile变量的副本
示例如下
class Counter{
    public int flag=0;
}
public class Threaddemo1 {
    public static void main(String[] args) {
        Counter counter=new Counter();
        Thread t1=new Thread(()->{
            while(counter.flag==0){

            }
            System.out.println("t1循环结束");
        });

        Thread t2=new Thread(()->{
            System.out.println("请输入一个整数");
            Scanner scanner=new Scanner(System.in);
            counter.flag= scanner.nextInt();
        });

        t1.start();
        t2.start();
    }
}
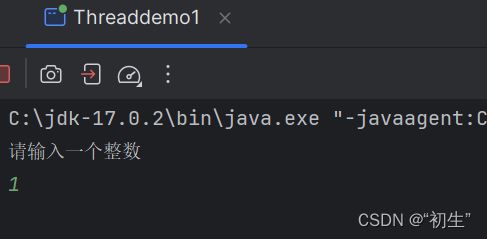
当 t2 对 flag 变量进行修改, 此时 t1 感知不到 flag 的变化;因为JVM进行了优化处理
当给 flag 加上 volatile修饰之后
class Counter{
    public volatile int flag=0;
}
wait 和 notify
由于线程之间是抢占式执行的, 因此线程之间执行的先后顺序难以预知;实际开发中有时候我们希望合理的协调多个线程之间的执行先后顺序
完成整个协调工作, 主要涉及到三个方法
- wait() / wait(long timeout): 让当前线程进入等待状态
- notify() / notifyAll(): 唤醒在当前对象上等待的线程
wait()方法
wait 的工作内容
- 使当前执行代码的线程进行等待. (把线程放到等待队列中)
- 释放当前的锁(前提是已经获得锁)
- 满足一定条件时被唤醒, 重新尝试获取这个锁
wait 结束等待的条件
- 其他线程调用该对象的 notify 方法
- 其他线程调用该等待线程的 interrupted 方法, 导致 wait 抛出 InterruptedException 异常
示例如下
public class Threaddemo2 {
    public static void main(String[] args) throws InterruptedException {
        Thread thread = Thread.currentThread();
        Object object=new Object();
        synchronized (object){
            System.out.println("wait之前:"+thread.getState());
            object.wait();
            System.out.println("wait之后:"+thread.getState());
        }
    }
}
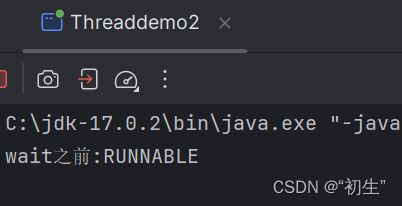
这样在执行到object.wait()之后就一直等待下去,那么程序肯定不能一直这么等待下去。这个时候就需要使用到了另外一个方法唤醒的方法notify()
notify()方法
notify 方法是唤醒等待的线程
- 方法notify()也要在同步方法或同步块中调用,该方法是用来通知那些可能等待该对象的对象锁的其它线程,对其发出通知notify,并使它们重新获取该对象的对象锁
- 如果有多个线程等待,则有线程调度器随机挑选出一个呈 wait 状态的线程。(并没有 “先来后到”)
- 在notify()方法后,当前线程不会马上释放该对象锁,要等到执行notify()方法的线程将程序执行完,也就是退出同步代码块之后才会释放对象锁
示例如下:按顺序打印ABC三个字符
public class Threaddemo4 {
    public static void main(String[] args) throws InterruptedException {
        Object lock1=new Object();
        Object lock2=new Object();

        Thread t1=new Thread(()->{
            System.out.println("A");
            synchronized (lock1){
                lock1.notify();
            }
        });

        Thread t2=new Thread(()->{
            synchronized (lock1){
                try {
                    lock1.wait();
                } catch (InterruptedException e) {
                    throw new RuntimeException(e);
                }
            }

            System.out.println("B");

            synchronized (lock2){
                lock2.notify();
            }
        });

        Thread t3=new Thread(()->{
            synchronized (lock2){
                try {
                    lock2.wait();
                } catch (InterruptedException e) {
                    throw new RuntimeException(e);
                }
            }

            System.out.println("C");
        });

        t2.start();
        t3.start();
        Thread.sleep(1000);
        t1.start();
    }
}
wait 和 sleep 的对比
其实理论上 wait 和 sleep 完全是没有可比性的,因为一个是用于线程之间的通信的,一个是让线程阻塞一段时间,唯一的相同点就是都可以让线程放弃执行一段时间
多线程案例
单例模式
单例模式是校招中最常考的设计模式之一
单例模式能保证某个类在程序中只存在唯一一份实例, 而不会创建出多个实例
单例模式具体的实现方式, 分成 “饿汉” 和 “懒汉” 两种
饿汉模式
类加载的同时, 创建实例
class Singleton{
    private static Singleton instance=new Singleton();
    public static Singleton getInstance(){
        return instance;
    }

    private Singleton(){}
}
public class Threaddemo5 {
    public static void main(String[] args) {
        Singleton s1=Singleton.getInstance();
        Singleton s2=Singleton.getInstance();
        System.out.println(s1==s2);
    }
}
懒汉模式
类加载的时候不创建实例. 第一次使用的时候才创建实例
class Singletonlazy{
    private static volatile Singletonlazy instance=null;

    public static Singletonlazy getInstance(){
        if(instance==null){
            synchronized (Singletonlazy.class){
                if(instance==null){
                    instance = new Singletonlazy();
                }
            }
        }
        return instance;
    }

    private Singletonlazy(){}
}

public class Threaddemo6 {
    public static void main(String[] args) {
        Singletonlazy s1=Singletonlazy.getInstance();
        Singletonlazy s2=Singletonlazy.getInstance();
        System.out.println(s1==s2);
    }
}
理解双重 if 判定 / volatile
加锁 / 解锁是一件开销比较高的事情. 而懒汉模式的线程不安全只是发生在首次创建实例的时候. 因此后续使用的时候, 不必再进行加锁. 外层的 if 就是判定下看当前是否已经把 instance 实例创建出来;同时为了避免 “内存可见性” 导致读取的 instance 出现偏差, 于是补充上 volatile
当多线程首次调用 getInstance, 大家可能都发现 instance 为 null, 于是又继续往下执行来竞争锁, 其中竞争成功的线程, 再完成创建实例的操作;当这个实例创建完了之后, 其他竞争到锁的线程就被里层 if 挡住了. 也就不会继续创建其他实例
阻塞式队列
阻塞队列的概念
阻塞队列是一种特殊的队列. 也遵守 “先进先出” 的原则.
阻塞队列能是一种线程安全的数据结构, 并且具有以下特性:
- 当队列满的时候, 继续入队列就会阻塞, 直到有其他线程从队列中取走元素
- 当队列空的时候, 继续出队列也会阻塞, 直到有其他线程往队列中插入元素
阻塞队列的一个典型应用场景就是 “生产者消费者模型”. 这是一种非常典型的开发模型
生产者消费者模型
生产者消费者模式就是通过一个容器来解决生产者和消费者的强耦合问题
生产者和消费者彼此之间不直接通讯,而通过阻塞队列来进行通讯,所以生产者生产完数据之后不用等待消费者处理,直接扔给阻塞队列,消费者不找生产者要数据,而是直接从阻塞队列里取
- 阻塞队列就相当于一个缓冲区,平衡了生产者和消费者的处理能力
- 阻塞队列也能使生产者和消费者之间 解耦
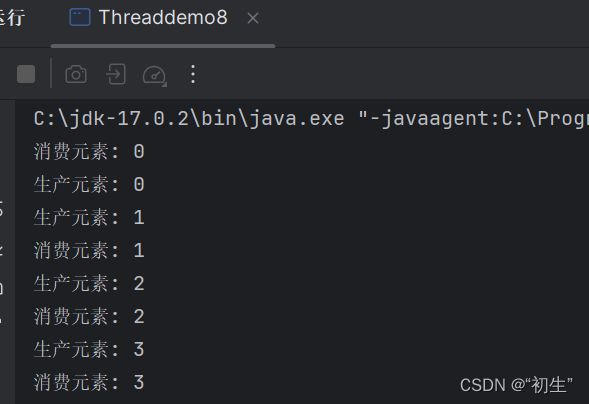
标准库中的阻塞队列
在 Java 标准库中内置了阻塞队列. 如果我们需要在一些程序中使用阻塞队列, 直接使用标准库中的即可
- BlockingQueue 是一个接口. 真正实现的类是 LinkedBlockingQueue
- put 方法用于阻塞式的入队列, take 用于阻塞式的出队列
- BlockingQueue 也有 offer, poll, peek 等方法, 但是这些方法不带有阻塞特性
public class Threaddemo8 {
    public static void main(String[] args) {
        BlockingDeque<Integer> blockingQueue=new LinkedBlockingDeque<>();

        // 创建两个线程, 来作为生产者和消费者
        Thread customer = new Thread(() -> {
            while (true) {
                try {
                    Integer result = blockingQueue.take();
                    System.out.println("消费元素: " + result);
                } catch (InterruptedException e) {
                    e.printStackTrace();
                }
            }
        });
        customer.start();

        Thread producer = new Thread(() -> {
            int count = 0;
            while (true) {
                try {
                    blockingQueue.put(count);
                    System.out.println("生产元素: " + count);
                    count++;
                    Thread.sleep(500);
                } catch (InterruptedException e) {
                    e.printStackTrace();
                }
            }
        });
        producer.start();
    }
}
阻塞队列实现
- 通过 “循环队列” 的方式来实现
- 使用 synchronized 进行加锁控制
- put 插入元素的时候, 判定如果队列满了, 就进行 wait. (注意, 要在循环中进行 wait. 被唤醒时不一定队列就不满了, 因为同时可能是唤醒了多个线程)
- take 取出元素的时候, 判定如果队列为空, 就进行 wait. (也是循环 wait)
class MyBlockingQueue {
    private int[] items = new int[1000];
    private int head = 0;
    private int tail = 0;
    private int size = 0;

    // 入队列
    public void put(int value) throws InterruptedException {
        synchronized (this) {
            while (size == items.length) {
                // 队列满了, 此时要产生阻塞.
                // return;
                this.wait();
            }
            items[tail] = value;
            tail++;
            if (tail >= items.length) {
                tail = 0;
            }
            size++;
            // 这个 notify 唤醒 take 中的 wait
            this.notify();
        }
    }

    // 出队列
    public Integer take() throws InterruptedException {
        int result = 0;
        synchronized (this) {
            while (size == 0) {
                // 队列空, 也应该阻塞.
                this.wait();
            }
            result = items[head];
            head++;
            if (head >= items.length) {
                head = 0;
            }
            size--;

            // 唤醒 put 中的 wait
            this.notify();
        }
        return result;
    }
}
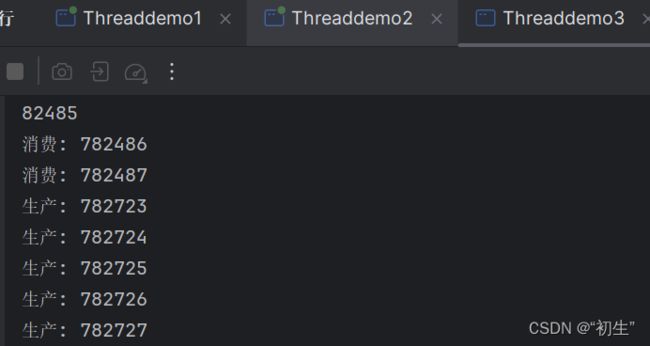
public class Threaddemo3 {
    public static void main(String[] args) throws InterruptedException {
        // 再写一次生产者消费者模型的代码.
        MyBlockingQueue queue = new MyBlockingQueue();
        Thread customer = new Thread(() -> {
            while (true) {
                try {
                    int result = queue.take();
                    System.out.println("消费: " + result);
                } catch (InterruptedException e) {
                    e.printStackTrace();
                }
            }
        });
        customer.start();

        Thread producer = new Thread(() -> {
            int count = 0;
            while (true) {
                try {
                    System.out.println("生产: " + count);
                    queue.put(count);
                    count++;
                } catch (InterruptedException e) {
                    e.printStackTrace();
                }
            }
        });
        producer.start();
    }
}
定时器
定时器的概念
定时器也是软件开发中的一个重要组件. 类似于一个 “闹钟”. 达到一个设定的时间之后, 就执行某个指定好的代码
标准库中的定时器
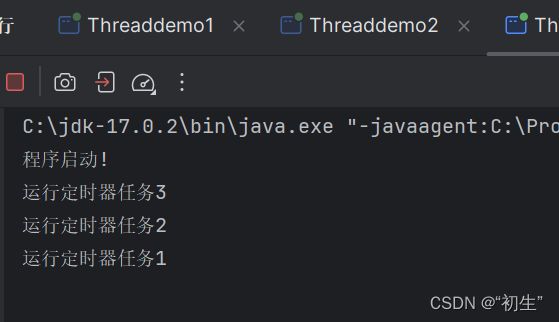
- 标准库中提供了一个 Timer 类. Timer 类的核心方法为 schedule
- schedule 包含两个参数. 第一个参数指定即将要执行的任务代码, 第二个参数指定多长时间之后执行 (单位为毫秒)
public class Threaddemo4 {
    public static void main(String[] args) {
        System.out.println("程序启动!");
        // 这个 Timer 类就是标准库的定时器.
        Timer timer = new Timer();
        timer.schedule(new TimerTask() {
            @Override
            public void run() {
                System.out.println("运行定时器任务1");
            }
        }, 3000);
        timer.schedule(new TimerTask() {
            @Override
            public void run() {
                System.out.println("运行定时器任务2");
            }
        }, 2000);
        timer.schedule(new TimerTask() {
            @Override
            public void run() {
                System.out.println("运行定时器任务3");
            }
        }, 1000);
    }
}
实现定时器
定时器的构成:
- 一个带优先级的阻塞队列(因为阻塞队列中的任务都有各自的执行时刻 (delay). 最先执行的任务一定是 delay 最小的. 使用带优先级的队列就可以高效的把这个 delay 最小的任务找出来)
- 队列中的每个元素是一个 Task 对象
- Task 中带有一个时间属性, 队首元素就是即将
- 同时有一个 worker 线程一直扫描队首元素, 看队首元素是否需要执行
MyTimer 类提供的核心接口为 schedule, 用于注册一个任务, 并指定这个任务多长时间后执行
class MyTimer {
    // 扫描线程
    private Thread t = null;

    // 有一个阻塞优先级队列, 来保存任务.
    private PriorityBlockingQueue<MyTask> queue = new PriorityBlockingQueue<>();

    // 专门使用这个对象来进行加锁/等待通知.
    private Object locker = new Object();

    public MyTimer() {
        t = new Thread() {
            @Override
            public void run() {
                while (true) {
                    try {
                        // 取出队首元素, 检查看看队首元素任务是否到时间了.
                        // 如果时间没到, 就把任务塞回队列里去.
                        // 如果时间到了, 就把任务进行执行.
                        System.out.println("this2: " + this);
                        synchronized (locker) {
                            MyTask myTask = queue.take();
                            long curTime = System.currentTimeMillis();
                            if (curTime < myTask.getTime()) {
                                // 还没到点, 先不必执行
                                // 现在是 13:00, 取出来的任务是 14:00 执行
                                queue.put(myTask);
                                // 在 put 之后, 进行一个 wait
                                locker.wait(myTask.getTime() - curTime);
                            } else {
                                // 时间到了!! 执行任务!!
                                myTask.run();
                            }
                        }
                    } catch (InterruptedException e) {
                        e.printStackTrace();
                    }
                }
            }
        };
        t.start();
    }
    // 指定两个参数
    // 第一个参数是 任务 内容
    // 第二个参数是 任务 在多少毫秒之后执行.
    public void schedule(Runnable runnable, long after) {
        MyTask task = new MyTask(runnable, System.currentTimeMillis() + after);
        queue.put(task);
        System.out.println("this1: " + this);
        synchronized (locker) {
            locker.notify();
        }
    }
}
MyTask类用于描述一个任务(作为 Timer 的内部类). 里面包含一个 Runnable 对象和一个 time(毫秒时间戳);由于对象需要放到 优先队列 中. 因此需要实现 Comparable 接口
class MyTask implements Comparable<MyTask> {
    // 要执行的任务内容
    private Runnable runnable;
    // 任务在啥时候执行 (使用毫秒时间戳表示)
    private long time;

    public MyTask(Runnable runnable, long time) {
        this.runnable = runnable;
        this.time = time;
    }

    // 获取当前任务的时间
    public long getTime() {
        return time;
    }

    // 执行任务
    public void run() {
        runnable.run();
    }

    @Override
    public int compareTo(MyTask o) {
        // 返回 小于 0, 大于 0, 0
        // this 比 o 小, 返回 < 0
        // this 比 o 大, 返回 > 0
        // this 和 o 相同, 返回 0
        // 当前要实现的效果, 是队首元素是时间最小的任务
        return (int) (this.time - o.time);
    }
}
MyTimer 实例中, 通过 PriorityBlockingQueue 来组织若干个 Task 对象;通过 schedule 来往队列中插入一个个 Task 对象;MyTimer 类中存在一个扫描线程, 一直不停的扫描队首元素, 看看是否能执行这个任务;
public class Threaddemo5 {
    public static void main(String[] args) {
        MyTimer myTimer = new MyTimer();
        myTimer.schedule(new Runnable() {
            @Override
            public void run() {
                System.out.println("任务1");
            }
        }, 2000);

        myTimer.schedule(new Runnable() {
            @Override
            public void run() {
                System.out.println("任务2");
            }
        }, 1000);
    }
}
线程池
线程池的概念
线程池是一种利用池化技术来实现的线程管理技术,主要是为了复用线程、便利地管理线程和任务、并将线程的创建和任务的执行解耦开来。我们可以创建线程池来复用已经创建的线程来降低线程的创建和销毁开销,提高系统性能;线程池最大的好处就是减少每次启动、销毁线程的损耗
标准库中的线程池
- 使用 Executors.newFixedThreadPool(10) 能创建出固定包含 10 个线程的线程池
- 返回值类型为 ExecutorService
- 通过 ExecutorService.submit 可以注册一个任务到线程池中
public class Threaddemo1 {
    public static void main(String[] args) {
        ExecutorService pool = Executors.newFixedThreadPool(10);
        for (int i = 0; i < 1000; i++) {
            int n=i;
            pool.submit(new Runnable() {
                @Override
                public void run() {
                    System.out.println("hello "+n);
                }
            });
        }
    }
}
实现线程池
- 核心操作为 submit, 将任务加入线程
- 使用 Runnable 描述一个任务
- 使用一个 BlockingQueue 组织所有的任务
- 每个线程要做的事情: 不停的从 BlockingQueue 中取任务并执行
- 指定一下线程池中的最大线程数; 当当前线程数超过这个最大值时, 就不再新增线程
class MyThreadPool {
    // 此处不涉及到 "时间" , 此处只有任务, 就直接使用 Runnable 即可~~
    private BlockingQueue<Runnable> queue = new LinkedBlockingQueue<>();
    // n 表示线程的数量
    public MyThreadPool(int n) {
        // 在这里创建出线程.
        for (int i = 0; i < n; i++) {
            Thread t = new Thread(() -> {
                while (true) {
                    try {
                        Runnable runnable = queue.take();
                        runnable.run();
                    } catch (InterruptedException e) {
                        e.printStackTrace();
                    }
                }
            });
            t.start();
        }
    }

    // 注册任务给线程池.
    public void submit(Runnable runnable) {
        try {
            queue.put(runnable);
        } catch (InterruptedException e) {
            e.printStackTrace();
        }
    }
}
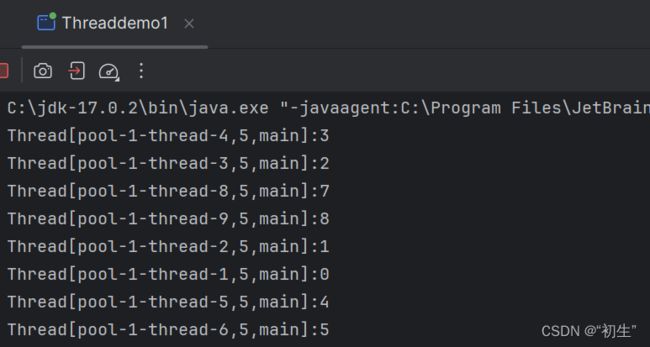
public class Threaddemo5 {
    public static void main(String[] args) {
        MyThreadPool pool = new MyThreadPool(10);
        for (int i = 0; i < 1000; i++) {
            int n = i;
            pool.submit(new Runnable() {
                @Override
                public void run() {
                    System.out.println(Thread.currentThread()+":"+n);
                }
            });
        }
    }
}
