基于openEuler20.03安装openGauss5.0.0及安装DBMind
基于openEuler20.03安装openGauss5.0.0及安装DBMind
-
- 一、环境说明
- 二、安装部署
- 三、问题及解决
一、环境说明
- 虚拟机:VirtualBox
- 操作系统:openEuler20.3LTS (x86)
- 数据库:openGauss5.0.0 (x86)
- DBMind:dbmind-5.0.0 (linux)
二、安装部署
-
下载openEuler20.03 LTS(安装省略),点击下载
-
下载openGauss-5.0.0 企业版(可选),点击下载
-
下载DBMind,点击下载
-
下载node-exporter,点击下载
-
下载prometheus,点击下载
-
安装openGauss5.0.0,使用
root用户进行安装:- 编辑clusterconfig.xml,并添加如下内容,
注意:主机名和IP地址修改成你自己的环境:<?xml version="1.0" encoding="UTF-8"?> <ROOT> <!-- openGauss整体信息 --> <CLUSTER> <!-- 数据库名称 --> <PARAM name="clusterName" value="mycluster" /> <!-- 数据库节点名称(hostname) --> <PARAM name="nodeNames" value="openEuler01" /> <!-- 数据库安装目录--> <PARAM name="gaussdbAppPath" value="/opt/install/app" /> <!-- 日志目录--> <PARAM name="gaussdbLogPath" value="/opt/install/log/omm" /> <!-- 临时文件目录--> <PARAM name="tmpMppdbPath" value="/opt/install/tmp" /> <!-- 数据库工具目录--> <PARAM name="gaussdbToolPath" value="/opt/install/om" /> <!-- 数据库core文件目录--> <PARAM name="corePath" value="/opt/install/corefile" /> <!-- 节点IP,与数据库节点名称列表一一对应 --> <PARAM name="backIp1s" value="192.168.56.6"/> </CLUSTER> <!-- 每台服务器上的节点部署信息 --> <DEVICELIST> <!-- 节点1上的部署信息 --> <DEVICE sn="100001"> <!-- 节点1的主机名称 --> <PARAM name="name" value="openEuler01"/> <!-- 节点1所在的AZ及AZ优先级 --> <PARAM name="azName" value="AZ1"/> <PARAM name="azPriority" value="1"/> <!-- 节点1的IP,如果服务器只有一个网卡可用,将backIP1和sshIP1配置成同一个IP --> <PARAM name="backIp1" value="192.168.56.6"/> <PARAM name="sshIp1" value="192.168.56.6"/> <!--dbnode--> <PARAM name="dataNum" value="1"/> <PARAM name="dataPortBase" value="15432"/> <PARAM name="dataNode1" value="/opt/install/data/dn"/> <PARAM name="dataNode1_syncNum" value="0"/> </DEVICE> </DEVICELIST> </ROOT> - 编辑install.sh脚本,添加如下内容,
注意:主机名和IP地址修改成你自己的环境:#!/bin/bash # 设置字符集参数 cat >>/etc/profile<<EOF export LANG=en_US.UTF-8 EOF # 使修改生效 source /etc/profile # 修改python版本并安装libaio包 mv /usr/bin/python /usr/bin/python.bak ln -s /usr/bin/python3 /usr/bin/python python -V yum install libaio* -y # 创建目录,用于存放openGauss软件包 mkdir -p /opt/software/openGauss mv clusterconfig.xml /opt/software/openGauss/ cd /opt/software/openGauss # 下载openGauss安装包并解压 wget https://opengauss.obs.cn-south-1.myhuaweicloud.com/5.0.0/x86_openEuler/openGauss-5.0.0-openEuler-64bit-all.tar.gz tar -zvxf openGauss-5.0.0-openEuler-64bit-all.tar.gz tar -zvxf openGauss-5.0.0-openEuler-64bit-om.tar.gz # 预安装数据库 chmod -R 755 /opt/software/openGauss cd /opt/software/openGauss/script ./gs_preinstall -U omm -G dbgrp -X /opt/software/openGauss/clusterconfig.xml chown omm:dbgrp -R /opt/software/ # 安装数据库,注意:以下操作是在suben用户下执行 su - omm -c 'gs_install -X /opt/software/openGauss/clusterconfig.xml --gsinit-parameter="--encoding=UTF8" --dn-guc="max_process_memory=4GB" --dn-guc="shared_buffers=256MB" --dn-guc="bulk_write_ring_size=256MB" --dn-guc="cstore_buffers=16MB";gs_om -t status --detail' - 执行脚本进行安装
sh install.sh - 创建dbmind_monitor数据库用户及元数据库
gs_guc reload -D /opt/install/data/dn -c 'password_encryption_type=1'
gsql -p 15432 -d postgres -c 'create user dbmind_monitor password "openEuler@1234";'
gsql -p 15432 -d postgres -c 'alter user dbmind_monitor monadmin;'
gsql -p 15432 -d postgres -c 'grant all privileges to dbmind_monitor;'
gs_guc reload -D /opt/install/data/dn -c 'password_encryption_type=2'
gsql -p 15432 -d postgres -c 'create database metadatabase owner dbmind_monitor;'
- 编辑clusterconfig.xml,并添加如下内容,
-
安装DBMind,使用
omm用户安装:- 上传dbmind安装包到/home/omm下,确保该文件用户是omm,用户组是dbgrp,修改命令如下:
chown omm:dbgrp /home/omm/dbmind-installer-x86_64-python3.10.sh.tar.gz - 解压
tar zxvf /home/omm/dbmind-installer-x86_64-python3.10.sh.tar.gz - 执行脚本安装:
sh /home/omm/dbmind-installer-x86_64-python3.10.sh - 环境变量生效
source ~/.bashrc - 测试是否安装成功:
gs_dbmind --help - 配置python资源库
添加如下内容:mkdir ~/.pip/ vim ~/.pip/pip.conf[global] index-url = http://mirrors.aliyun.com/pypi/simple/ trusted-host = mirrors.aliyun.com timeout = 120 - 安装第三方插件
建议您将DBMind所需的Python运行环境安装到DBMind根目录下的 python 目录中,DBMind会优先选择使用在其根目录下 python 目录中的环境。即 gs_dbmind 命令会首先在python/bin 目录下寻找 python3 命令执行后续的Python功能。/home/omm/openGauss-DBMind/python/bin/python -m pip install -r /home/omm/openGauss-DBMind/requirements-x86.txt /home/omm/openGauss-DBMind/python/bin/python -m pip install python-multipart
- 上传dbmind安装包到/home/omm下,确保该文件用户是omm,用户组是dbgrp,修改命令如下:
-
安装node-exporter,并将其上传到omm用户的家目录/home/omm,修改其用户和用户组为omm:dbgrp
- 解压
tar -zvxf node_exporter-1.7.0.linux-amd64.tar.gz -C /opt/software/ cd /opt/software/node_exporter-1.7.0.linux-amd64 - 启动 【node_exporter】 默认端口号为9100:
./node_exporter > node_exporter.log 2>&1 & - 查看端口是否处于监听状态:
正常会看到如下内容:netstat -anp|grep 9100[omm@openEuler01 openGauss-DBMind]$ netstat -anp|grep 9100 tcp 0 0 192.168.56.11:39872 192.168.56.11:9100 ESTABLISHED 30259/./prometheus tcp6 0 0 :::9100 :::* LISTEN 24724/./node_export tcp6 0 0 192.168.56.11:9100 192.168.56.11:39872 ESTABLISHED 24724/./node_export [omm@openEuler01 openGauss-DBMind]$ - 启动【
cmd_exporter】
cmd_exporter用来执行cmd命令并获取返回结果以及采集日志信息,当前主要用于采集集群状态,如是主备集群环境,则只需要在一个备数据库节点上安装就可以了。gs_dbmind component cmd_exporter --web.listen-address 0.0.0.0 --web.listen-port 9180 --disable-https - 启动【
opengauss_exporter】
opengauss_exporter是DBMind采集数据库的组件,从openGauss数据库中读取系统表(或系统视图)的数据,并通过Prometheus保存起来。支持远程部署,需要在每个数据库节点上安装。opengauss_exporter的默认端口号范围是9187-9197,如果被占用可以使用其他端口。注意:对于采用URL格式的DSN,由于@等特殊字符用来分割URL串中各个部分的内容,故需要URL编码。例如某个用户dbmind的密码为openEuler@1234,则URL格式的DSN为psotgresql:dbmind:Test%[email protected]:15432,即将@字符编码为%40。
启动成功后,可执行如下命令查看,如能看到输出,则说明正常:gs_dbmind component opengauss_exporter --url postgresql://dbmind_monitor:openEuler%[email protected]:15432/postgres --web.listen-address 0.0.0.0 --web.listen-port 9187 --log.level info --disable-https# 端口号9187为用户指定的端口号, 如果失败会显示Connection refused curl -vv http://localhost:9187/metrics
- 解压
-
安装Prometheus,并将其上传到omm用户的家目录/home/omm,修改其用户和用户组为omm:dbgrp。
prometheus是业内非常流行的开源监控系统,同时本身也是一款时序数据库。需要将其安装在主控节点,默认占用端口为9090。
-
解压:
tar -zvxf prometheus-2.48.0.linux-amd64.tar.gz -C /opt/software/ cd /opt/software/prometheus-2.48.0.linux-amd64 -
修改配置文件
vim prometheus.yml在该文件中找到 scrape_configs 部分,该部分包含了所有需要被抓取的targets的配置信息,用户需要根据自己的节点数量和端口占用情况进行修改。本实验是单机模式,做如下配置:
scrape_configs: # The job name is added as a label `job=` to any timeseries scraped from this config. - job_name: "prometheus" # metrics_path defaults to '/metrics' # scheme defaults to 'http'. static_configs: - targets: ["192.168.56.11:9090"] - job_name: "opengauss_exporter" static_configs: - targets: ["192.168.56.11:9187"] - job_name: "node_exporter" static_configs: - targets: ["192.168.56.11:9100"] - job_name: "reprocessing_exporter" static_configs: - targets: ["192.168.56.11:8181"] - job_name: "cmd_exporter" static_configs: - targets: ["192.168.56.11:9180"] -
启动【
prometheus】并将日志输入到同目录下的prometheus.log里:./prometheus --web.enable-admin-api --web.enable-lifecycle --storage.tsdb.retention.time=1w >./prometheus.log 2>&1 & -
再启动【reprocessing_exporter】
reprocessing_exporter是一个用于二次加工处理数据的exporter。由于node_exporter、opengauss_exporter保存到prometheus中的数据是即时的监控信息,而只通过这些信息是无法反应某些指标的瞬时增量信息的。因此,reprocessing_exporter可以用来计算增量信息或者聚合结果等。
由于reprocessing_exporter是从prometheus中获取指标数据,进行二次加工处理后再返回给prometheus。因此,它与prometheus是一一对应的,即如果只有一个prometheus服务,则只需要一个reprocessing_exporter即可。prometheus和reprocessing_exproter一起部署在主控节点上,reprocessing_exproter依赖prometheus,所以需要先启动prometheus再启动reprocessing_exporter。
gs_dbmind component reprocessing_exporter 192.168.56.11 9090 --web.listen-address 0.0.0.0 --web.listen-port 8181 --disable-https
-
-
生成DBMind配置文件,在openGauss-DBMind目录下执行如下命令会在openGauss-DBMind目录下创建dbmindconf/dbmind.conf配置文件:
cd /home/omm/openGauss-DBMind gs_dbmind service setup -c dbmindconf -
修改DBMind配置文件,需要修改内容如下:
vim /home/omm/openGauss-DBMind/dbmindconf/dbmind.conf修改如下内容,如下为必填的配置项如下:
- TDSB为时序数据库配置,即prometheus相关信息。
[TSDB] name = prometheus # The type of time-series database. Options: prometheus. host = 192.168.56.11 # Address of time-series database. port = 9090 # Port to connect to time-series database. - 元数据库,DBMind服务器所创建的metadatabase数据库相关信息,注意用户需要有数据库创建的权限。在启动DBMind之前,需要把metadatabase创建好。
[METADATABASE] dbtype = opengauss # Database type. Options: sqlite, opengauss, postgresql. host = 192.168.56.11 # Address of meta-data database. port = 15432 # Port to connect to meta-data database. username = dbmind_monitor # User name to connect to meta-data database. password = openEuler@1234 # Password to connect to meta-data database. database = metadatabase # Database name to connect to meta-data database. - 工作线程数,该模块用于指定DBMind可以使用的worker子进程数量,如果写0则会进行自适应,尽可能多地使用CPU资源。
[WORKER] process_num = 2 # Number of worker processes on a local node. Less than or equal to zero means adaptive. - openGauss数据库Agent,该模块用于指定DBMind连接到openGauss Agent的信息。使用该Agent,可以让DBMind获取到被监控实例的即时状态,从而提高分析准确性。同时,也可以向数据库实例下发一些变更动作。
masterurl为http://{DBMind服务器IP}:{opengaussexporter监听端口},置空会自动识别。usename为数据库实例的dbmind_minotor用户。[AGENT] master_url = username = dbmind_monitor password = openEuler@1234 - 设置定时任务TIMED_TASK,可设置参数有如下:
Discard_expired_results: 删除过期结果
self_monitoring:指标异常监控
daily_inspection:日检
weekly_inspection:周检
monthly_inspection: 月检
slow_sql_diagnosis:慢SQL诊断
knob_recommend:参数调优
slow_query_killer:慢SQL查杀[TIMED_TASK] task=discard_expired_results,self_monitoring,daily_inspection, weekly_inspection,slow_sql_diagnosis,knob_recommend,slow_query_killer - 配置DNMind的WEB-SERVICE访问界面
[WEB-SERVICE]
host = 192.168.56.11  # Which host to bind for web service. '0.0.0.0' means to bind all.
port = 8080  # Port to listen for web serivce.
- TDSB为时序数据库配置,即prometheus相关信息。
-
初始化DBMind配置,即会在元数据metadatabase创建30表
cd /home/omm/openGauss-DBMind
gs_dbmind service setup --initialize -c dbmindconf
正常执行后,会看到如下信息:
[omm@openEuler01 openGauss-DBMind]$ gs_dbmind service setup --initialize -c dbmindconf
NOTICE: You have set the variable PYTHONPATH. DBMind ignored it.
Starting to generate a dynamic config file...
WARN: default PostgreSQL connector (psycopg2-binary) does not support openGauss.
It would help if you compiled psycopg2 with openGauss manually or created a connection user after setting the GUC password_encryption_type to 1.
Notice: Without explicitly setting agent configurations, the automatic detection mechanism is used.
Starting to encrypt the plain-text passwords in the config file...
Starting to initialize and check the essential variables...
Starting to connect to meta-database and create tables...
The setup process finished successfully.
另外,可以登录openGauss数据库下进行查看是否有30张表生成:
gsql -d metadatabase -p 15432 -r metadatabase=# \d List of relations Schema | Name | Type | Owner | Storage --------+-----------------------------------------------+----------+----------------+---------------------------------- public | tb_existing_indexes | table | dbmind_monitor | {orientation=row,compression=no} public | tb_existing_indexes_id_seq | sequence | dbmind_monitor | public | tb_future_alarms | table | dbmind_monitor | {orientation=row,compression=no} public | tb_future_alarms_future_alarm_id_seq | sequence | dbmind_monitor | public | tb_healing_records | table | dbmind_monitor | {orientation=row,compression=no} public | tb_healing_records_id_seq | sequence | dbmind_monitor | public | tb_history_alarms | table | dbmind_monitor | {orientation=row,compression=no} public | tb_history_alarms_history_alarm_id_seq | sequence | dbmind_monitor | public | tb_index_recommendation | table | dbmind_monitor | {orientation=row,compression=no} public | tb_index_recommendation_id_seq | sequence | dbmind_monitor | public | tb_index_recommendation_stats | table | dbmind_monitor | {orientation=row,compression=no} public | tb_index_recommendation_stats_id_seq | sequence | dbmind_monitor | public | tb_index_recommendation_stmt_details | table | dbmind_monitor | {orientation=row,compression=no} public | tb_index_recommendation_stmt_details_id_seq | sequence | dbmind_monitor | public | tb_index_recommendation_stmt_templates | table | dbmind_monitor | {orientation=row,compression=no} public | tb_index_recommendation_stmt_templates_id_seq | sequence | dbmind_monitor | public | tb_killed_slow_queries | table | dbmind_monitor | {orientation=row,compression=no} public | tb_killed_slow_queries_killed_query_id_seq | sequence | dbmind_monitor | public | tb_knob_recommendation_details | table | dbmind_monitor | {orientation=row,compression=no} public | tb_knob_recommendation_details_id_seq | sequence | dbmind_monitor | public | tb_knob_recommendation_metric_snapshot | table | dbmind_monitor | {orientation=row,compression=no} public | tb_knob_recommendation_metric_snapshot_id_seq | sequence | dbmind_monitor | public | tb_knob_recommendation_warnings | table | dbmind_monitor | {orientation=row,compression=no} public | tb_knob_recommendation_warnings_id_seq | sequence | dbmind_monitor | public | tb_regular_inspections | table | dbmind_monitor | {orientation=row,compression=no} public | tb_regular_inspections_id_seq | sequence | dbmind_monitor | public | tb_slow_queries | table | dbmind_monitor | {orientation=row,compression=no} public | tb_slow_queries_journal | table | dbmind_monitor | {orientation=row,compression=no} public | tb_slow_queries_journal_journal_id_seq | sequence | dbmind_monitor | public | tb_slow_queries_slow_query_id_seq | sequence | dbmind_monitor | (30 rows) -
启动DBMind服务:
gs_dbmind service start -c dbmindconf正常执行命令会看到有成功信息打印出来
另外,可以通过查看端口8080是否被监听,命令如下:[omm@openEuler01 openGauss-DBMind]$ netstat -anp|grep 8080 tcp 0 0 192.168.56.11:8080 0.0.0.0:* LISTEN 33752/DBMind [Maste -
打开浏览器,访问http://192.168.56.11:8080/,正常情况下会看到如下界面:
- 首页,需登录
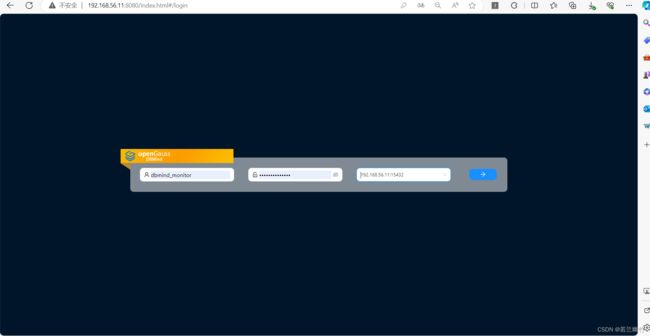
- 登录成功

至此,已成功在openEuler20.03 LTS上安装openGauss-5.0.0企业版及DBMind-5.0.0。希望对你有所帮助~~~~
- 首页,需登录
三、问题及解决
- 在安装过程中,可能因python环境导致缺少依赖的问题,具体文件及解决过程如下:
[omm@openEuler01 openGauss-DBMind]$ gs_dbmind service start -c dbmindconf
NOTICE: You have set the variable PYTHONPATH. DBMind ignored it.
The process is starting.
Notice: Without explicitly setting agent configurations, the automatic detection mechanism is used.
[omm@openEuler01 openGauss-DBMind]$ An exception raised: Form data requires "python-multipart" to be installed.
You can install "python-multipart" with:

pip install python-multipart

pip install python-multipart^C
[omm@openEuler01 openGauss-DBMind]$ cd python/
[omm@openEuler01 python]$ ls
bin              condabin    envs  include  LICENSE.txt  pkgs   shell  x86_64-conda_cos7-linux-gnu
compiler_compat  conda-meta  etc   lib      man          share  ssl    x86_64-conda-linux-gnu
[omm@openEuler01 python]$ bin/python -m pip install python-multipart
/opt/install/om/lib/ipaddress.py:1106: SyntaxWarning: 'str' object is not callable; perhaps you missed a comma?
  raise TypeError("%s and %s are not of the same version" (a, b))
Looking in indexes: http://mirrors.aliyun.com/pypi/simple/
Collecting python-multipart
  Downloading http://mirrors.aliyun.com/pypi/packages/b4/ff/b1e11d8bffb5e0e1b6d27f402eeedbeb9be6df2cdbc09356a1ae49806dbf/python_multipart-0.0.6-py3-none-any.whl (45 kB)
     ━━━━━━━━━━━━━━━━━━━━━━━━━━━━━━━━━━━━━━━━ 45.7/45.7 kB 752.7 kB/s eta 0:00:00
Installing collected packages: python-multipart
Successfully installed python-multipart-0.0.6
[omm@openEuler01 python]$ cd ..
[omm@openEuler01 openGauss-DBMind]$ which python-multipart
which: no python-multipart in (/home/omm/openGauss-DBMind:/opt/install/app/bin:/opt/install/om/script/gspylib/pssh/bin:/opt/install/om/script:/home/omm/.local/bin:/home/omm/bin:/opt/install/app/bin:/opt/install/om/script/gspylib/pssh/bin:/opt/install/om/script:/bin:/opt/software/binarylibs/buildtools/openeuler_x86_64/gcc7.3/gcc/bin:/home/omm/.local/bin:/home/omm/bin:/usr/local/bin:/usr/bin:/usr/local/sbin:/usr/sbin:/opt/install/om/script/gspylib/pssh/bin:/opt/install/om/script:/root/gauss_om/omm/script)
[omm@openEuler01 openGauss-DBMind]$ gs_dbmind service start -c dbmindconf
NOTICE: You have set the variable PYTHONPATH. DBMind ignored it.
The process is starting.
Notice: Without explicitly setting agent configurations, the automatic detection mechanism is used.
[omm@openEuler01 openGauss-DBMind]$ netstat -anp|grep 8080
(Not all processes could be identified, non-owned process info
 will not be shown, you would have to be root to see it all.)
tcp        0      0 192.168.56.11:8080      0.0.0.0:*               LISTEN      33752/DBMind [Maste
tcp        0      0 192.168.56.11:58080     192.168.56.11:9090      TIME_WAIT   -
[omm@openEuler01 openGauss-DBMind]$