Django 后台与便签
1. 什么是后台管理
后台管理是网页管理员利用网页的后台程序管理和更新网站上网页的内容。各网站里网页内容更新就是通过网站管理员通过后台管理更新的。
2. 创建超级用户
1. python .\manage.py createsuperuser
2. 输入账号密码等信息
Username (leave blank to use 'sylviazhang'): admin
Email address: [email protected]
Password: xxxxx
Password (again):xxxxx
This password is too short. It must contain at least 8 characters. This password is too common. Bypass password validation and create user anyway? [y/N]: y Superuser created successfully.
3. 打开网址 http://127.0.0.1:8000/admin/login/?next=/admin/
4. 输入username: admin, password: xxxxx, 点击login,就成功登录啦
3. 配置后台管理语言
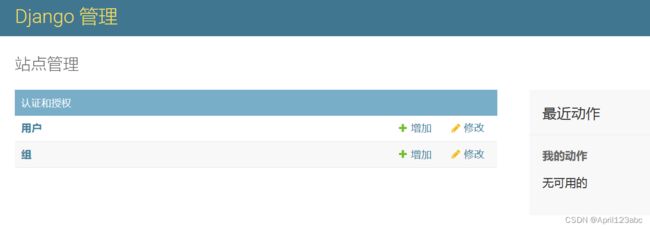
登录成功后的页面如下:
配置后台管理语言 LANGUAGE_CODE
系统默认是
LANGUAGE_CODE = 'en-us'

TIME_ZONE = 'utc'
如果想改成中文:
LANGUAGE_CODE = 'zh-hans'

TIME_ZONE = 'Asia/Shanghai'   # utc会晚8小时
刷新网页,就变成了中文
4. 定义模型
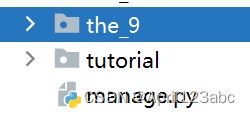
4.1 terminal 输入 django-admin startapp the_9 回车
4.2. 配置模型 tutorial子文件夹 settings.py 里面 INSTALLED_APPS 中括号里面添加 "the_9"
INSTALLED_APPS = [
    'django.contrib.admin',
    'django.contrib.auth',
    'django.contrib.contenttypes',
    'django.contrib.sessions',
    'django.contrib.messages',
    'django.contrib.staticfiles',
    "the_3",
    "the_5",
    "the_6",
    "the_7",
    "the_8",
    "the_9",
]
4.3. 创建模型 , the_9\models.py
from django.db import models

# Create your models here.

"""
问题 -- (问题是什么, 什么时间)

模型 -- (回答问题, 关注度)
"""

class Question(models.Model):
    question_text = models.CharField(max_length=200)
    pub_date = models.DateTimeField("发布日期")

class Choice(models.Model):
    question = models.ForeignKey(Question,on_delete=models.CASCADE)
    choice_text = models.TextField()
    votes = models.IntegerField(default=0)
4.4. 接下来是迁移,迁移完成后再纳入后台管理系统
4.4.1 terminal 输入 python .\manage.py 回车
(class15env) D:\Python\xxx\class15\tutorial>python .\manage.py
Type 'manage.py help
' for help on a specific subcommand. Available subcommands:
[auth]
changepassword
createsuperuser[contenttypes]
remove_stale_contenttypes[django]
check
compilemessages
createcachetable
dbshell
diffsettings
dumpdata
flush
inspectdb
loaddata
makemessages
makemigrations
migrate
sendtestemail
shell
showmigrations
sqlflush
sqlmigrate
sqlsequencereset
squashmigrations
startapp
startproject
test
testserver[sessions]
clearsessions[staticfiles]
collectstatic
findstatic
runserver
4.4.2 terminal 输入 python .\manage.py makemigrations回车
(class15env) D:\Python\xxx\class15\tutorial>python .\manage.py makemigrations
Migrations for 'the_8':
the_8\migrations\0002_alter_entry_blog.py
- Alter field blog on entry
Migrations for 'the_9':
the_9\migrations\0001_initial.py
- Create model Question
- Create model Choice
4.4.3 迁移 terminal 输入 python .\manage.py migrate回车
(class15env) D:\Python\xxx\class15\tutorial>python .\manage.py migrate
Operations to perform:
Apply all migrations: admin, auth, contenttypes, sessions, the_6, the_8, the_9
Running migrations:
Applying the_8.0002_alter_entry_blog... OK
Applying the_9.0001_initial... OK
5. 模型纳入后台管理
5.1 在the_9\admin.py配置
from django.contrib import admin
from .models import Question, Choice

# Register your models here.

admin.site.register(Question)
admin.site.register(Choice)
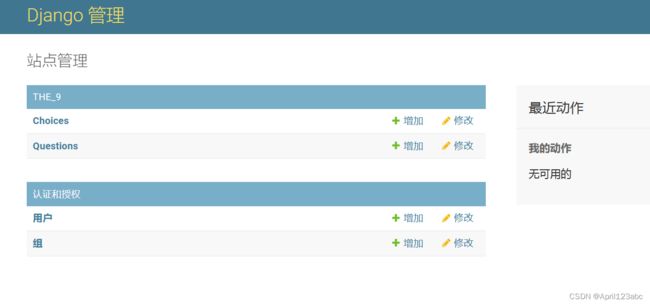
5.2. 刷新浏览器, 可以看到Questions和Choices已经配置进来
6. 操作新加入的模型
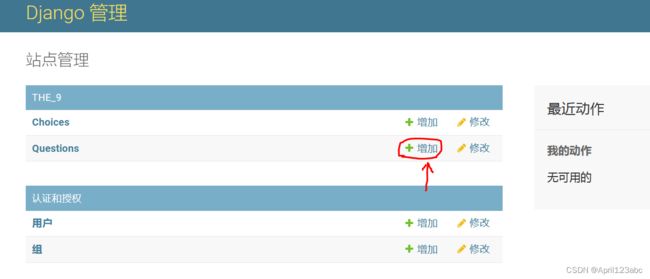
6.1 点击Questions后面的添加
6.2 输入内容,时间选择今天,现在,保存
6.3 出现Question object 对象是因为在 models.py我们没有添加 __str__
class Question(models.Model):
    question_text = models.CharField(max_length=200)
    pub_date = models.DateTimeField("发布日期")

    def __str__(self):
        return self.question_text
6.4 刷新浏览器 , 1月1号大家准备去什么地方就出来了
6.5 再添加一条Question
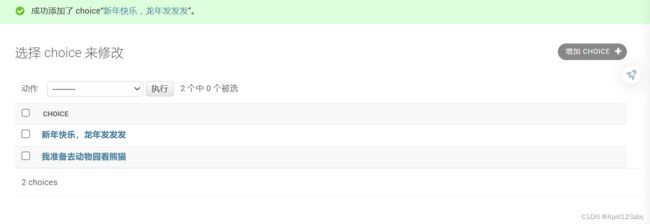
6.6 同样给 Choice也加上 __str__
class Choice(models.Model):
    question = models.ForeignKey(Question,on_delete=models.CASCADE)
    choice_text = models.TextField()
    votes = models.IntegerField(default=0)

    def __str__(self):
        return self.choice_text
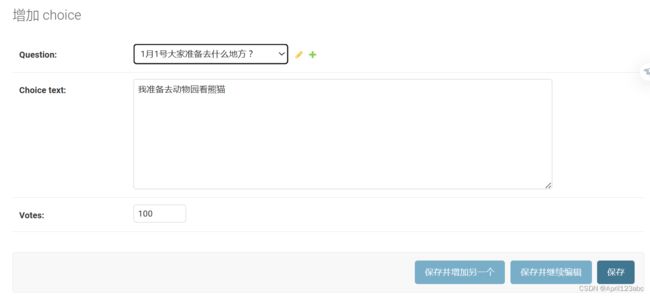
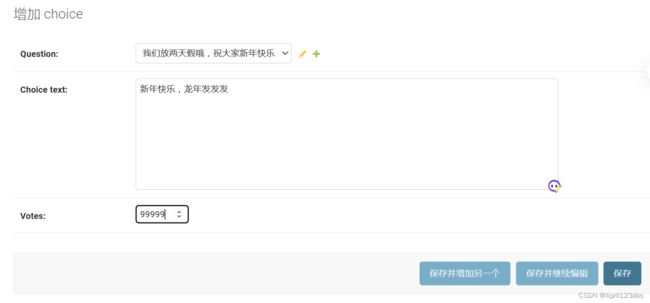
6.7 操作Choices, 点击Choice后面的添加, Question选择第一个 1月1号去什么地方?输入内容,保存
可以再添加一条
7. 自定义字段展示
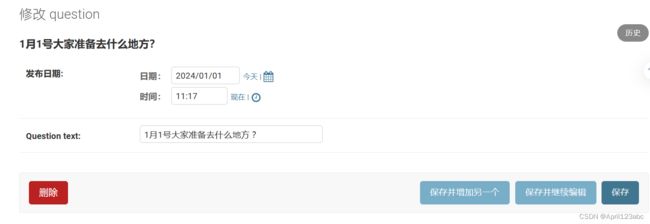
7.1 在the_9\admin.py 里面自定义
from django.contrib import admin
from .models import Question, Choice

# Register your models here.

class QuestionAdmin(admin.ModelAdmin):
    fields = ['pub_date','question_text']

admin.site.register(Question,QuestionAdmin)
admin.site.register(Choice)
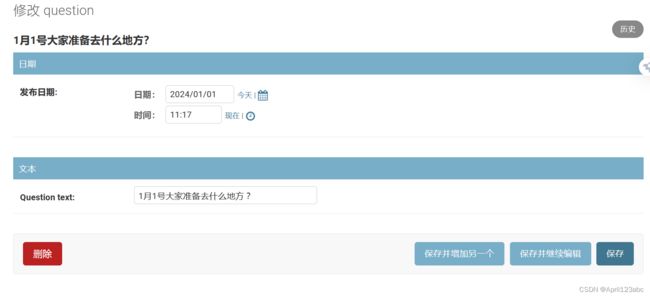
刷新网页, 可以看到 发布日期 调整到上面了
7.2 还可以进行分类设置
class QuestionAdmin(admin.ModelAdmin):
    # fields = ['pub_date','question_text']
    fieldsets = [
        ('日期', {'fields':['pub_date']}),
        ('文本', {'fields': ['question_text']}),
    ]
刷新网页
8.添加关联对象
9. 自定义列表页
在the_9\admin.py 中添加 list_display = ('pub_date','question_text')
class QuestionAdmin(admin.ModelAdmin):
    # fields = ['pub_date','question_text']
    fieldsets = [
        ('日期', {'fields':['pub_date']}),
        ('文本', {'fields': ['question_text']}),
    ]
    list_display = ('pub_date','question_text')
刷新网页

