Elasticsearch:带有自查询检索器的聊天机器人示例
本工作簿演示了 Elasticsearch 的自查询检索器 (self-query retriever) 将问题转换为结构化查询并将结构化查询应用于 Elasticsearch 索引的示例。
在开始之前,我们首先使用 langchain 将文档分割成块,然后使用 ElasticsearchStore.from_documents 创建一个向量存储并将数据索引到 elasticsearch。
然后,我们将看到一些示例查询,展示了由 elasticsearch 驱动的自查询检索器的全部功能。
安装
如果你还没有安装好自己的 Elasticsearch 及 Kibana,请参考文章:
安装 Elasticsearch 及 Kibana
如果你还没有安装好自己的 Elasticsearch 及 Kibana,那么请参考一下的文章来进行安装:
-
如何在 Linux,MacOS 及 Windows 上进行安装 Elasticsearch
-
Kibana:如何在 Linux,MacOS 及 Windows 上安装 Elastic 栈中的 Kibana
在安装的时候,请选择 Elastic Stack 8.x 进行安装。在安装的时候,我们可以看到如下的安装信息:
Python 安装包
我们需要安装 Python 版本 3.6 及以上版本。我们还需要安装如下的 Python 安装包:
python3 -m pip install -qU lark elasticsearch langchain openai$ pwd
/Users/liuxg/python/elser
$ python3 -m pip install -qU lark elasticsearch langchain openai
$ pip3 list | grep elasticsearch
elasticsearch 8.11.1
rag-elasticsearch 0.0.1 /Users/liuxg/python/rag-elasticsearch/my-app/packages/rag-elasticsearch在本练习中,我们将使用最新的 Elastic Stack 8.11 来进行展示。
环境变量
在启动 Jupyter 之前,我们设置如下的环境变量:
export ES_USER="elastic"
export ES_PASSWORD="yarOjyX5CLqTsKVE3v*d"
export ES_ENDPOINT="localhost"
export OPENAI_API_KEY="YOUR_OPEN_AI_KEY"
请在上面修改相应的变量的值。特别是你需要输入自己的 OPENAI_API_KEY。
拷贝 Elasticsearch 证书
我们把 Elasticsearch 的证书拷贝到当前的目录下:
$ pwd
/Users/liuxg/python/elser
$ cp ~/elastic/elasticsearch-8.11.0/config/certs/http_ca.crt .
overwrite ./http_ca.crt? (y/n [n]) y
$ ls http_ca.crt
http_ca.crt
创建应用
导入 python 包
我们在当前的目录下创建 jupyter notebook:Chatbot Example with Self Query Retriever.ipynb
from langchain.schema import Document
from langchain.embeddings.openai import OpenAIEmbeddings
from langchain.vectorstores import ElasticsearchStore
from langchain.llms import OpenAI
from langchain.retrievers.self_query.base import SelfQueryRetriever
from langchain.chains.query_constructor.base import AttributeInfo
创建文档
接下来,我们将使用 langchain 模式文档创建包含电影摘要的文档列表,其中包含每个文档的 page_content 和元数据。
docs = [
    Document(
        page_content="A bunch of scientists bring back dinosaurs and mayhem breaks loose",
        metadata={"year": 1993, "rating": 7.7, "genre": "science fiction", "director": "Steven Spielberg", "title": "Jurassic Park"},
    ),
    Document(
        page_content="Leo DiCaprio gets lost in a dream within a dream within a dream within a ...",
        metadata={"year": 2010, "director": "Christopher Nolan", "rating": 8.2, "title": "Inception"},
    ),
    Document(
        page_content="A psychologist / detective gets lost in a series of dreams within dreams within dreams and Inception reused the idea",
        metadata={"year": 2006, "director": "Satoshi Kon", "rating": 8.6, "title": "Paprika"},
    ),
    Document(
        page_content="A bunch of normal-sized women are supremely wholesome and some men pine after them",
        metadata={"year": 2019, "director": "Greta Gerwig", "rating": 8.3, "title": "Little Women"},
    ),
    Document(
        page_content="Toys come alive and have a blast doing so",
        metadata={"year": 1995, "genre": "animated", "director": "John Lasseter", "rating": 8.3, "title": "Toy Story"},
    ),
    Document(
        page_content="Three men walk into the Zone, three men walk out of the Zone",
        metadata={
            "year": 1979,
            "rating": 9.9,
            "director": "Andrei Tarkovsky",
            "genre": "science fiction",
            "rating": 9.9,
            "title": "Stalker",
        },
    ),
]
连接到 Elasticsearch
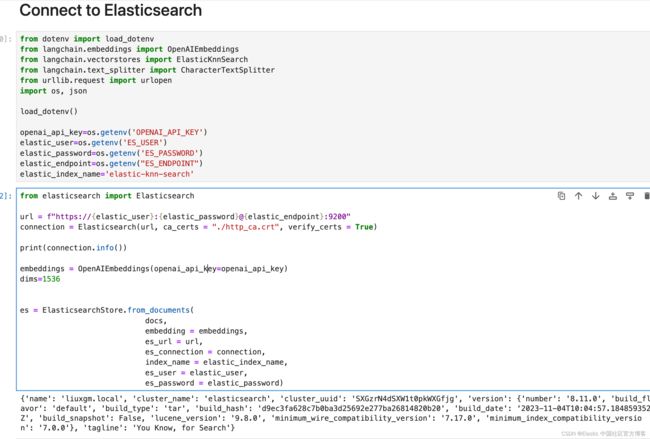
我们将使用我们本地构建的 Elasticsearch 集群进行连接。我们可以参考之前的文章 “Elasticsearch:使用 Open AI 和 Langchain 的 RAG - Retrieval Augmented Generation (三)”。
from dotenv import load_dotenv
from langchain.embeddings import OpenAIEmbeddings
from langchain.vectorstores import ElasticKnnSearch
from langchain.text_splitter import CharacterTextSplitter
from urllib.request import urlopen
import os, json

load_dotenv()

openai_api_key=os.getenv('OPENAI_API_KEY')
elastic_user=os.getenv('ES_USER')
elastic_password=os.getenv('ES_PASSWORD')
elastic_endpoint=os.getenv("ES_ENDPOINT")
elastic_index_name='elastic-knn-search'
from elasticsearch import Elasticsearch
url = f"https://{elastic_user}:{elastic_password}@{elastic_endpoint}:9200"
connection = Elasticsearch(url, ca_certs = "./http_ca.crt", verify_certs = True)
print(connection.info())
embeddings = OpenAIEmbeddings(openai_api_key=openai_api_key)
dims=1536
es = ElasticsearchStore.from_documents(
docs,
embedding = embeddings,
es_url = url,
es_connection = connection,
index_name = elastic_index_name,
es_user = elastic_user,
es_password = elastic_password)设置查询检索器
接下来,我们将通过提供有关文档属性的一些信息和有关文档的简短描述来实例化自查询检索器。
然后我们将使用 SelfQueryRetriever.from_llm 实例化检索器 (retriever)
metadata_field_info = [
    AttributeInfo(
        name="genre",
        description="The genre of the movie. Can be either 'science fiction' or 'animated'.",
        type="string or list[string]",
    ),
    AttributeInfo(
        name="year",
        description="The year the movie was released",
        type="integer",
    ),
    AttributeInfo(
        name="director",
        description="The name of the movie director",
        type="string",
    ),
    AttributeInfo(
        name="rating", description="A 1-10 rating for the movie", type="float"
    ),
]

document_content_description = "Brief summary of a movie"

# Set up openAI llm with sampling temperature 0
llm = OpenAI(temperature=0, openai_api_key=openai_api_key)

# instantiate retriever
retriever = SelfQueryRetriever.from_llm(
    llm, es, document_content_description, metadata_field_info, verbose=True
)
使用自查询检索器回答问题
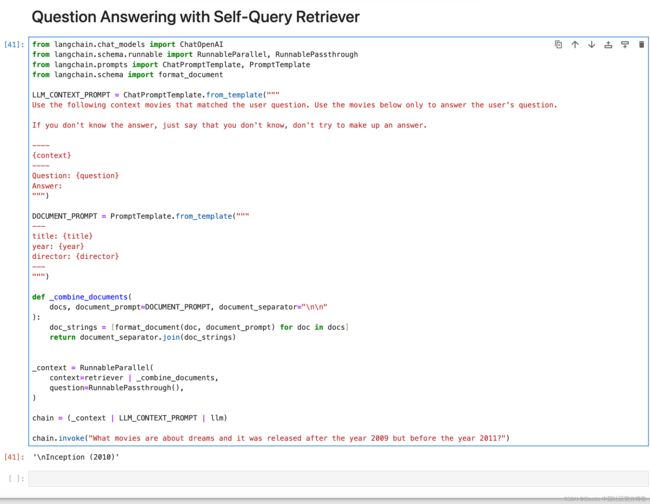
现在我们将演示如何使用 RAG 的自查询检索器。
from langchain.chat_models import ChatOpenAI
from langchain.schema.runnable import RunnableParallel, RunnablePassthrough
from langchain.prompts import ChatPromptTemplate, PromptTemplate
from langchain.schema import format_document

LLM_CONTEXT_PROMPT = ChatPromptTemplate.from_template("""
Use the following context movies that matched the user question. Use the movies below only to answer the user's question.

If you don't know the answer, just say that you don't know, don't try to make up an answer.

----
{context}
----
Question: {question}
Answer:
""")

DOCUMENT_PROMPT = PromptTemplate.from_template("""
---
title: {title}
year: {year}
director: {director}
---
""")

def _combine_documents(
    docs, document_prompt=DOCUMENT_PROMPT, document_separator="\n\n"
):
    doc_strings = [format_document(doc, document_prompt) for doc in docs]
    return document_separator.join(doc_strings)


_context = RunnableParallel(
    context=retriever | _combine_documents,
    question=RunnablePassthrough(),
)

chain = (_context | LLM_CONTEXT_PROMPT | llm)

chain.invoke("What movies are about dreams and it was released after the year 2009 but before the year 2011?")
上面的代码可以在地址:https://github.com/liu-xiao-guo/semantic_search_es/blob/main/Chatbot%20Example%20with%20Self%20Query%20Retriever.ipynb下载。


