2019独角兽企业重金招聘Python工程师标准>>> 
前言:最近接到一个需求,要实现客户端对程序进行集中管理,类似于软件管家。 一开始心想,他妈的这么复杂。但我们初步只是做简化版,所以没什么技术难度。 但作为一个常年做web开发的工程师来说,要做好一个客户端,也不是一件容易的事情。刚好现在做的差不多了,总结一下这个过程。
1.准备工作,找到几个开源源代码,研究其代码的核心实现方法。
我们找了三个源代码,有两个较为复杂,没有太深入去研究,找了一个稍微简单点的加以研究分析。
同时也通过百度,查了一些资料,最为基础的是:如何下载文件。
有两种方式,一种通过http数据流传输,另一种是利用webclient的下载文件的方法。
研究代码发现,它用的是webclient下载文件的方式,这种方式显而易见的好处是非常便于做进度条展示。
webclient 示例伪代码如下
private WebClient client = null;
client = new WebClient();
client.Credentials = CredentialCache.DefaultCredentials;
client.Headers.Add("Content-Type:application/octet-stream");
client.Encoding = Encoding.UTF8;
client.DownloadProgressChanged += client_onDownloadChanged;
client.DownloadFileCompleted += client_onDownloadComplete;
String uri = "http://xxx/test.rar";
String localfile = 本地文件路径
String targetName = token对象,传递给完成下载时的回调。这里我用的文件名(不带路径)
client.DownloadFileAsync(uri, localfile, targetName);
2.需求分析
核心的需求是这样,指定客户存放程序的路径,如果该路径下没有相应的程序,则从服务器上下载,这里我们把这个过程叫做安装,如果存在文件了,则比较版本信息,如果需要升级,则自动升到最新版本,否则直接启动程序。
额外的需求有:1.版本控制,不同版本对应不同的程序,而且需要做版本发布。
2.日志记录, 记录程序运行期间出现的错误信息
3.软件排行,软件使用频率的排行
4.其他需求(程序安装部署等)
3.具体实现
1.设计数据库,针对每一个环节设计相应的数据以及关联。
2.客户端实现(使用C# winform,由于客户机大多数是windows xp系统,为了保证系统兼容性,没有使用wpf技术)
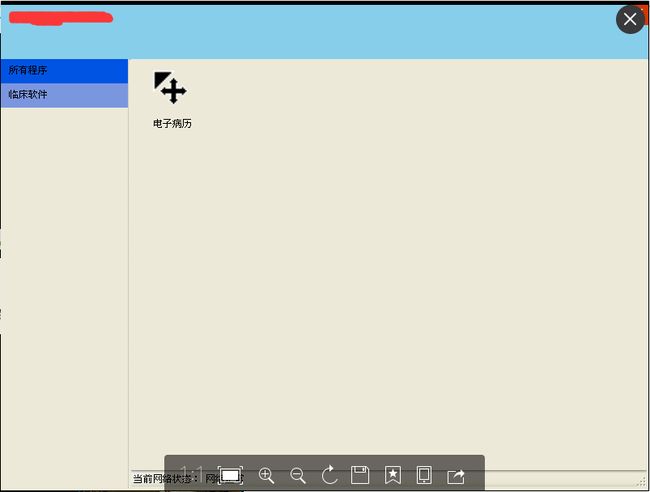
客户端分为上、左、右三个部分,上为标题栏,可以控制窗体移动,左侧为不同的软件类型,右侧为应用列表,用图标加文字的方式展示。软件类型、应用图标,各自有通用的处理,所以将这两个封装成了用户控件,主窗体只要遍历输出空间就可以了。
数据,是通过http接口方式提供,返回的是json格式的数据。
在下载数据的时候,刚开始为了快速实现,直接使用的同步方法,导致有时候该弹出对话框的地方,等待了很久才出来。 后来,改用多线程,在线程中进行下载操作,同时传入对象,更新UI,这样就不会出现看上去卡死的情况。
3.后台功能实现
后台的界面采用easyui,为了快速开发,后台是直接写代码,没有采用什么框架技术,用的ADO.NET访问数据库。包括接口的实现和各个管理功能的实现。功能模块有:应用分类,应用管理,应用版本,文件上传(针对指定版本的应用,上传对应的文件,但此功能由于实现较为复杂,不够稳定,暂时不用此功能),软件排行,查看日志。
4.功能调整小插曲
本来希望能通过后台上传文件,以达到上传完成后,发布版本,客户端就可以从上传文件的目标路径,下载到客户端指定的程序存放路径。 但经过多次测试,发现上传的文件不稳定,而且flash上传控件可以多选文件,但不能选文件夹,前端如果需要选文件夹,很可能存在不兼容的问题。因此,改变技术方案,后台只发布版本,程序手动传到服务器上,让客户端仍然从指定版本下载文件。这样虽然说,有了人工介入,但能够保证程序是正确可用的,投入生产环境时,出现问题的概率降低了。
由于程序由不同的方式产生,所以在服务器配置上需要增加很多扩展配置,大多数mime配置为application/octet-stream 。对于没有后缀的文件,应该这样配置: mime . application/octet-stream
5. 安装部署
第一次使用installsheild,对其研究也花了些时间,第一步是配置一些安装程序的基本信息,第二步是安装之前所需要具备的环境,第三步是选文件,第四步是设置菜单栏和卸载程序,第五步是注册表设置,第六步是安装过程的一些提示信息的配置。
在项目下会有1-6共6个目录,每个目录里面有几个项,每一项都是一些配置。特别注意Redistributables 这里可以配置安装哪些基础程序或依赖程序。勾选选项会下载相应程序安装包,并且在生成时会带上相应的安装包。
6.一些winform开发的代码细节
1.控件.SuspendLayout() 减少触发layout事件,提高性能。
2.图片设置居中的办法(示例代码):
this.pictureBox1.BackgroundImageLayout = System.Windows.Forms.ImageLayout.Zoom;
this.pictureBox1.Location = new System.Drawing.Point(10, 0);
this.pictureBox1.Name = "pictureBox1";
this.pictureBox1.Size = new System.Drawing.Size(60, 60);
this.pictureBox1.TabIndex = 0;
this.pictureBox1.TabStop = false;
this.pictureBox1.Click += new System.EventHandler(this.pictureBox1_Click);
3. 退出程序(关闭进程)
this.Close();
Environment.Exit(0);
4.窗口最大化最小化
最大化 : this.WindowState = FormWindowState.Maximized;
最小化 : this.WindowState = FormWindowState.Minimized;
5.开启新线程,定时检测网络状态代码(两种方法都在里面,只是在使用的时候,只用了ping ip的方式,没有调用 InternetGetConnectedState方法,这是因为我这里需要测试内网网络环境是否正常,而调用InternetGetConnectedState只能判断是否连上外网)
//导入dll
[DllImport("wininet.dll", EntryPoint = "InternetGetConnectedState")]
//判断网络状况的方法,返回值true为连接,false为未连接
public extern static bool InternetGetConnectedState(out int conState, int reder);
public constructor(){
Thread netThread = new Thread(ListenNetWork);
netThread.Start();
}
private void ListenNetWork() {
//定时检测网络状态
System.Timers.Timer timer = new System.Timers.Timer();
//时间频率
timer.Interval = 1000;
//设置为一直执行 false表示只执行一次
timer.AutoReset = true;
//开启System.Timers.Timer.Elapsed事件
timer.Enabled = true;
//执行检测网络方法
timer.Elapsed += new System.Timers.ElapsedEventHandler(CheckNetState);
}
private void CheckNetState(object source, System.Timers.ElapsedEventArgs e)
{
int result = 0;
String message = "";
//调用api检测网络状态
// bool flag = InternetGetConnectedState(out result, 0);
Ping ping = new Ping();
IPAddress address = IPAddress.Parse(ServerIp); //IPAddress.Loopback;
PingReply reply= ping.Send(address);
if (reply.Status==IPStatus.Success)
{
message = "网络正常";
NetState.CurrentState = 1;
}
else
{
message = "网络连接失败";
NetState.CurrentState = -1;
}
this.status_label.Text = message;
}
6.窗体移动代码
#region 鼠标选中移动窗体
[DllImport("user32.dll")]
public static extern bool ReleaseCapture();
[DllImport("user32.dll")]
public static extern bool SendMessage(IntPtr hwnd, int wMsg, int wParam, int lParam);
public const int WM_SYSCOMMAND = 0x0112;
public const int SC_MOVE = 0xF010;
public const int HTCAPTION = 0x0002;
Point mouseOff;//鼠标移动位置变量
bool leftFlag;//标签是否为左键
private void FrmMain_MouseDown(object sender, MouseEventArgs e)
{
ReleaseCapture();
SendMessage(this.Handle, WM_SYSCOMMAND, SC_MOVE + HTCAPTION, 0);
}
private void FrmMain_MouseMove(object sender, MouseEventArgs e)
{
if (leftFlag)
{
Point mouseSet = System.Windows.Forms.Control.MousePosition;
mouseSet.Offset(mouseOff.X, mouseOff.Y); //设置移动后的位置
Location = mouseSet;
}
}
private void FrmMain_MouseUp(object sender, MouseEventArgs e)
{
if (leftFlag)
{
leftFlag = false;//释放鼠标后标注为false;
}
}
#endregion
7.点击菜单,切换菜单项代码
System.Windows.Forms.Control.ControlCollection collection = this.panel3.Controls;
//重置样式
for (int i = 0; i < collection.Count; i++)
{
Biz.Controls.MenuItem m_item = (Biz.Controls.MenuItem)collection[i];
m_item.BackColor = System.Drawing.SystemColors.InactiveCaption;
}
//选中当前项
Biz.Controls.MenuItem menuitem = (Biz.Controls.MenuItem)sender;
curMenuId = menuitem.Menuid;
menuitem.BackColor = System.Drawing.SystemColors.ActiveCaption;
8.给控件画虚边线
Pen pen = new Pen(SystemColors.ControlDark);
pen.DashStyle = System.Drawing.Drawing2D.DashStyle.Dot;
e.Graphics.DrawLine(pen, panel.Width - 1, panel.Height - 1, panel.Width - 1, 0);
9.多线程更新UI控件方法
private delegate void UpdateLabelCallback(String info);
private void FrmMain_Load(object sender, EventArgs e)
{
Thread subThread= new Thread(new ThreadStart(doSomeThing));
subThread.Start();
}
private void UpdateLabel(String info)
{
//this.lab_fileinfo.Text = info ;
if (this.lab_fileinfo.InvokeRequired)//如果调用控件的线程和创建创建控件的线程不是同一个则为True
{
while (!this.lab_fileinfo.IsHandleCreated)
{
if (this.lab_fileinfo.Disposing || this.lab_fileinfo.IsDisposed)
{
return;
}
}
UpdateLabelCallback callback = new UpdateLabelCallback(UpdateLabel);
this.lab_fileinfo.Invoke(callback, new object[] { info });
}
else {
this.lab_fileinfo.Text = info;
}
}
private void doSomeThing(){
//省略逻辑代码
UpdateLabel("doSomeThing");
}
10. 进程启动程序方法
1.调用Process.Start方法
String exeFile = "D:\\QQ.exe";
System.Diagnostics.Process.Start(exeFile);
2.有些绿色版免安装程序启动exe文件时,必须制定启动程序的工作路径,不能直接用上述方法启动,正确启动方法如下:
String exeFile = "D:\\test\\QQ.exe";
String workDir = "D:\\test";
ProcessStartInfo process = new ProcessStartInfo();
process.FileName = exeFile;
process.UseShellExecute = false;
//关键在这里,相当于是切换到该目录下,打开exe 文件
process.WorkingDirectory = workDir;
process.CreateNoWindow = true;
Process.Start(process);
11.获取机器名称和mac地址
 public class SysUtil
    {
        public static String machineName {
            get {

                return Dns.GetHostName();
            }
        }

        public static String machineIp
        {
            get
            {
                IPAddress addr;
                addr = new IPAddress(Dns.GetHostByName(Dns.GetHostName()).AddressList[0].Address);
                return addr.ToString();
            }
        }
    }
12.写入日志文件
        public static void Write(string msg, bool isAppend)
        {
            try
            {
                string filename = Path.Combine(AppDomain.CurrentDomain.BaseDirectory, "run.log");
                if (!Directory.Exists(Path.GetDirectoryName(filename)))
                {
                    Directory.CreateDirectory(Path.GetDirectoryName(filename));
                }
                using (FileStream stream = new FileStream(filename, isAppend ? FileMode.Append : FileMode.Create, FileAccess.Write, FileShare.None))
                {
                    StreamWriter writer = new StreamWriter(stream);
                    writer.WriteLine(msg);
                    writer.Close();
                    stream.Close();
                }
            }
            catch
            {
            }
        }
13.http请求封装
 public String GetResponse(String uri)
        {
            HttpWebRequest request =(HttpWebRequest) HttpWebRequest.Create(uri);
            request.Method = "GET";
            HttpWebResponse response=(HttpWebResponse)request.GetResponse();
            Stream respStream = response.GetResponseStream();
            StreamReader reader = new StreamReader(respStream);
            String info = reader.ReadToEnd();
            return info;
        }
14.执行dos命令的封装
 ///
        /// DOS命令运行函数
        ///
        ///
        public void ExeCommand(string commandText)
        {
            Process p = new Process();
            p.StartInfo.FileName = "cmd.exe";
            p.StartInfo.UseShellExecute = false;
            p.StartInfo.RedirectStandardInput = true;
            p.StartInfo.RedirectStandardOutput = true;
            p.StartInfo.RedirectStandardError = true;
            p.StartInfo.CreateNoWindow = true;
            try
            {
                p.Start();
                p.StandardInput.WriteLine(commandText);
                p.StandardInput.WriteLine("exit");

            }
            catch
            {

            }
        }
以下是部分截图


本博客文章大多是经验积累总结,以免今后忘却,记录下来。同时感谢您的阅读,也希望能对您有所帮助。