C++ 使用 openGL 实现吃豆人游戏
一、游戏须知
1.1 实验内容
本节实验主要通过 C++ 和 openGL 库来实现了一个吃豆人的小游戏。主要的课程内容涉 及到 C++ 相关的序
列容器 vector 、deque 和迭代器,以及 openGL 相关的窗口初始化与绘图功能。
1.2 知识点
C++ 编程基础
C++ 模板库使用
openGl 库使用
1.3 实验环境
xfce 终端
ubuntu16.04
openGl 库
首先在 include 创建 main.h,用来存放头文件和一些全局变量,全局变量的定义是方便所 有的模块访问并反映游戏的状态。全局变量定义后,在主函数中进行赋值,所有模块就都 能访问了。
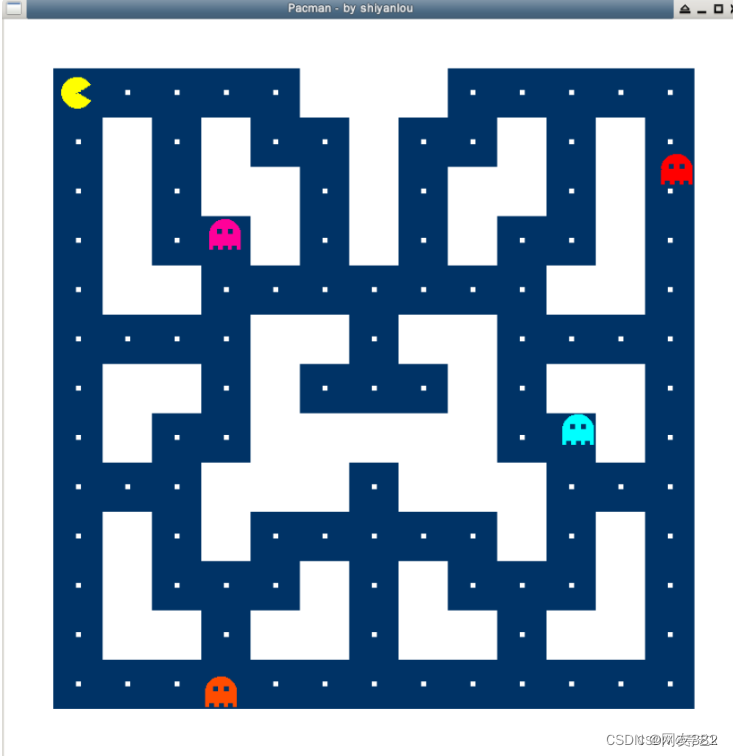
二、实现的效果图

三、代码实现
首先在 include 创建 main.h,用来存放头文件和一些全局变量,全局变量的定义是方便所有的模块访问并反映游戏的状态。全局变量定义后,在主函数中进行赋值,所有模块就都能访问了。
//main.h
#ifndef MAIN_H
#define MAIN_H
#include
#include
#include
#include
#define _USE_MATH_DEFINES
#include
#include
#include
#include
using namespace std;
extern bool replay; //检查是否启动游戏
extern bool over; //检查游戏是否结束
extern float squareSize; //一个单元大小
extern float xIncrement; // x坐标
extern float yIncrement; // y坐标
extern int rotation; // 方向
extern float* monster1; //第一个怪物的坐标和方向
extern float* monster2; //第二个怪物的坐标和方向
extern float* monster3; //第三个怪物的坐标和方向
extern float* monster4; //第四个怪物的坐标和方向
extern vector border; //墙坐标
//障碍物坐标 (为了清晰分为三部分)
extern vector obstaclesTop;
extern vector obstaclesMiddle;
extern vector obstaclesBottom;
extern deque food;
extern vector
extern bool* keyStates; // 按键状态
extern int points; // 得分
#endif
1.4初始化地图:
在主函数中对全局变量进行赋值,然后初始化一个窗口。在这里将使用到 openGL 的初始化接口。具体包括:

void glutInit(int*argc,char**argv);初始化

void glutInitDisplayMode(unsighed int mode);定义显示方式 mode:是一个 GLUT 库里预定义的
可能的布尔组合,使用 mode 去指定颜色模式,数量和缓冲区类型。

void glutInitWindowSize(int width,int height);设置窗口大小 width:窗口宽度 height:窗口
高度

void glutInitWindowPositon(int x,int y);确定窗口位置(默认左上角) x:横坐标 y:纵坐标
Int glutCreateWindow(char* title);设置窗口的标题 title:标题内容
void glutDisplayFunc(void(*func)(void);注册当前窗口的显示回调函数 void (*func)(void):回调
函数名称,在这里我们用的是 display
void glutReshapeFunc(void(*func)(int width,int height));重新设置窗口 void(*func)(int
width,int height):回调函数名称,在这里我们用的是 reshape
void glutIdleFunc(void(*func)(void));调用渲染函数 void(*func)(void):回调函数名称,系统空闲
时
调用,在这里我们用的是 display
void glutKeyboardFunc(void(*func)(unsigned char key,int x,int y));处理按键事件
void glutKeyboardUpFunc(void (*func)(unsigned char key,int x,int y));处理松开按键事件
void glutMainLoop(void);循环执行
将下面的代码写入 Code/Pacman/src/Pacman.cpp 文件中:
//Pacman.cpp
#include “main.h”
#include “control.h”
#include “food.h”
#include “gameresult.h”
#include “gameover.h”
#include “gamestart.h”
#include “init.h”
#include “monster.h”
#include “createpacman.h”
#include “laberynth.h”
using namespace std;
bool replay = false; //检查是否启动游戏
bool over = true; //检查游戏是否结束
float squareSize = 50.0; //一个单元大小
float xIncrement = 0; // x坐标
float yIncrement = 0; // y坐标
int rotation = 0; // 方向
float* monster1 = new float[3] {10.5, 8.5, 1.0}; //第一个怪物的坐标和方向
float* monster2 = new float[3] {13.5, 1.5, 2.0}; //第二个怪物的坐标和方向
float* monster3 = new float[3] {4.5, 6.5, 3.0}; //第三个怪物的坐标和方向
float* monster4 = new float[3] {2.5, 13.5, 4.0}; //第四个怪物的坐标和方向
vector border = { 0, 0, 15, 1, 15, 15, 14, 1, 0, 14, 15, 15, 1, 14, 0, 0 }; //墙坐标
//障碍物坐标 (为了清晰分为三个)
vector obstaclesTop = { 2, 2, 3, 6, 3, 6, 4, 5, 4, 2, 5, 4, 5, 3, 6, 5, 6, 1, 9, 2, 7, 2, 8, 5, 9, 5, 10, 3, 10, 4, 11, 2, 11, 5, 12, 6, 12, 6, 13, 2 };
vector obstaclesMiddle = { 2, 9, 3, 7, 3, 7, 4, 8, 4, 9, 5, 11, 5, 6, 6, 10, 6, 10, 7, 8, 7, 8, 8, 9, 6, 7, 7, 6, 8, 6, 9, 7, 10, 6, 9, 10, 9, 10, 8, 8, 11, 9, 10, 11, 11, 8, 12, 7, 12, 7, 13, 9 };
vector obstaclesBottom = { 2, 10, 3, 13, 3, 13, 4, 12, 5, 12, 6, 13, 6, 13, 7, 11, 8, 11, 9, 13, 9, 13, 10, 12, 11, 12, 12, 13, 12, 13, 13, 10 };
deque food = { 1.5, 1.5, 1.5, 2.5, 1.5, 3.5, 1.5, 4.5, 1.5, 5.5, 1.5, 6.5, 1.5, 7.5, 1.5, 8.5, 1.5, 9.5, 1.5, 10.5, 1.5, 11.5, 1.5, 12.5, 1.5, 13.5, 2.5, 1.5, 2.5, 6.5, 2.5, 9.5, 2.5, 13.5, 3.5, 1.5, 3.5, 2.5, 3.5, 3.5, 3.5, 4.5, 3.5, 6.5, 3.5, 8.5, 3.5, 9.5, 3.5, 10.5, 3.5, 11.5, 3.5, 13.5, 4.5, 1.5, 4.5, 4.5, 4.5, 5.5, 4.5, 6.5, 4.5, 7.5, 4.5, 8.5, 4.5, 11.5, 4.5, 12.5, 4.5, 13.5, 5.5, 1.5, 5.5, 2.5, 5.5, 5.5, 5.5, 10.5, 5.5, 11.5, 5.5, 13.5, 6.5, 2.5, 6.5, 3.5, 6.5, 4.5, 6.5, 5.5, 6.5, 7.5, 6.5, 10.5, 6.5, 13.5, 7.5, 5.5, 7.5, 6.5, 7.5, 7.5, 7.5, 9.5, 7.5, 10.5, 7.5, 11.5, 7.5, 12.5, 7.5, 13.5, 8.5, 2.5, 8.5, 3.5, 8.5, 4.5, 8.5, 5.5, 8.5, 7.5, 8.5, 10.5, 8.5, 13.5, 9.5, 1.5, 9.5, 2.5, 9.5, 5.5, 9.5, 10.5, 9.5, 11.5, 9.5, 13.5, 10.5, 1.5, 10.5, 4.5, 10.5, 5.5, 10.5, 6.5, 10.5, 7.5, 10.5, 8.5, 10.5, 11.5, 10.5, 12.5, 10.5, 13.5, 11.5, 1.5, 11.5, 2.5, 11.5, 3.5, 11.5, 4.5, 11.5, 5.5, 11.5, 6.5, 11.5, 8.5, 11.5, 9.5, 11.5, 10.5, 11.5, 11.5, 11.5, 13.5, 12.5, 1.5, 12.5, 6.5, 12.5, 9.5, 12.5, 13.5, 13.5, 1.5, 13.5, 2.5, 13.5, 3.5, 13.5, 4.5, 13.5, 5.5, 13.5, 6.5, 13.5, 7.5, 13.5, 8.5, 13.5, 9.5, 13.5, 10.5, 13.5, 11.5, 13.5, 12.5, 13.5, 13.5 };
vector
bool* keyStates = new bool[256]; // 按键记录
int points = 0; // 得分
//主函数
int main(int argc, char** argv){
//初始化并创建屏幕
glutInit(&argc, argv);
glutInitDisplayMode(GLUT_DOUBLE | GLUT_RGB); //显示方式(双缓冲区,颜色索引方式)
glutInitWindowSize(750, 750); //窗口大小
glutInitWindowPosition(500, 50); //窗口起始位置
glutCreateWindow(“Pacman - by HD”);
//定义所有控制功能
glutDisplayFunc(display);            //显示窗口
glutReshapeFunc(reshape);            //重置窗口
glutIdleFunc(display);                //循环
glutKeyboardFunc(keyPressed);        //按键盘操作
glutKeyboardUpFunc(keyUp);

//运行游戏
init();
glutMainLoop();
return 0;
}
1.5 建立迷宫
上面我们已经对地图进行了初始化,也对障碍物进行了初始化,接下来就需要使用 openGL 来绘图了。这里涉及到的接口包括:
void glRectf(GLfloat x1, GLfloat y1, GLfloat x2, GLfloat y2 );绘画矩形 x1:矩形左上角横坐标 y1:矩形左上角纵坐标 x2:矩形右下角横坐标 y2:矩形右下角纵坐标
头文件
将下面的代码写入 /Code/Pacman/include/laberynth.h 文件中:
//laberynth.h
#ifndef _LABERYTH_H
#define _LABERYTH_H
void drawLaberynth();
#endif
copy
源代码
将下面的代码写入 Code/Pacman/src/laberynth.cpp 文件中:
//laberynth.cpp
#include “laberynth.h”
#include “main.h”
//障碍物与墙体的绘制方法
void drawLaberynth(){
glColor3f(1.0, 1.0, 1.0);
//边界
for (vector::size_type i = 0; i < border.size(); i = i + 4){
glRectf(border.at(i) * squareSize, border.at(i + 1)*squareSize, border.at(i + 2)*squareSize, border.at(i + 3)*squareSize);
}
//障碍物,分为上中下三部分绘图
for (vector::size_type j = 0; j < obstaclesBottom.size(); j = j + 4){
    glRectf(obstaclesBottom.at(j) * squareSize, obstaclesBottom.at(j + 1)*squareSize, obstaclesBottom.at(j + 2)*squareSize, obstaclesBottom.at(j + 3)*squareSize);
}
for (vector::size_type k = 0; k < obstaclesMiddle.size(); k = k + 4){
    glRectf(obstaclesMiddle.at(k) * squareSize, obstaclesMiddle.at(k + 1)*squareSize, obstaclesMiddle.at(k + 2)*squareSize, obstaclesMiddle.at(k + 3)*squareSize);
}
for (vector::size_type p = 0; p < obstaclesTop.size(); p = p + 4){
    glRectf(obstaclesTop.at(p) * squareSize, obstaclesTop.at(p + 1)*squareSize, obstaclesTop.at(p + 2)*squareSize, obstaclesTop.at(p + 3)*squareSize);
}
}
1.6 建立游戏任务
在上面已经建立好了地图和迷宫,接下来一步,应该创建一个游戏角色,也就是吃豆人。按照以往的经验,吃豆人可以设计为一个圆形然后拥有一张嘴。需要用到的新接口包括:
void glBegin(GLenum mode);表示绘图方式
void glVertex2f(GLfloat x, GLfloat y);指定画笔位置
头文件
将下面的代码写入 Code/Pacman/include/createpacman.h 文件中:
//createpacman.h
#ifndef CREATEPACMAN_H
#define CREATEPACMAN_H
#include
void drawPacman(float positionX, float positionY, float rotation);
#endif
copy
源代码
将下面的代码写入 Code/Pacman/src/createpacman.cpp 文件中:
//createpacman.cpp
#include “createpacman.h”
#include “GL/gl.h”
#include “main.h”
void drawPacman(float positionX, float positionY, float rotation){
int x, y;
glBegin(GL_LINES); //创建一条线
glColor3f(1.0, 1.0, 0.0);
for (int k = 0; k < 32; k++){
x = (float)k / 2.0 * cos((30 + 90rotation) * M_PI / 180.0) + (positionXsquareSize);
y = (float)k / 2.0* sin((30 + 90 * rotation) * M_PI / 180.0) + (positionYsquareSize);
for (int i = 30; i < 330; i++){
glVertex2f(x, y);
x = (float)k / 2.0 * cos((i + 90 * rotation) * M_PI / 180.0) + (positionXsquareSize);
y = (float)k / 2.0* sin((i + 90 * rotation) * M_PI / 180.0) + (positionY*squareSize);
glVertex2f(x, y);
}
}
glEnd();//绘图结束
}
1.7怪物设计:
怪物设计这里我们需要考虑到几点,第一怪物的外形设计、第二怪物的移动设计,第三怪物与障碍物的碰撞检测。
头文件
将下面的代码写入 Code/Pacman/include/monster.h 文件中:
//monster.h
#ifndef MONSTER_H
#define MONSTER_H
void drawMonster(float positionX, float positionY, float r, float g, float b);
void updateMonster(float* monster, int id);
#endif
copy
源代码
将下面的代码写入 /Code/Pacman/src/monster.cpp 文件中:
//monster.cpp
#include “monster.h”
#include “main.h”
//绘画怪物
void drawMonster(float positionX, float positionY, float r, float g, float b){
int x, y;
glBegin(GL_LINES);
glColor3f(r, g, b);
//头
for (int k = 0; k < 32; k++){
x = (float)k / 2.0 * cos(360 * M_PI / 180.0) + (positionXsquareSize);
y = (float)k / 2.0 sin(360 * M_PI / 180.0) + (positionYsquareSize);
for (int i = 180; i <= 360; i++){
glVertex2f(x, y);
x = (float)k / 2.0 * cos(i * M_PI / 180.0) + (positionXsquareSize);
y = (float)k / 2.0* sin(i * M_PI / 180.0) + (positionYsquareSize);
glVertex2f(x, y);
}
}
glEnd();
//身体
glRectf((positionXsquareSize) - 17, positionYsquareSize, (positionXsquareSize) + 15, (positionYsquareSize) + 15);
glBegin(GL_POINTS);
glColor3f(0, 0.2, 0.4);
//眼睛和腿
glVertex2f((positionXsquareSize) - 11, (positionYsquareSize) + 14); //legs
glVertex2f((positionXsquareSize) - 1, (positionYsquareSize) + 14); //legs
glVertex2f((positionXsquareSize) + 8, (positionYsquareSize) + 14); //legs
glVertex2f((positionXsquareSize) + 4, (positionYsquareSize) - 3); //eyes
glVertex2f((positionXsquareSize) - 7, (positionY*squareSize) - 3); //eyes
glEnd();
}
//怪物移动
void updateMonster(float* monster, int id){
//找到当前位置
int x1Quadrant = (int)((monster[0] - (2/squareSize)) - (16.0 *cos(360 * M_PI / 180.0)) / squareSize);
int x2Quadrant = (int)((monster[0] + (2/squareSize)) + (16.0 *cos(360 * M_PI / 180.0)) / squareSize);
int y1Quadrant = (int)((monster[1] - (2/squareSize)) - (16.0 *cos(360 * M_PI / 180.0)) / squareSize);
int y2Quadrant = (int)((monster[1] + (2/squareSize)) + (16.0 *cos(360 * M_PI / 180.0)) / squareSize);
//怪物移动和撞墙检测
switch ((int)monster[2]){
case 1:
if (!bitmap.at(x1Quadrant).at((int)monster[1])){
monster[0] -= 2 / squareSize;
}else {
int current = monster[2];
do{
monster[2] = (rand() % 4) + 1;
} while (current == (int) monster[2]);
}
break;
case 2:
if (!bitmap.at(x2Quadrant).at((int)monster[1])){
monster[0] += 2 / squareSize;
}
else {
int current = monster[2];
do{
monster[2] = (rand() % 4) + 1;
} while (current == (int)monster[2]);
}
break;
case 3:
if (!bitmap.at((int)monster[0]).at(y1Quadrant)){
monster[1] -= 2 / squareSize;
}
else {
int current = monster[2];
do{
monster[2] = (rand() % 4) + 1;
} while (current == (int)monster[2]);
}
break;
case 4:
if (!bitmap.at((int)monster[0]).at(y2Quadrant)){
monster[1] += 2 / squareSize;
}
else {
int current = monster[2];
do{
monster[2] = (rand() % 4) + 1;
} while (current == (int)monster[2]);
}
break;
default:
break;
}
}
1.8 食物设计
食物应该设计在可移动区域内,也就是迷宫内,在主函数中我们已经对食物坐标进行了初始化,这里需要进行绘图,另外还需考虑食物被吃的情况。这里用到的新接口包括:
void glPointSize( GLfloat size);点大小设置
头文件
将下面的代码写入 /Code/Pacman/include/food.h 文件中:
//food.h
#ifndef FOOD_H
#define FOOD_H
#include
bool foodEaten(int x, int y, float pacmanX, float pacmanY);
void drawFood(float pacmanX, float pacmanY);
#endif
copy
源代码
将下面的代码写入 /Code/Pacman/src/food.cpp 文件中:
//food.cpp
#include “food.h”
#include “main.h”
//检查食物是否被吃
bool foodEaten(int x, int y, float pacmanX, float pacmanY){
if (x >= pacmanX - 16.0 cos(359 * M_PI / 180.0) && x <= pacmanX + 16.0cos(359 * M_PI / 180.0)){
if (y >= pacmanY - 16.0cos(359 * M_PI / 180.0) && y <= pacmanY + 16.0cos(359 * M_PI / 180.0)){
return true;
}
}
return false;
}
//画上食物
void drawFood(float pacmanX, float pacmanY){
deque temp;
//检查食物是否没有被吃掉
for (deque::size_type i = 0; i < food.size(); i = i + 2){
if (!foodEaten(food.at(i)*squareSize, food.at(i + 1)*squareSize, pacmanX, pacmanY)){
temp.push_back(food.at(i));
temp.push_back(food.at(i + 1));
}
else {
points++;
}
}
food.swap(temp);
glPointSize(5.0);
glBegin(GL_POINTS);
glColor3f(1.0, 1.0, 1.0);
//画上食物
for (deque::size_type j = 0; j < food.size(); j = j + 2){
glVertex2f(food.at(j)*squareSize, food.at(j + 1)*squareSize);//画点
}
glEnd();
}
1.9 角色移动命令:
现在已经设计好了迷宫、食物和怪物,接下来就可以做角色的控制设计了,在这里我们只设计了角色的上下左右移动。
头文件
将下面的代码写入 Code/Pacman/include/control.h 文件中:
//control.h
#ifndef CONTROL_H
#define CONTROL_H
void keyPressed(unsigned char key, int x, int y);
void keyUp(unsigned char key, int x, int y);
void resetGame();
void keyOperations();
#endif
copy
源代码
将下面的代码写入 Code/Pacman/src/control.cpp 文件中:
//control.cpp
#include “control.h”
#include “main.h”
//设置按键
void keyPressed(unsigned char key, int x, int y){
keyStates[key] = true;
}
//释放按键
void keyUp(unsigned char key, int x, int y){
keyStates[key] = false;
}
//重置所有元素并开始游戏
void resetGame(){
over = false;
xIncrement = 0;
yIncrement = 0;
rotation = 0;
monster1 = new float[3] {10.5, 8.5, 1.0};
monster2 = new float[3] {13.5, 1.5, 2.0};
monster3 = new float[3] {4.5, 6.5, 3.0};
monster4 = new float[3] {2.5, 13.5, 4.0};
points = 0;
for (int i = 0; i < 256; i++){
keyStates[i] = false;
}
food = { 1.5, 1.5, 1.5, 2.5, 1.5, 3.5, 1.5, 4.5, 1.5, 5.5, 1.5, 6.5, 1.5, 7.5, 1.5, 8.5, 1.5, 9.5, 1.5, 10.5, 1.5, 11.5, 1.5, 12.5, 1.5, 13.5, 2.5, 1.5, 2.5, 6.5, 2.5, 9.5, 2.5, 13.5, 3.5, 1.5, 3.5, 2.5, 3.5, 3.5, 3.5, 4.5, 3.5, 6.5, 3.5, 8.5, 3.5, 9.5, 3.5, 10.5, 3.5, 11.5, 3.5, 13.5, 4.5, 1.5, 4.5, 4.5, 4.5, 5.5, 4.5, 6.5, 4.5, 7.5, 4.5, 8.5, 4.5, 11.5, 4.5, 12.5, 4.5, 13.5, 5.5, 1.5, 5.5, 2.5, 5.5, 5.5, 5.5, 10.5, 5.5, 11.5, 5.5, 13.5, 6.5, 2.5, 6.5, 3.5, 6.5, 4.5, 6.5, 5.5, 6.5, 7.5, 6.5, 10.5, 6.5, 13.5, 7.5, 5.5, 7.5, 6.5, 7.5, 7.5, 7.5, 9.5, 7.5, 10.5, 7.5, 11.5, 7.5, 12.5, 7.5, 13.5, 8.5, 2.5, 8.5, 3.5, 8.5, 4.5, 8.5, 5.5, 8.5, 7.5, 8.5, 10.5, 8.5, 13.5, 9.5, 1.5, 9.5, 2.5, 9.5, 5.5, 9.5, 10.5, 9.5, 11.5, 9.5, 13.5, 10.5, 1.5, 10.5, 4.5, 10.5, 5.5, 10.5, 6.5, 10.5, 7.5, 10.5, 8.5, 10.5, 11.5, 10.5, 12.5, 10.5, 13.5, 11.5, 1.5, 11.5, 2.5, 11.5, 3.5, 11.5, 4.5, 11.5, 5.5, 11.5, 6.5, 11.5, 8.5, 11.5, 9.5, 11.5, 10.5, 11.5, 11.5, 11.5, 13.5, 12.5, 1.5, 12.5, 6.5, 12.5, 9.5, 12.5, 13.5, 13.5, 1.5, 13.5, 2.5, 13.5, 3.5, 13.5, 4.5, 13.5, 5.5, 13.5, 6.5, 13.5, 7.5, 13.5, 8.5, 13.5, 9.5, 13.5, 10.5, 13.5, 11.5, 13.5, 12.5, 13.5, 13.5 };
}
//控制吃豆人移动
void keyOperations(){
//获得当前位置
float x = (1.5 + xIncrement) * squareSize;
float y = (1.5 + yIncrement) * squareSize;
//更新按键
if (keyStates[‘a’]){
x -= 2;
int x1Quadrant = (int)((x - 16.0 *cos(360 * M_PI / 180.0)) / squareSize);
if (!bitmap.at(x1Quadrant).at((int)y/squareSize)){
xIncrement -= 2 / squareSize;
rotation = 2;
}
}
if (keyStates[‘d’]){
x += 2;
int x2Quadrant = (int)((x + 16.0 *cos(360 * M_PI / 180.0)) / squareSize);
if (!bitmap.at(x2Quadrant).at((int)y / squareSize)){
xIncrement += 2 / squareSize;
rotation = 0;
}
}
if (keyStates[‘w’]){
y -= 2;
int y1Quadrant = (int)((y - 16.0 *cos(360 * M_PI / 180.0)) / squareSize);
if (!bitmap.at((int)x/squareSize).at(y1Quadrant)){
yIncrement -= 2 / squareSize;
rotation = 3;
}
}
if (keyStates[‘s’]){
y += 2;
int y2Quadrant = (int)((y + 16.0 *cos(360 * M_PI / 180.0)) / squareSize);
if (!bitmap.at((int)x / squareSize).at(y2Quadrant)){
yIncrement += 2 / squareSize;
rotation = 1;
}
}
if (keyStates[’ ']){
if (!replay && over){
resetGame();
replay = true;
}
else if (replay && over){
replay = false;
}
}
}
2.0 游戏开始界面:
接着要准备一个欢迎界面,同时对游戏具体操作方式做一个声明,然后显示游戏元素。这里我们需要用到 openGL 的绘图接口。具体包括:
void glClearColor(GLfloat red, GLfloat green, GLfloat blue, GLfloat alpha); 红、绿、蓝和 alpha 值,指定值范围均为[ 0.0f,1.0f ]
void glcolor3f(GLfloat red,GLfloat green,GLfloat blue); 设置画笔颜色
void glRasterPos2f( GLfloat x, GLfloat y);要显示字体的起始坐标
void glutBitmapCharacter(void *font, int character);渲染字符 font:字体类型 character:具体字符
void glutSwapBuffers(void);刷新
void glMatrixMode(GLenum mode);投影方式 GLenum mode:投影方式,有 3 种模式: GL_PROJECTION 投影, GL_MODELVIEW 模型视图, GL_TEXTURE 纹理.
void glLoadIdentity(void);恢复初始坐标系
void glViewport(GLint x,GLint y,GLsizei width,GLsizei height);定义窗口 x:起始横坐标 y:起始纵坐标 width:宽度 height:高度
void glOrtho(GLdouble left,GLdouble right,GLdouble bottom,GLdouble top,GLdouble near,GLdouble far);设置或修改修剪空间的范围.这个函数的操作是创建一个正射投影矩阵,并且用这个矩阵乘以当前矩阵。其中近裁剪平面是一个矩形,矩形左下角点三维空间坐标是(left,bottom,-near),右上角点是(right,top,-near);远裁剪平面也是一个矩形,左下角点空间坐标是(left,bottom,-far),右上角点是(right,top,-far)
头文件
将下面的代码写入 Code/Pacman/include/gamestart.h 文件中:
//gamestart.h
#ifndef GAMESTART_H
#define GAMESTART_H
#include
void welcomeScreen();
void display();
void reshape(int w, int h);
#endif
copy
源代码
将下面的代码写入 Code/Pacman/src/gamestart.cpp 文件中:
//gamestart.cpp
#include “gamestart.h”
#include “monster.h”
#include “createpacman.h”
#include “laberynth.h”
#include “main.h”
#include “gameover.h”
#include “food.h”
#include “gameresult.h”
#include “control.h”
//欢迎界面
void welcomeScreen(){
glClearColor(0, 0.2, 0.4, 1.0);
string message = “**";
string::iterator it = message.begin();
glRasterPos2f(150, 200);
while (it!=message.end())
glutBitmapCharacter(GLUT_BITMAP_TIMES_ROMAN_24, it++);
message = “Pacman - by HD”;
glColor3f(1, 1, 1);
glRasterPos2f(225, 250);
it = message.begin();
while (it!=message.end())
glutBitmapCharacter(GLUT_BITMAP_TIMES_ROMAN_24, it++);
message = "”;
glRasterPos2f(150, 300);
it = message.begin();
while (it!=message.end())
glutBitmapCharacter(GLUT_BITMAP_TIMES_ROMAN_24, *it++);
message = “To control Pacman use A to go right, D to go left, W to go up and S to go down.”;
glRasterPos2f(50, 400);
it = message.begin();
while (it!=message.end())
glutBitmapCharacter(GLUT_BITMAP_HELVETICA_18, *it++);
message = “To start or restart the game, press the space key.”;
glRasterPos2f(170, 450);
it = message.begin();
while (it!=message.end())
glutBitmapCharacter(GLUT_BITMAP_HELVETICA_18, *it++);
}
//显示屏幕和元素
void display(){
if (points == 1){
over = false;
}
keyOperations();
glClear(GL_COLOR_BUFFER_BIT); //清除颜色缓冲区(当前被激活为写操作的颜色缓存)
gameOver();
if (replay){
if (!over){
drawLaberynth();
drawFood((1.5 + xIncrement) * squareSize, (1.5 + yIncrement) * squareSize);
drawPacman(1.5 + xIncrement, 1.5 + yIncrement, rotation);
updateMonster(monster1, 1);
updateMonster(monster2, 2);
updateMonster(monster3, 3);
updateMonster(monster4, 4);
drawMonster(monster1[0], monster1[1], 0.0, 1.0, 1.0); //cyan
drawMonster(monster2[0], monster2[1], 1.0, 0.0, 0.0); //red
drawMonster(monster3[0], monster3[1], 1.0, 0.0, 0.6); //magenta
drawMonster(monster4[0], monster4[1], 1.0, 0.3, 0.0); //orange
}
else {
resultsDisplay();
}
}
else {
welcomeScreen();
}
glutSwapBuffers();
}
//重置窗口
void reshape(int w, int h){
glMatrixMode(GL_PROJECTION);
glLoadIdentity();
glViewport(0, 0, (GLsizei)w, (GLsizei)h);
glOrtho(0, 750, 750, 0, -1.0, 1.0);
glMatrixMode(GL_MODELVIEW);
glLoadIdentity();
}
2.1游戏结果判断
到此游戏元素已经基本设计完成,这里我们给游戏设计一个结束判断模块,应该包括胜利条件和失败条件。
头文件
将下面的代码写入 /Code/Pacman/include/gameover.h 文件中:
//gameover.h
#ifndef GAME_OVER_H
#define GAME_OVER_H
void gameOver();
#endif
copy
源代码
将下面的代码写入 Code/Pacman/src/gameover.cpp 文件中:
//gameover.cpp
#include “gameover.h”
#include “main.h”
//游戏结束
void gameOver(){
int pacmanX = (int)(1.5 + xIncrement);
int pacmanY = (int)(1.5 + yIncrement);
int monster1X = (int)(monster1[0]);
int monster1Y = (int)(monster1[1]);
int monster2X = (int)(monster2[0]);
int monster2Y = (int)(monster2[1]);
int monster3X = (int)(monster3[0]);
int monster3Y = (int)(monster3[1]);
int monster4X = (int)(monster4[0]);
int monster4Y = (int)(monster4[1]);
if (pacmanX == monster1X && pacmanY == monster1Y){
over = true;
}
if (pacmanX == monster2X && pacmanY == monster2Y){
over = true;
}
if (pacmanX == monster3X && pacmanY == monster3Y){
over = true;
}
if (pacmanX == monster4X && pacmanY == monster4Y){
over = true;
}
if (points == 106){
over = true;
}
}
2.2游戏结束界面:
到这里已经是尾声了,我们的游戏也已经结束了。在结构界面除了得分以外,我们可以人性化的提供一些提示来进行接下来的操作。
头文件
将下面的代码写入 Code/Pacman/include/gameresult.h 文件中:
//gameresult.h
#ifndef GAMERESULT_H
#define GAMERESULT_H
#include
#include
void resultsDisplay();
#endif
copy
源代码
将下面的代码写入 Code/Pacman/src/gameresult.cpp 文件中:
//gameresult.cpp
#include “gameresult.h”
#include “main.h”
//游戏结果
void resultsDisplay(){
if (points == 106){
//胜利
string message = “";
string::iterator it = message.begin();
glRasterPos2f(170, 250);
while (it!=message.end())
glutBitmapCharacter(GLUT_BITMAP_TIMES_ROMAN_24, it++);
message = "CONGRATULATIONS, YOU WON! ";
glColor3f(1, 1, 1);
glRasterPos2f(200, 300);
it = message.begin();
while (it!=message.end())
glutBitmapCharacter(GLUT_BITMAP_TIMES_ROMAN_24, it++);
message = "";
glRasterPos2f(170, 350);
it = message.begin();
while (it!=message.end())
glutBitmapCharacter(GLUT_BITMAP_TIMES_ROMAN_24, it++);
message = “To start or restart the game, press the space key.”;
glRasterPos2f(170, 550);
it = message.begin();
while (it!=message.end())
glutBitmapCharacter(GLUT_BITMAP_HELVETICA_18, it++);
}else {
//Lost
string message = "**********";
string::iterator it = message.begin();
glRasterPos2f(210, 250);
while (it!=message.end())
glutBitmapCharacter(GLUT_BITMAP_TIMES_ROMAN_24, it++);
message = "SORRY, YOU LOST … ";
glColor3f(1, 1, 1);
glRasterPos2f(250, 300);
it = message.begin();
while (it!=message.end())
glutBitmapCharacter(GLUT_BITMAP_TIMES_ROMAN_24, it++);
message = "”;
glRasterPos2f(210, 350);
it = message.begin();
while (it!=message.end())
glutBitmapCharacter(GLUT_BITMAP_TIMES_ROMAN_24, *it++);
message = "You got: “;
glRasterPos2f(260, 400);
it = message.begin();
while (it!=message.end())
glutBitmapCharacter(GLUT_BITMAP_TIMES_ROMAN_24, it++);
string result = to_string(points);
message = (char)result.c_str();
glRasterPos2f(350, 400);
it = message.begin();
while (it!=message.end())
glutBitmapCharacter(GLUT_BITMAP_TIMES_ROMAN_24, *it++);
message = " points!”;
glRasterPos2f(385, 400);
it = message.begin();
while (it!=message.end())
glutBitmapCharacter(GLUT_BITMAP_TIMES_ROMAN_24, *it++);
message = “To start or restart the game, press the space key.”;
glRasterPos2f(170, 550);
it = message.begin();
while (it!=message.end())
glutBitmapCharacter(GLUT_BITMAP_HELVETICA_18, *it++);
}
}
2.3 Makefile
最后一步就是对源代码进行编译了,这里有两种方式,看个人喜好来选择。
g++ 方式,这种方式好处就是简单明了,弊端就是每次编译都需要敲入比较麻烦,首先在终端进入 Pacman/src/ 目录
g++ *.cpp -std=c++11 -Wall -I…/include -lglut -lGL -o …/bin/Pacman
copy
Makefile 方式,首先在 Pacman/src/ 目录下建立 Makefile 文件。
#编译方式
CC = g++
#C++版本,显示所有警告
VERSION = -g -std=c++11 -Wall
#头文件和库文件
INCLUDE = -I…/include -lglut -lGL
#目标文件,最后生成文件
TARGET = …/bin/Pacman
#源代码路径
SRCS = $(wildcard *.cpp)
#编译为.o文件
OBJS = ( p a t s u b s t (patsubst %cpp,%o, (patsubst(SRCS))
all:$(TARGET)
#执行编译
( T A R G E T ) : (TARGET): (TARGET):(OBJS)
$(CC) $(OBJS) $(VERSION) $(INCLUDE) -o $(TARGET)
%.o:%.cpp
$(CC) $(VERSION) $(INCLUDE) -c $<
#清除
.PHONY:clean
clean:
rm -rf $(OBJS) $(TARGET)
————————————————
版权声明:本文为CSDN博主「寻艺k」的原创文章,遵循CC 4.0 BY-SA版权协议,转载请附上原文出处链接及本声明。
原文链接:https://blog.csdn.net/qq_67308050/article/details/124717997