SpringBoot中整合ElasticSearch快速入门以及踩坑记录
场景
若依前后端分离版手把手教你本地搭建环境并运行项目:
若依前后端分离版手把手教你本地搭建环境并运行项目_本地运行若依前后端分离-CSDN博客
参考上面搭建项目。
ElaticSearch
Elasticsearch 是java开发的,基于 Lucene 的搜索引擎。它提供了一个分布式多用户能力的全文搜索引擎,基于RESTful Web接口。
Elasticsearch 可以快速有效地存储,搜索和分析大量数据,而且在处理半结构化数据(即自然语言)时特别有用。
ElasticSearch官方文档:
Elastic documentation | Elastic
应用集成ElasticSearch的方式有,REST Client、Jest、Spring Data、Spring Data Elasticsearch Repositories。
下面将介绍Spring Data Elasticsearch的方式。
注:
博客:
霸道流氓气质-CSDN博客
实现
1、在Windows上实现ElaticSearch下载安装和配置
下载地址:
Download Elasticsearch | Elastic
这里是Windows,下载对应的包,下载之后解压
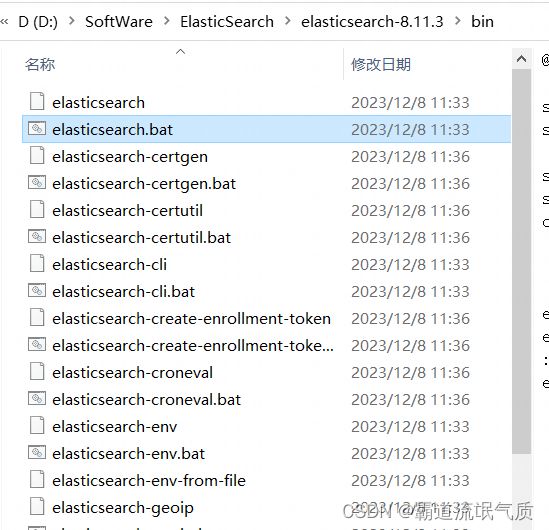
进入bin下,双击elasticsearch.bat可以启动
2、踩坑一,这里不要随意下载官网最新的ES的安装包,需要与springboot版本以及spring-boot-data-elasticsearch的版本
使用指定的对应关系。
否则在运行时会提示:
Elasticsearch exception [type=illeagal_argument_exception,reason = request [/test] contains unrecognized parameter: [include_type_name]]
以及其他不可预知的问题。

如何查看SpringBoot版本、SpringBoot-data-elasticsearch版本、ElasticSearch版本的对应关系
Versions :: Spring Data Elasticsearch
这里的SpringBoot版本为2.2.13,所以上面下载ES时选择对应的6.8.2的版本
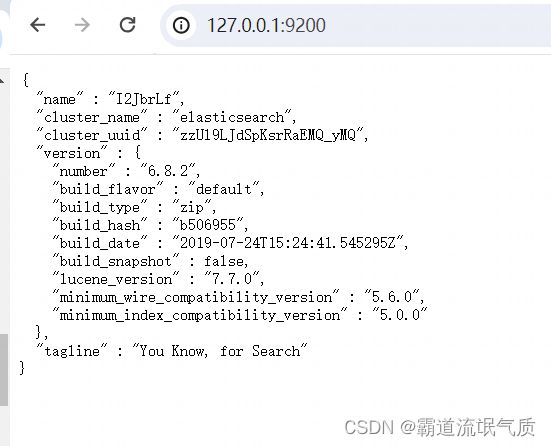
双击上面bat启动后,访问默认端口9200,出现如下提示则es启动成功
3、为了验证以上ES搭建成功,可使用调用接口的方式测试索引的创建与查询
创建索引
使用接口调用工具,发送如下PUT请求
http://localhost:9200/user
则会创建名为user的索引

然后再访问如下GET请求则可以查询索引
http://localhost:9200/user

ES还支持更多其他的api调用的方式和功能,这里不做介绍。
4、 ElasticSearch可视化工具elasticsearch-head的下载与使用
可以借助可视化工具进行对索引等的可视化操作。
GitHub - mobz/elasticsearch-head: A web front end for an elastic search cluster
访问以上地址
按照官网提示步骤运行
git clone git://github.com/mobz/elasticsearch-head.git

cd elasticsearch-head

npm install

npm run start
电脑需要安装node环境
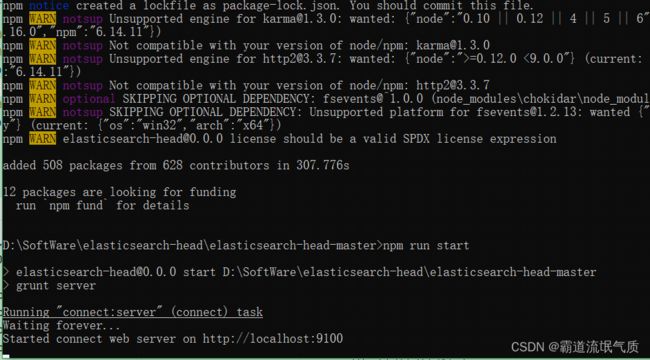
然后访问
http://localhost:9100/ 访问之后需要对ES连接,输入上面es的地址即可,这里是
http://localhost:9200/
但是在连接时没有连接成功的提示,此时打开控制台发现。
elasticsearch-head在连接Elasticsearch时提示:
GET http://localhost:9200/_nodes net::ERR_FAILED
Access to XMLHttpRequest at ... from origin ...has been blocked....

这是因为跨域了。
找到es的配置文件,config目录下的elasticsearch.yml
添加如下跨域配置
http.cors.enabled: true
http.cors.allow-origin: "*"
http.cors.allow-credentials: true
http.cors.allow-headers: Content-Type,Accept,Authorization,x-requested-with
然后重启es服务,则再连接显示成功

5、SpringBoot中集成ES
按照上面版本对应关系,添加pom依赖
            org.springframework.boot
            spring-boot-starter-data-elasticsearch
            3.2.2
然后新建配置类,用来配置es连接地址等
import org.elasticsearch.client.RestHighLevelClient;
import org.springframework.context.annotation.Bean;
import org.springframework.context.annotation.Configuration;
import org.springframework.data.elasticsearch.client.ClientConfiguration;
import org.springframework.data.elasticsearch.client.RestClients;
import org.springframework.data.elasticsearch.config.AbstractElasticsearchConfiguration;

@Configuration
public class ElasticConfig extends AbstractElasticsearchConfiguration {

    @Override
    @Bean
    public RestHighLevelClient elasticsearchClient() {
        final ClientConfiguration clientConfiguration = ClientConfiguration.builder()
                .connectedTo("127.0.0.1:9200") //这里注意不要加http://
                .build();
        return RestClients.create(clientConfiguration).rest();
    }
}
这里注意使用的是官网推荐使用的RestHighLevelClient方式,详情见官方文档:
Spring Data Elasticsearch - Reference Documentation
注意这里避免踩坑,在配置类中配置es的地址时,使用ip和端口号的方式127.0.0.1:9200
不要带http://
编写单元测试,测试连接与创建索引。
import org.elasticsearch.client.RequestOptions;
import org.elasticsearch.client.RestHighLevelClient;
import org.elasticsearch.client.indices.CreateIndexRequest;
import org.elasticsearch.client.indices.CreateIndexResponse;
import org.junit.Test;
import org.junit.runner.RunWith;
import org.springframework.beans.factory.annotation.Autowired;
import org.springframework.beans.factory.annotation.Qualifier;
import org.springframework.boot.test.context.SpringBootTest;
import org.springframework.test.context.junit4.SpringRunner;
import java.io.IOException;

@RunWith(SpringRunner.class)
@SpringBootTest(classes = RuoYiApplication.class,webEnvironment = SpringBootTest.WebEnvironment.RANDOM_PORT)
public class ElasticSearchTest {

    @Autowired
    @Qualifier("elasticsearchClient")
    public RestHighLevelClient highLevelClient;

    @Test
    public void connecTest() throws IOException {
        CreateIndexRequest request = new CreateIndexRequest("test");
        CreateIndexResponse response = highLevelClient.indices().create(request, RequestOptions.DEFAULT);
        // 查看是否创建成功
        System.out.println(response.isAcknowledged());
        highLevelClient.close();
    }
}
运行单元测试结果
