uniapp uniCloud 云开发上传图片与查看图片
效果图:
1. 开通uniCloud 地址:https://unicloud.dcloud.net.cn 选择阿里云,需要实名认证。
2. 在uniCloud 的 web控制台创建服务空间,然后在云数据库新建数据表tableImages

3. 在HBuilder X 新建项目。

关联创建好的云服务空间

4. 新建云函数

addImage 云函数(把数据写入表)
'use strict';
const db = uniCloud.database()
exports.main = async (event, context) => {
	const collection = db.collection('tableImages') //云数据库里的表名 ,记录上传图片到云存储后返回的fileID
	const res = await collection.add(event)  //event为客户端上传的参数
	return res
};
selectImage 云函数(从表读取数据)
'use strict';
const db = uniCloud.database()
exports.main = async (event, context) => {  //event为客户端上传的参数
    const collection = db.collection('tableImages') // 获取表'tableImages'的集合对象
	const res = await collection
				.orderBy('createTime','desc')  //排序
				.get() //获取数据


    //const res = await collection.limit(100).get() // 获取表中的100条数据,结果为json格式
	//const res =await collection.where({'username':'王达'}).get() //条件查询

    return res // 返回json给客户端
};
5. 上传部署云函数
函数编写完成后要上传才能使用

函数上传成功后,在web控制台可见到函数

6.在pages新建页面,编写客户端页面代码。
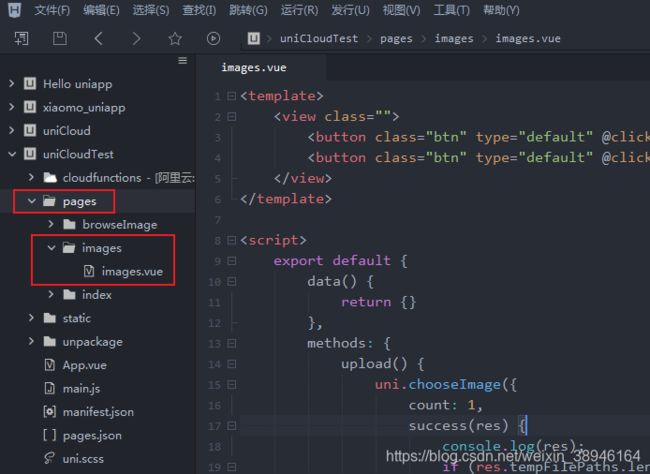
上传图片的代码
<template>
	<view class="">
		<button class="btn" type="default" @click="upload">上传图片</button>
		<button class="btn" type="default" @click="browseImage">查看云图片</button>
	</view>
</template>

<script>
	export default {
		data() {
			return {}
		},
		methods: {
			upload() {
				uni.chooseImage({
					count: 1,
					success(res) {
						console.log(res);
						if (res.tempFilePaths.length > 0) {
							uni.showLoading({
								title: '上传中...'
							})

							let filePath = res.tempFilePaths[0]
							// callback方式 ,进行上传操作
							uniCloud.uploadFile({
								filePath: filePath,  //要上传的文件对象
								cloudPath: Date.now() + '.jpg',  //保存在云端的文件名,这里以时间戳命名
								success(res) {
									//console.log(res.fileID)
									let imageUrl = res.fileID  //云端返回的图片地址
									uniCloud.callFunction({  //调用云端函数,把图片地址写入表
										name: 'addImage',  //云函数名称
										data: {				//提交给云端的数据
											imageUrl: imageUrl,
											createTime: Date.now()
										},
										success: (res) => {
											//console.log('数据插入成功')
											console.log(res)
										},
										fail: (err) => {
											console.log(err)
										},
										complete: () => {

										}
									})
								},
								fail(err) {
									console.log(err)
								},
								complete() {
									uni.hideLoading()
								}
							});
						}
					}
				});
			},

			browseImage() {
				uni.navigateTo({  //跳转到指定页面
					url: "../browseImage/browseImage",
				});
			}
		}
	}
</script>

<style>
	.btn{
		margin: 10px;
		background-color: #4CD964;
	}
</style>
浏览云端图片的代码
<template>
<view class="free-panel-title">
<view class="free-WaterfallFlow">
<block>
<view class="flex-wrap" v-for="(item,index) in imgList" :key="index" v-if="index % 2 != 0">
<image mode="widthFix" :src="item.imageUrl" :data-src="item.imageUrl" @click="clickimg" ></image>
<view>评论</view>
<view> {{item.createTime}} </view>
</view>
</block>
<block>
<view class="flex-wrap" v-for="(item,index) in imgList" :key="'2-'+index" v-if="index % 2 == 0">
<image mode="widthFix" :src="item.imageUrl" :data-src="item.imageUrl" @click="clickimg" ></image>
<view>评论</view>
<view> {{item.createTime}} </view>
</view>
</block>
</view>
<!--返回顶部-->
<view class="top" :style="{'display':(flag===true? 'block':'none')}">
<image class="topc" @click="top" src="../../static/top.png" ></image>
</view>
</view>
</template>
<script>
export default {
data() {
return {
imgList: [],
flag: false
}
},
onLoad() {
uni.showLoading({
title: '查询中...'
})
uniCloud.callFunction({ //调用云函数
name:'selectImages', //云函数名称
success: res => {
//console.log(res)
this.imgList = res.result.data //云端返回的数据
this.imgList.forEach( item => { //循环调用函数happenTimeFun,将时间戳转为年月日
item.createTime = this.happenTimeFun(item.createTime)
})
},
fail(e) {
console.log(e)
},
complete: () => {
uni.hideLoading()
}
})
},
methods: {
happenTimeFun(num){ //时间戳数据处理
let date = new Date(num); //时间戳为10位需*1000,时间戳为13位的话不需乘1000
let y = date.getFullYear();
let MM = date.getMonth() + 1;
MM = MM < 10 ? ('0' + MM) : MM;//月补0
let d = date.getDate();
d = d < 10 ? ('0' + d) : d;//天补0
let h = date.getHours();
h = h < 10 ? ('0' + h) : h;//小时补0
let m = date.getMinutes();
m = m < 10 ? ('0' + m) : m;//分钟补0
let s = date.getSeconds();
s = s < 10 ? ('0' + s) : s;//秒补0
return y + '-' + MM + '-' + d; //年月日
//return y + '-' + MM + '-' + d + ' ' + h + ':' + m+ ':' + s; //年月日时分秒
},
// 图片预览
clickimg(event) {
var imgurl = event.currentTarget.dataset.src
var currentUrl = event.currentTarget.dataset.src //获取点击图片的地址, **对应里面的 :data-src="item.src"
uni.previewImage({
urls: [imgurl], //这里是单图 . 需要预览的全部图片地址,这个数组是必须的,要用[]
current: currentUrl, //当前显示图片的地址
})
},
//回到顶部
top() {
uni.pageScrollTo({
scrollTop: 0,
duration: 300
});
},
onPageScroll(e) { //根据距离顶部距离是否显示回到顶部按钮
if(e.scrollTop>600){ //当距离大于600时显示回到顶部按钮
this.flag=true
}else{ //当距离小于600时隐藏回到顶部按钮
this.flag=false
}
}
}
}
</script>
<style>
.free-WaterfallFlow{
width:96%;
column-count:2; /* 分隔的列数 */
}
.free-WaterfallFlow .flex-wrap{
display: inline-block;
width:98%;
margin-left:3%;
margin-bottom:3%;
padding:2%;
padding-top:5%;
border:0px solid #cc22b0; /* 边框 */
box-shadow: 0 2px 2px rgba(34, 25, 25, 0.4); /* 框阴影 */
text-align: center; /* 框内元素居中对齐 */
}
.flex-wrap image{
width:95%;
margin:0 auto;
}
.flex-wrap view:nth-child(2){
font-size:15px;
padding:2% 0;
color:#717171;
}
.flex-wrap view:nth-child(3){
font-size:13px;
padding:2% 0;
color:#aaa;
text-align: right;
}
/* 回到顶部 */
.top {
position: relative;
display: none; /* 先将元素隐藏 */
}
.topc {
height: 30px;
width: 30px;
position: fixed;
right: 5px;
top: 80%;
}
</style>
删除云存储文件 js
let imgurl = e.currentTarget.dataset.src
let imgIndex = e.currentTarget.dataset.index
let id = e.currentTarget.dataset.id
uni.showModal({
title: '注意了',
content: '确认要删除吗?',
success: (res) => {
if (res.confirm) {
//删除数组中的值
this.contentData.splice(imgIndex, 1)
//删除数据库中的记录
uniCloud.callFunction({ //调用云函数
name:'deleteImage', //云函数名称
data:{id: id}, //传给云端的参数
success:(res) => {
console.log('删除数据库记录成功',res)
},
fail:()=> {
console.log('调用云函数deleteImage 失败')
}
})
//删除云存储中的文件,阿里云要调用云函数才能删除,腾讯云可以在前端删除( uniCloud.deleteFile )
uniCloud.callFunction({ //调用云函数
name:'deleteFile', //云函数名称
data:{fileID: imgurl}, //传给云端的参数
success:(res) => {
console.log('删除云存储文件成功',res)
},
fail:()=> {
console.log('调用云函数deleteFile 失败')
}
})
}else{
console.log('点击了取消')
}
}
})
云函数 deleteFile
'use strict';
exports.main = async (event, context) => {
//从云存储删除文件
let res = await uniCloud.deleteFile({
fileList: [ event.fileID ]
});
//返回数据给客户端
return res
};
云函数 deleteImage
'use strict';
const db = uniCloud.database()
exports.main = async (event, context) => {
//从数据库删除记录
let res = await db.collection('wallpaper').doc(event.id).remove()
return res
};
你可能感兴趣的:(uni-app,前端)